Create Message
Learn how to create a Web Push campaign using the CleverTap dashboard
Create a New Campaign
Create a campaign to deliver your Web Push message. To create a new campaign:
- From the dashboard, select Campaigns.
- Click + Campaign.
- From the Messaging Channels list, select Web Push.

Select Messaging Channel
The campaign page displays.

Create Campaign
Define all the sections and publish the campaign.
Start Campaign Setup
The Start here section displays the setup information.
This section has the following parts:
- Start here: Displays the list of integrated and available browsers.
- Qualification criteria: Here you need to define the criteria for your target audience. You can deliver the web push notification based on Past behavior/Custom list or Live behavior.
- Set a goal: Tracks your campaign conversions by setting a goal. This step is optional, but it helps you measure how effectively your campaign meets its goal.
You can define your conversion goal by selecting the Event and specifying the Conversion Time. The Conversion Time field accepts any numeric value along with a time unit such as Minutes, Hours, Days, Weeks, or Months. This allows you to define conversion windows such as 10 days, 72 hours, or 2 months. The value can range from a minimum of 1 minute to a maximum of 5 months.
For example, if you set the conversion time to 5 Minutes, the system counts conversions within 5 minutes of the goal event.
Your campaign goal can be as broad or as specific as you want. For example, you can answer questions such as: How many users were influenced to purchase an X amount? or How many first-time visitors purchased red shoes worth at least X and blue jackets worth at least Y?
Set Conversion Time
Define the Audience
You must indicate the target audience for your campaign. You can specify your target audience from the Target segment section. Here, you can create a new segment or use a previously saved user segment from the segment list.

Define Target Segment - Who
You can also create the target audience based on past user behavior and user properties or live (ongoing) user behavior. The latter helps send out real-time, triggered campaigns.
Delay > 24 HoursWe recommend creating a Past Behavior campaign for all campaigns where the delay is greater than 24 hours for a live inaction campaign.
For instance, you can create a live Inaction within time campaign that targets users as soon as they add a product to their cart but do not finish transacting within 10 minutes; the golden window within which most users transact on online platforms.
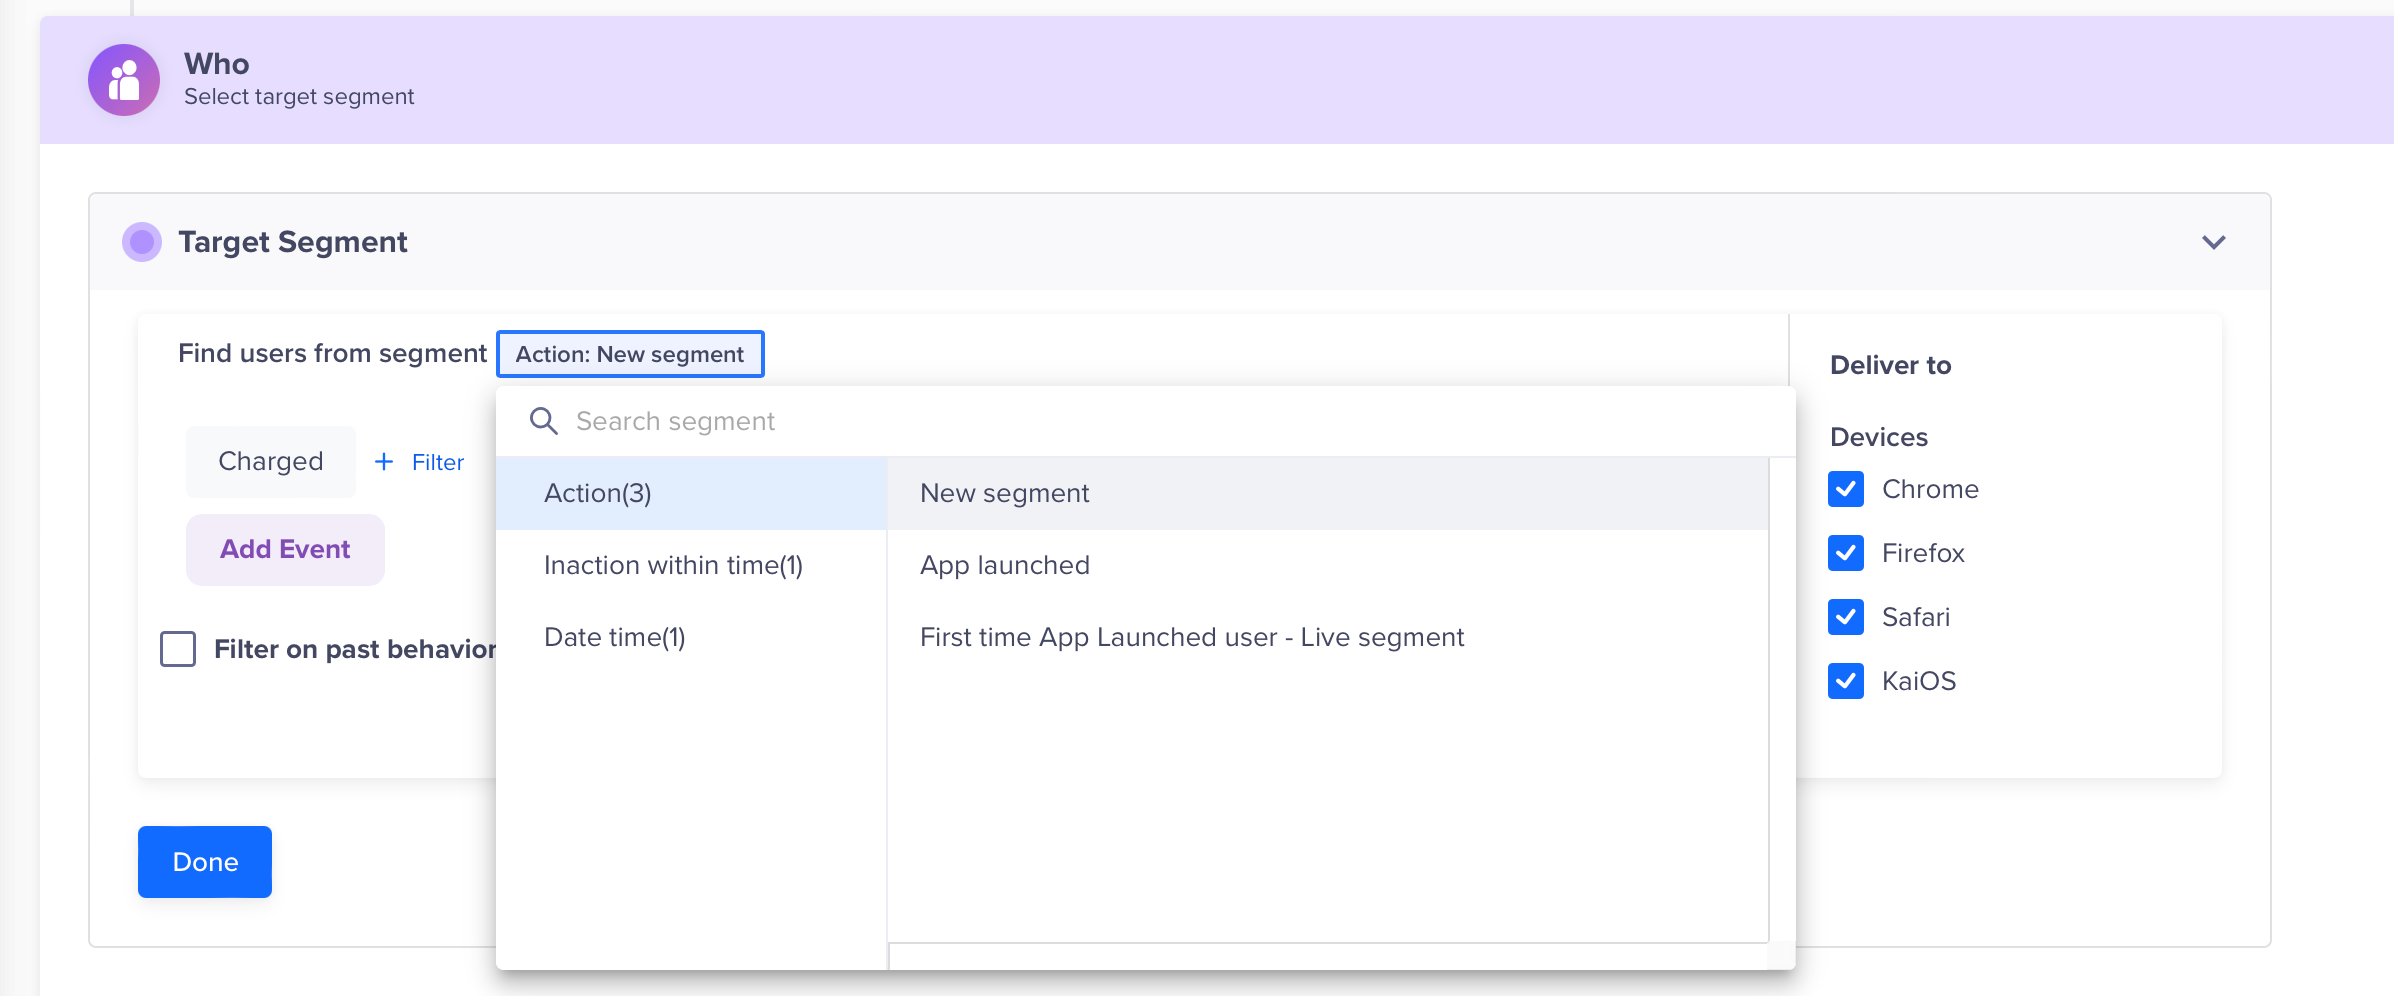
Deliver Action Based Web Push Notifications
You can trigger a web push message based on an action. For example, a web push message with a promo code can be shown to a set of customers who have just completed a purchase. This will help in incentivizing an existing user. Moreover, such push messages make notifications more contextual and result in increased conversion.
Filter Users based on Past Behavior
You can also target users basis their past behavior. For example, you might want to target customers who have purchased a specific product in the past.
Filter by User Properties
Using the With user properties filter in the Who section, you can segment your campaign to only reach users who meet specific criteria.
For example, you can send a Web Push notification to all the customers from Mumbai who are currently subscribed to Platinum membership.

Filter by User Properties
The following table explains the various property types:
| Property Type | Description | Example |
|---|---|---|
| User Properties | Custom user profile properties that you define and send to CleverTap. | Customer Type = Platinum |
| Demographics | Demographics filters include Age and Gender. | Age = 25 to 40 years Gender = Female |
| Geography | User's coarse location. Filters include Country, Region, and City. CleverTap's SDK can automatically detect this from the user's IP address. | Country = United States State = California City = San Francisco |
| Geography Radius | User's exact location. You can select a city, and then define the target radius. You can also select multiple cities. You can send this information using CleverTap's SDK. For more information, refer to the iOS and Android developer guides. | Locations = San Francisco, USA; Paris, France |
| Reachability | Reachability filters include Has email address, Has phone number, Unsubscribed email, and Unsubscribed SMS. | Unsubscribed email = No |
| App Fields | App fields filters include App Version, Device Make, Device Model, OS Version, and CleverTap SDK Version. This information is sent by CleverTap's SDK for each device that has your app which means a single user can have multiple devices associated with their user profile. | OS Version = 10 |
To know more about what segments can be used, see Segments.
Calculate Estimated Reach
The Estimated Reach option allows you to preview how many users meet your targeting criteria in an online trigger campaign before publishing it. This helps you validate audience size and adjust filters to ensure the campaign reaches the intended users.
Estimated Reach is particularly useful when you select the Filter on past behavior and user properties option. You can view both the estimated user count and device count.
To calculate the estimated reach, perform the steps below:
-
Select Filter on past behavior and user properties.
-
Click Calculate in the right panel. The result shows the estimated number of users or devices for that segment. You can view the following:
- Total Users: The number of users that match the filters.
- Breakdown by Platform and Devices: The users count on Android, iOS, or both, and on different devices.
- Visual Indicator: A chart summarizing the share by operating system.
The estimate, based on the latest available event data, updates each time you apply or modify filters. It reflects stored event data and is not a real-time count. This helps you plan and refine your audience before sending the campaign.
Calculate Estimate Reach
Control Group
You can define the control group to compare and measure the results of your campaign. For more information on control groups, see Control Groups.

Control Group
Targeting Cap
Sometimes, you want to send a message to only a subset of the qualifying audience (Target Reach) for a campaign or avoid sending it if the number of qualified users exceeds the specified number.
A relevant use case is a limited offer where you want to send a fixed number of coupon codes you want to distribute. If the total reach for your campaign exceeds the number of coupon codes you can distribute, you can limit the number of users who will receive the message to exactly the number of coupons you want to distribute.

Campaign LimitEnsure that you set up a limit of 100 or more, regardless of the qualified user segment size. If the limit specified is less than 100, an error occurs.
Web Push Message Types
You can create the following types of messages for your web push campaigns:
- Single Message
- A/B Test
- Split Delivery
- By User Property
Single Message
In this campaign, a standard push message is sent to all users who qualify as your target audience. This message type is best for broadcast messages and for applications that do not vary campaign communication based on differences between properties such as language, geography, or any other user properties.
A/B Test
A/B testing helps you understand what type of message copy works best in the push messages to get clicks from users.
You can test up to three push message variants on a test group. The variant that gets the most clicks is declared the winning variant and is automatically sent to the rest of your target audience.

A/B Test Variant Distribution
Split Delivery
With split delivery, you can define what percentage of your audience receives the respective push message variant for that campaign duration. You can test up to three message variants.

Split Delivery Variant Distribution
By User Property
If you would like to send different message variants to your target audience based on the user properties they possess, this campaign type is your best bet. A good example would be when you want to send a localized update to people based on their preferred language.
Similar to creating A/B test variants, click + Variant to add multiple variants based on a user property value. You can send up to 50 message variants to different users based on a user property. In the example below, we have used the Language user property so users with different language preferences will receive corresponding copies of the campaign in their preferred language.

Message Variant by User Property
Web Push Editor
After you select a particular message type, the web push editor displays.
From the What section, click Go To Editor to create your message. This section displays the editor, where you can craft your web push message using various tools to make messages more relevant and impactful. For the Title and Message fields, you can use the following options to create personalized and engaging web push notifications:
- Personalization: Use @ Personalization or {{}} to dynamically insert user-specific details.
- Emoticons: Enhance your notifications with emoticons to grab attention and convey emotions more effectively than plain text. The emojis may vary in size depending on the device and platform.
- Scribe: Use Scribe, the AI-powered writing assistant, to refine your message tone, improve readability, and generate compelling content. Scribe helps ensure your web push notifications are engaging and emotionally resonant.
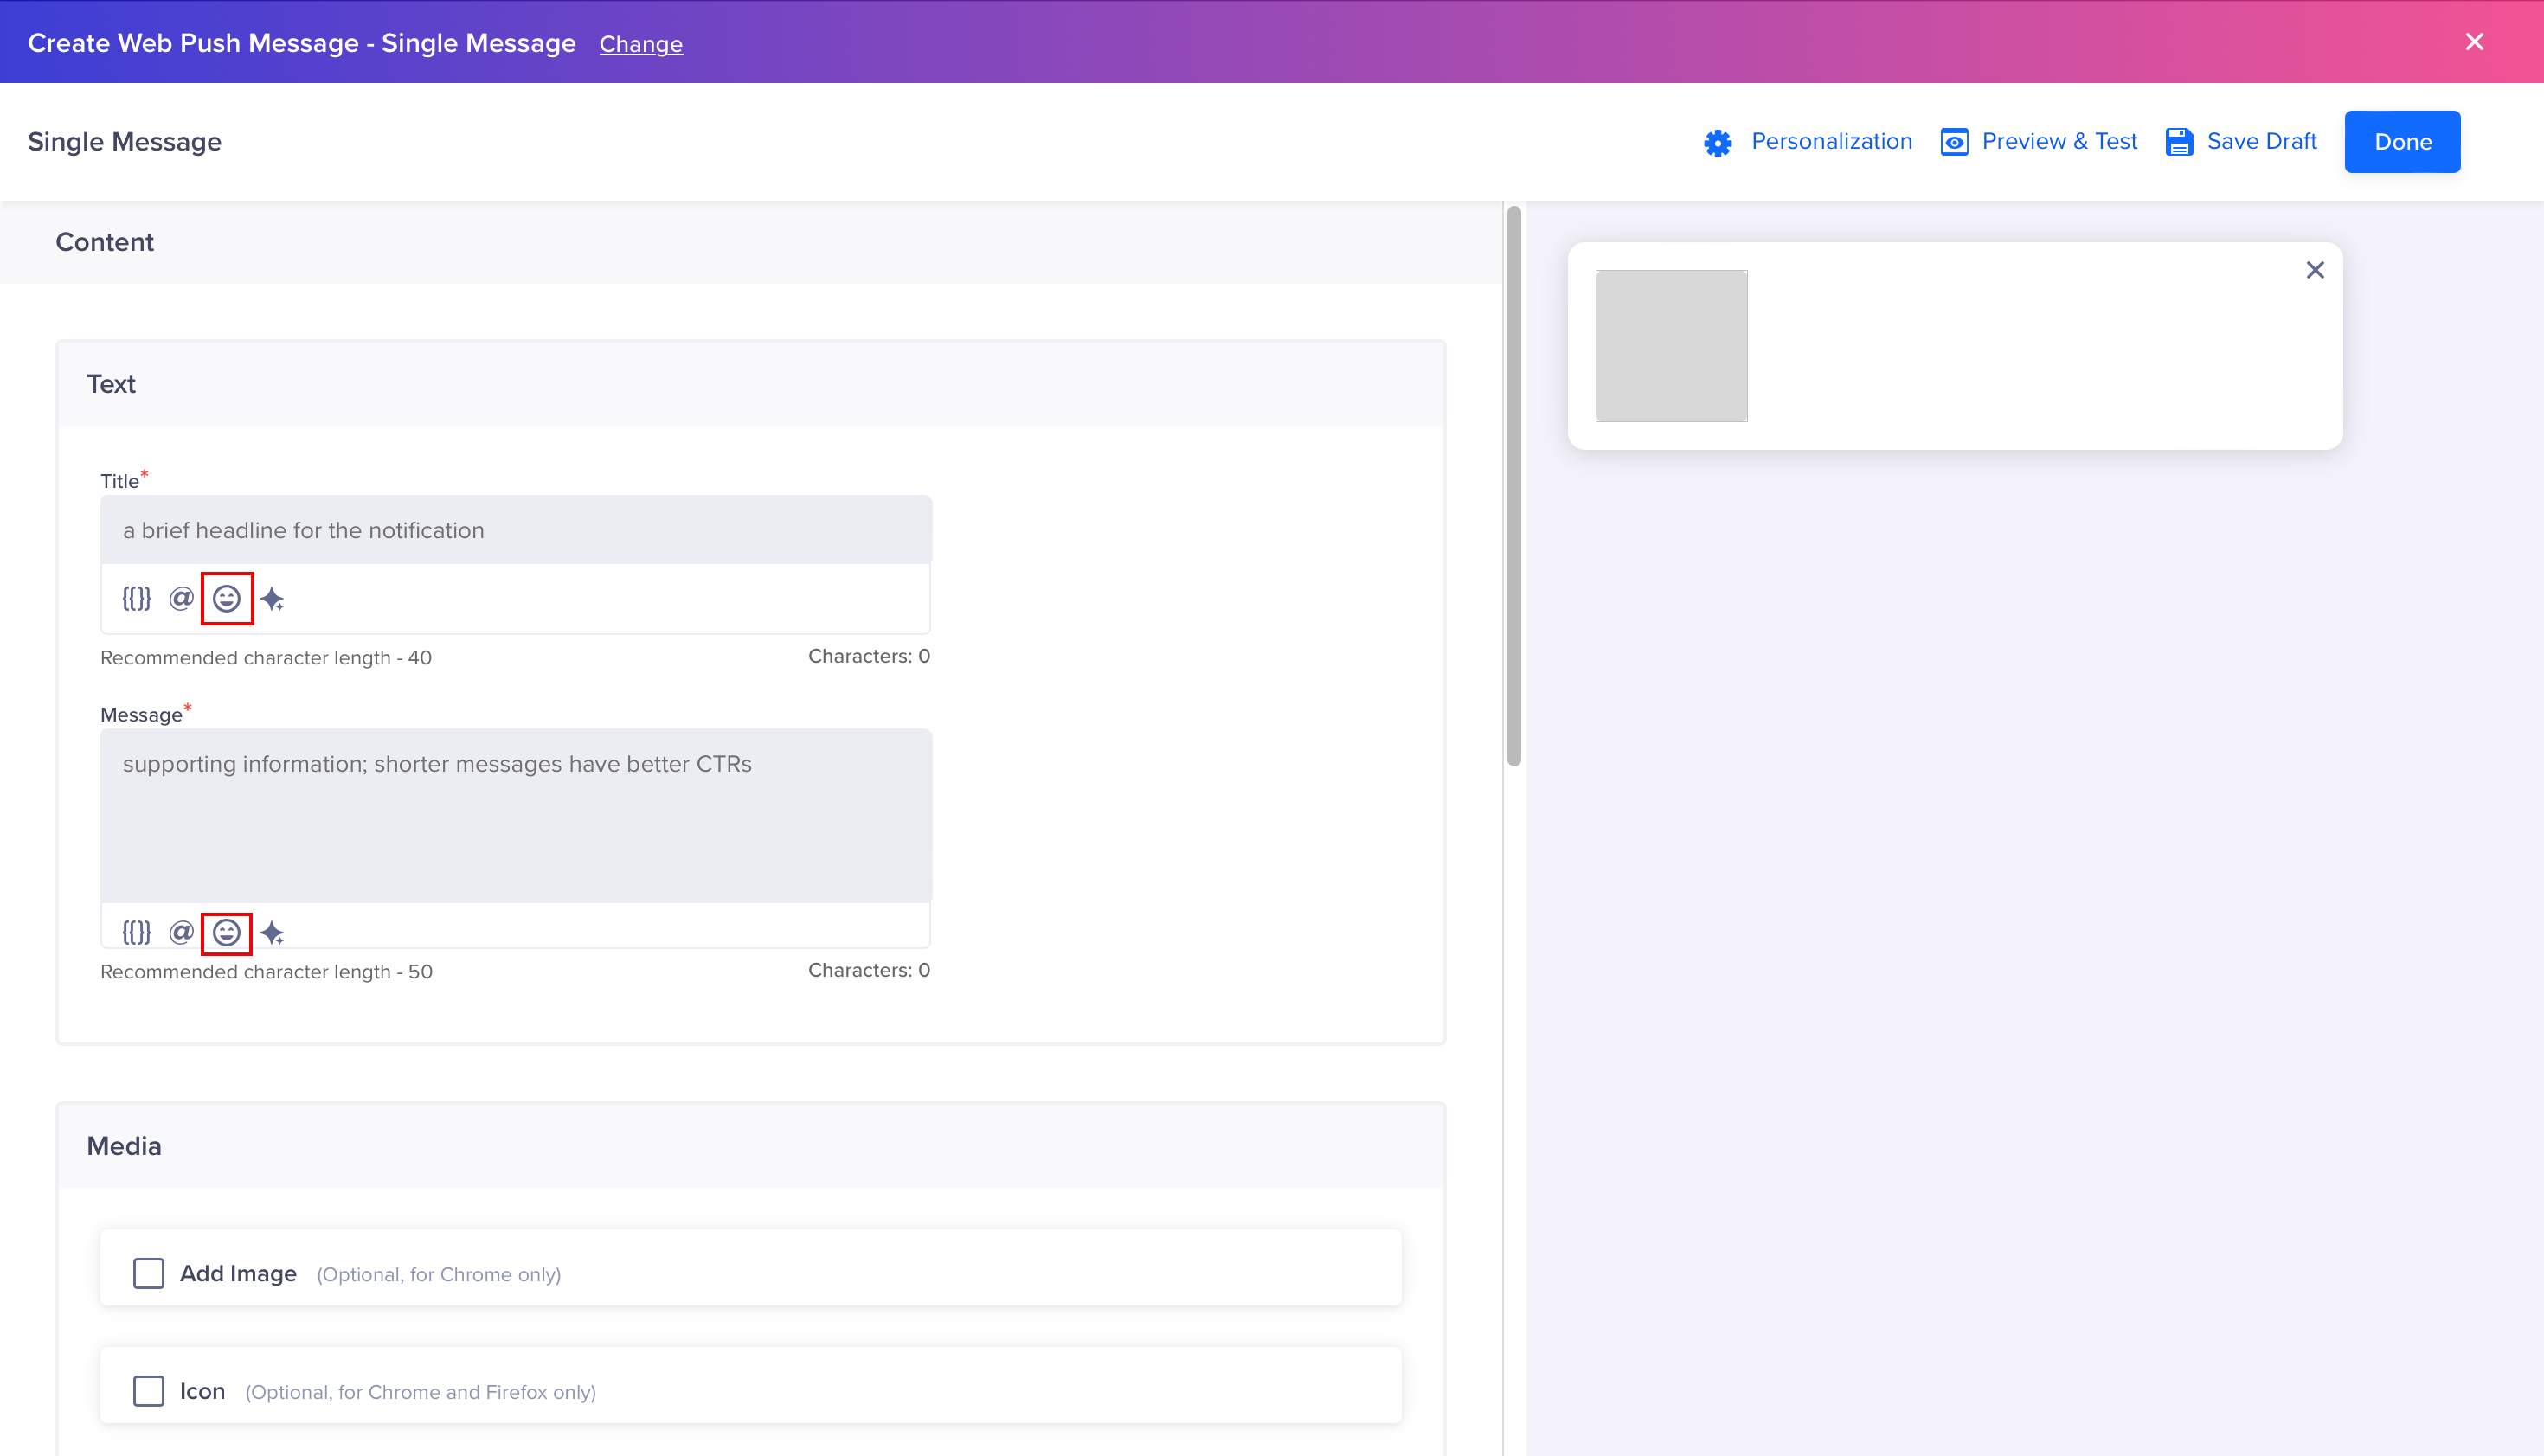
Web Push Editor Options for Title and Message
The following web push notification text fields can be personalized for every user based on specific user property or event property values. For more information, refer to User Profiles. Enter all the required information.

Web Push Editor
-
Deep Link: Specify a deep link, so that upon a web push click, the user is taken back to one of your specific webpages, such as the checkout page. With dynamic replacements, you can take the user right back to the webpage of the product they just added to their cart and present them with an incentive to encourage the transaction.
-
Image Link: Specify an image link for the image you wish to send along with the web push message. The supported image ratio for the image is 4:3 and the most commonly preferred image sizes are 512x256 and 1440x720 pixels. The supported file formats are JPG, JPEG, and PNG for desktop. Only JPEG is supported for mobile.
-
Icon Link: Specify an icon link. This is primarily used for displaying brand logos. The recommended size of the icon is 192x192 pixels.
-
Time To Live: It defines how long the push message is preserved for delivery if the device is offline or due to OEM device restrictions.
-
Custom key-value pairs: It lets you send custom data when a user clicks on the button. This data is not visible to the customers.
Browser ConsiderationsSome of the optional items only apply to a certain browser, such as Firefox, Chrome, or KaiOS.
Preview & Test
Once you are all done setting up the content of your campaign in the What section, you have the option to send a test notification to any CleverTap user profile you have marked as a Test profile.
Click the Preview & Test button from the message editor to test a message.
Define the Campaign Schedule
You can set up the When to schedule the campaign's start and end.

Campaign Schedule
Past behavior campaigns can be scheduled to run at a specific time:
- On a specific date and time.
- On multiple specified dates and times.
- Recurring at a periodicity you set.
Live campaigns can be set up on a specific event:
- In response to a user event.
- User event/inaction combination (e.g., abandoned cart scenario).
- Based on a date event property value of an event (for example, a reminder for upcoming travel booking).
For Live behaviour campaigns, go to the Who section and select the users from the segment.
Target Segment
For example, for a date event property, you can select Date Time and define the campaign schedule.
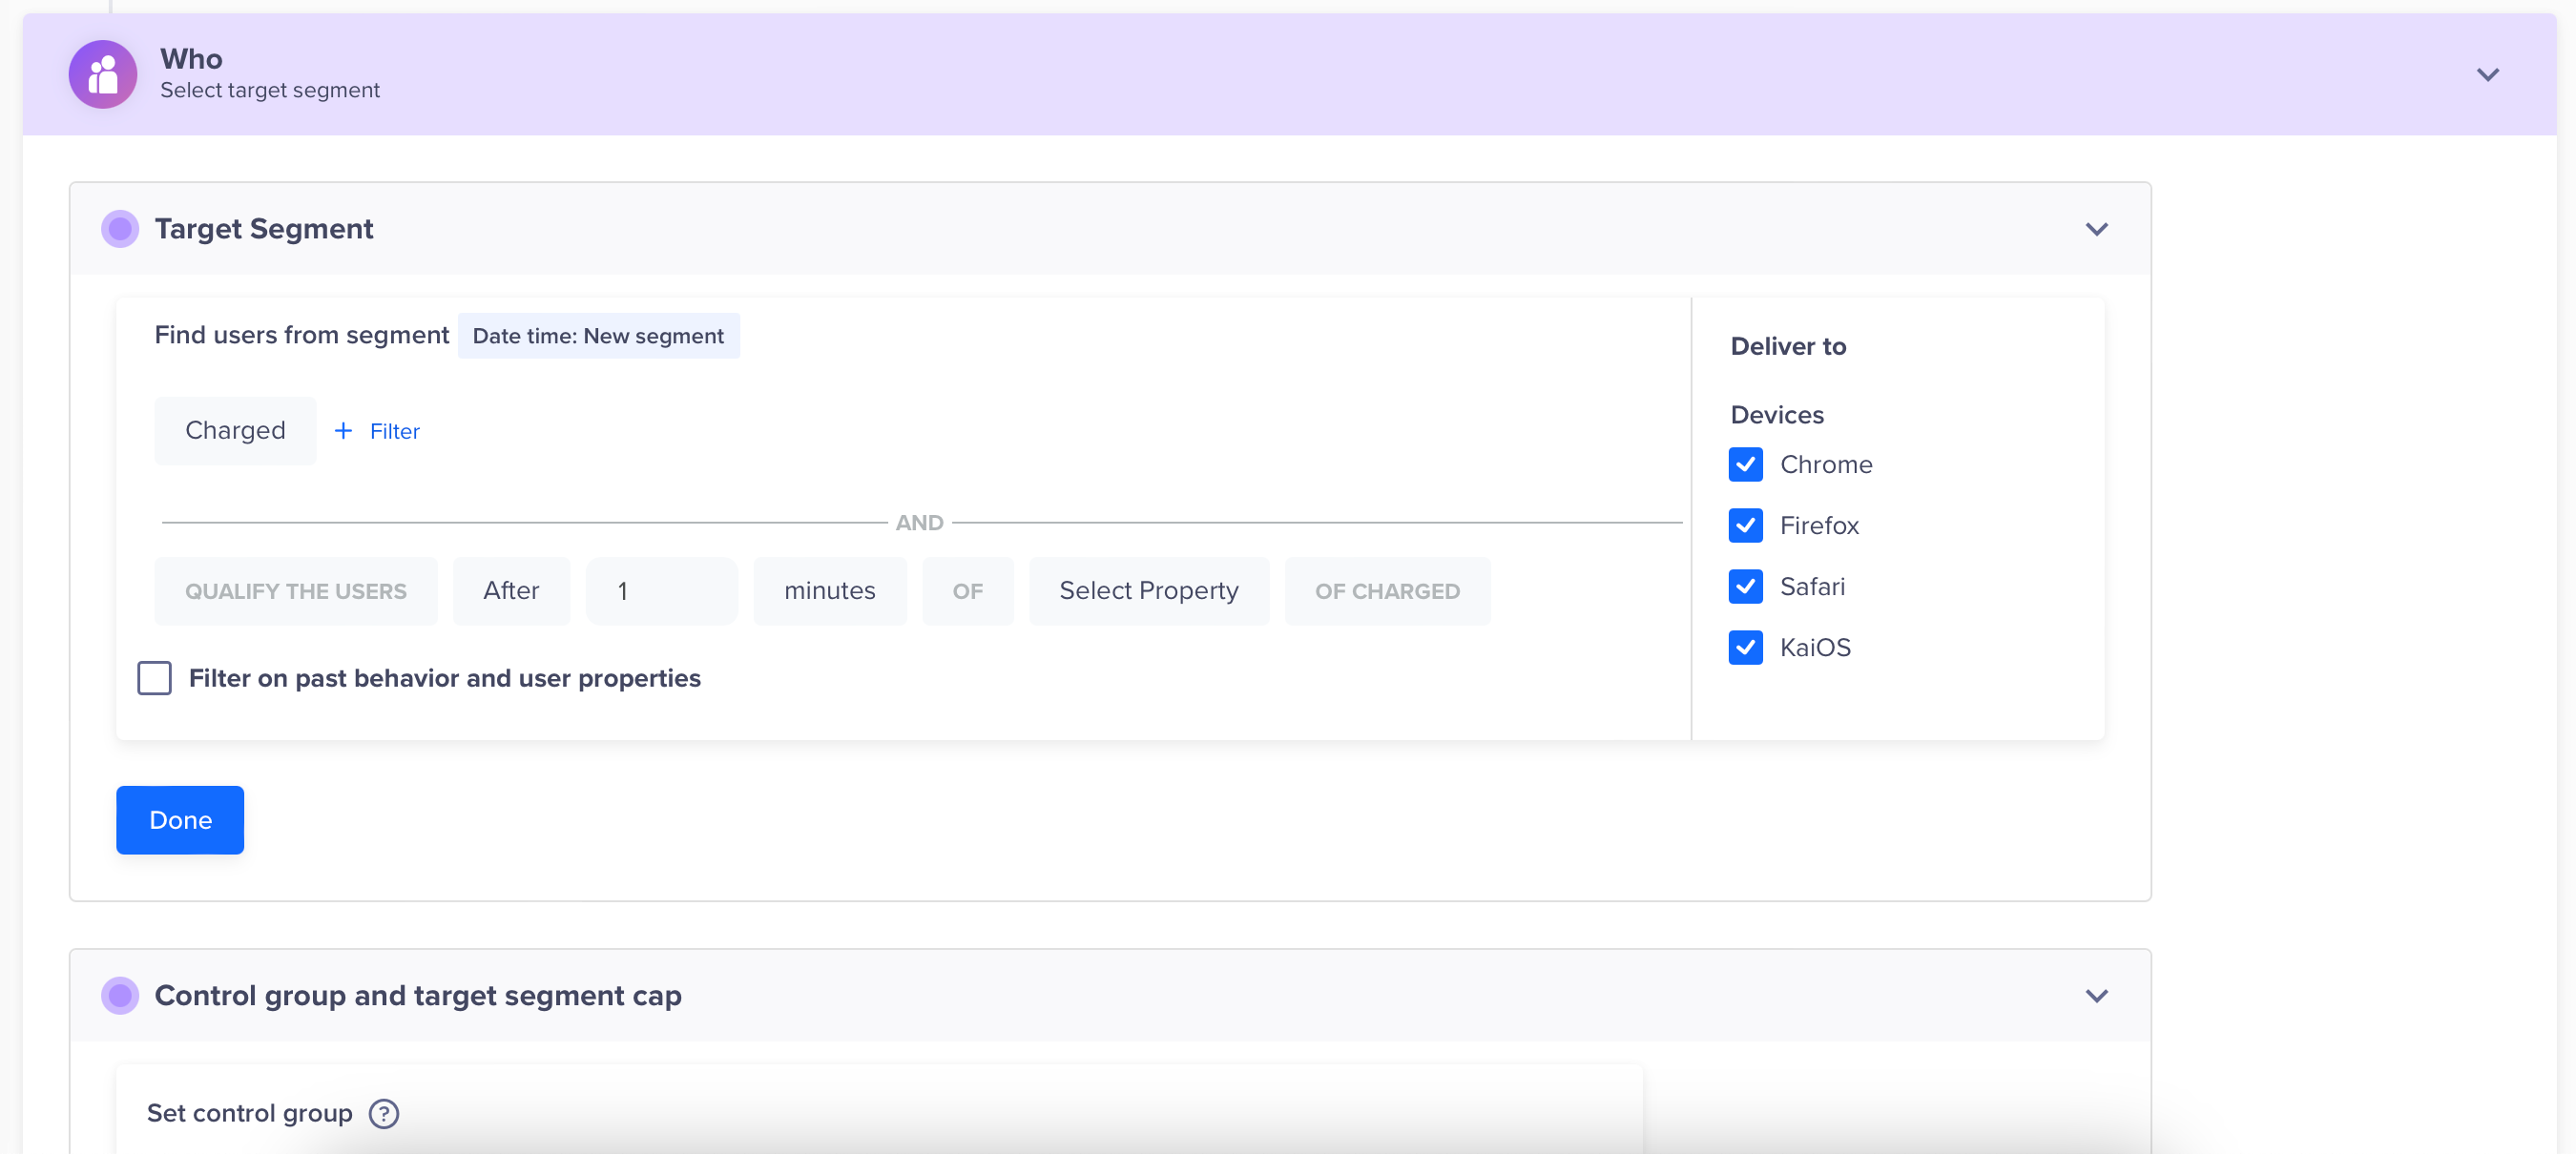
Who Section
Delivery preferences
You can also set the Do Not Disturb (DND) hours during which notifications from this Web Push campaign are prevented from going out, either by discarding them or delaying delivery to after DND hours complete, such as 9 PM to 9 AM.
If you want your campaign to adapt delivery times according to the user’s timezone, check the Timezone checkbox. For more information, refer to Delivery in User’s Timezone.
Since past behavior campaigns can have scheduled times, you have the option to stop a campaign delivery after a certain cut-off time, or even deliver at the specified time in the user’s timezone. For more information, refer to Delivery in User’s Timezone.

Delivery Preferences
Recurring DayIf you specify a recurring day for a campaign such as the 7th of each month, then the campaign will start for the specified day and ignore the creation date. This is a precaution to avoid sending a campaign unintentionally on a prior date.
Publish Campaign
After previewing the appearance of your overall campaign, finalize your campaign by clicking Publish Campaign.

Publish Campaign