Boltic
Overview
Boltic, a powerful platform for AI-driven workflows and automation, allows you to seamlessly connect various tools and services for efficient data synchronization and automation.
Boltic offers two seamless ways to integrate with CleverTap, allowing you to push user profiles and events (custom and predefined) efficiently. You can choose between:
- API-based Integration (using Webhooks and API calls) for real-time, event-driven automation.
- Data Hub Stream integration for direct, scalable data synchronization from multiple sources.
Boltic helps centralize user data, automate workflows, and enhance engagement campaigns in CleverTap. Common use cases include:
- Subscription Management: Send payment and subscription events (for example, renewals, cancellations, and so on) to CleverTap to drive targeted messaging.
- Lifecycle Marketing: Send key lifecycle events (for example, Signup, Login, Purchase, and so on) to CleverTap to trigger automated engagement workflows.
- E-Commerce Feedback: Send events to CleverTap after closing a support ticket, enabling feedback collection and engagement.
Prerequisites for Integration
The following are the prerequisites for Boltic:
- For API-based Integration:
- Boltic account with Webhook and API action permissions.
- CleverTap account with valid Account ID, Passcode, and Region.
- For Data Hub Stream Integration:
- A Boltic account with access to Data Hub.
- A CleverTap account with appropriate permissions to receive streamed data.
Integrate Boltic with CleverTap
Boltic offers two methods to integrate with CleverTap, allowing you to push user profiles and event data seamlessly:
Method 1: API-based Integration
With this method, you can directly transfer event and user profile data using Webhooks and API calls. To set up this integration, perform the following steps:
Create Passcode on CleverTap Dashboard
CleverTap uses a header-based authentication model to authenticate requests to the API. Every CleverTap API call must include the Account ID and Passcode as the request headers. To create a passcode, refer to Create Account Passcode.
Send Data to CleverTap (Using Webhooks & API Actions)
Boltic allows you to send user profiles and event data to CleverTap using triggers such as Webhooks, Fynd, Slack, Calendly, and Webflow. These triggers help automate data flow based on predefined conditions.
For example, you want to automate user engagement with CleverTap to run an E-commerce mobile app and want to:
- Track New User Sign-ups: Every time new users register, their profile details (such as name, email, and phone number) should be updated in CleverTap to personalize their experience.
- Capture Purchase Events: When a user makes a purchase, the event data (such as product ID, price, and currency) should be sent to CleverTap to trigger relevant engagement campaigns such as order confirmations, loyalty rewards, or cross-sell recommendations.
For this specific use case, we will use the Webhook trigger to send real-time data updates to CleverTap, tracking new user sign-ups (user profiles) and capturing purchase data (event data). To do so, follow these steps:
- Go to Workflows on the Boltic dashboard and click + Create Workflow and assign it a unique name.
- Set Up a Trigger to initiate actions when specific criteria are met, streamlining automation processes:
- Select Webhook from the Trigger dropdown.
- Click Webhook for configuration (refer to the following GIF):
- Select the appropriate authentication type from the dropdown.
- Enter a test payload in JSON format per the use case. The following are sample JSON payloads for pushing data.
- Sample Payload for Sending User Profile Data (Track New User Sign-ups)
//for pushing user profile { "payload": { "name": "John D", "user_id": "1717" } } - Sample Payload for Sending Event Data (Capture Purchase Events)
//for pushing events
{
  "payload": {
    "user_id": "1717",
    "event_name": "Product Purchased",
    "properties": {
      "amount": 499.99,
      "currency": "USD",
      "product_id": "98765"
    }
  }
}
- Sample Payload for Sending User Profile Data (Track New User Sign-ups)
- Click Save to test and save the trigger.
- Select the API Action to send the events or user profiles to CleverTap from Boltic whenever the trigger event occurs. Follow these steps:
- Drag the API block from the Helpers panel on the left and drop it below the Webhook block in the workflow.
- Click API for configuration:
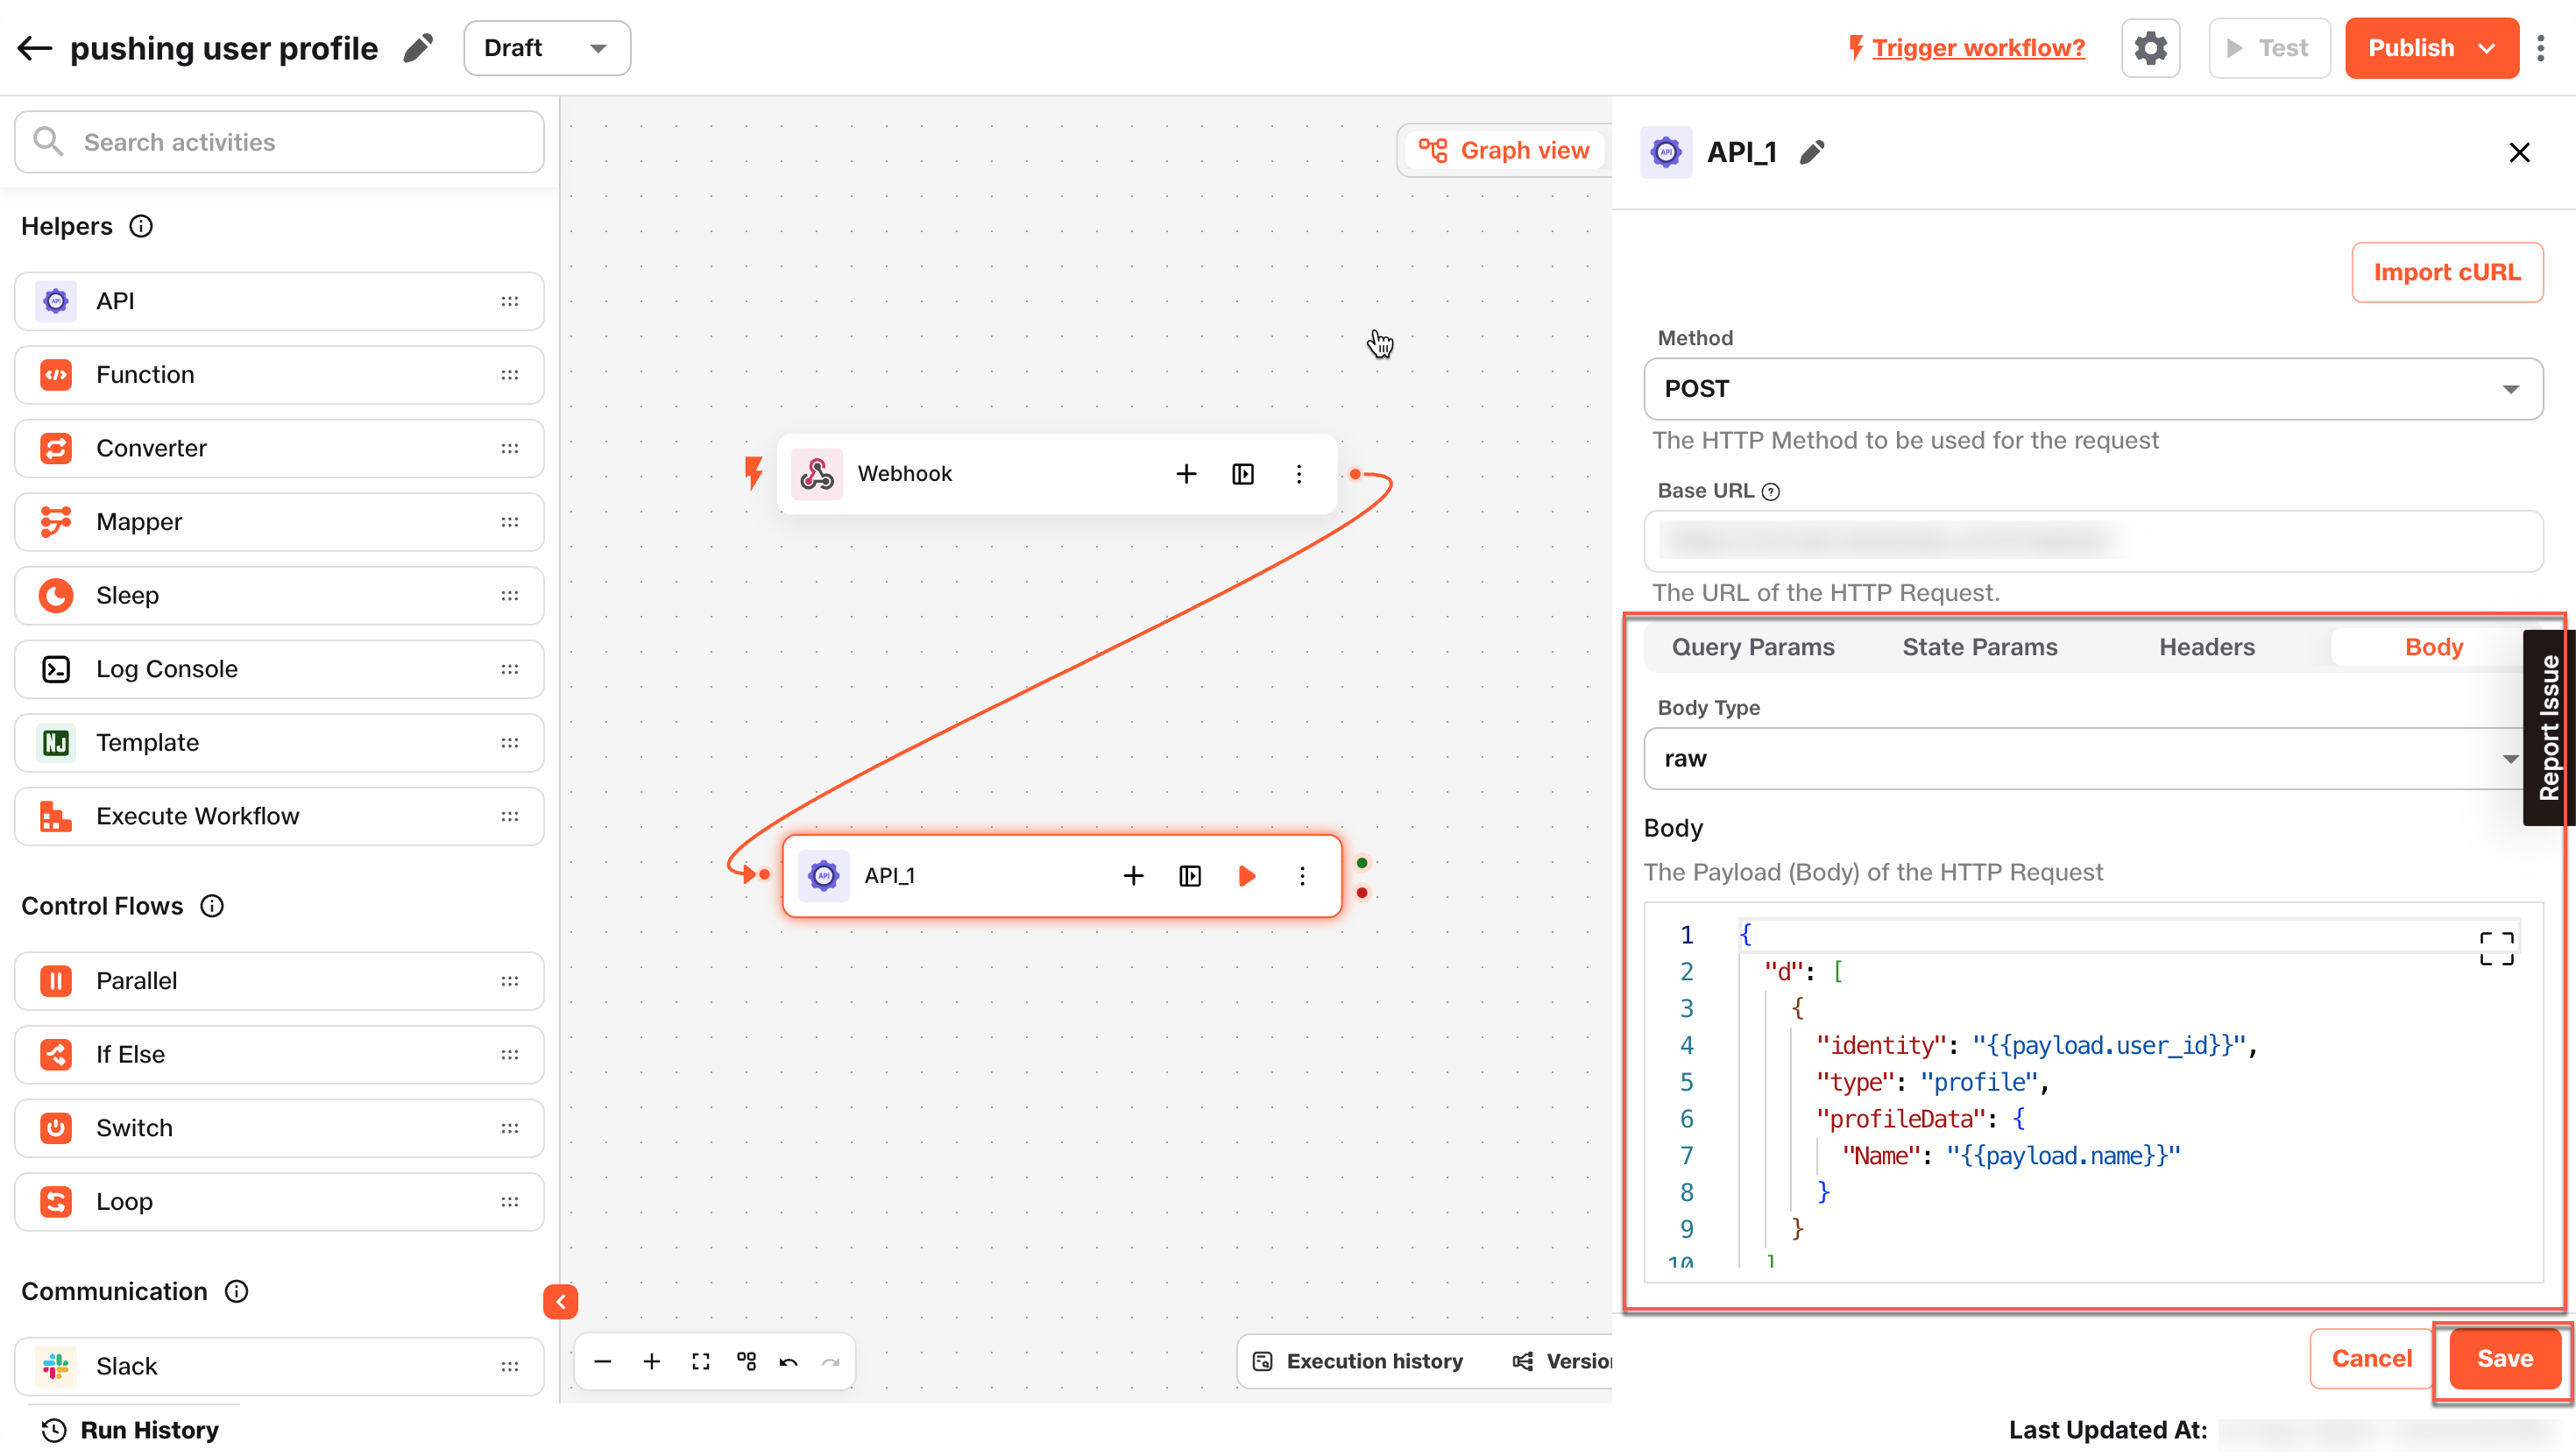
- Set the HTTP Method to POST to send the events and user profiles to CleverTap.
- Enter the following CleverTap API endpoint URL, where you need to replace
<region>with the region of your CleverTap account. To know the region of your account, refer to API Quick Start Guide:https://<region>.api.clevertap.com/1/upload

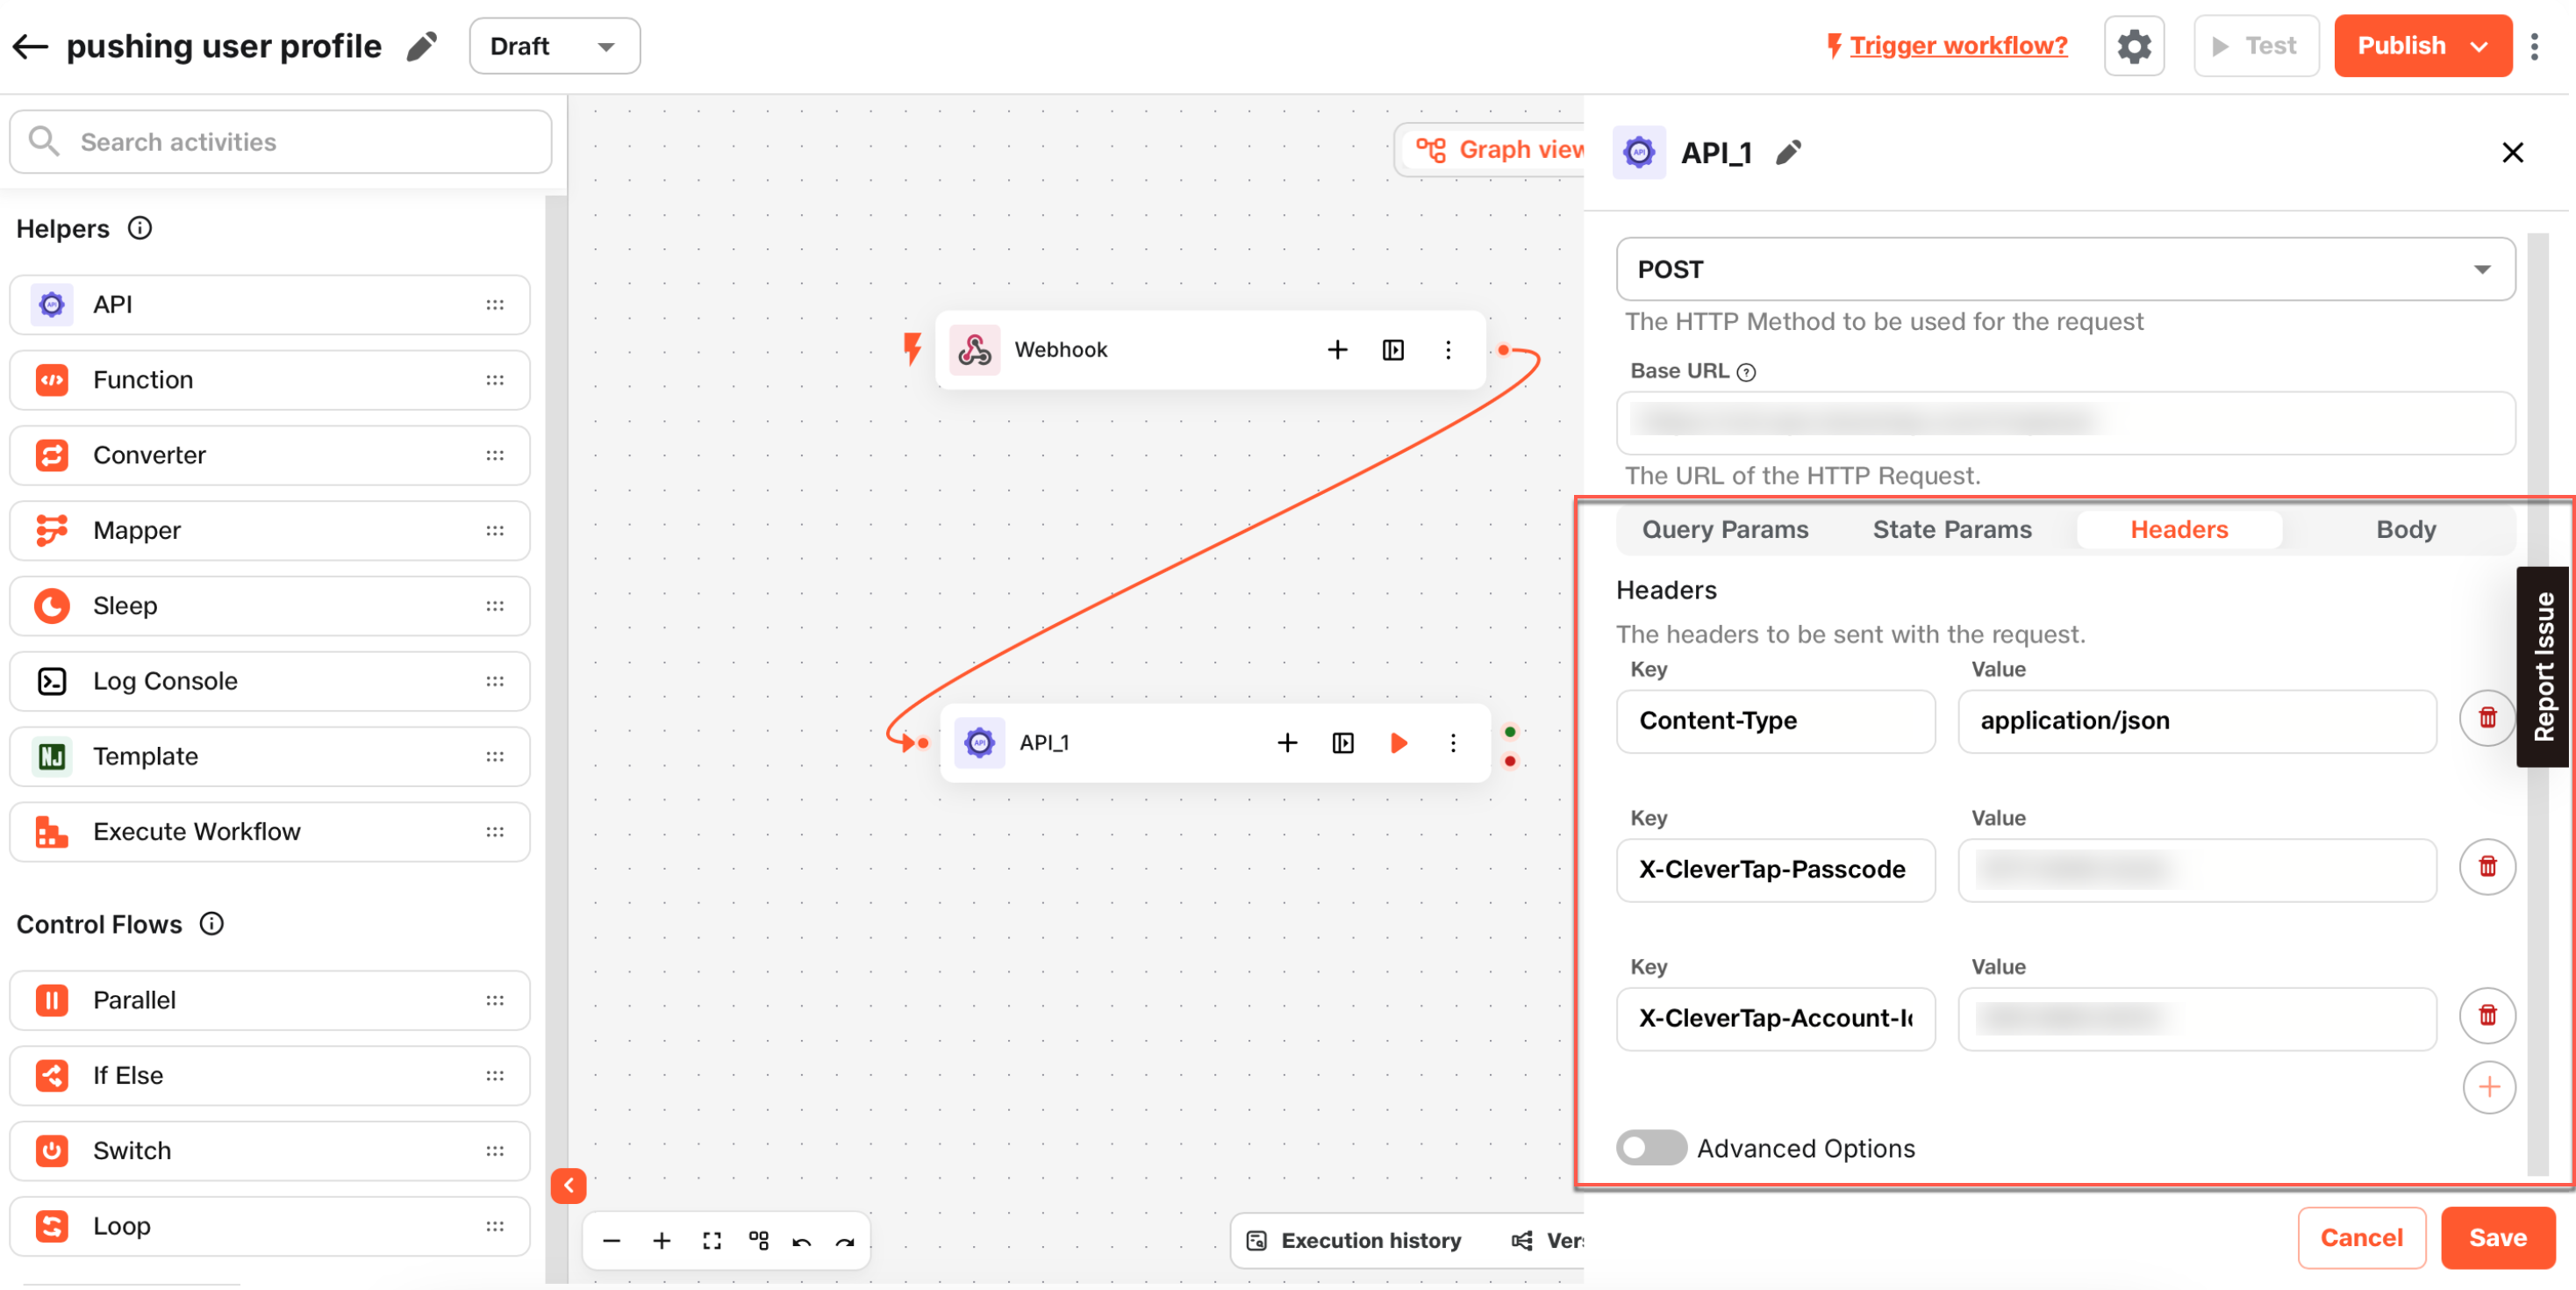
- Configure Headers to connect the CleverTap Account. To do so, perform the following steps:
- Enter the required details in the headers to connect the CleverTap account.
Use the same passcode obtained during the Create a Passcode on CleverTap Dashboard step. - Add the following key-value pairs in the headers:
- Enter the required details in the headers to connect the CleverTap account.
| Header Key | Description |
|---|---|
| Content-Type | application/json |
| X-CleverTap-Account-Id | Your CleverTap Account ID |
| X-CleverTap-Passcode | Your CleverTap Passcode |
- Configure the Request Body. Based on your use case, you can send user profiles or events (custom/predefined). Use the following payload structure in the API body:
{
  "d": [
    {
      "identity": "{{payload.user_id}}",
      "type": "profile",
      "profileData": {
        "Name": "{{payload.name}}",
        "Email": "{{payload.email}}"
      }
    }
  ]
}{
"d": [
{
"objectId": "{{payload.user_id}}",
"type": "event",
"evtName": "{{payload.event_name}}",
"evtData": {
"Product ID": "{{payload.properties.product_id}}",
"Amount": "{{payload.properties.amount}}",
"Currency": "{{payload.properties.currency}}"
}
}
]
}- Click Save to save the API configuration.
- Click Test to verify the workflow. Check the inputs, outputs, and logs to verify:
- Successful API requests.
- Data reflecting accurately in CleverTap.
- Click Publish to activate the workflow after testing is successful.
After publishing the workflow for updating user profiles or uploading events, a new user is created, an existing user is updated, or an event is uploaded to the CleverTap dashboard every time a trigger occurs. CleverTap uses the Identity field to determine whether the action applies to a new or existing user.
Method 2: Data Hub Stream Integration
This method leverages Boltic Data Hub to automate event and user profile data flow from various sources to CleverTap.
To integrate using this method, perform the following steps:
Create and Configure Data Stream
Setting up a data stream in Boltic allows you to collect, process, and forward data to CleverTap. This method is ideal for handling large-scale event flows without manual intervention. To do so, follow these steps:
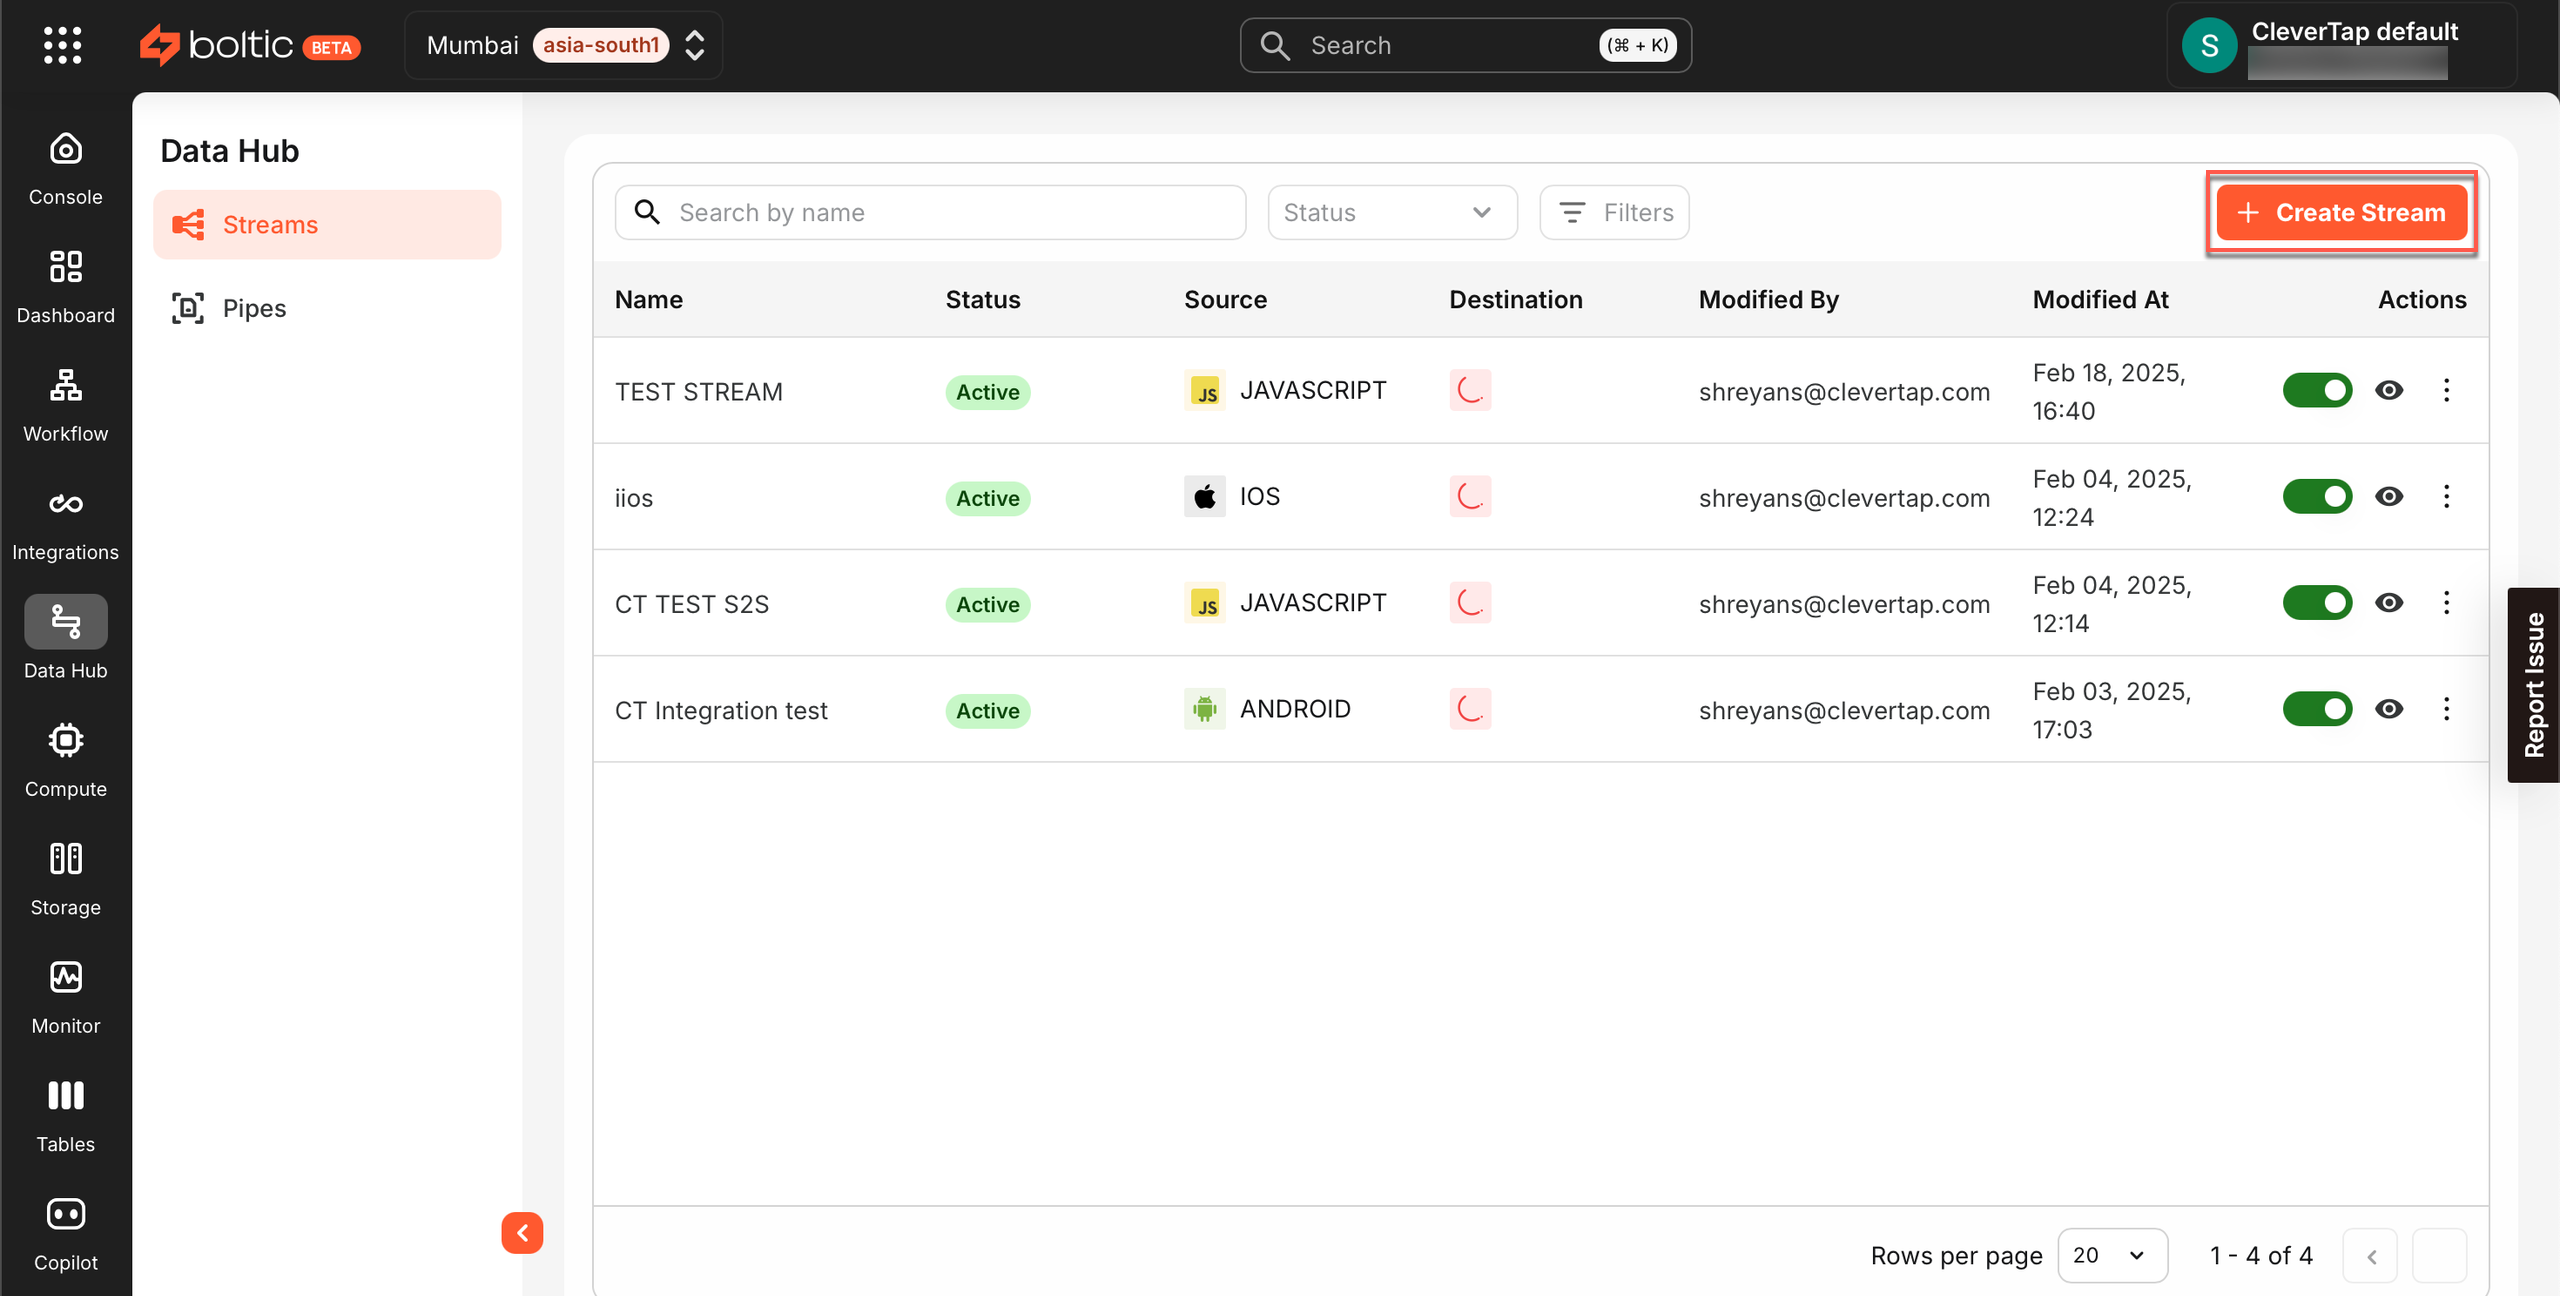
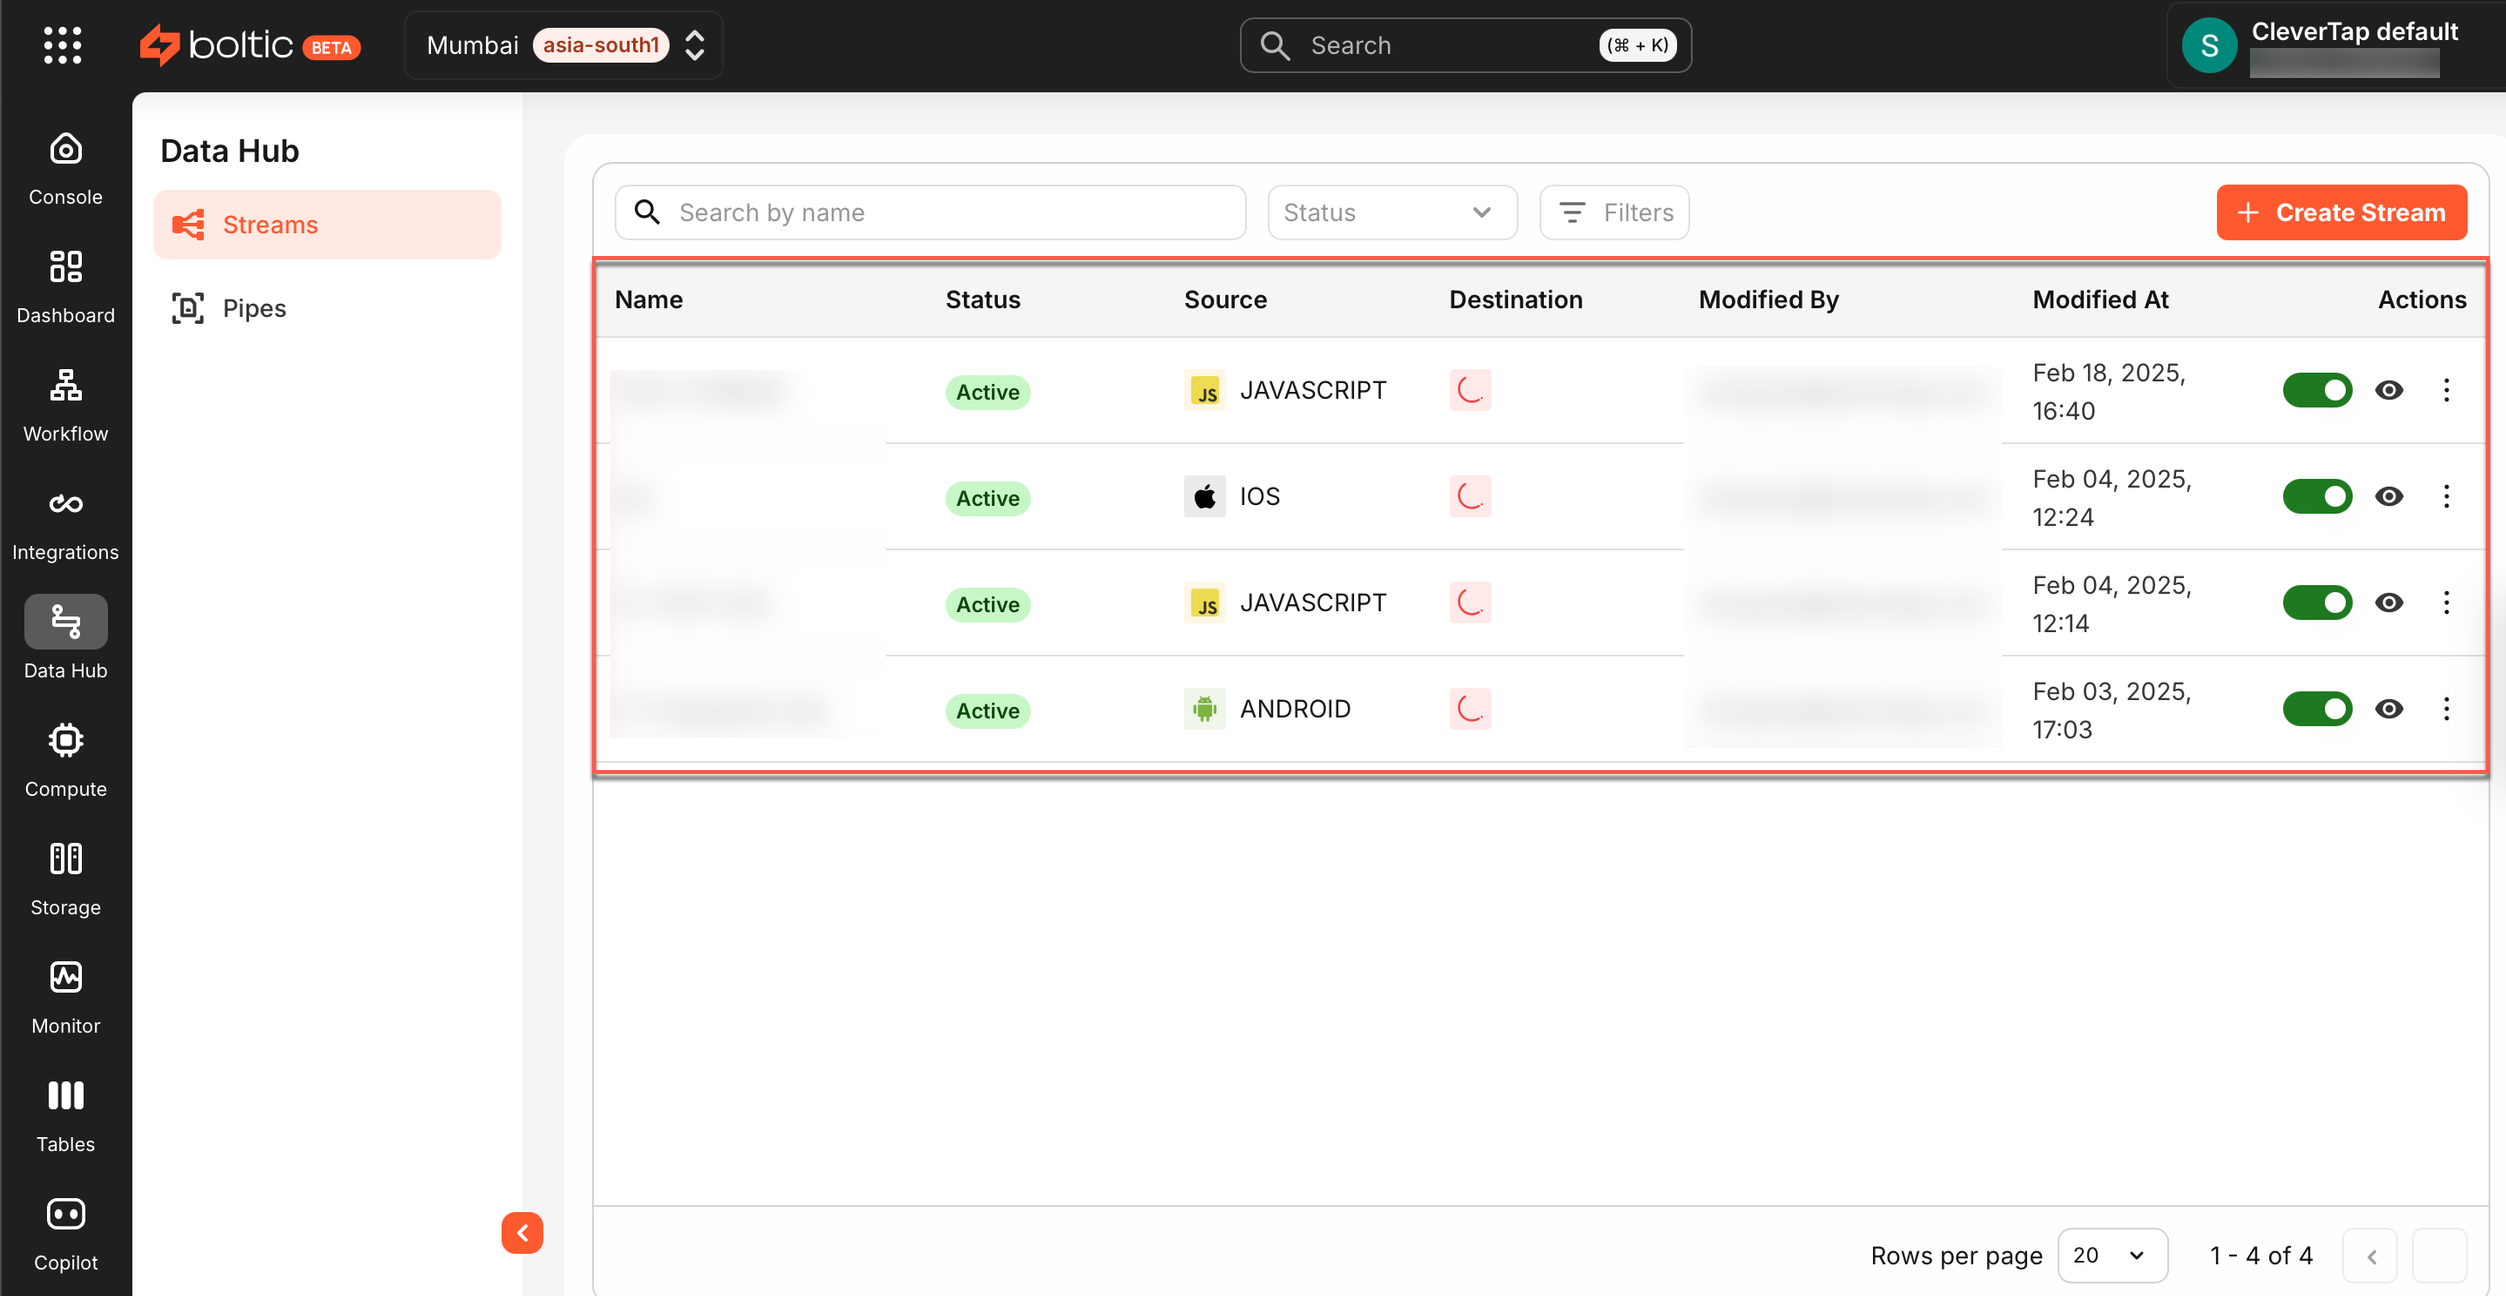
- Go to your Boltic Dashboard and select Data Hub > Streams from the left navigation panel.
- Click + Create Stream to start setting up a new data stream.
- Select the data source you want to connect from the Select source dropdown to create for stream.
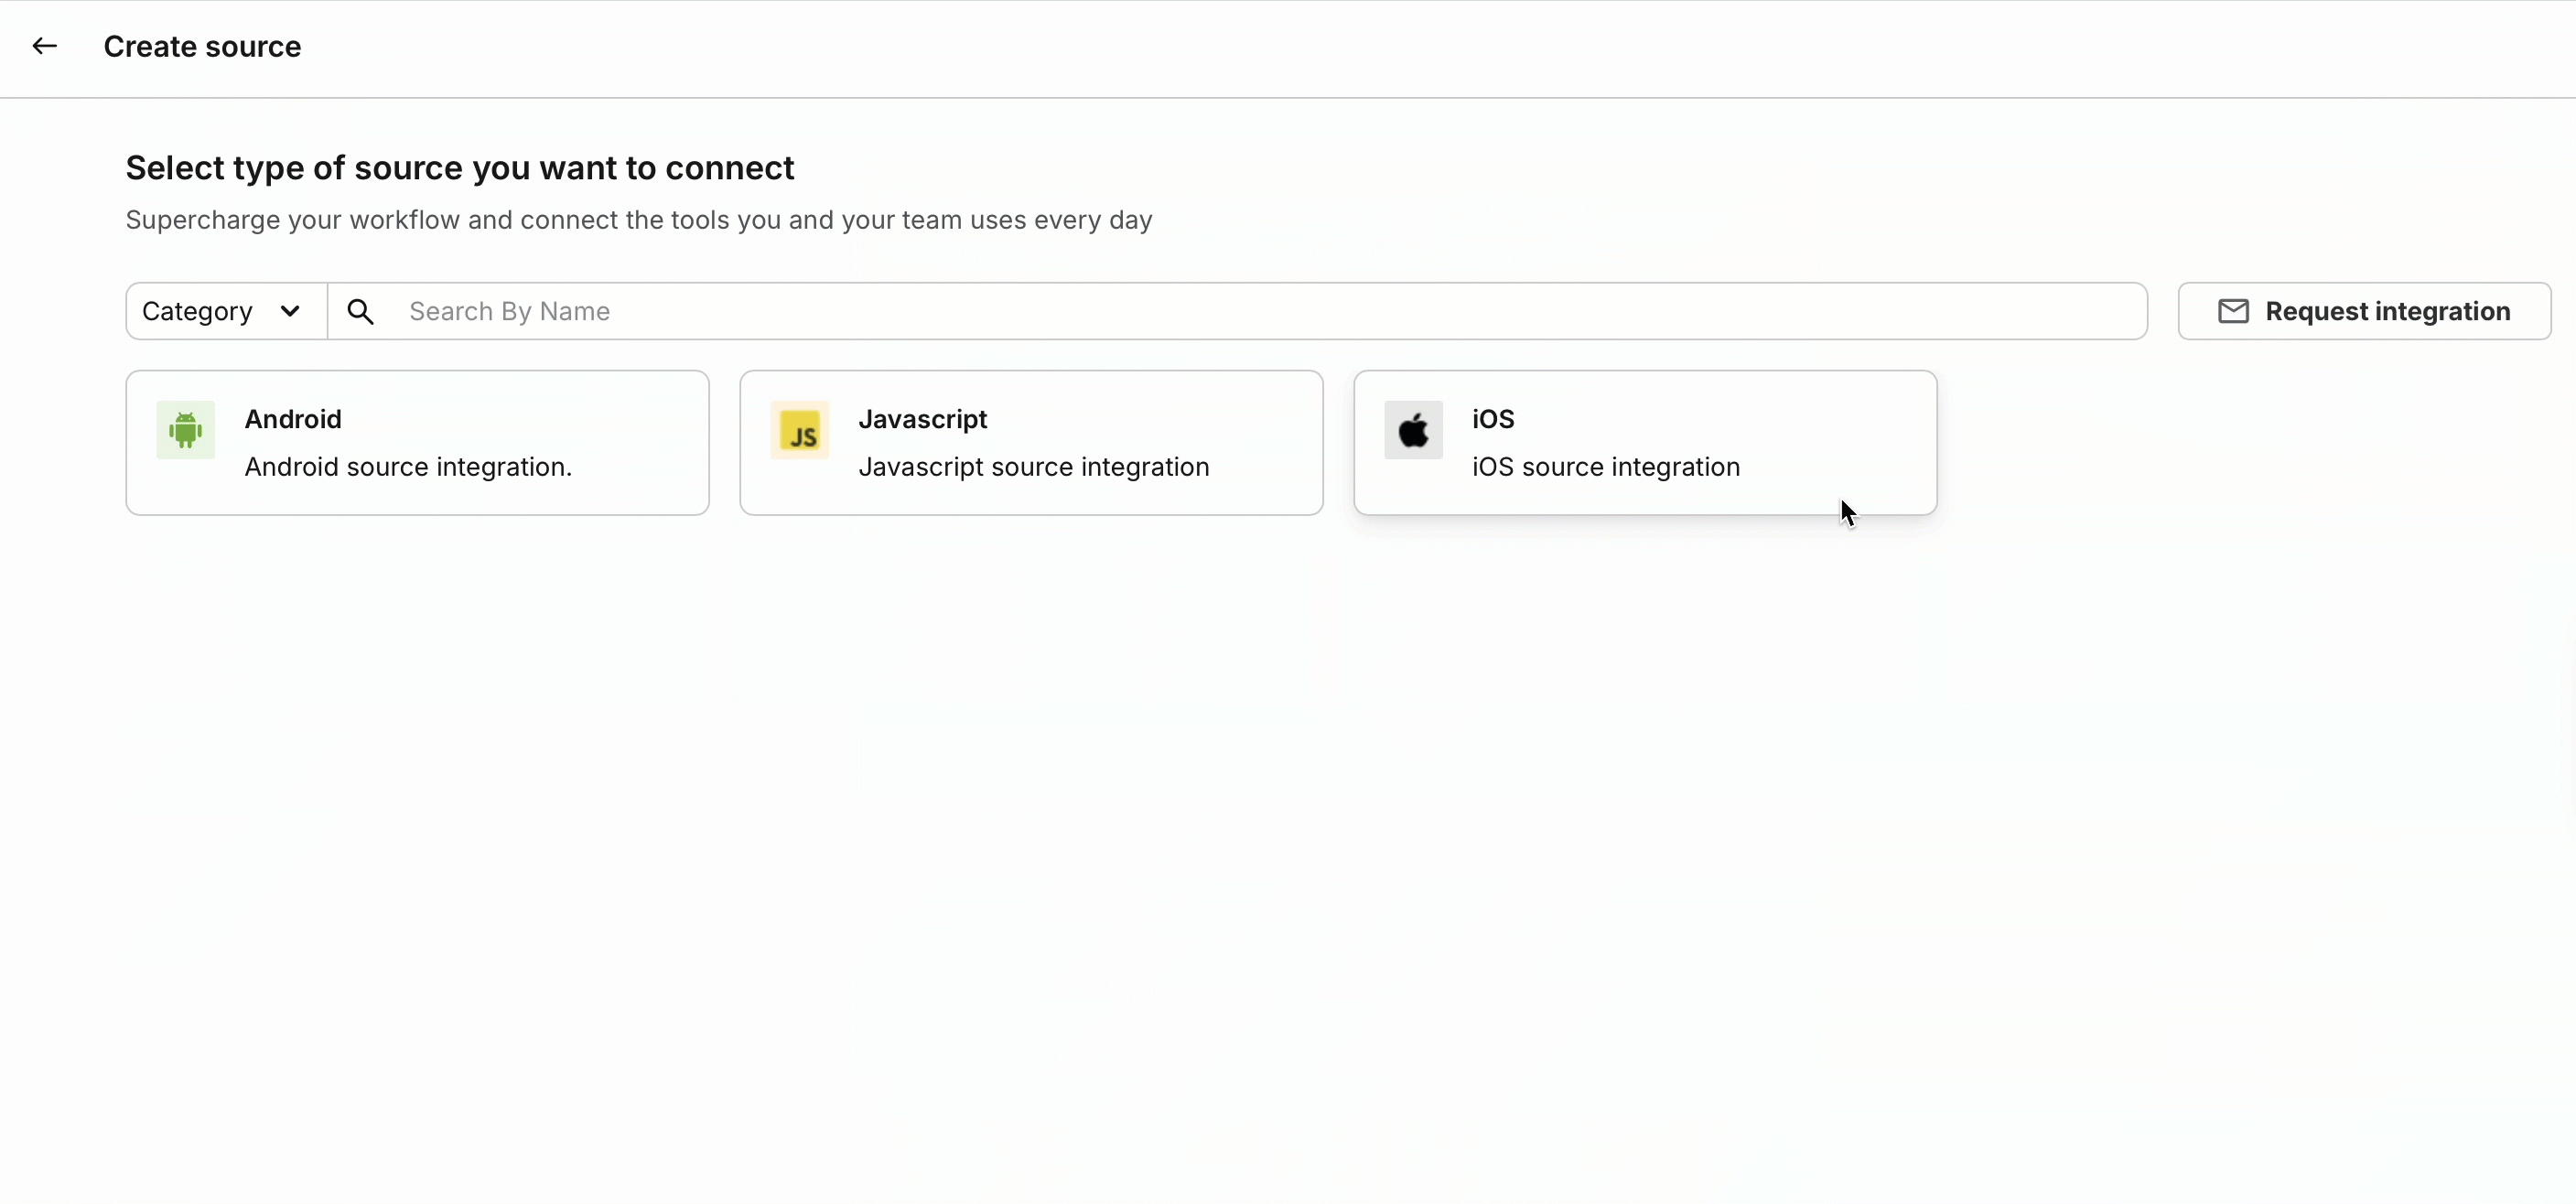
- If the source is not yet configured, click Add Source and follow the setup instructions.
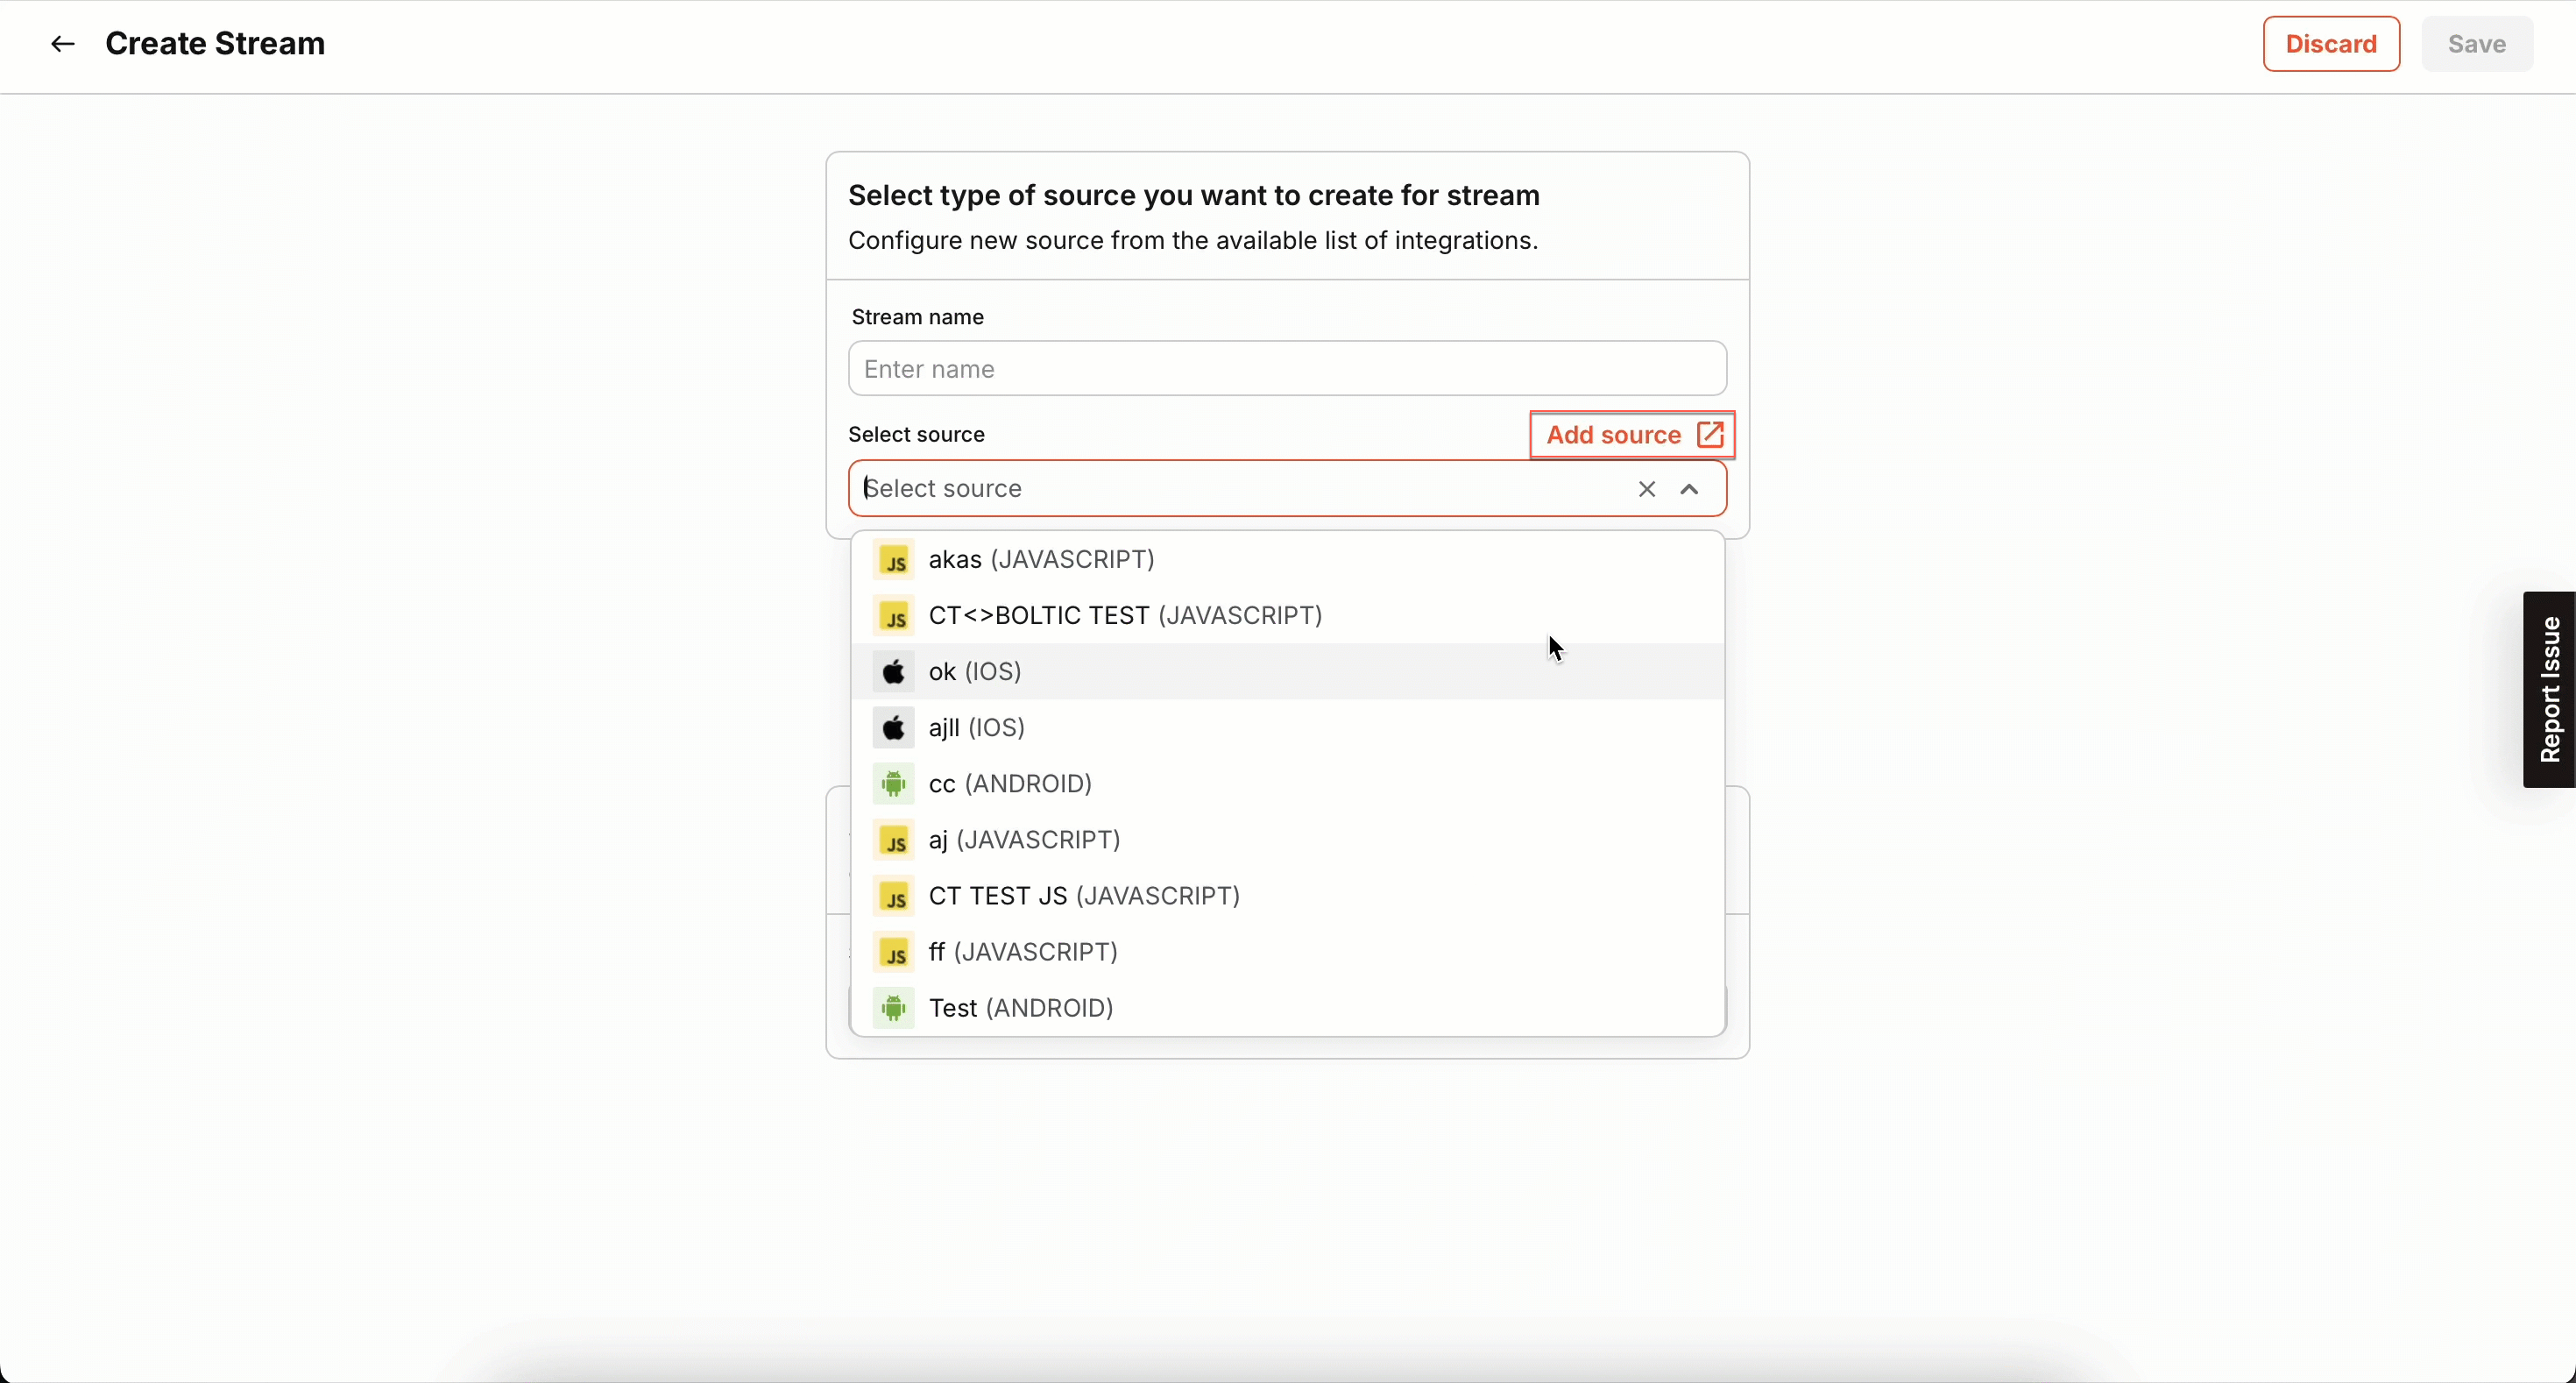
- For this case, use the Javascript Source Integration.
Install and Verify Data Flow
Once your stream is configured, the next step is to install the stream snippet at the source and verify that data is successfully flowing to CleverTap. This ensures a seamless integration with real-time event tracking. To do so, follow these steps:
- From the Destination dropdown, select CleverTap.
- If CleverTap is not yet configured, click Add Destination and enter your CleverTap account details.
- Click Test and Save to validate the configuration.
- After selecting the Source and Destination, click Create Stream. The newly created stream will now be visible in the Streams list in Boltic.
- Open the stream you created and scroll down to find the Install the stream snippet on your website for your selected source.
- Follow the installation instructions carefully, as steps vary depending on the source type.
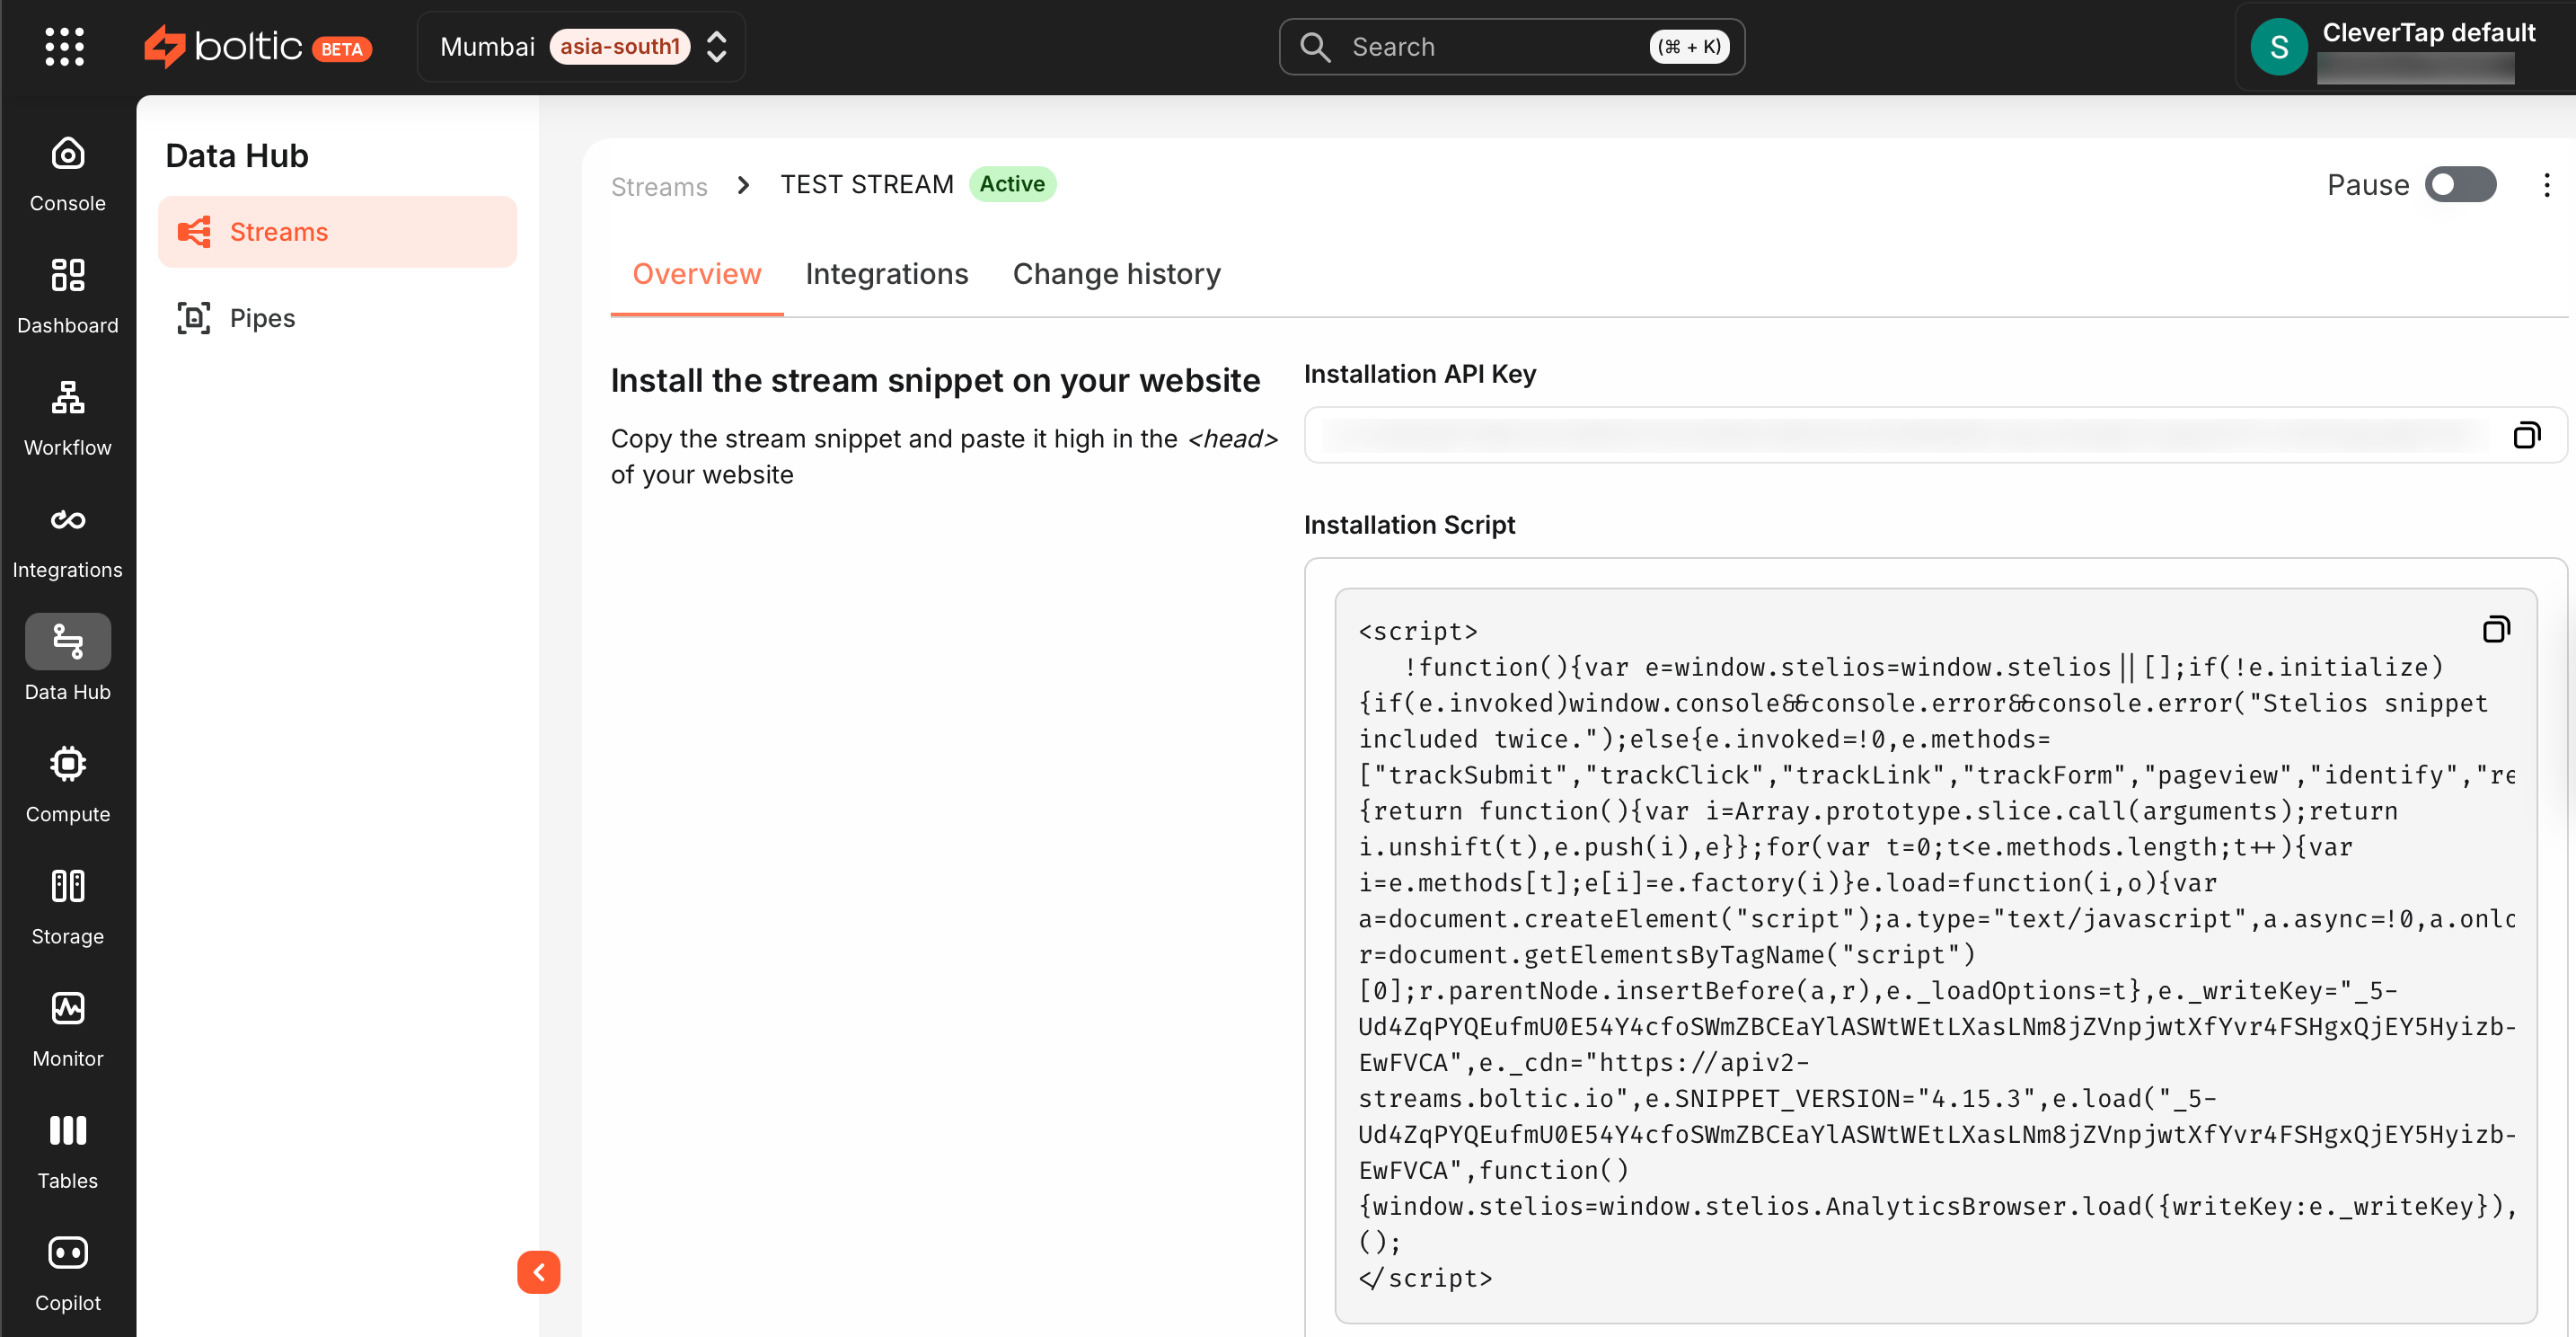
Once the stream snippet is installed, real-time event data flows from the source to CleverTap.
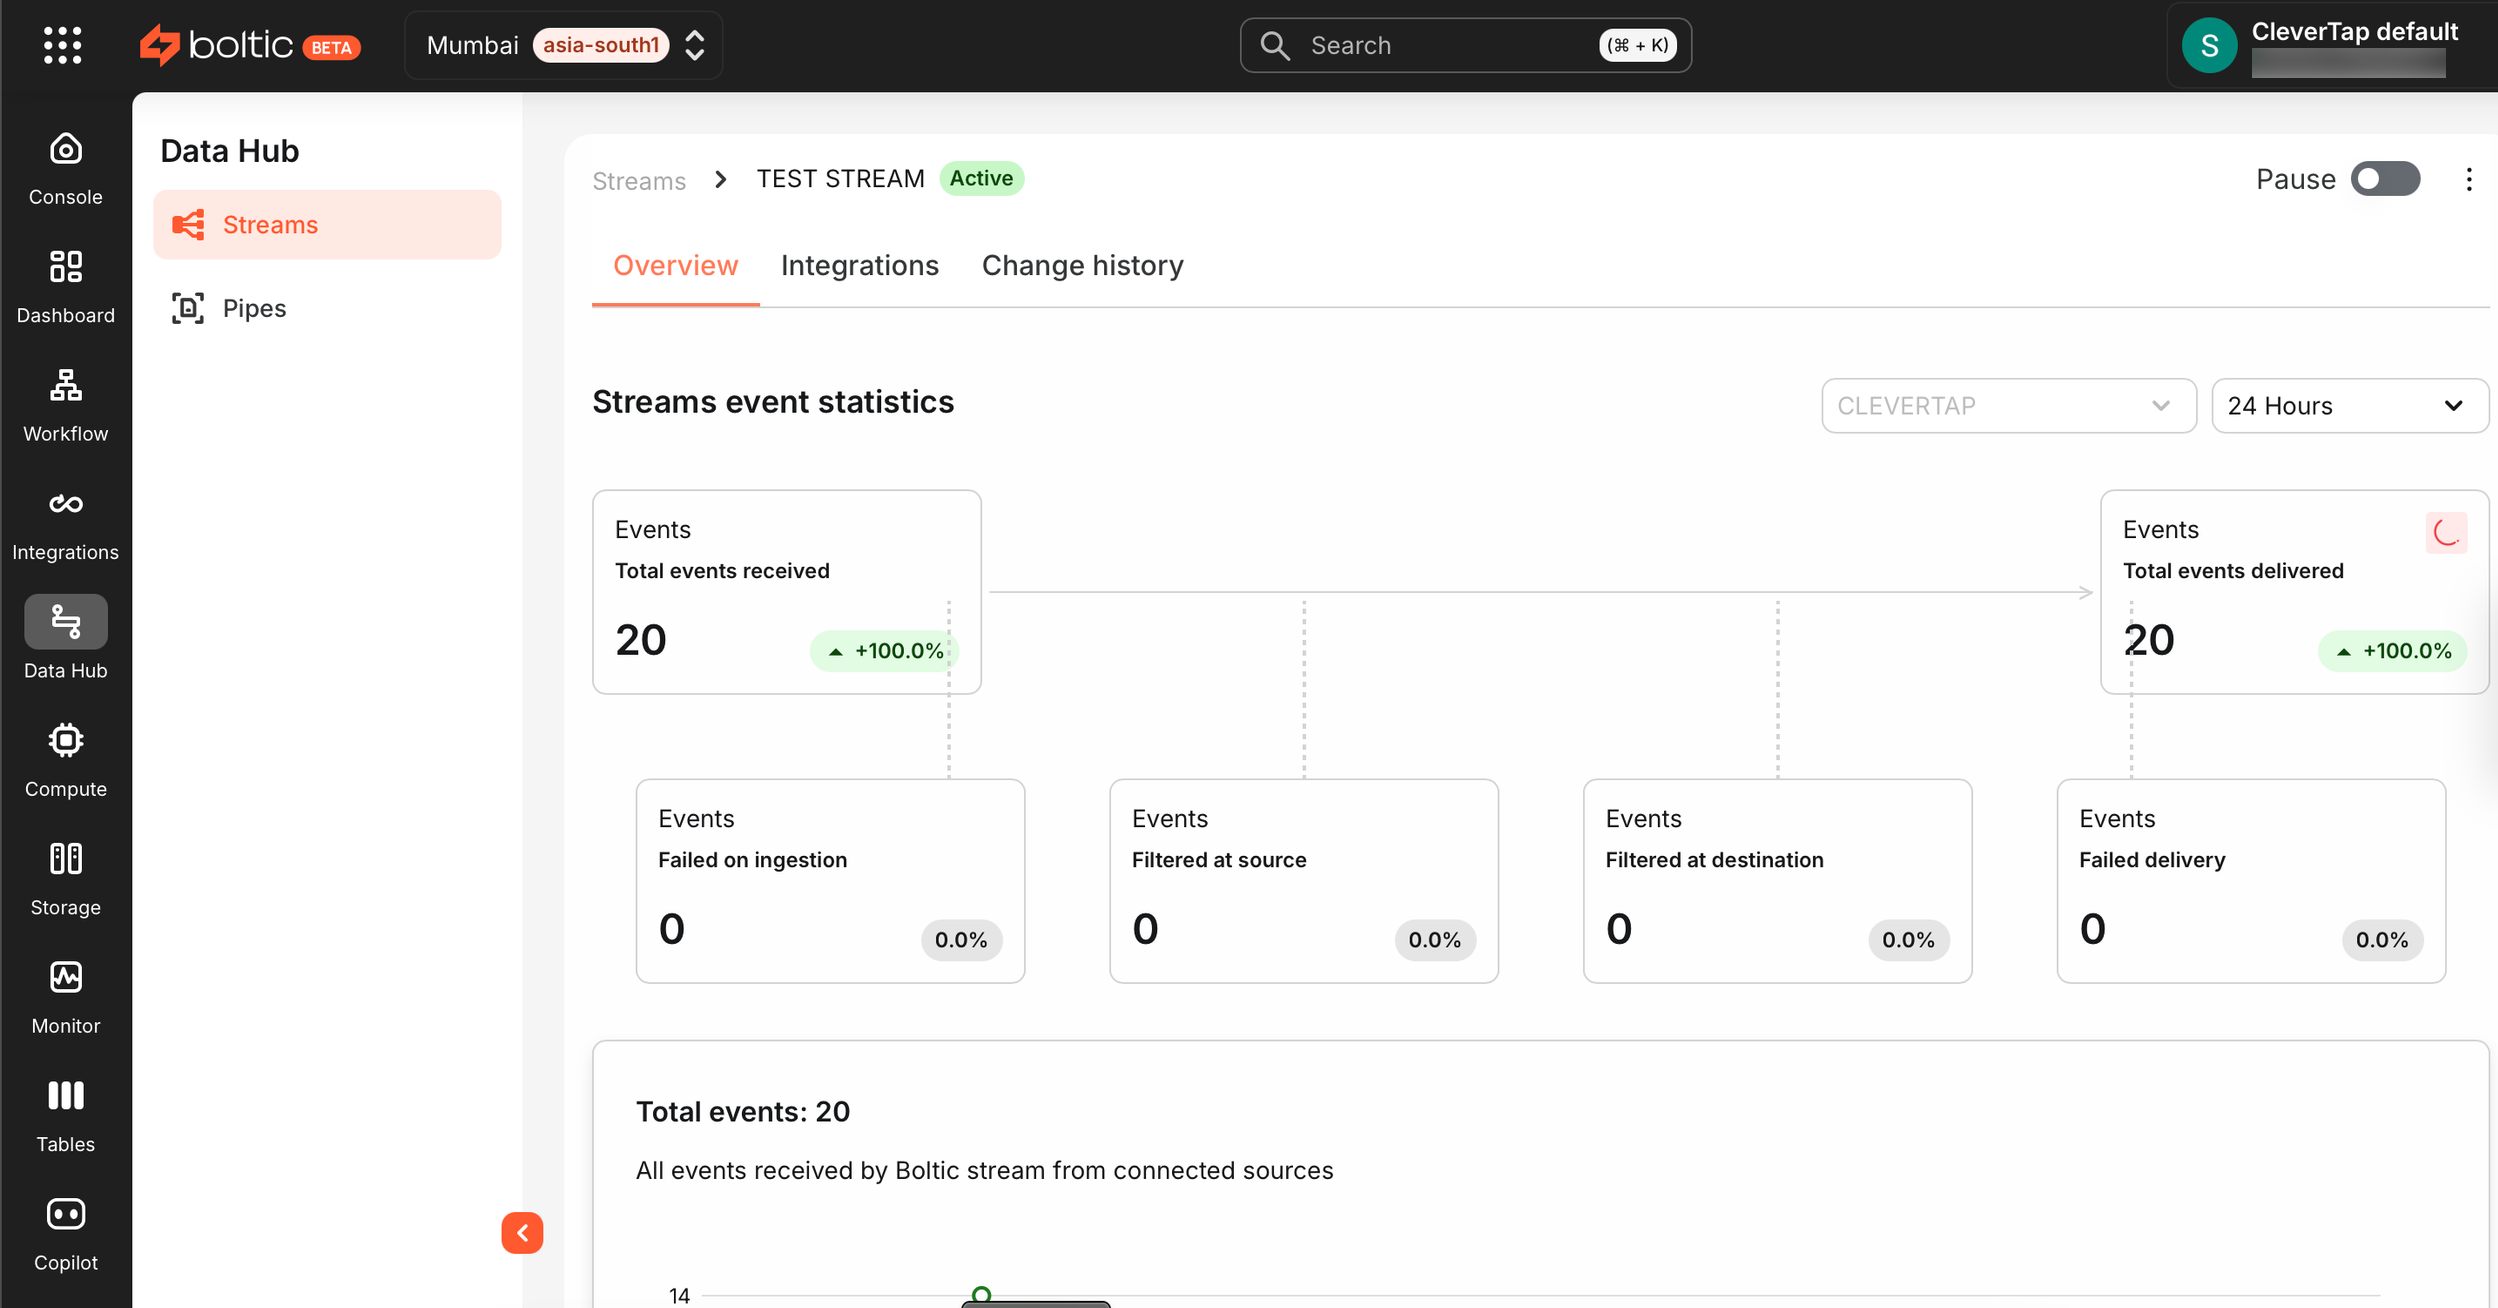
- To ensure the data is successfully reflected in CleverTap, go to the CleverTap Dashboard and check if the events and user profiles are updating as expected.
This alternative integration method offers an automated and scalable way to sync user data and events between Boltic and CleverTap, enabling enhanced tracking and engagement workflows.
FAQs
What are the key differences between API-based integration and Data Hub Stream integration?
| Integration Type | Best For | Pros | Con |
|---|---|---|---|
| API-based (Webhooks & API Actions) | Real-time event-driven automation | Provides instant updates and requires a simple setup | Requires API familiarity and may need rate-limiting |
| Data Hub Stream Integration | Bulk data synchronization from multiple sources | Scales well for large datasets and does not require API calls | It may introduce slight latency and require a more complex initial setup |
Choosing the right method:
- Use API-based integration for real-time updates.
- Use Data Hub Stream integration for large-scale data synchronization.
Why is data not appearing in CleverTap?
Check the following if the data is not appearing in CleverTap:
- Ensure the CleverTap API keys (Account ID and Passcode) are correct.
- Verify that the endpoint URL is correct for API-based integration (
https://<region>.api.clevertap.com/1/upload). - Confirm that the source is correctly configured in Boltic for Data Hub Stream integration.
- Activate the workflow after testing.