Apxor
Workflow Automation
Overview
Apxor is an app intelligence platform that enables mobile apps to deliver hyper-contextual In-App experiences such as walkthroughs, tooltips, coachmarks, spotlights, In-App messages, and surveys. By integrating Apxor with CleverTap, product and marketing teams can sync user segments from CleverTap to Apxor and trigger targeted, personalized In-App interactions for onboarding, feature adoption, activation, and announcements, driving measurable product-led growth.
With this integration, for example, a product manager can identify users who have not tried a new feature in CleverTap, sync that segment to Apxor, and automatically launch a contextual walkthrough inside the app to encourage adoption.
Prerequisites for Integration
Ensure you have the following before setting up the integration:
- Access to the Apxor Dashboard.
- Apxor Android SDK is integrated into your app.
- Access to your CleverTap account.
Support for IntegrationThis integration is managed and continuously improved by Apxor. The CleverTap and Apxor integration has undergone stringent testing to ensure seamless functionality. For any questions or issues, contact Apxor for support and resolution.
Integrate CleverTap with Apxor
To integrate Apxor with CleverTap, perform the following three major steps:
Set Up Apxor for Integration
Ensure Apxor is fully set up to receive cohort data by completing its initial setup. Proper configuration at this stage helps guarantee a smooth, error-free sync when you connect the two platforms. To do so, follow these steps:
- Log in to your Apxor Dashboard.
- Verify that the Android SDK integration is complete and active. If not, refer to Apxor Android SDK.
- Locate your App ID, which will be required during the CleverTap setup.
- (Optional) Review Apxor API Guides for advanced customization.
Set Up Webhook in CleverTap
To send data to your Apxor account, set up a webhook in CleverTap:
-
Go to Settings > Channels > Webhooks from the CleverTap dashboard.
-
Click Add Webhook and provide a meaningful name for the webhook.
-
In the Create webhook template popup, enter the following details:
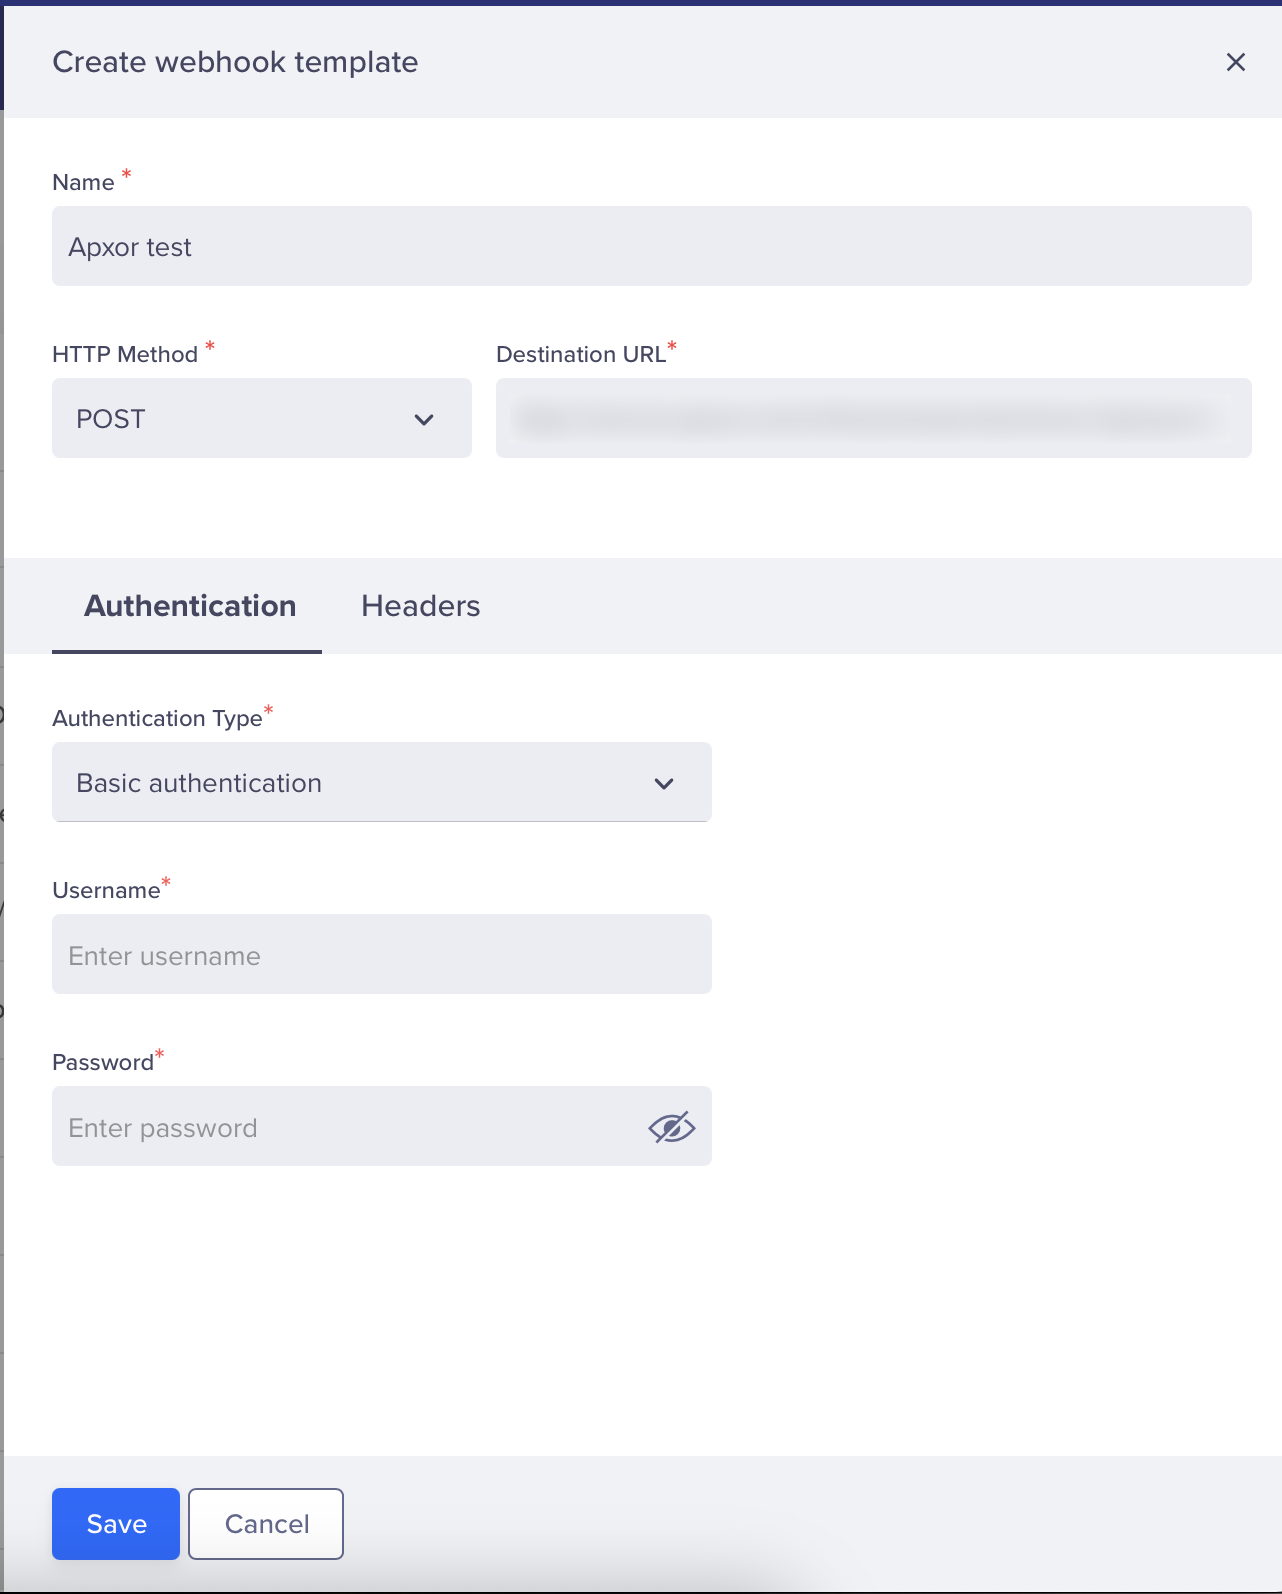
Field Description Name Enter the name for your webhook. HTTP Method Set the HTTP Method to POST. Destination URL Enter the following destination URL:
https://server.apxor.com/v1/track/external/clever-tap/sync/<app-id>Replace <app-id> with your Apxor App ID. For more information about your App ID, refer to Apxor Application Identifier.
-
Enable Basic Authorization and enter the username and password provided by Apxor.
-
Click Save.
The webhook can now sync CleverTap segments with Apxor cohorts.
Create Webhook Campaign in CleverTap
Once the webhook is ready, configure a campaign to send user data to Apxor.
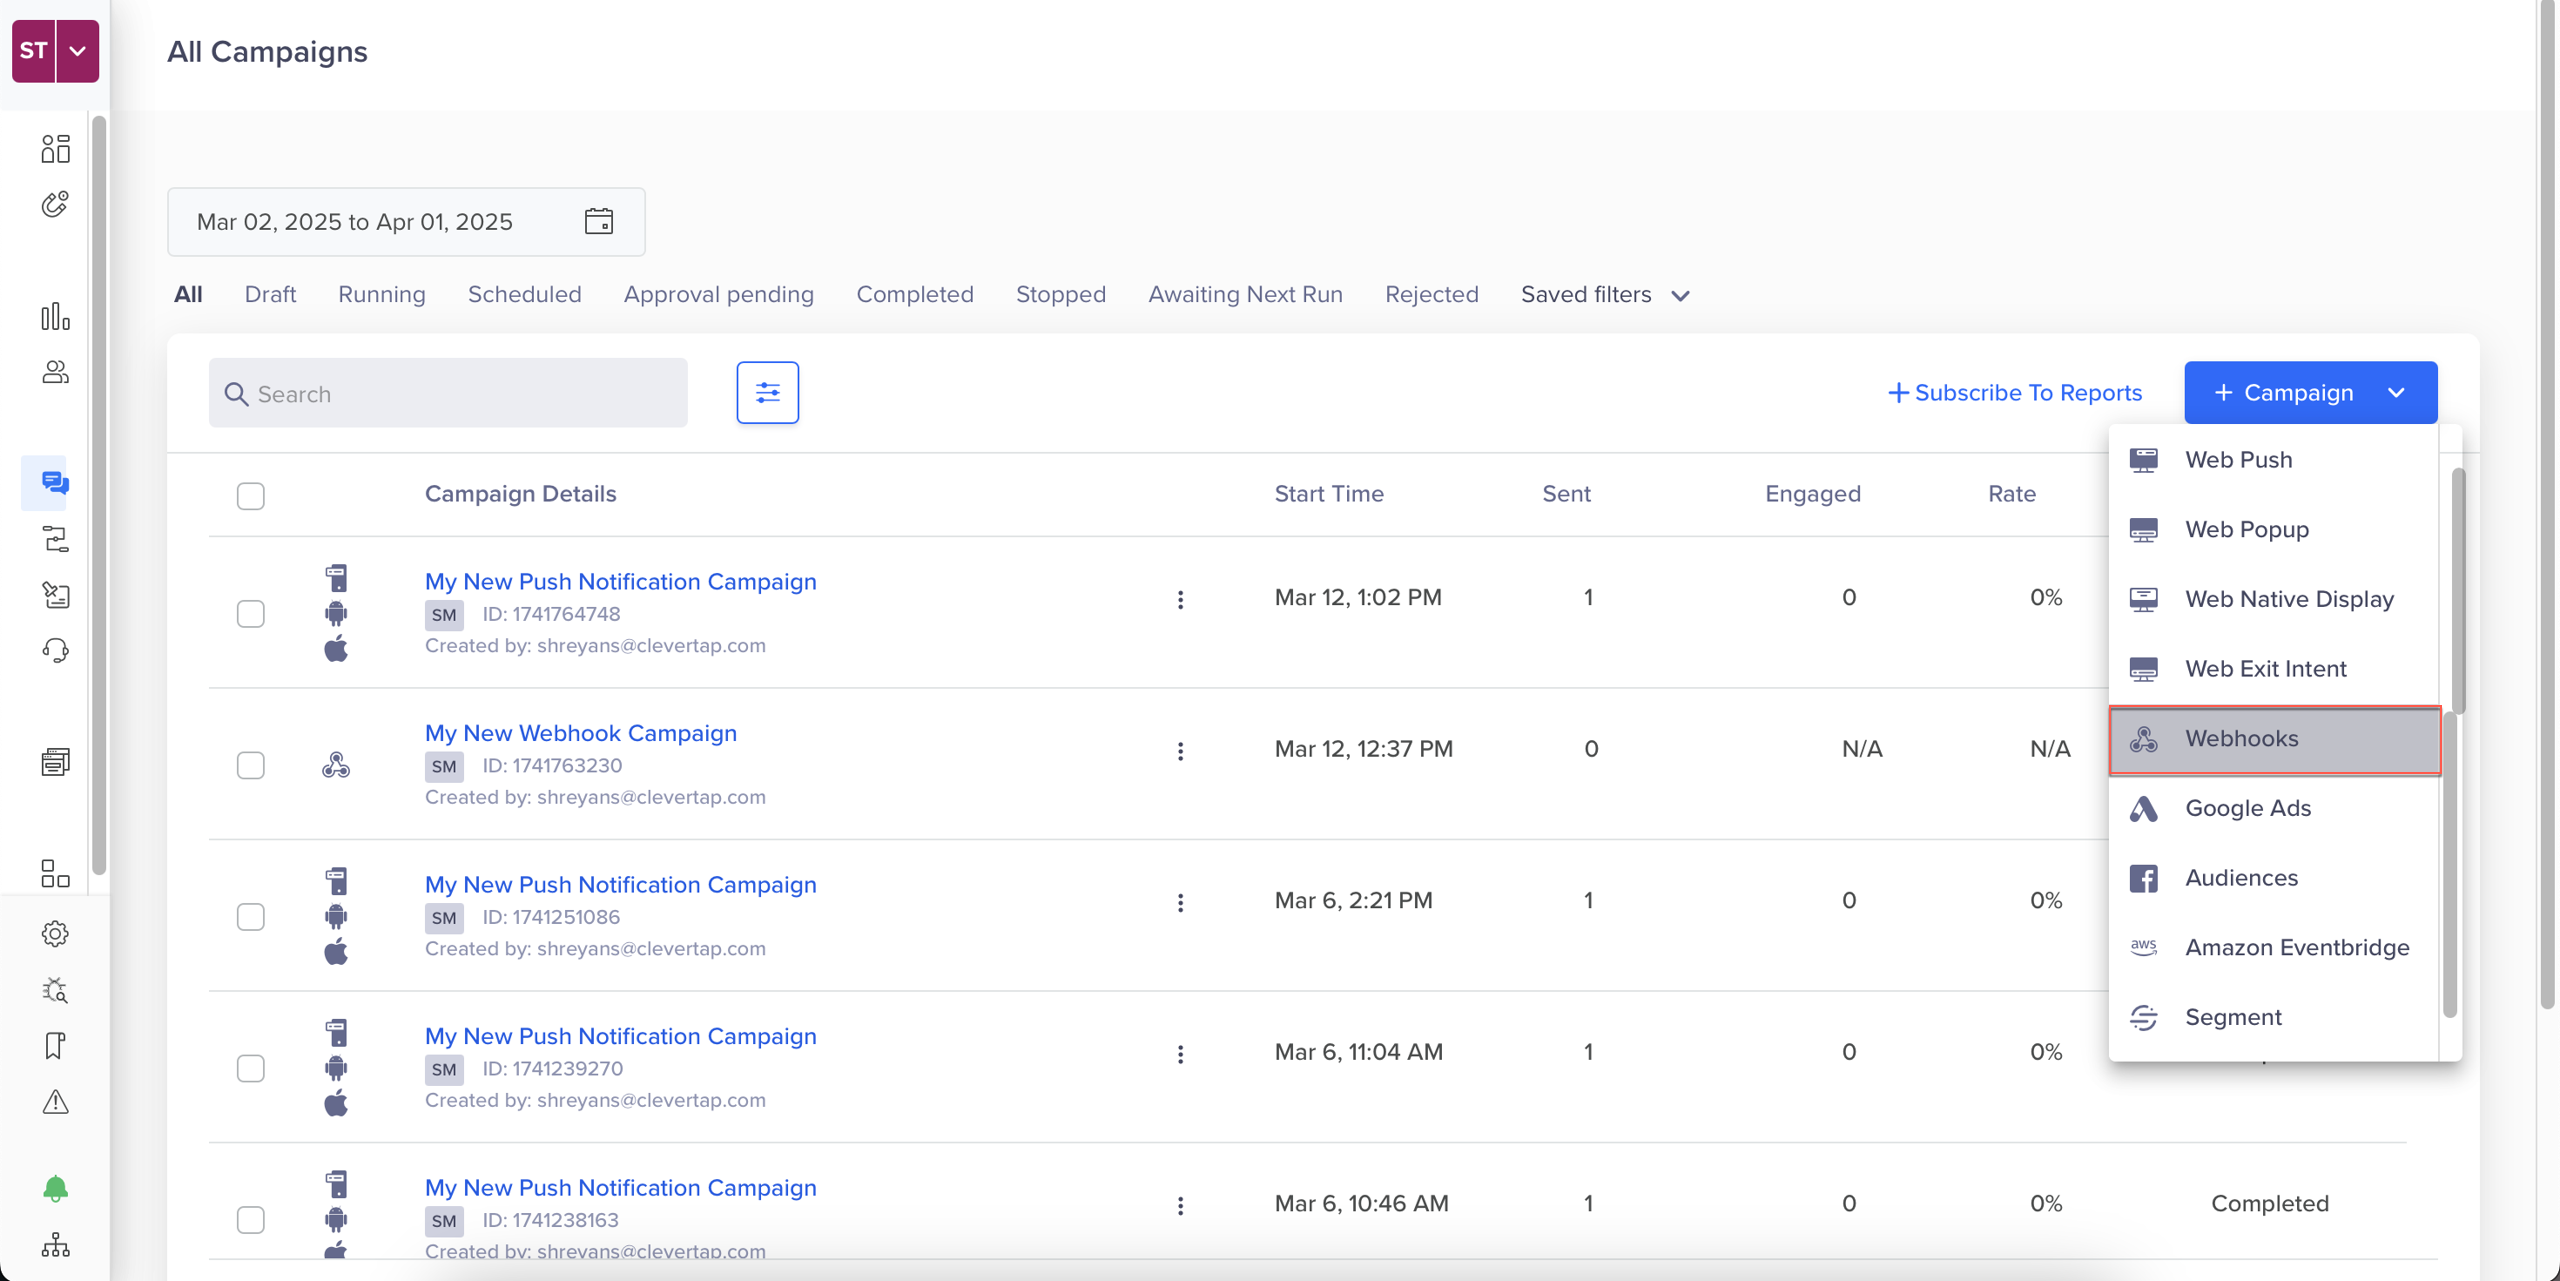
- Go to Campaigns on the CleverTap dashboard, click + Campaign and select Webhook from the list of messaging channels.
- Configure the following campaign settings: qualification criteria, target segment, and delivery preferences.
- Under the What section, select the webhook created in Set Up Webhook in CleverTap.
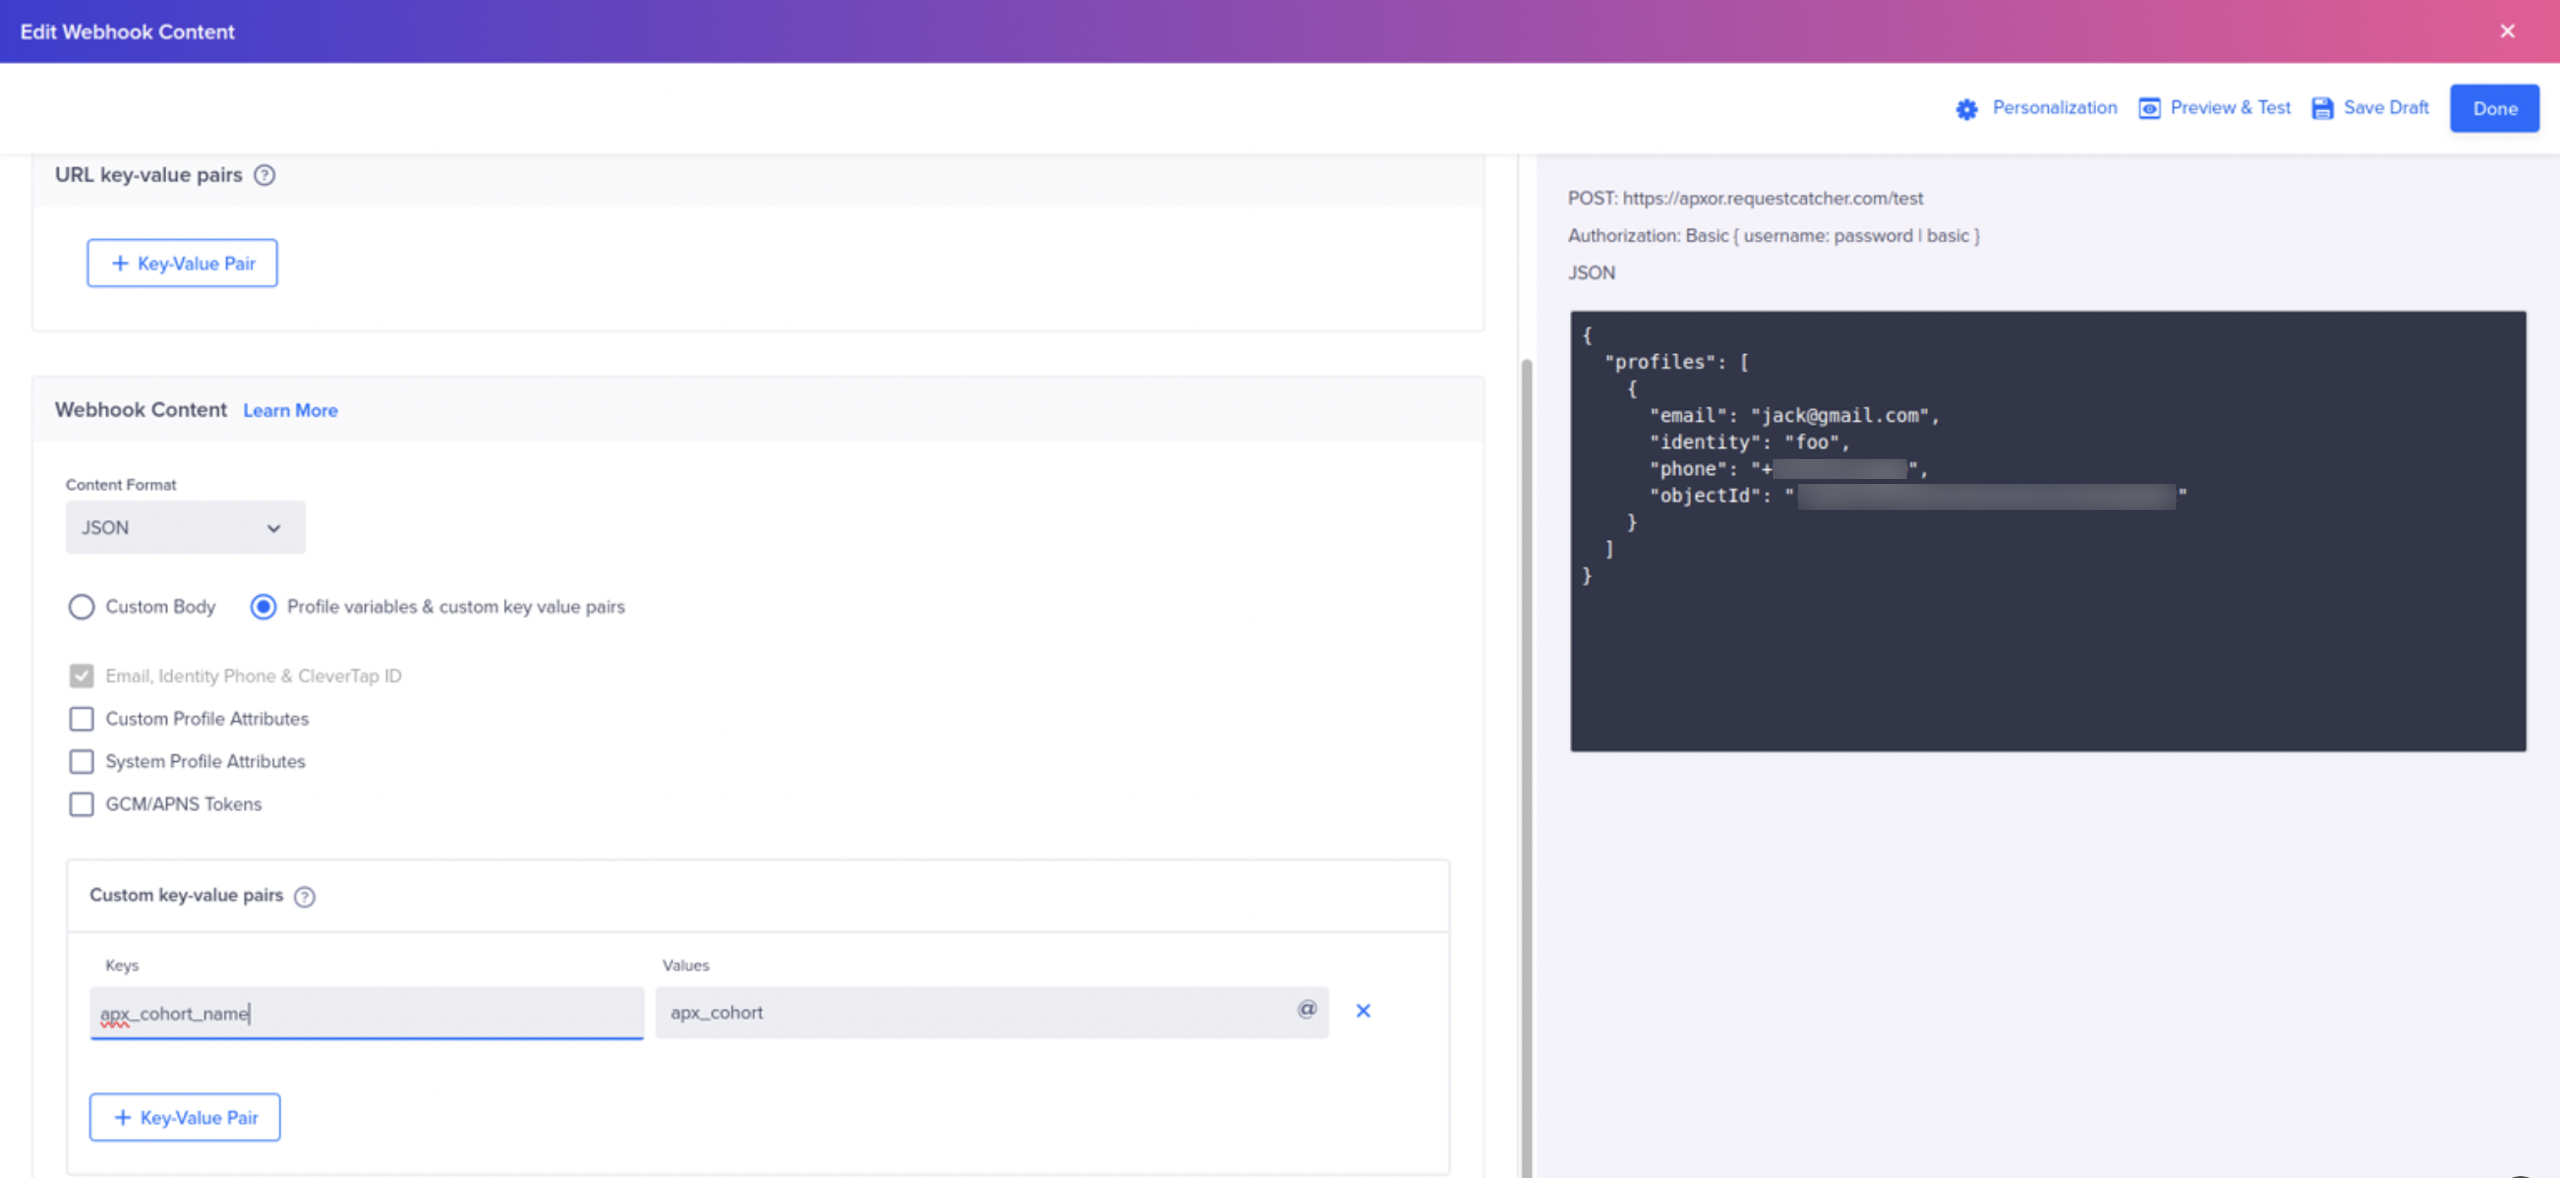
- Click Go to Editor, select Custom Profile Attributes under the Webhook Content and enter the following details:
- Key:
apx_cohort_name - Value: The name of the cohort in Apxor. You can also insert a dynamic variable (for example,
{'{{Cohort Name}}'}) to send personalized cohort data.
- Key:
- Click Preview & Test to validate that the data sync works correctly.
- Once verified, click Publish.

A dynamic cohort appears in your Apxor dashboard, ready to be targeted for In-App experiences. Completing this integration establishes a seamless connection between CleverTap's segmentation power and Apxor's personalization capabilities. This helps deliver the right experience to the right user at the right time.
Updated 8 months ago