Publish a Journey
Understand how to get your journey to work by saving and publishing it.
Overview
After building your Journey, you can save it as a draft for further editing or publish it to make it live. This document offers a step-by-step guide to managing CleverTap Journeys, detailing the processes of saving drafts, publishing Journeys, and activating them effectively.
Once a Journey is published, you can still edit it to make changes. This creates a new version of the Journey without disrupting the live version. For more information, refer to Edit a Journey.
Save Journeys
Once you create and save a journey, the status of the Journey changes to the Draft state. You can make more changes to it at a later date or time. Any unsaved changes in this state may be lost unless explicitly saved.
To save a journey, follow these steps:
- Click Save Draft from the Journey canvas. The Save this journey as popup opens.
- Enter journey name and click Save.

Save Journeys
The other journey actions, such as Archive, Stop, and so on, are unavailable, as the journey has still not been published.
Publish Journeys
After setting up the Journey, click Publish on the Journey canvas to activate it. The Publish journey popup opens. Enter or verify the Journey name. You can also update the name here if needed. Add a description or summary for your Journey to help understand its purpose and click Publish. For example, This journey aims to onboard new users by sending a welcome push notification immediately after signup.
The description can be up to 120 characters long.

Add a Description and Publish the Journey
You can view the description from the Journey List page. Click the ![]() icon and select View description from the available actions. You can also edit the description when editing the Journey.
icon and select View description from the available actions. You can also edit the description when editing the Journey.
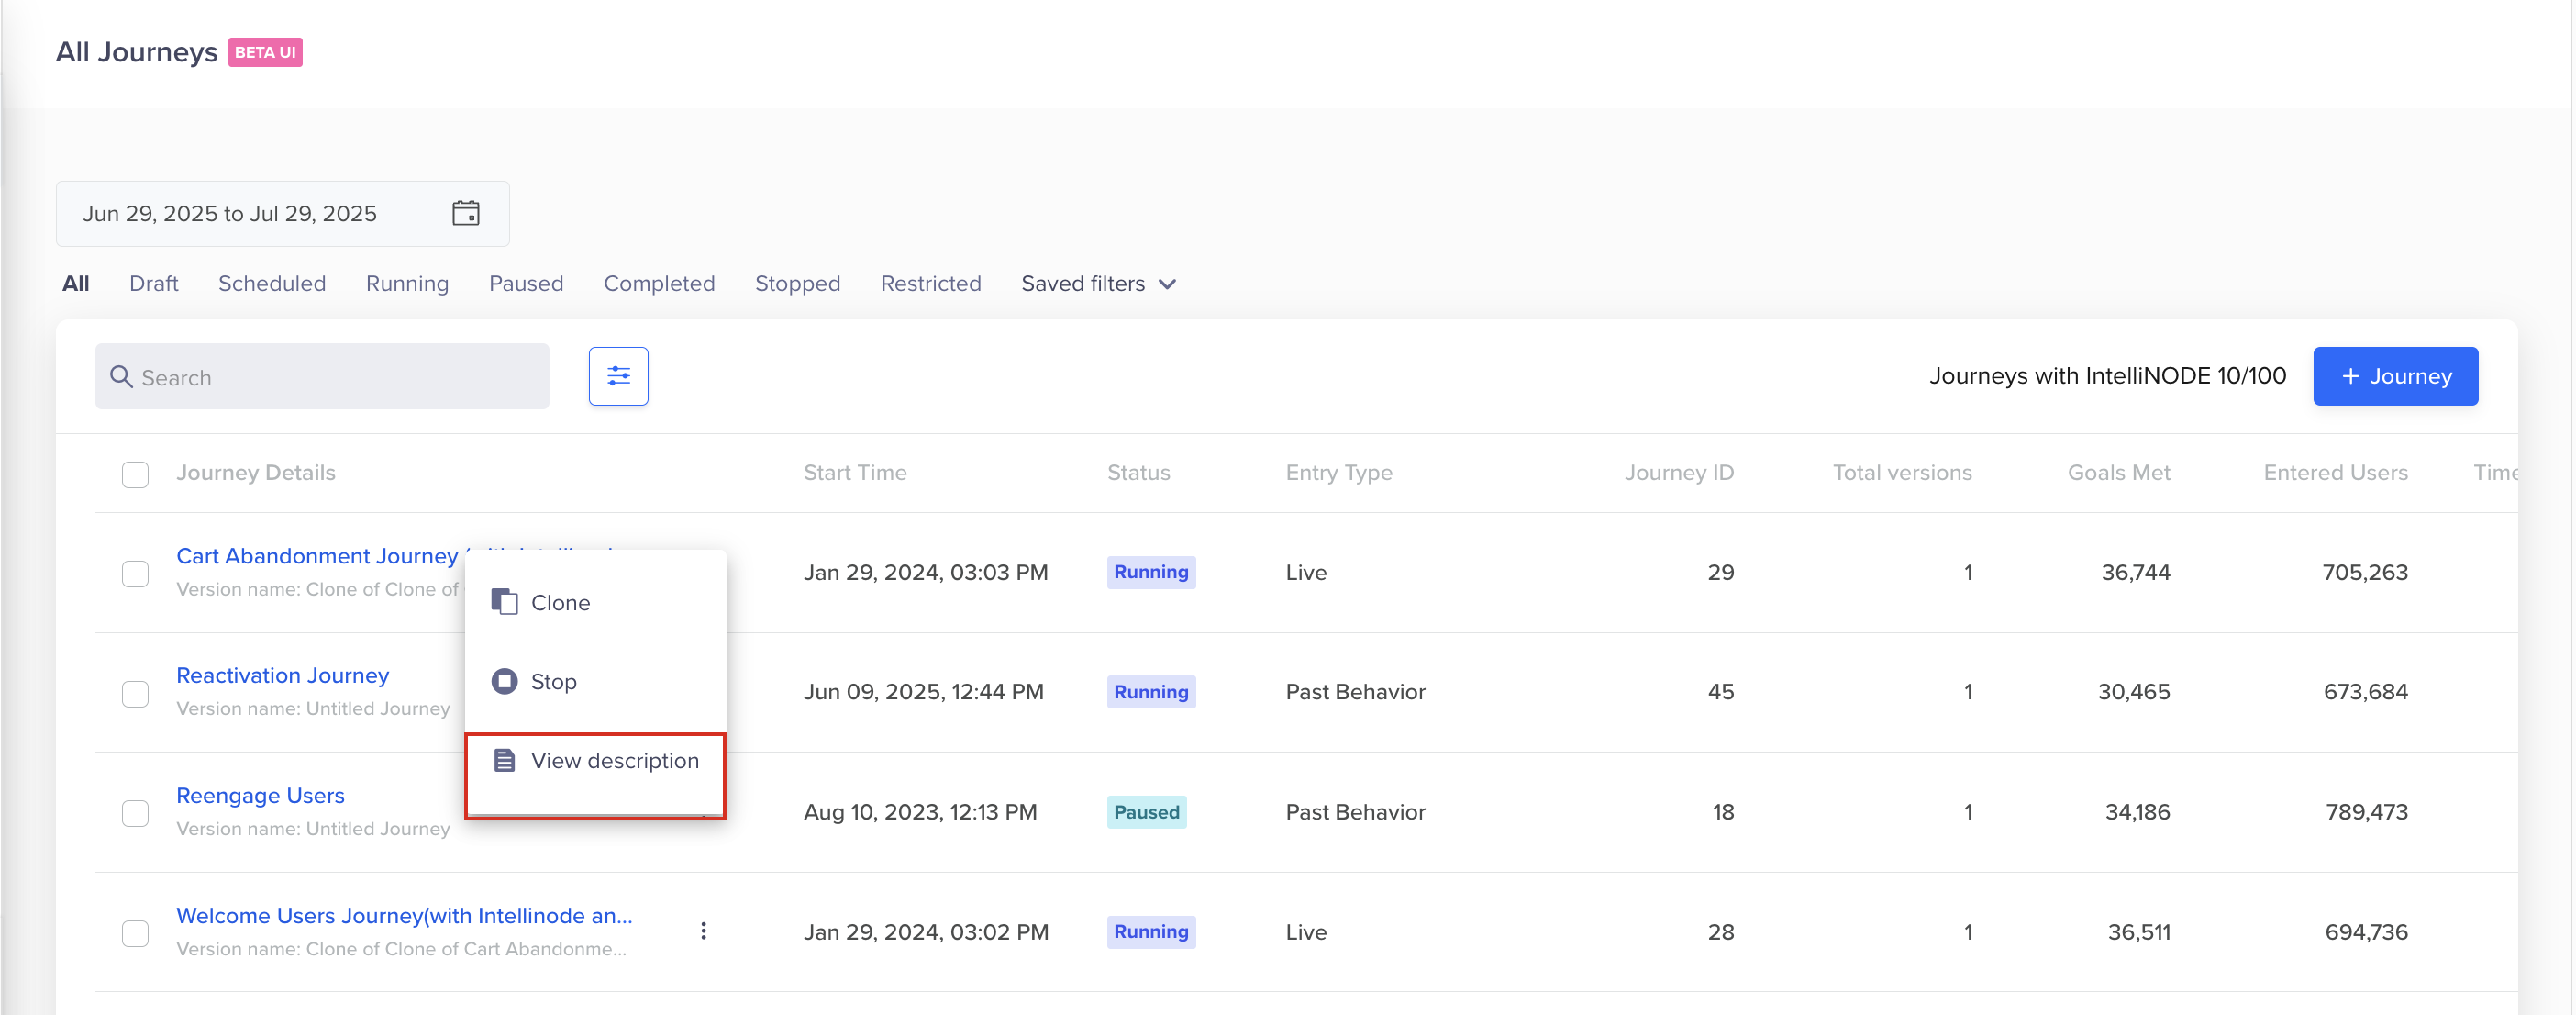
View Journey Description
Once you publish a journey, the journey status on the Journey List page changes to Running or Scheduled.
You can edit any part of the published Journey, including entry criteria, paths, and content, by creating a new version. This allows you to iterate without disrupting the currently running version. You can still edit the What section of a message node inline without creating a new version. For more information about how editing works, refer to Edit a Journey.
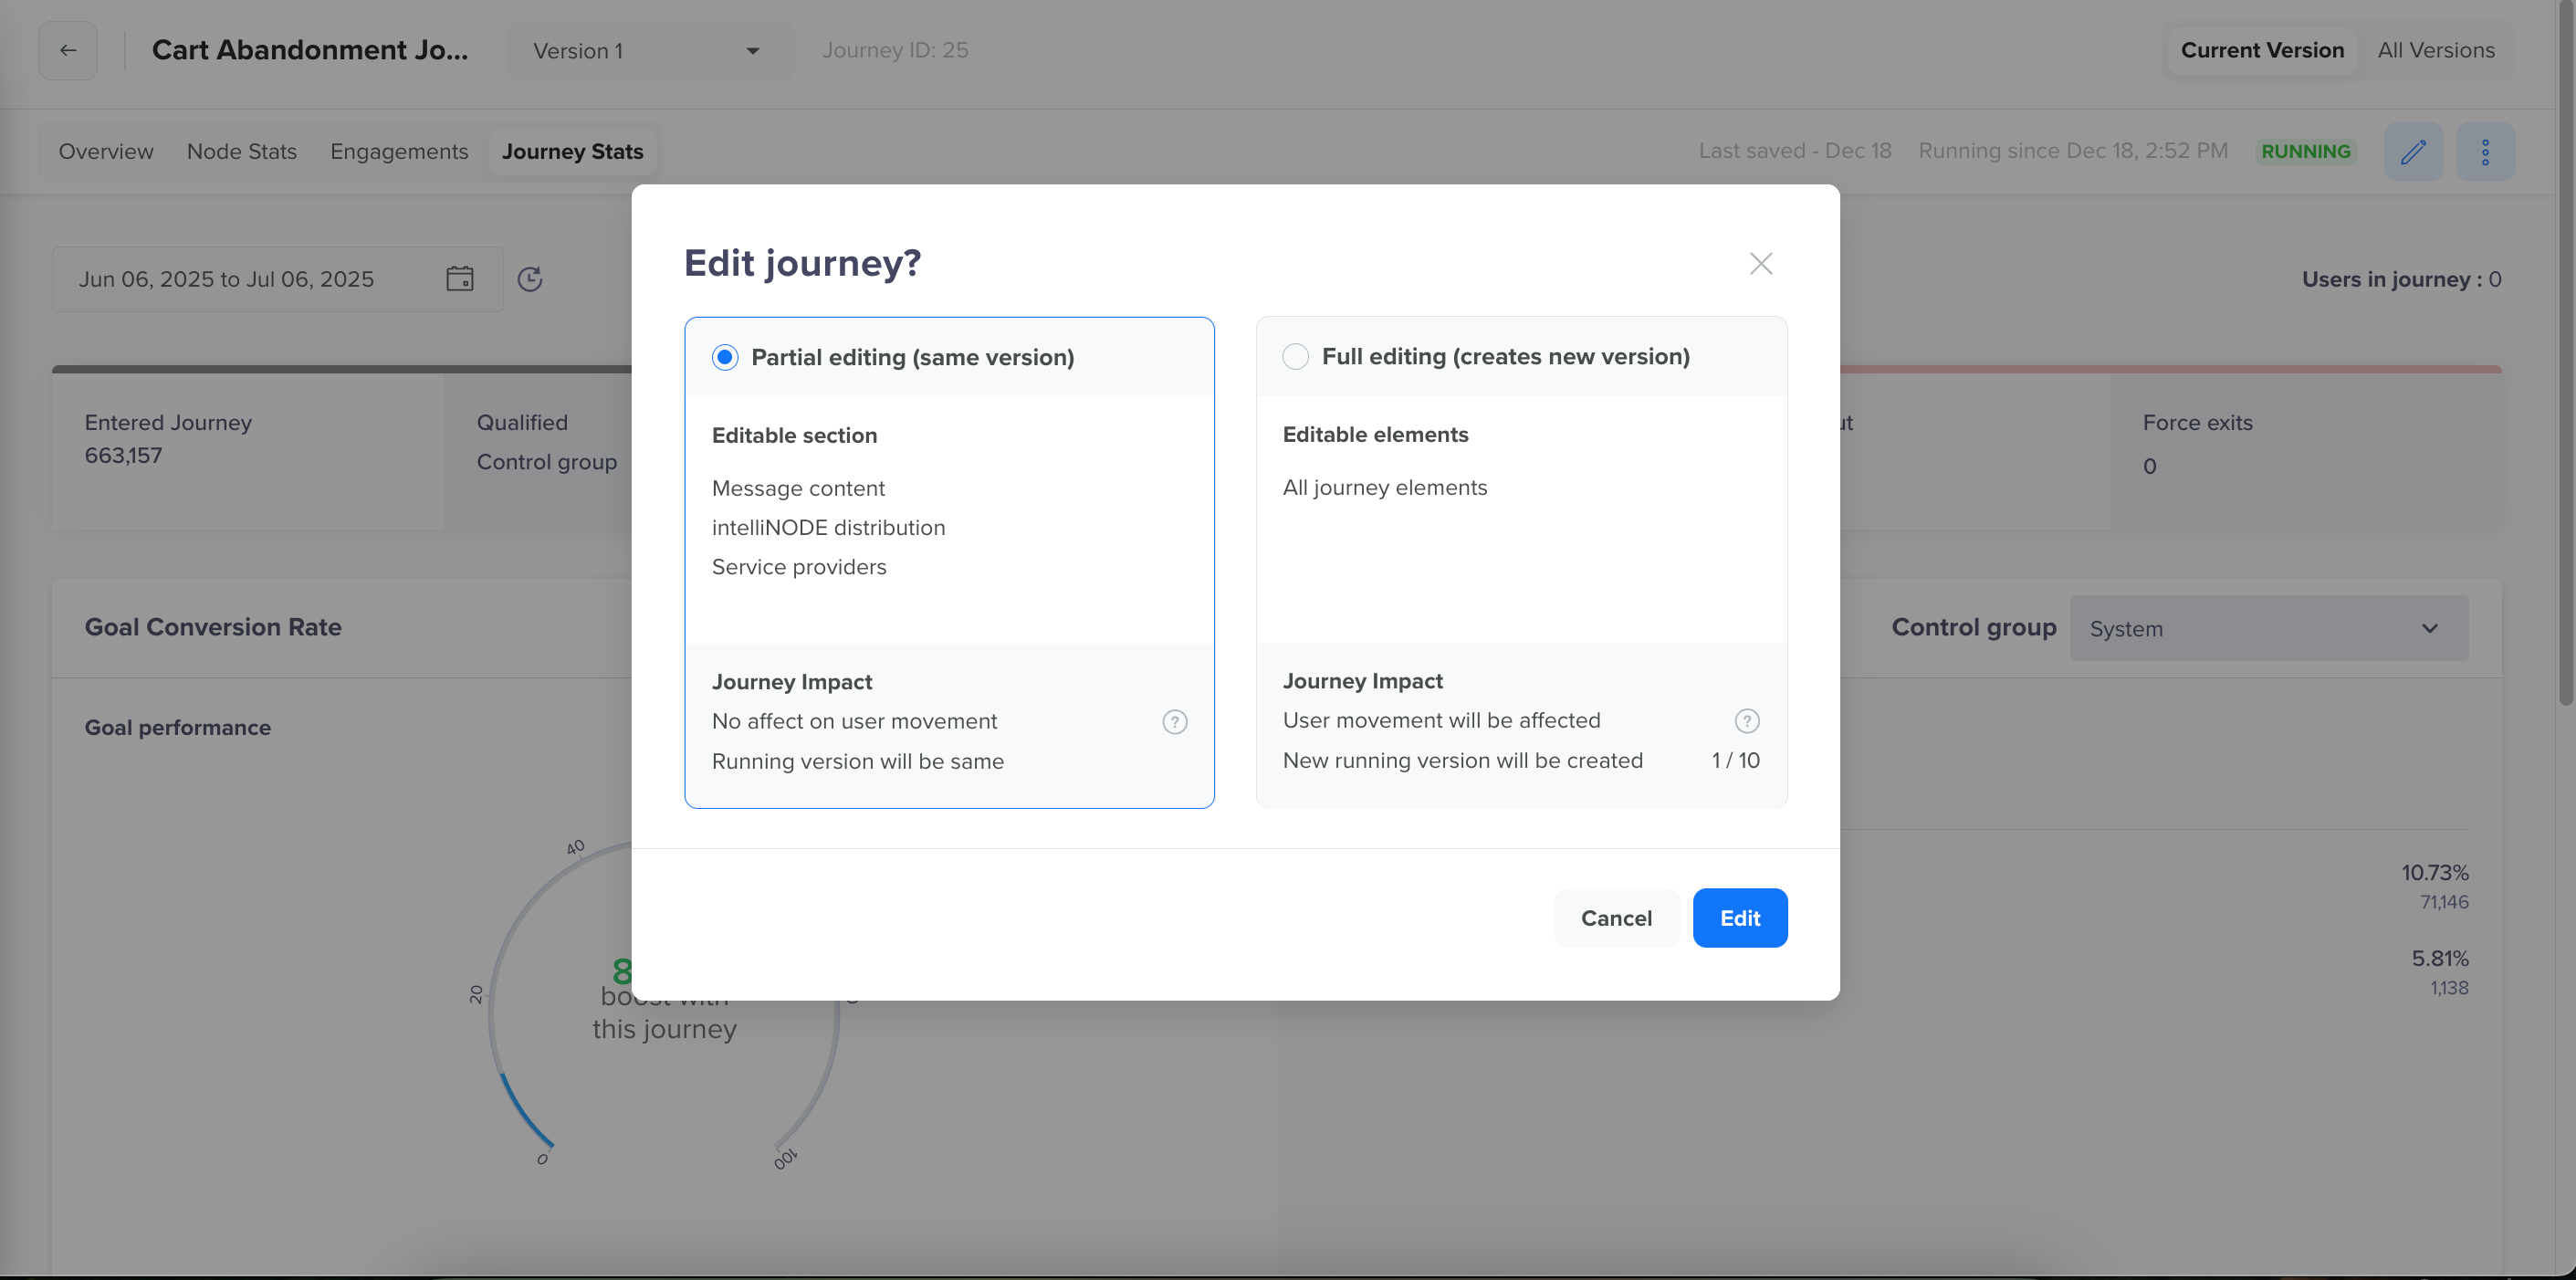
Edit a Currently Active Journey
Journey Activation, User Qualification, and Message Delivery
Once the journey is activated, users qualify, and messages are sent to the users based on the Journey Entry Timelinethey are activated as follows:
- Activation: Journeys activate immediately after publishing or at a scheduled start time.
- User Qualification: Users qualify for the Journey at midnight the day after activation. It applies to both multi-date and recurring Journeys.
- Message Delivery: Messages are sent to users starting from the night of publishing and continue as scheduled. It applies to both multi-date and recurring Journeys.