Create Message
Understand how to create mParticle campaign
Create a New Campaign
Create a campaign to deliver your message to mParticle. To create a new campaign:
- From the CleverTap dashboard, select Campaigns.
- Click + Campaign.
- From the Messaging Channels list, select mParticle.
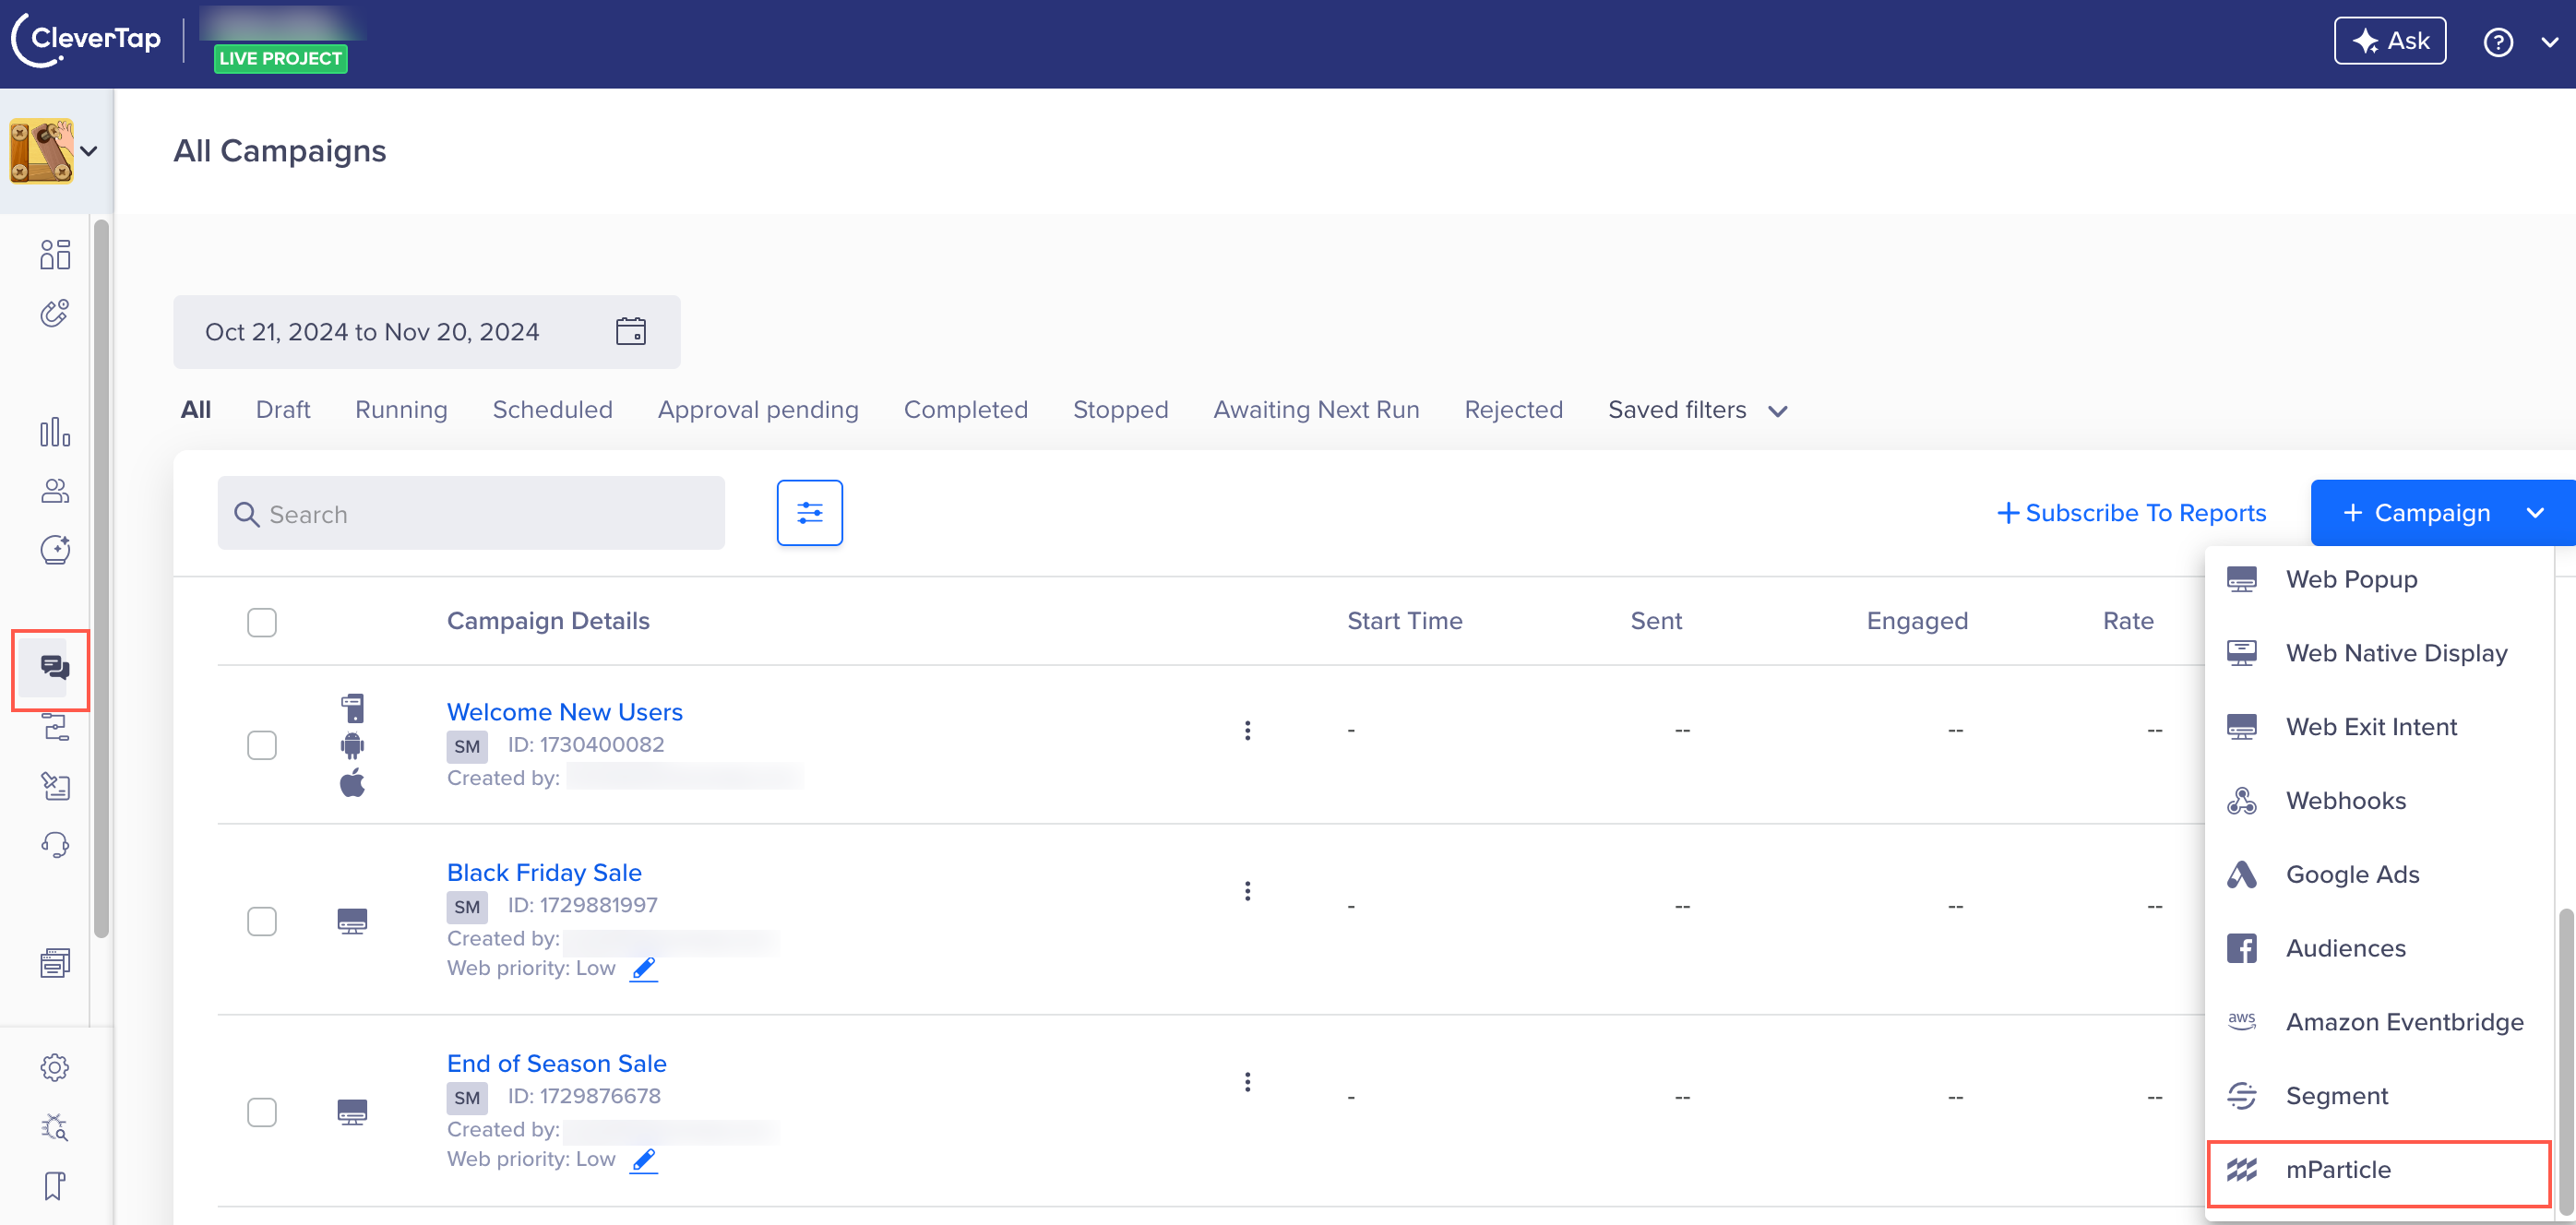
Create a New mParticle Campaign
The Campaigns page displays.
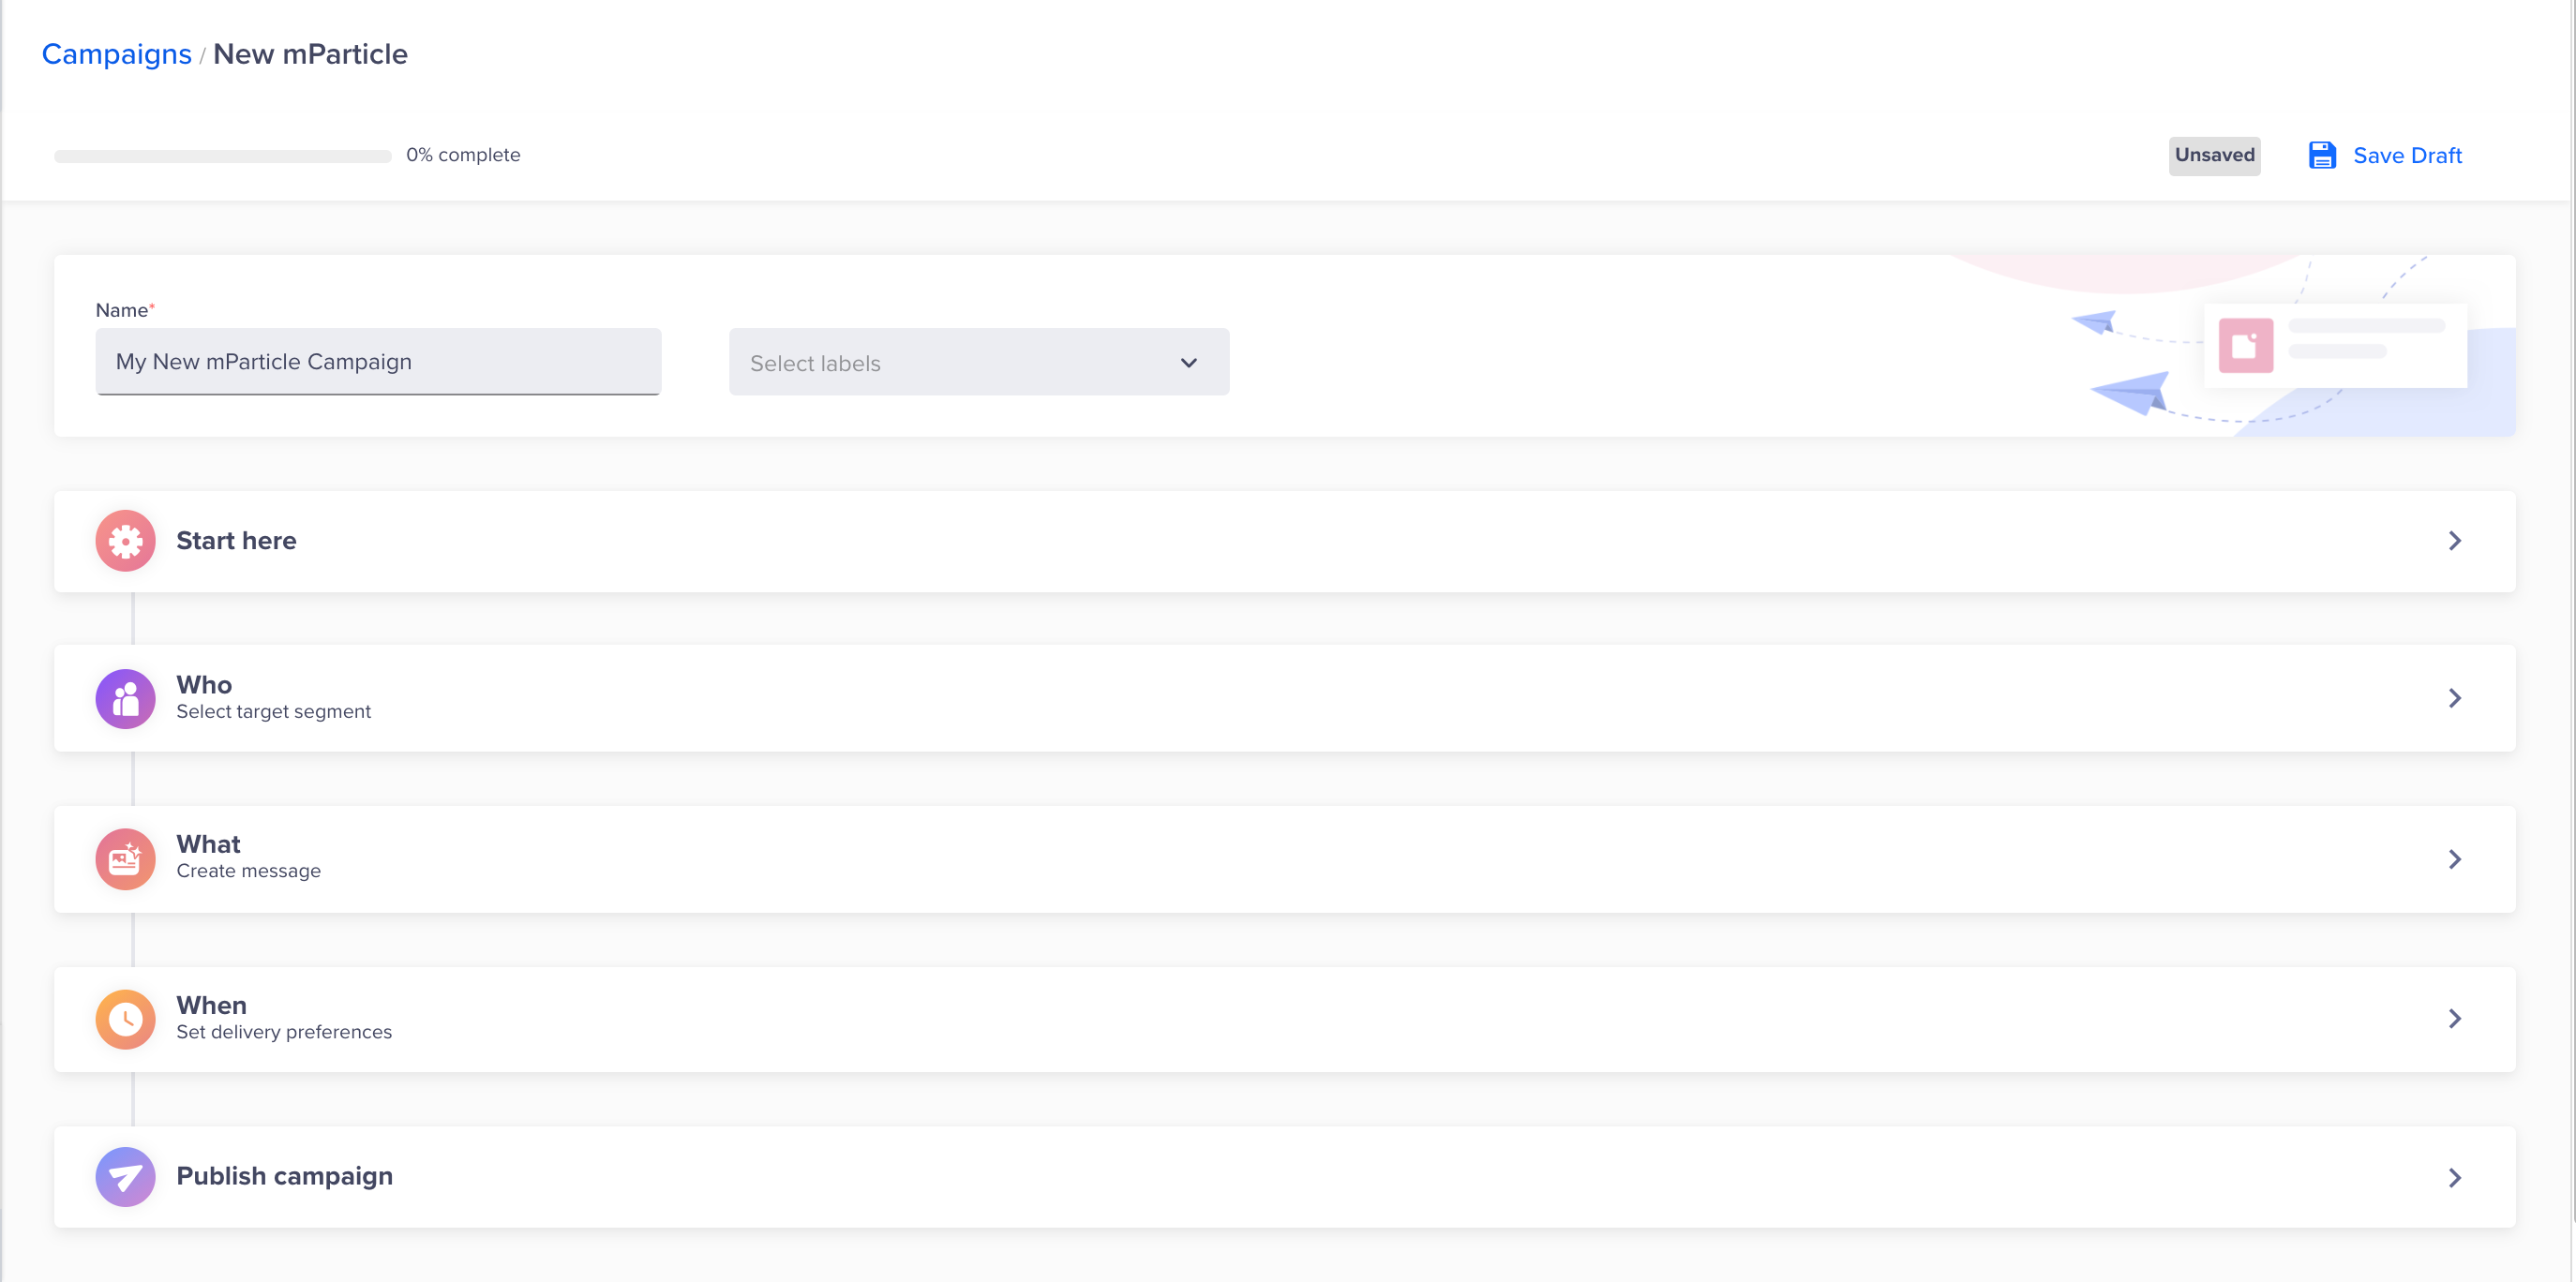
mParticle Campaign Configuration Page
Define all the sections and publish the campaign.
Start Campaign Setup
The Start here section displays the setup information.
This section has the following parts:
-
Start here: Displays the information whether the mParticle account has been set up or not.
-
Qualification criteria: Deliver the notification by Past Behavior, Custom List, or Live Behavior.
Past/Custom List: Select this option to deliver notifications to users based on an activity they performed or have been performing.
Live Behavior: Select this option to deliver notifications to users as soon as they perform or fail to perform an activity.
For more information about segmenting users, refer to Segments. -
Set a goal: You can track your campaign conversion by setting up a goal. Setting a goal allows you to measure your campaign effectively against what you want to achieve in the campaign. You can define your conversion goal by selecting the Event and Conversion time. This selection is optional.

Goal Conversion Tracking
Define the Audience
You must indicate the target audience for your campaign. You can specify your target audience from the Target Segment section. Here, you can create a new segment or use a previously saved user segment from the segment list.
You can create the target based on past user behavior and user properties or live (ongoing) user behavior. The latter is helpful to send out real-time, triggered mParticle campaigns.
For instance, you can create a live Inaction within time campaign that targets users as soon as they add a product to their cart but do not finish transacting within 10 minutes; that is the golden window within which most users transact on iOS and Android app platforms.
Target Segment
Deliver Notifications based on Past Behavior (PBS)
You can also target users based on their past user behavior. For past behavior campaigns, you also have an option to calculate Estimated reach. The Estimated reach shows the number of users that qualify for the campaign criteria and the number of reachable users via mParticle.
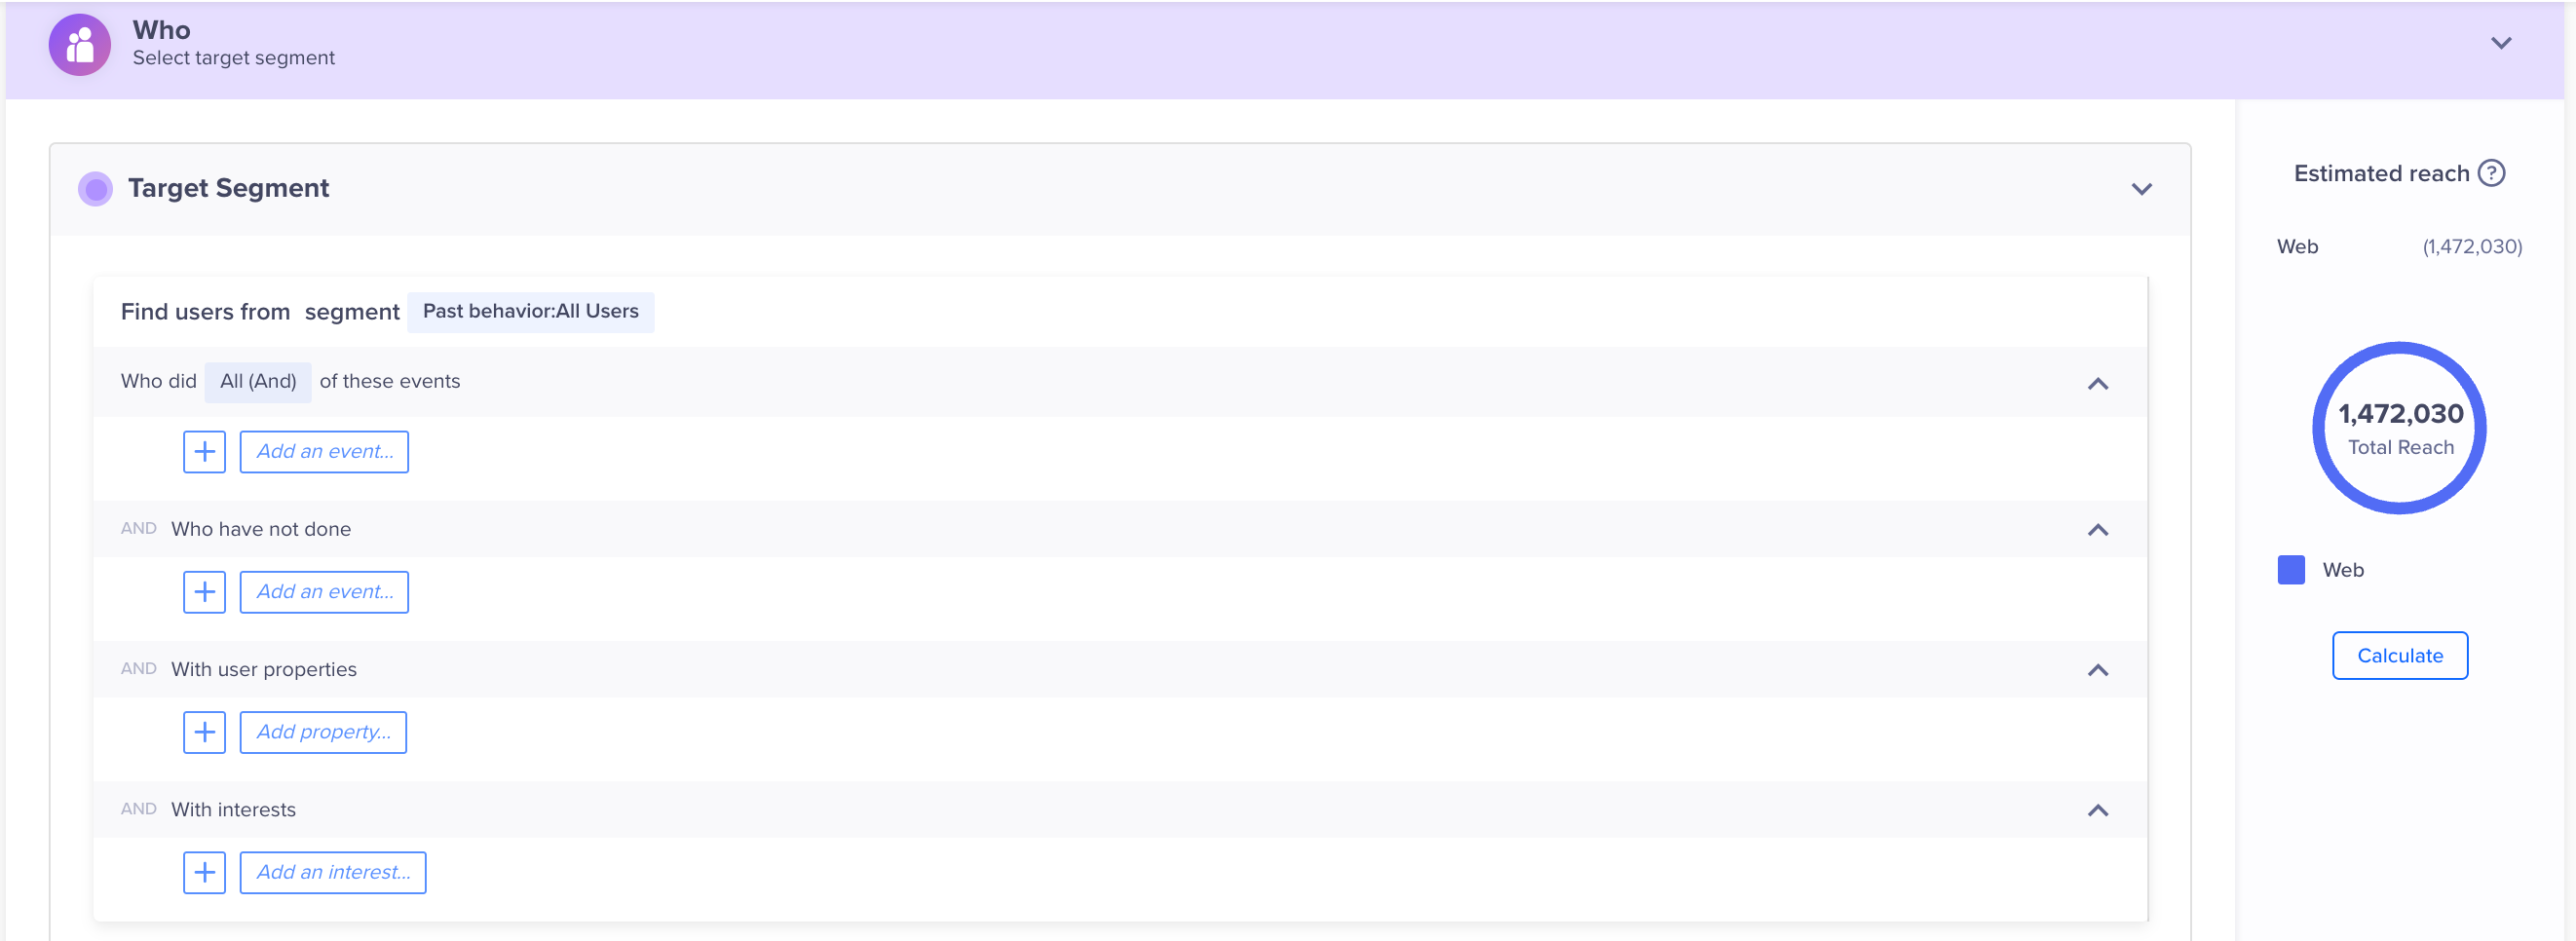
Segment Your Target Audience
Deliver Action Based Notifications
You can trigger a mParticle message based on an action. Users receive mParticle notifications when they perform an action in the app instead of waiting for the next app launch. It makes the messages more contextual and increases conversion. The mParticle message is not triggered for campaigns with delays.

Deliver Action Based Notifications
When creating Live Campaigns, you can also use the past behavior and user properties by selecting the Filter on past behavior and user properties checkbox. On selecting the checkbox, you can further filter your target segment.
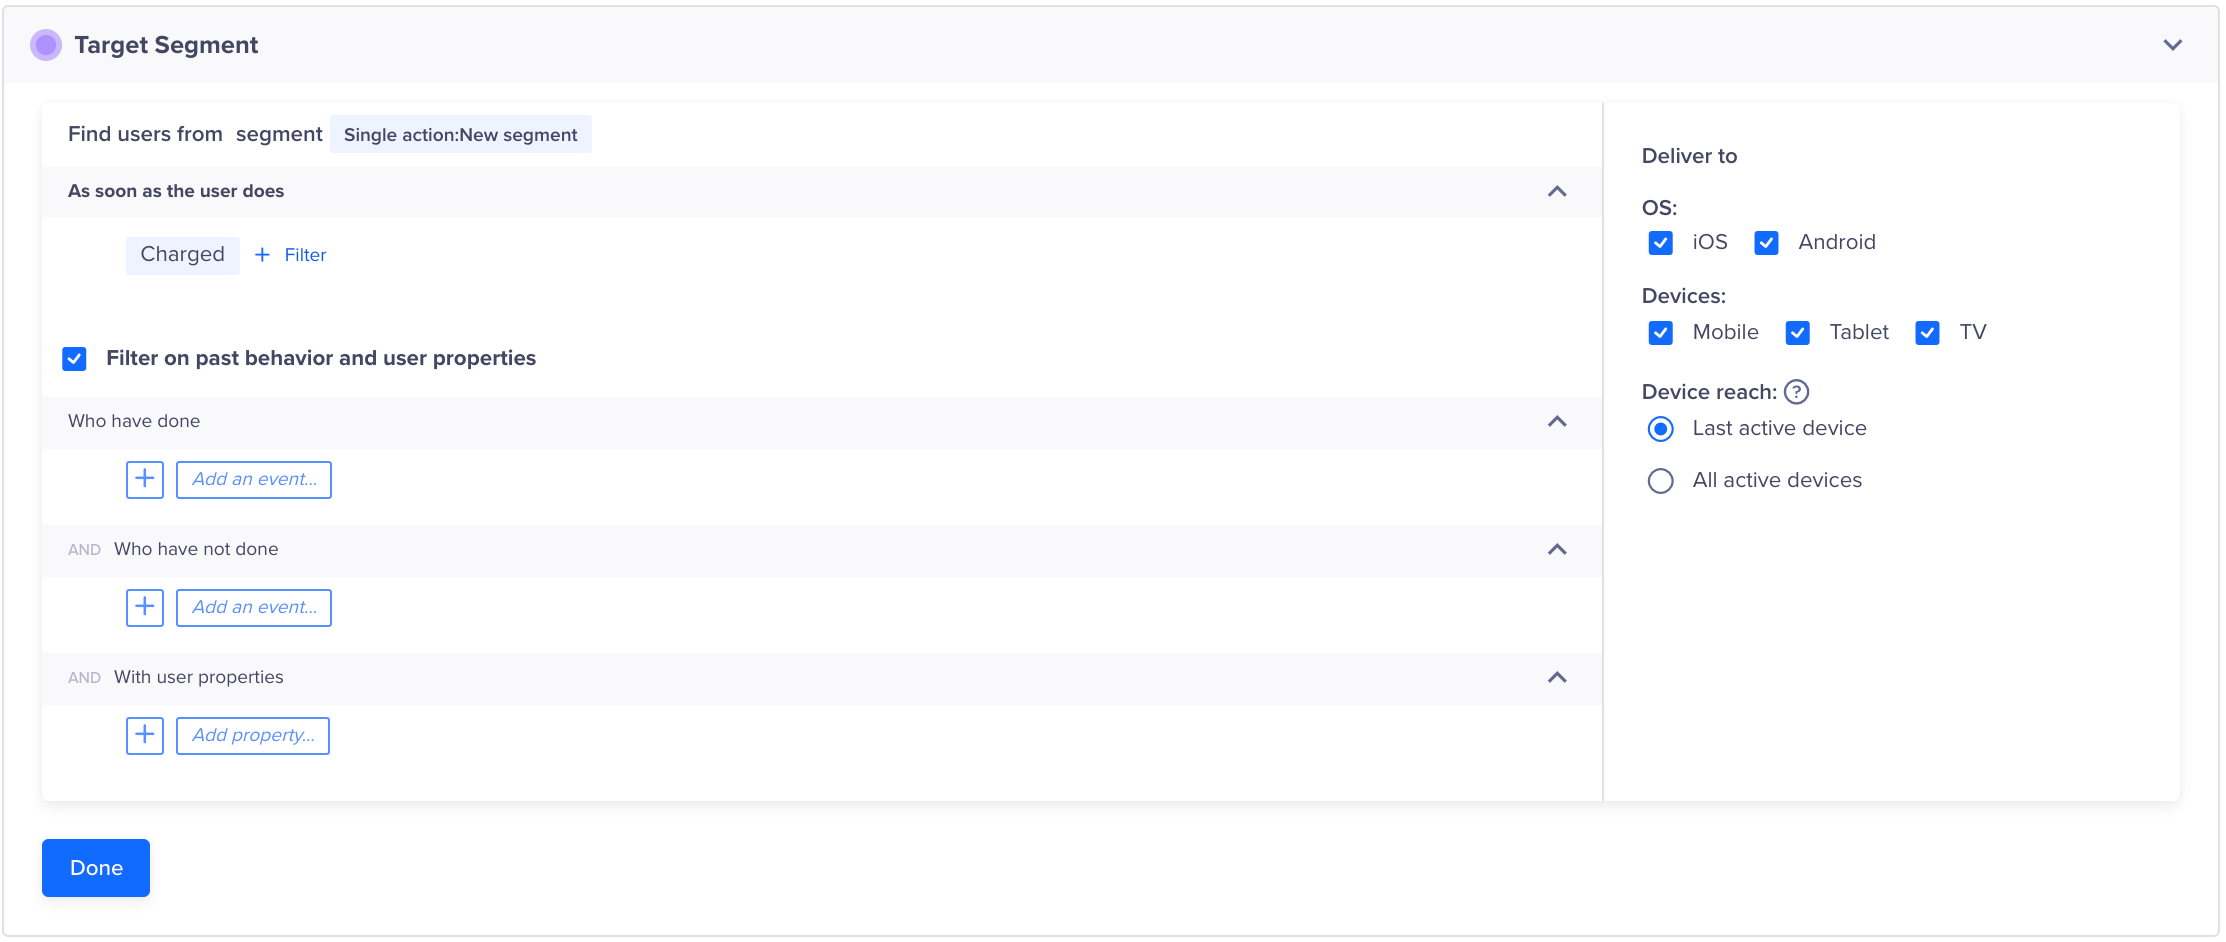
Filter on Past Behavior and User Properties
Events available for Live Behavior CampaignsFor Live Behavior Campaigns, the following list of events can be exported:
- AB Experiment Disqualified
- AB Experiment Rendered
- AB Experiment Rolled Out
- AB Experiment Stopped
- Any Event
- App Uninstalled
- App Version Changed
- Control Group
- Experiment Rendered
- Geocluster Entered
- Geocluster Exited
- Notification Clicked
- Notification Delivered
- Notification Replied
- Notification Viewed
- Push Impressions
- Reply Sent
- UTM Visited
- wzrk_fetch
Filter by User Properties
Using the With user properties filter in the Who section, you can segment your campaign only to reach users who meet specific criteria.
For example, you can send a mParticle export to English-speaking female users who live in the United States.
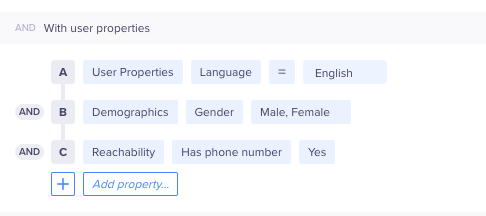
Filter by User Properties
To know more about which segments can be used, refer to Segments.
Constant event property
You can also hold a property constant across the selected events. For more information, see Constant Event Property.
Control Group and Targeting Cap
Set Control Group
You can define the control group to compare and measure the results of your campaign. For more information on control groups, refer to Control Groups.
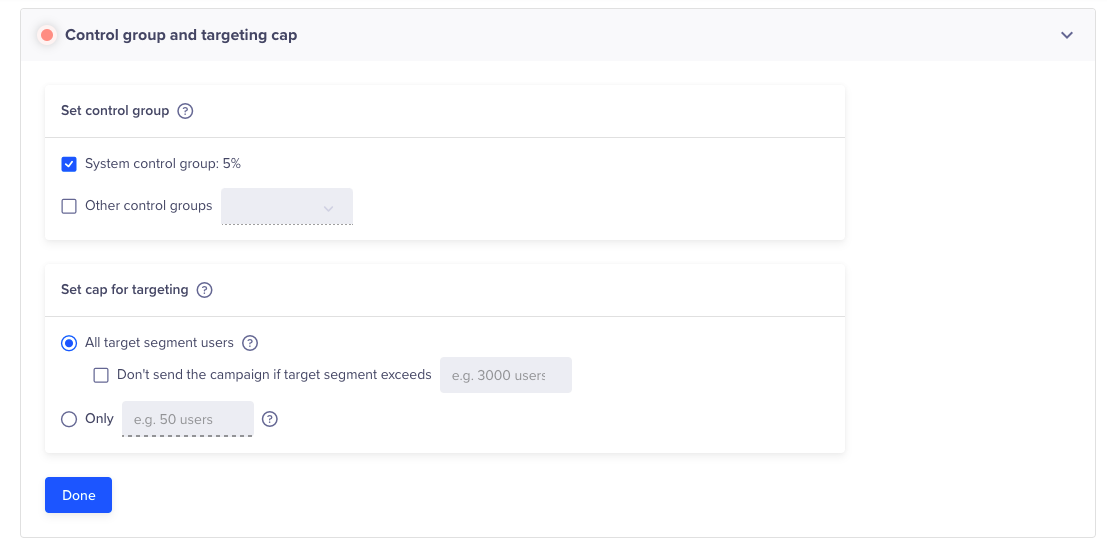
Set Control Group
Set Cap for Targeting
You can limit the number of users receiving the message.
- Past Behavior Segment
A relevant use case is a limited offer where you want to send a fixed number of coupon codes you want to distribute. If the total reach for your campaign exceeds the number of coupon codes you can distribute, you can limit the number of users who will receive the message to precisely the number of coupons you want to distribute.

Set Cap for Targeting
This section explains the campaign creation flow when you are determining who to send your message to. Under the Estimated reach section, select the option to limit the delivery of the messages to a specified number.
The campaign limits can also be configured using the following options:
All target segment users: Select this option to send the campaign to all the target segment users. You can also prevent sending out unwanted campaigns by Don't send the campaign if target segment exceeds checkbox and entering the value for the number of users. When selecting this option, a campaign does not run if the number of qualified users exceeds the safety limit. The campaign creator receives an email alert for further action.
Only: Select this option to limit the number of users for each run of a campaign.
- Live Behavior Segment
For triggered campaigns based on live user segments, the users receive a message as they qualify until the total quantity specified has been delivered after which the campaign ends.

Configure the Campaign Limits
The campaign limits can be configured using the following options:
All target segment users: Select this option to send the campaign to all the target segment users.
Only: Select this option to limit the number of users for each run of a campaign.
Only per day: Select this option to limit the number of users for each run of a campaign per day.
Campaign LimitEnsure that you set up a limit of 100 or more, regardless of the qualified user segment size. If the limit specified is less than 100, an error occurs.
Safety Check ExampleA customer has a budget for distributing 1,000 discount coupons but the qualified user count is 10,000. If you select the safety check, the campaign does not run and prevents the sender from spending over budget.
Define the Message Content
Now, to set up the What for the mParticle campaign content, perform the following steps:
- Click Go To Editor.

Message Editor in What Section
- Select the User Profiles Attributes and/or GCM/APNS Tokens to send in the payload if required.
- Click +Key-Value Pair and enter your Custom key-value pairs. For more information about customizing the key-value pair, refer to Personalize Message.
- Click Done.
You can also use custom key-value pairs to send custom data.
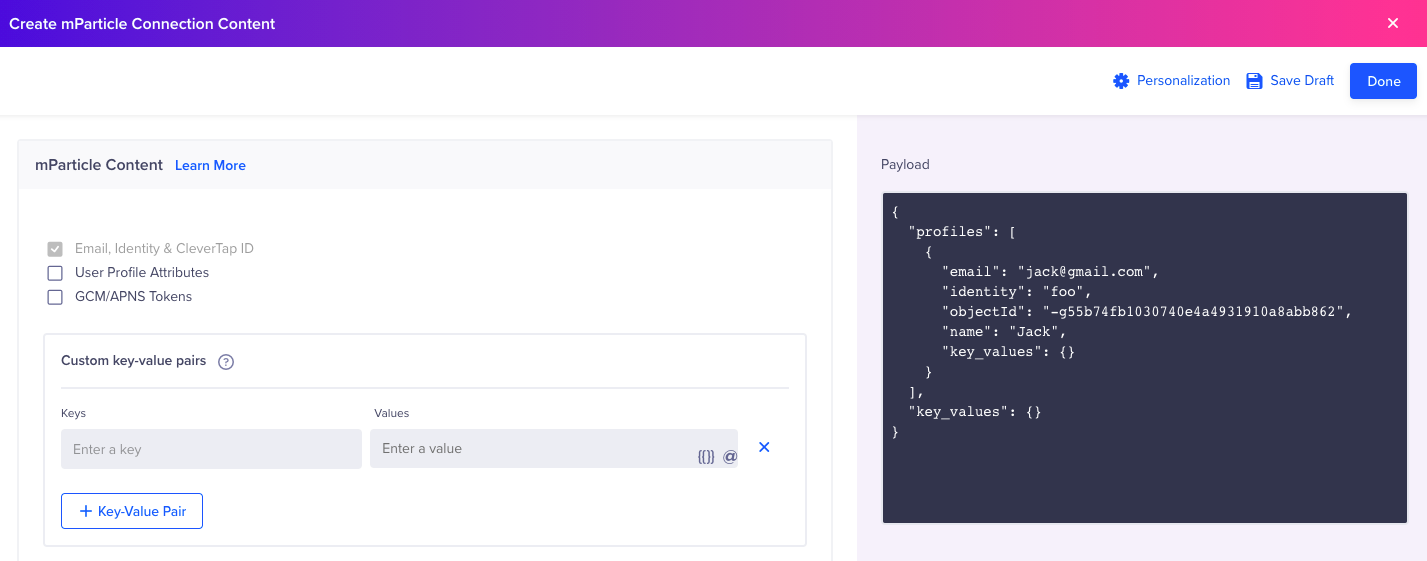
Add Custom Key-Value Pairs
Define the Campaign Schedule
You can set up the When to schedule the campaign start and end using the options below:
Date and Time
The Date and time for Past behavior campaigns can be set as follows:
- Send Now: Select this option to send the campaign right away.
- Schedule for later: Select this option to send the campaign on a specific date and time.
- Set as Recurring: Selec this option to send the campaign at defined intervals.
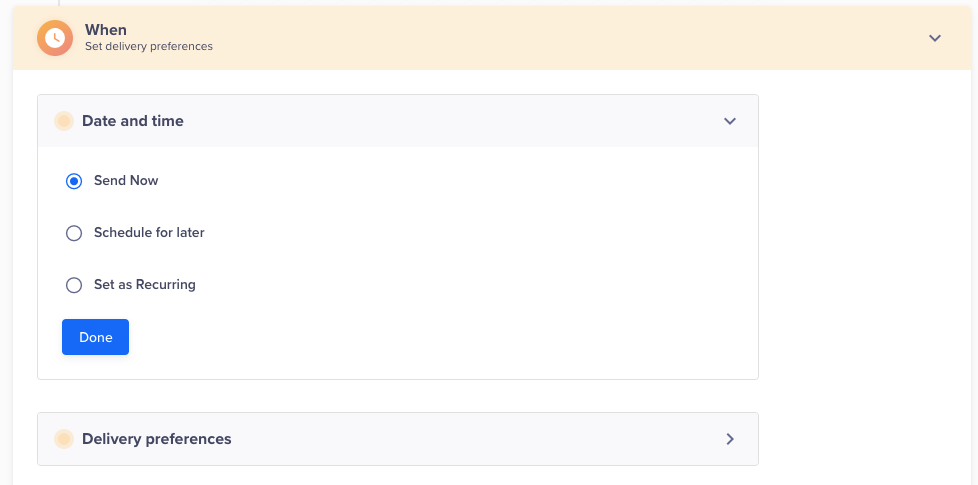
Configure the Campaign Schedule
The Date and time for Live campaigns can be set as follows:
- Start Date and Time: Select this option to send the campaign right away or on a specific date and time.
- End Date and Time: Select this option to run the campaign indefinitely or define the end date of the campaign.
- Set Delay: Select this option to send the campaign as soon as the user qualifies for the segment or define the delay.
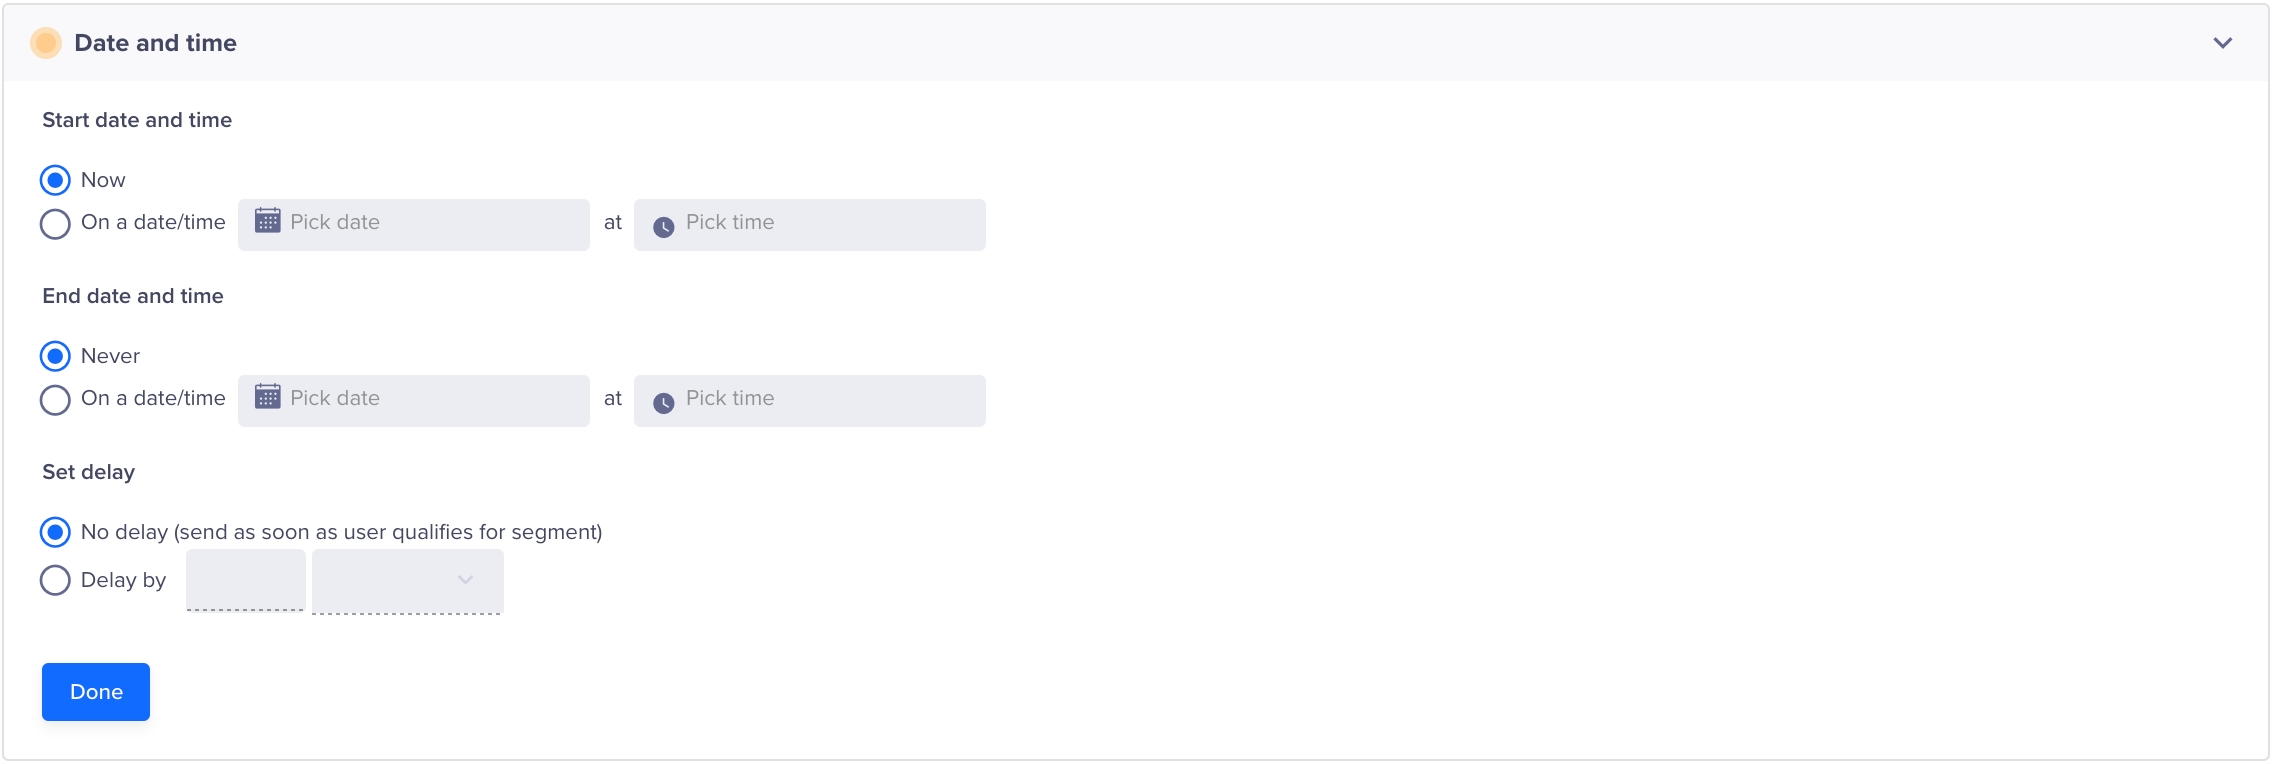
Configure Date and Time
Delivery Preferences
For both Past Behavior and Live Campaigns, you can also set the Do Not Disturb (DND) hours during which notifications from the campaign are prevented from going out, either by discarding them or delaying delivery to after DND hours complete, such as 9 PM to 9 AM.
For Past Behavior Campaigns, if you want your campaign to adapt delivery times according to the user’s timezone, check the Timezone checkbox. For more information, refer to Delivery in User’s Timezone.
Since past behavior campaigns can have scheduled times, you have the option to stop a campaign delivery after a certain cut-off time, or even deliver at the specified time in the user’s timezone. For more information, refer to Delivery in User’s Timezone.
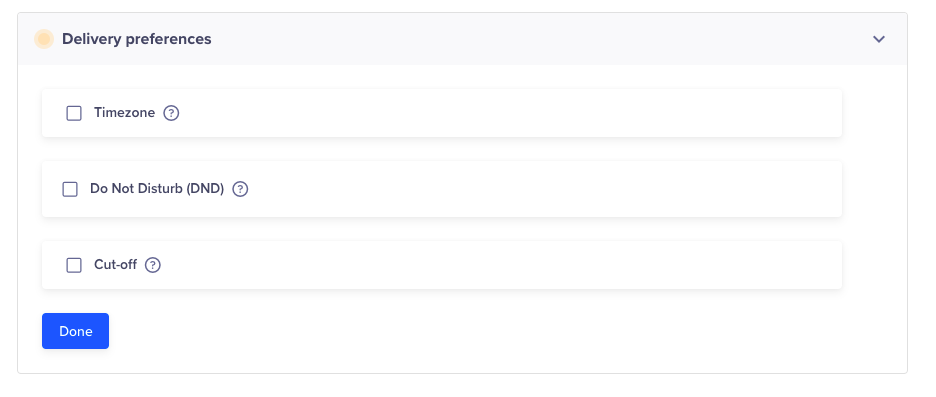
Select Delivery Preference
Recurring DayIf you specify a recurring day for a campaign, such as the 7th of each month, the campaign will start for the specified day and ignore the creation date. This is a precaution to avoid sending a campaign unintentionally on a prior date.
Publish Campaign
After testing and previewing the appearance of your campaign, finalize your campaign by clicking Publish Campaign.

Publish Campaign
Updated about 2 months ago
Refer to the pages listed below to learn more about the following mParticle section:
