Setup
Understand how to set up Email as a channel for your marketing campaigns.
Overview
This section covers various email tasks, including the integrations and inbox previews. No matter the type of customer emails, all businesses have the same goal of getting to the correct recipient's inbox. By setting up your email correctly, you ensure successful email deliverability.
Email Integrations
Before creating email campaigns, you must integrate an email service provider with CleverTap.
CleverTap supports integrations with popular email service providers. Select your email service provider from the following list:
For all other service providers, use Generic SMTP.
Setup Provider
Once you have integrated an email service provider with CleverTap, you can set up your email service provider.
To add a provider, perform the following steps:
-
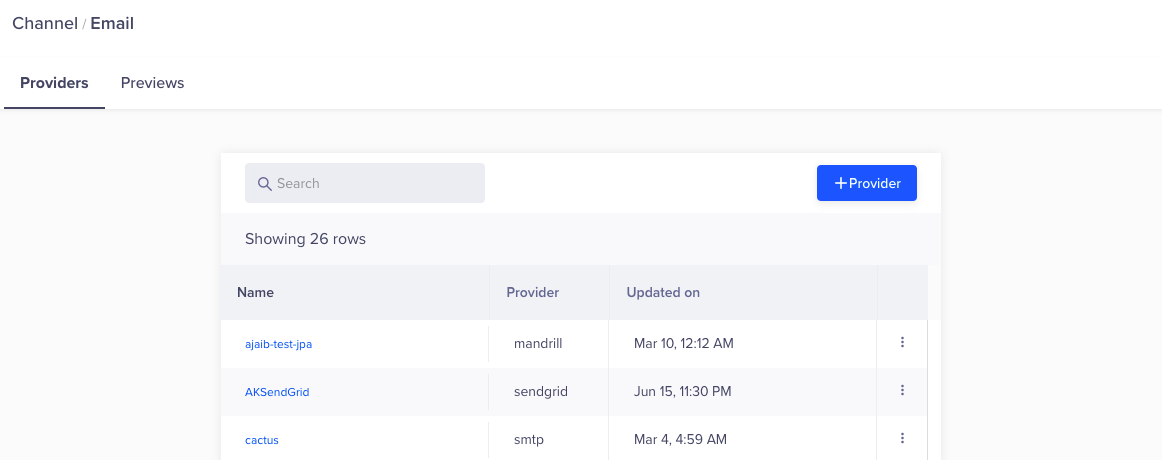
From the dashboard, navigate to Settings > Engage > Channels > Email.
-
Click + Provider to add a provider.

Add Provider
-
Add the following provider details:
| Column | Description |
|---|---|
| Provider | Select your Email Provider from the dropdown list. Select SMPT if the provider is not listed |
| Nickname |
|
| Callback URL |
|
| Host |
|
| Port |
|
| API Key |
|
| Default From Address |
|
| Default Reply Address |
|
| Email Preference Center |
|
- Click Save.
- (Optional) Click Send Test Email to check if the provider has been set up correctly and can send emails.
Provider Operations
This section describes actions for the available email service providers.

Provider Operations
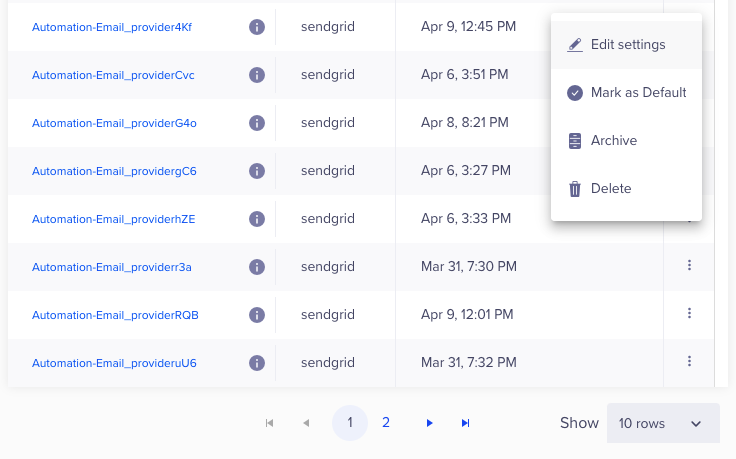
Archive Service Providers
You can archive any current email service providers from the email settings. Archiving the email service provider stops any active Campaigns or Journeys for this provider. The archived provider will not be available for use in the future. However, it will still retain the provider stats.
Follow the steps to archive an email service provider:
- From the CleverTap dashboard, navigate to Settings > Channels > Email > Providers tab.
- Click the ellipsis next to the provider.
- Select Archive from the list.
Delete Service Providers
You can delete any current email service providers from the email settings. Deleting the email service provider will remove all existing data from our system and stop any active Campaigns or Journeys. The deleted provider will not be available for use in the future, and the corresponding provider stats won't be retained.
Follow the steps to delete an email service provider:
- From the CleverTap dashboard, navigate to Settings > Channels > Email > Providers tab.
- Click the ellipsis next to the provider.
- Select Delete from the list.
Edit Settings
Edit the email settings to change Provider credentials.
Follow the steps to edit provider settings:
- From the CleverTap dashboard, navigate to Settings > Channels > Email > Providers tab.
- Click the ellipsis next to the provider.
- Select Edit settings from the list. The Provider credentials window displays.
- Change the required information.
- Click Send Test Email to check that the provider works correctly.
- Click Save.
Mark as Default
Set a service provider as the default so that the same provider is used to deliver your emails.
- Follow the steps to set a default email service provider:
- From the CleverTap dashboard, navigate to Settings > Channels > Email > Providers tab.
- Click the ellipsis next to the provider.
- Select Mark as Default from the list.
Inbox Previews
Before you can use inbox previews, you must enable them. Inbox previews with code analysis let you view an analysis of your HTML code. It also allows viewing previews across devices and inboxes before you send out a campaign.
Account SpecificationsEmail previews are available only if you have opted for the email add-on from CleverTap.
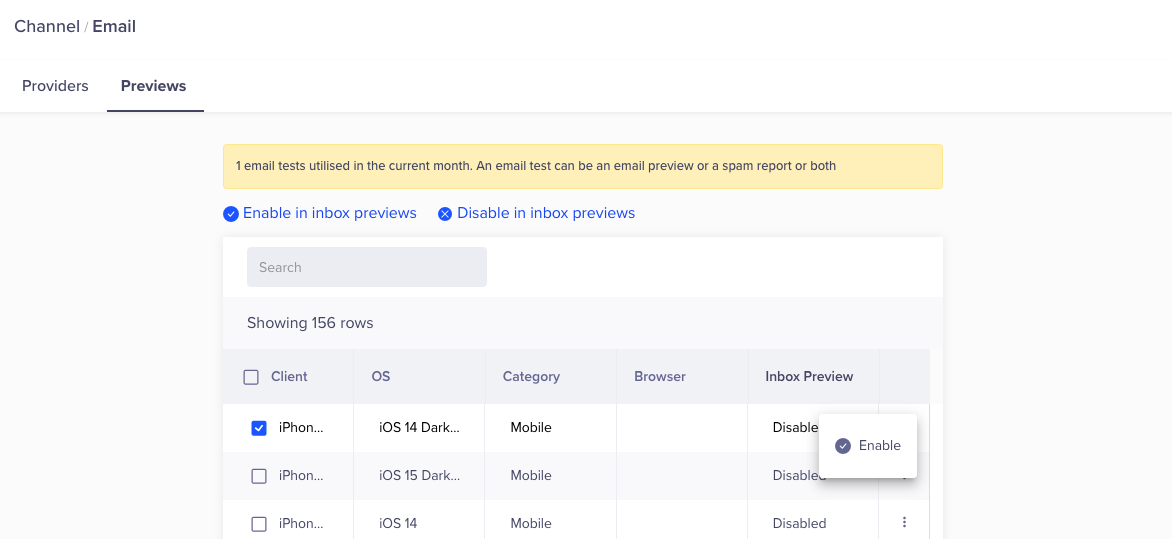
Enable or Disable Inbox Previews
To enable or disable the inbox preview, perform the following steps:
- From the dashboard, navigate to Settings > Engage > Channels > Email.
- Select the Previews tab.
- Select a client from the list.
- Click on the ellipsis and click Enable or Disable.
Multi-selectYou can also select multiple clients, then enable or disable previews by clicking Enable in inbox previews or Disable in inbox previews.

Enable or Disable Inbox Previews
The Previews tab lists the available email inboxes. For example, a mobile device that runs Gmail on Android 8 or a computer that runs Apple Mail 10 on an OS X 10.10 operating system.
Account Specifications
Email previews are available only if you have opted for the email add-on from CleverTap.
This feature is not available for trial accounts.
Advanced Setup
The Advance Setup for email campaigns in CleverTap allows users to configure more complex and fine-tuned settings for their email campaigns. This feature typically includes options such as:
- AppsFlyer OneLink: Enables you to set up deep links using Appsflyer, guiding recipients directly to specific in-app content when they click on an email link.
- Font Manager: Allows font customization within the email template, giving more control over the look and feel of the email design to align with brand guidelines.
- Email Preference Center: Enables you to manage user email preferences, allowing them to choose which types of emails they want to receive, improving the relevance of communications.
- One-Click Unsubscribe: Offers recipients a quick and easy way to unsubscribe from future emails with a single click, ensuring compliance with regulations and enhancing the user experience.
Updated about 1 month ago
