Journeys List
Overview
The Journeys List page on the CleverTap Dashboard provides a comprehensive overview of all the Journeys created on the dashboard with detailed performance statistics.
This section also lets you easily search for and filter specific Journeys.
To access the Journeys List page, go to Journeys from the CleverTap Dashboard.
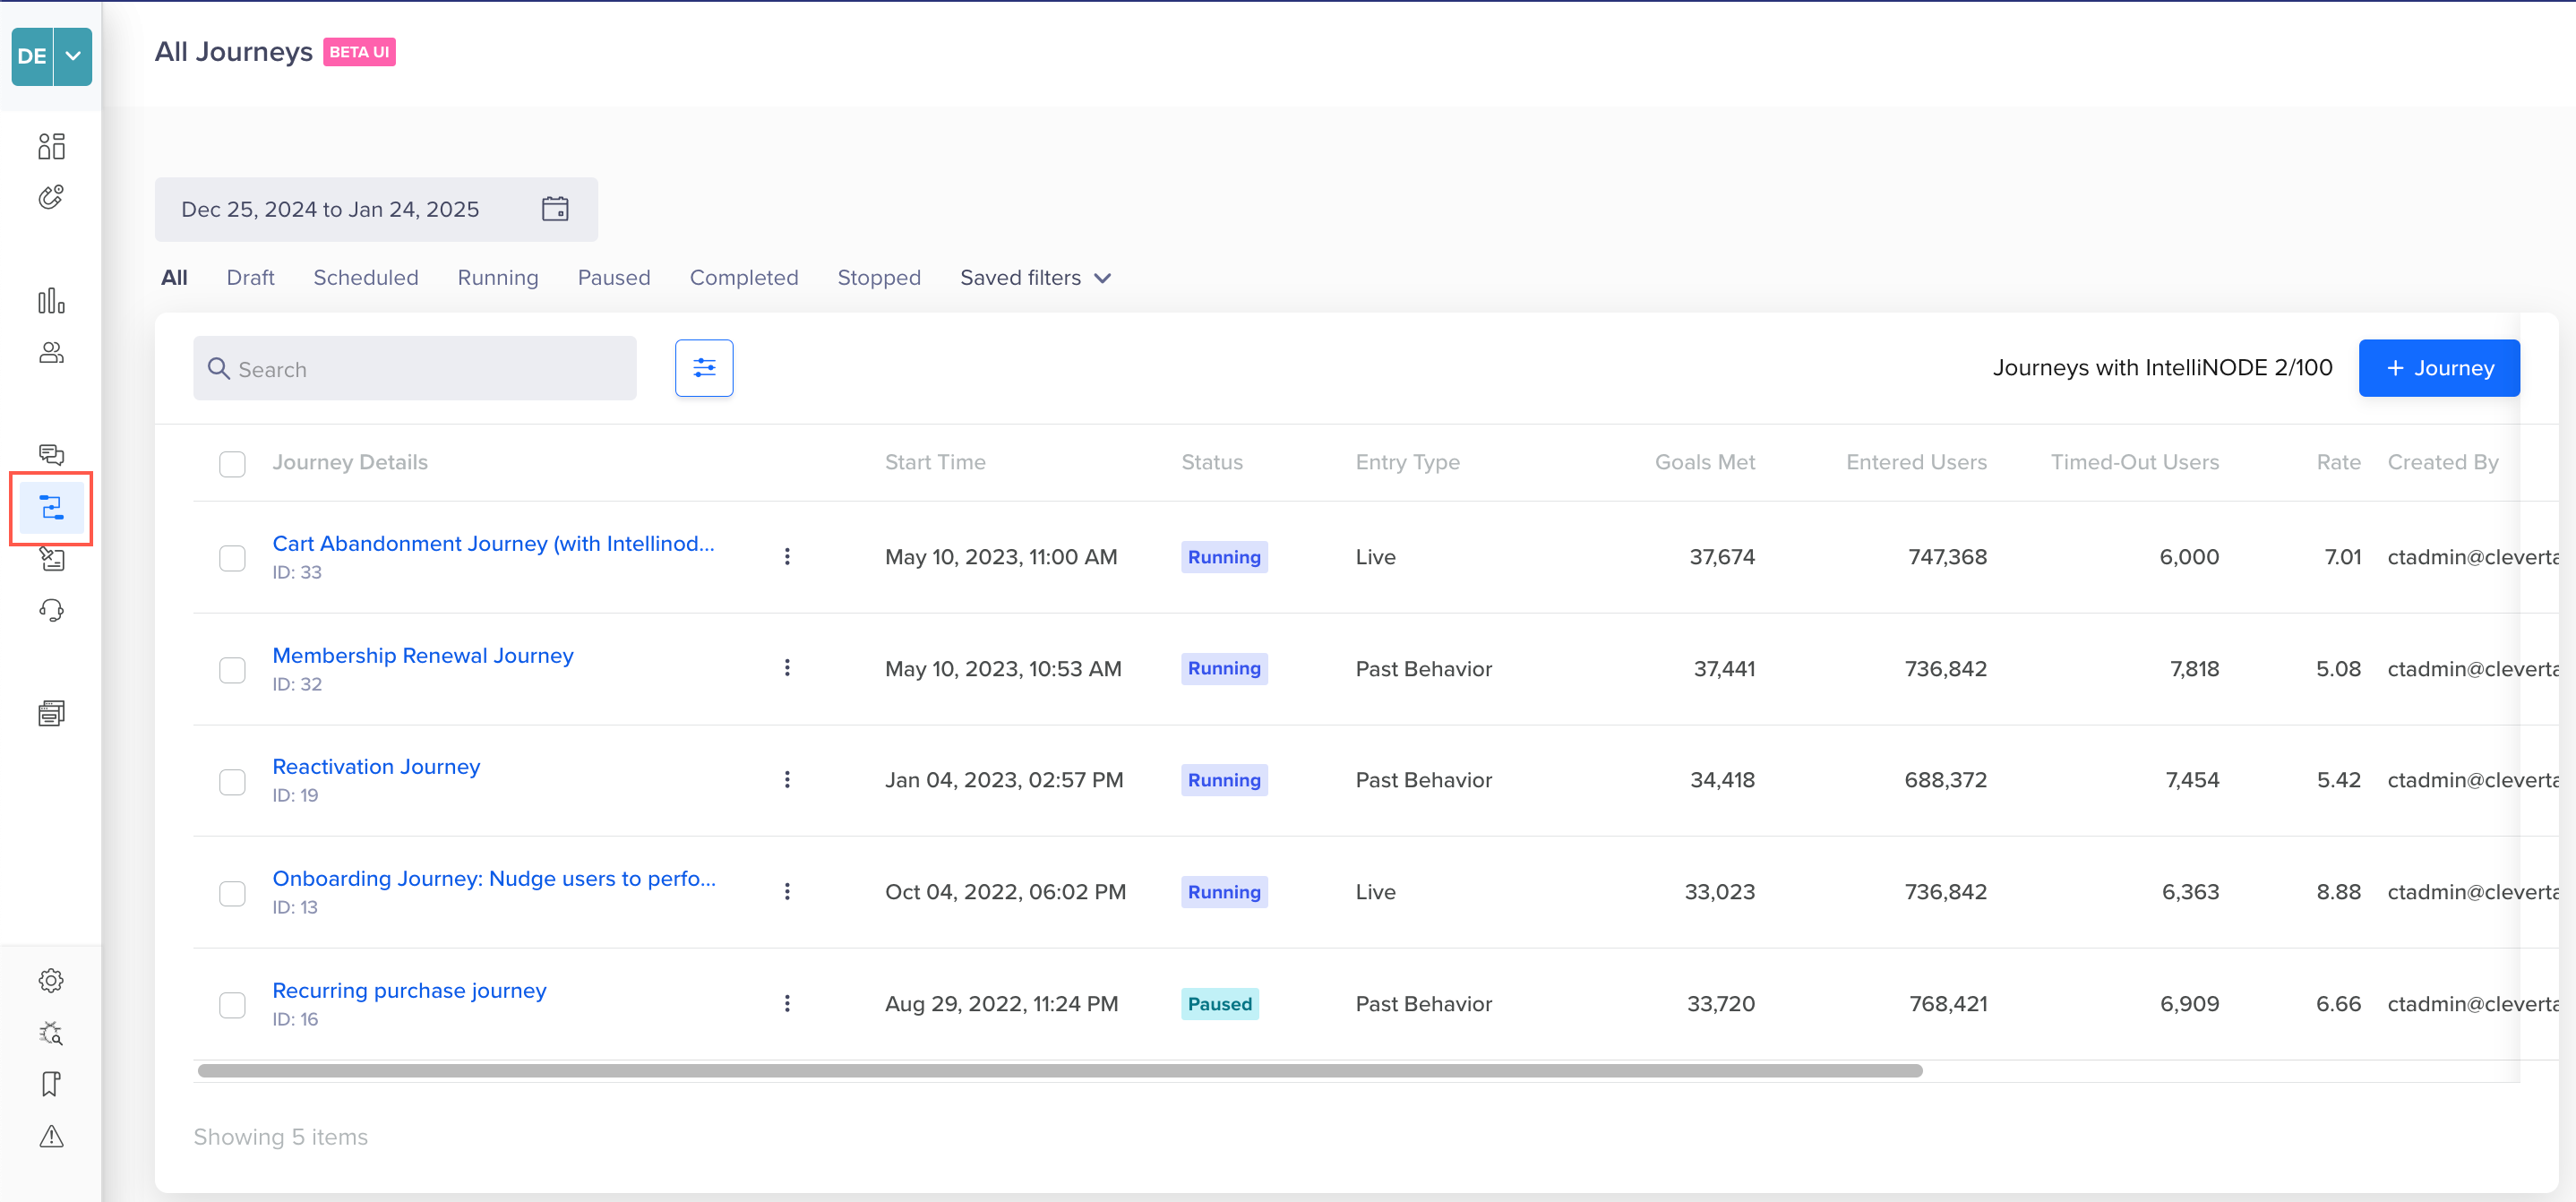
Journeys List
If a Journey has been edited after publishing, it may have multiple versions. The list displays details of the latest journey entity, which can be either published or in the Draft state. For example, you have a journey called Cart Abandonment where:
- Version 1 was published on June 1.
- You edited the journey on June 15, creating Version 2 (in Draft).
- On June 20, you published Version 2.
If you view the journey on the list and version 2 is the latest version, all journey information shown will correspond to version 2 only. To view metrics for a different version, you must open the Journey and select the desired version using the Version Selector at the top.
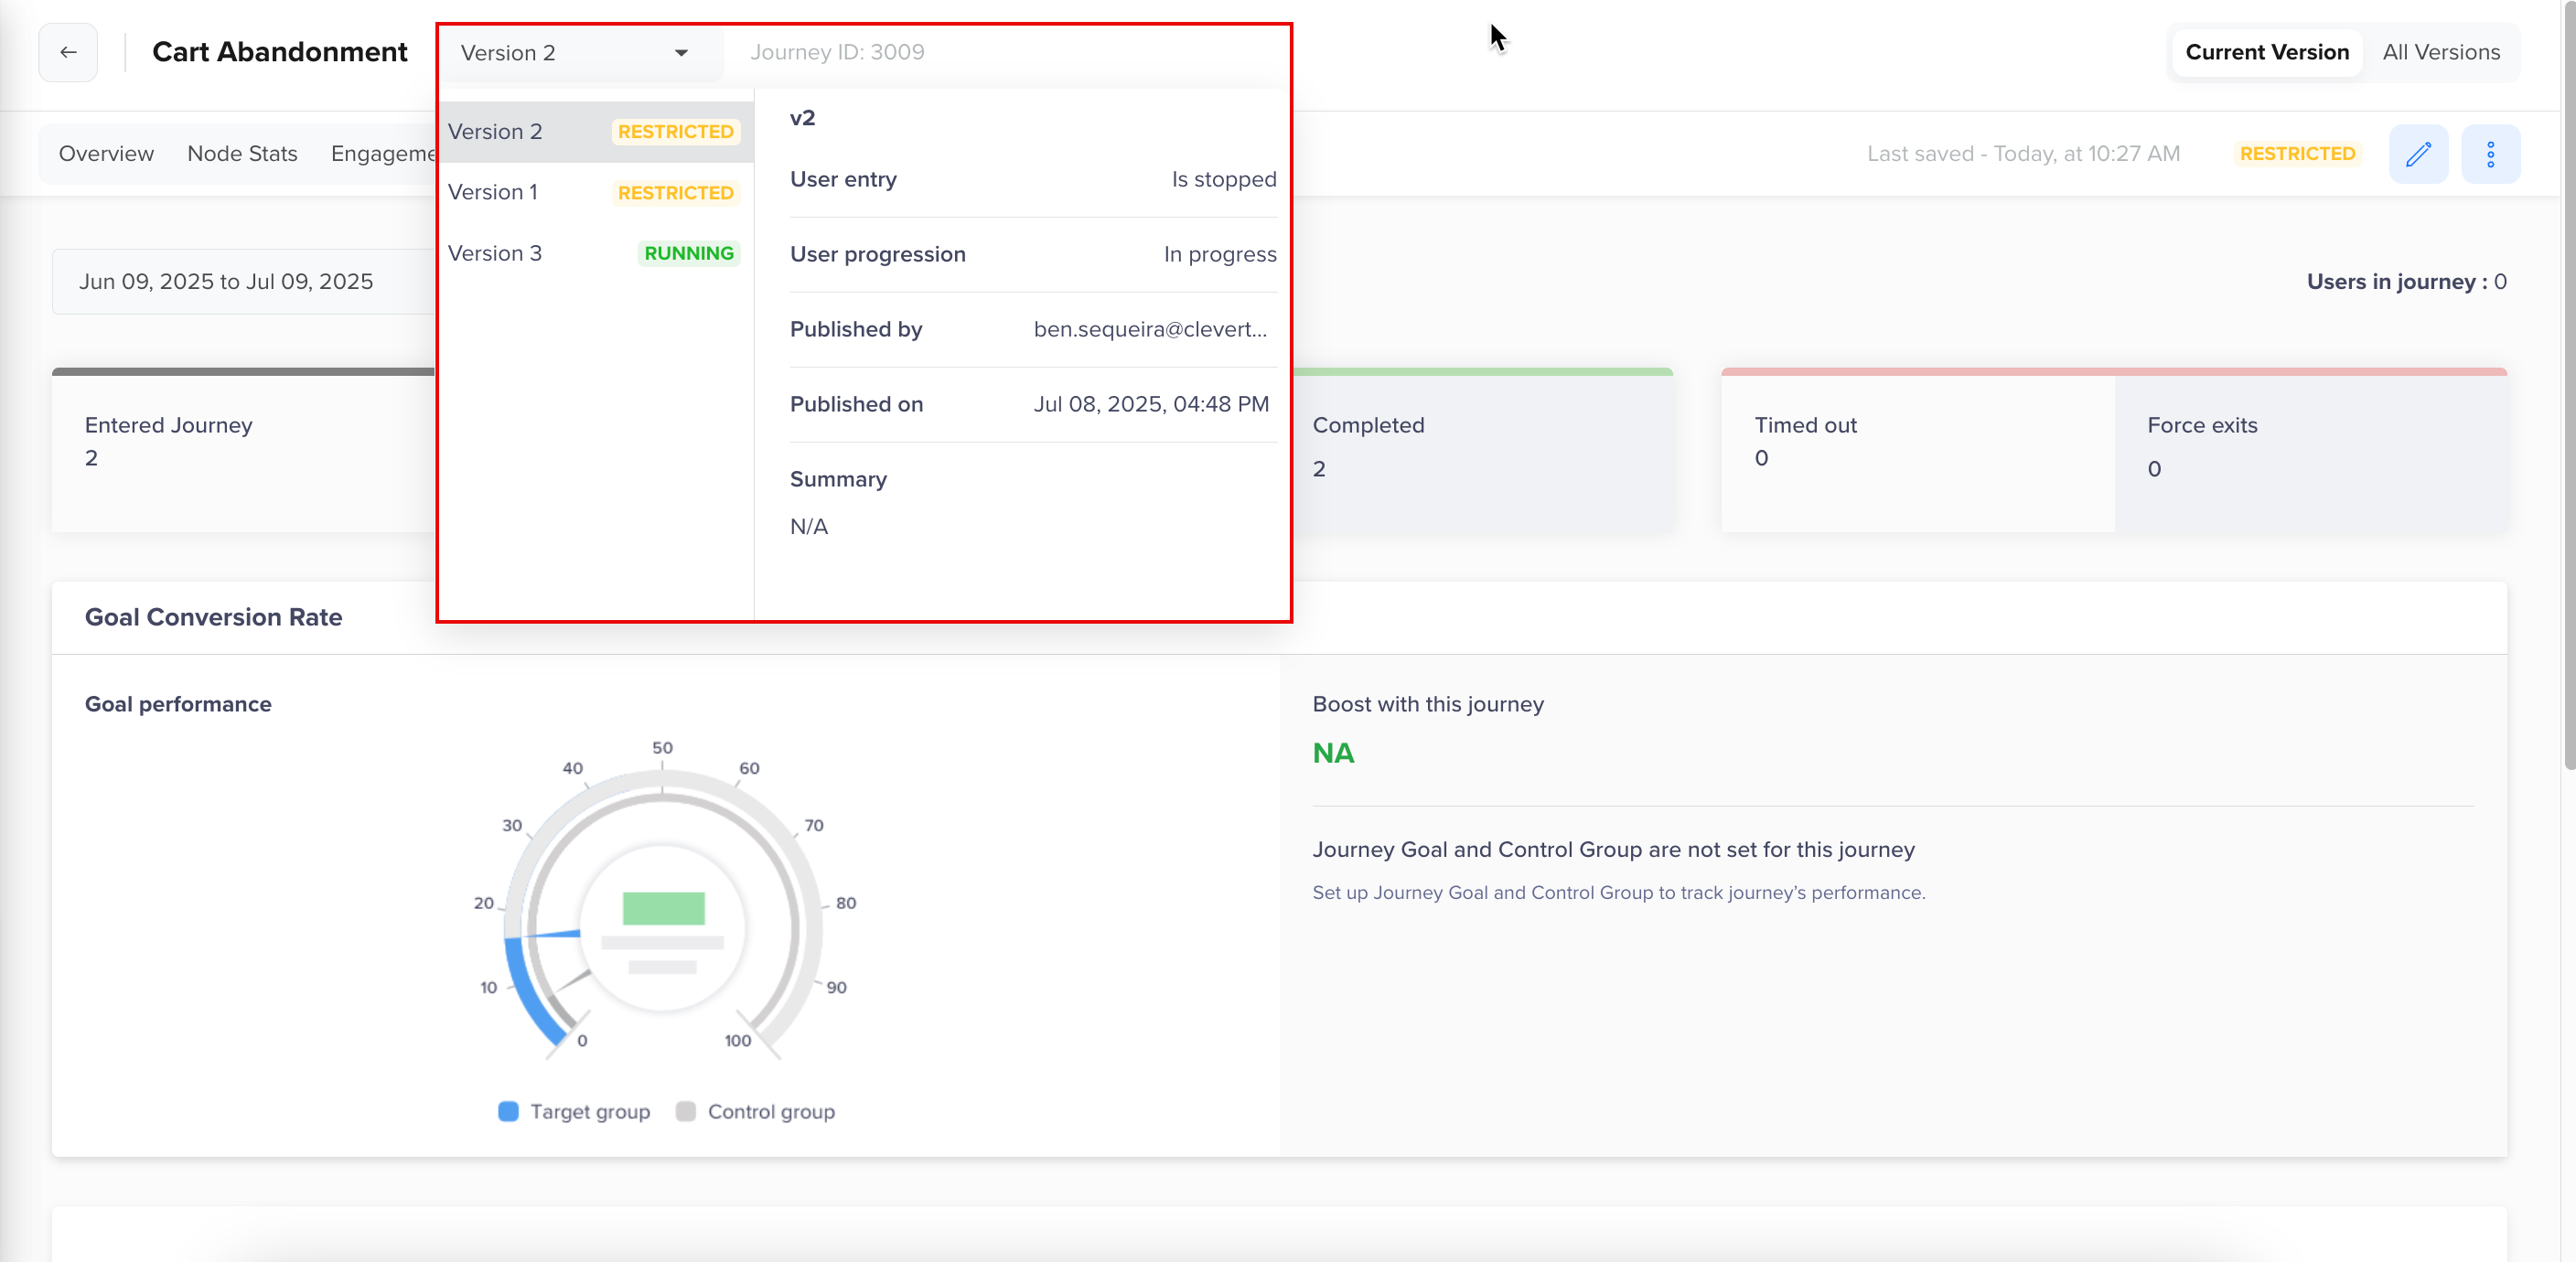
Select Journey Version from Dropdown
The following details are displayed for each journey:
| Field | Description |
|---|---|
| Journey Details | Displays the Journey name and version name present on the list page. It also displays the unique Journey identifier. This ID remains the same across versions. |
| Start Time | Displays the date and time when the Journey state changed to Running, and users started entering the Journey. |
| Status | Displays the current state of the Journey, such as Draft, Scheduled, Running, Paused, Completed, Restricted, and Stopped. For more information, refer to Journey States. |
| Entry Type | Specifies how users qualify for the Journey. They can qualify based on the Past behavior / Custom list (actions they have performed in the past) or Live behavior (as soon as they perform an action). |
| Total versions | Displays the number of versions created for the Journey. Note: A new version is created each time you make structural changes to the published Journey, such as updating entry criteria or conversion goals. For more information, refer to Edit a Journey. |
| Goals Met | Displays the total number of users who completed the Journey goal(s) defined in the Journey, such as purchases, sign-ups, or other tracked events. |
| Entered Users | Displays the number of unique users who entered the Journey based on the entry criteria. |
| Timed-Out Users | Displays the total number of users who exited the Journey without achieving any defined goals because they exceeded the Journey timelines |
| Rate | Indicates the percentage of Goal Met.
|
| Created By | Displays the email ID of the user who created the journey. |
| Created On | Displays the date on which the Journey was initially created. |
| Published By | Displays the email ID of the user who last published the Journey. If the Journey has been edited post-publish, this reflects the most recent version. |
| Published On | Displays the date on which the most recent version of the Journey was published. |
Filter Journeys
You can locate a specific journey from the 'All Journeys' page using Journey Filters. By applying these filters, you can refine your search based on the following criteria:
- Entry type
- Status
- Created by
- Labels
- IntelliNODE
- Conditional Split
The list shows the details for the latest journey entity, which can be published or in the Draft state. You can apply quick filters directly from the top of the All Journeys page.
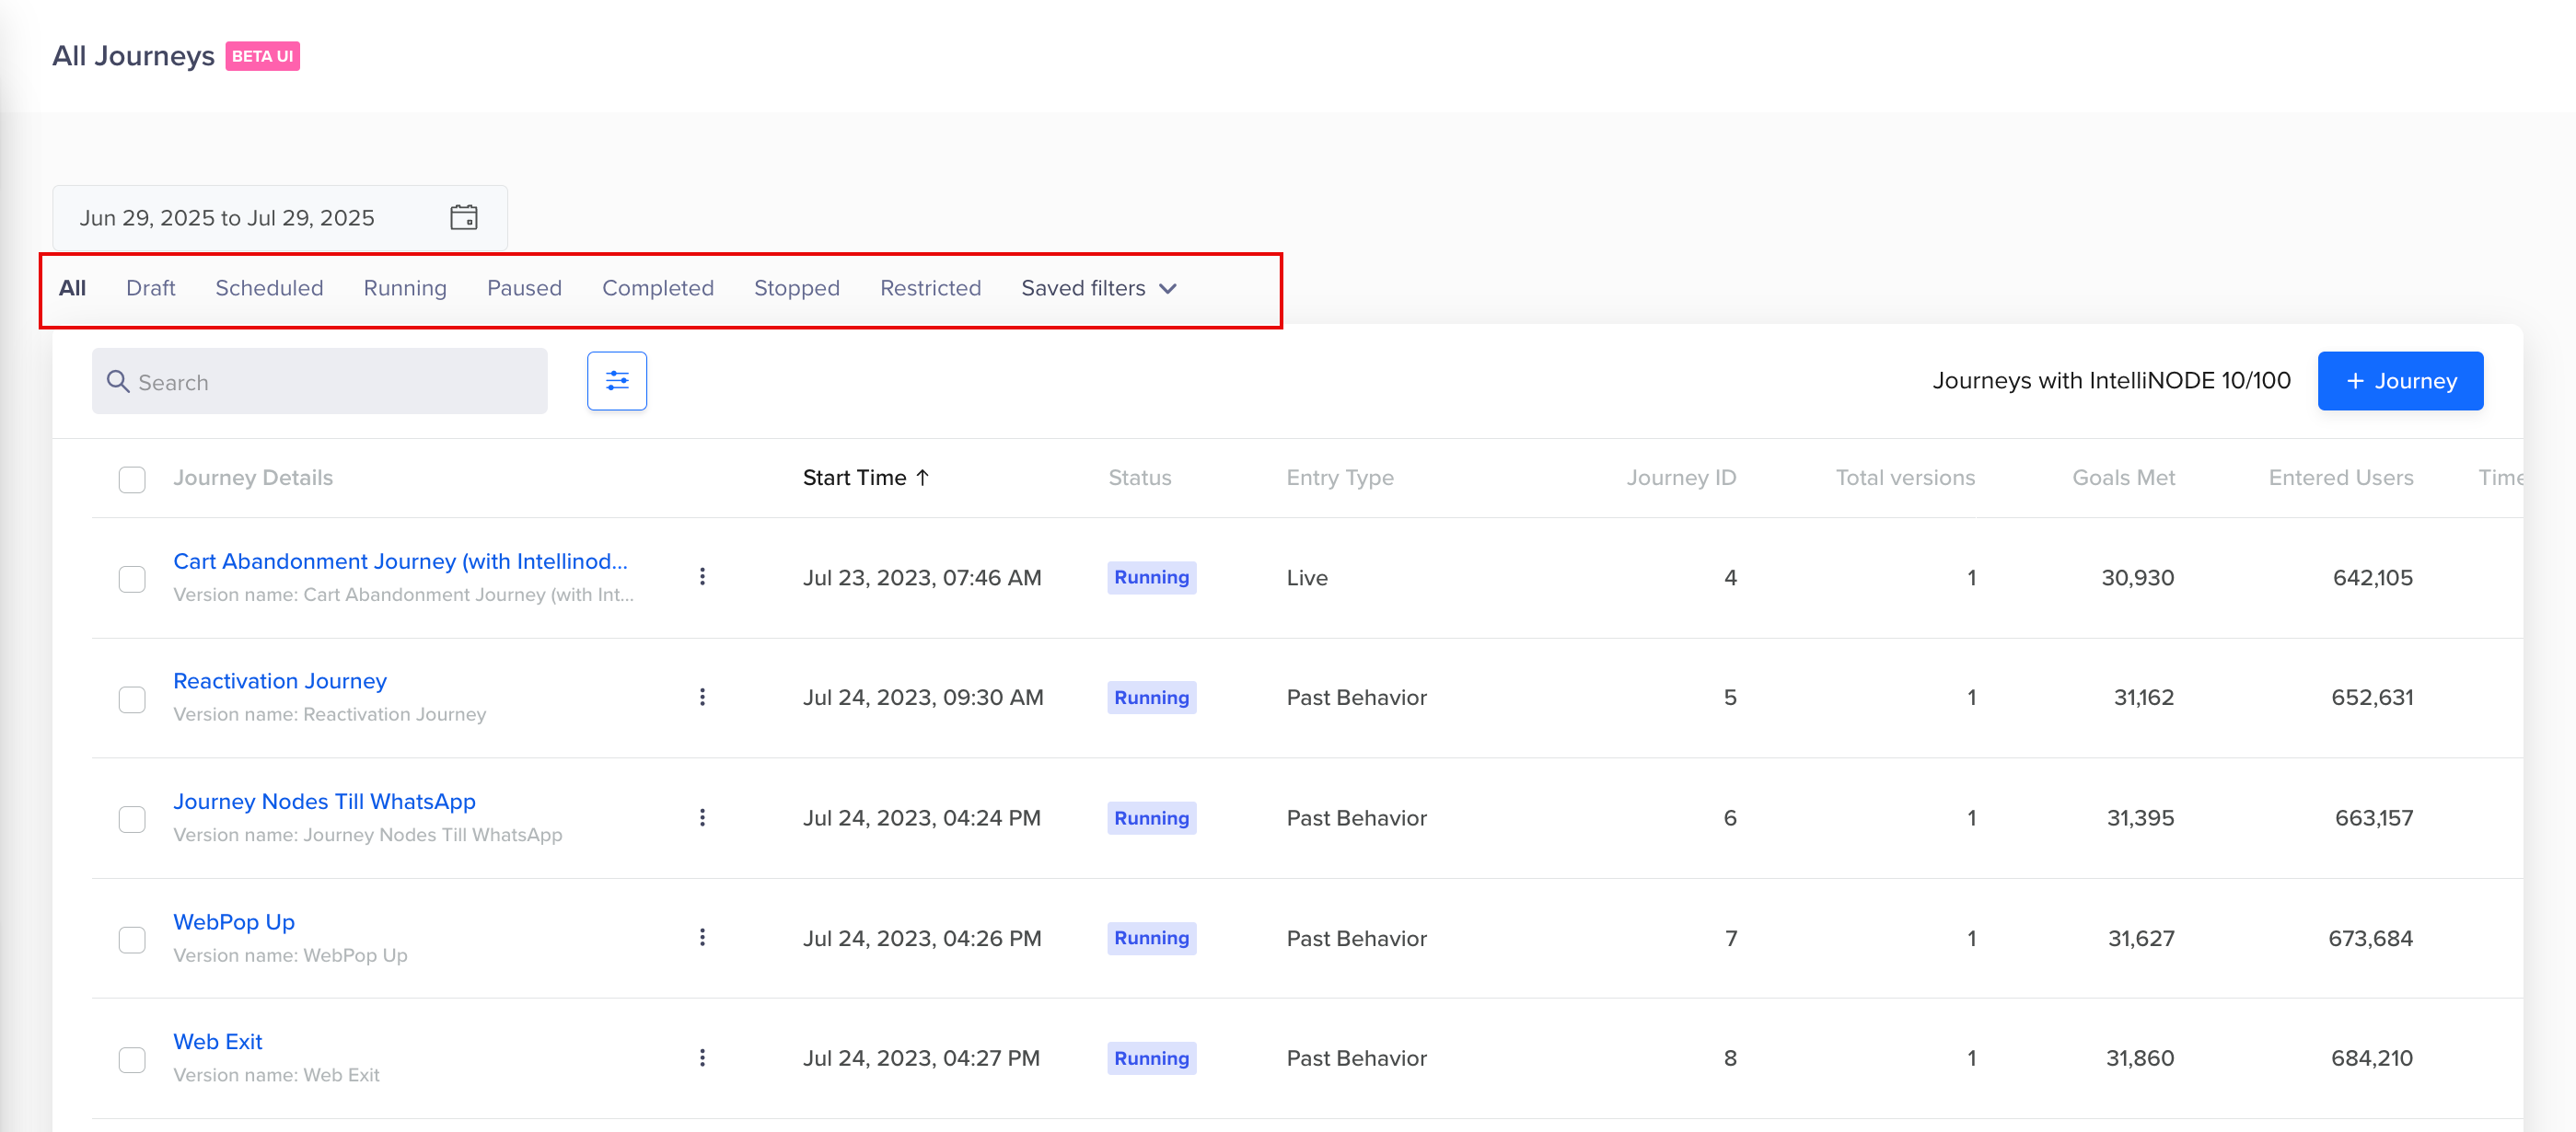
Quick Journey Filters
To filter journeys, perform the following steps:
- Go to Journeys from the CleverTap dashboard. The All Journeys page opens.
- Click
 icon. The Filter Journeys window opens on the right side.
 - Apply the required filters and click Apply. For example, if you want to look at the Running journeys with Entry type as Past Behavior.
Filter Journeys
You can also save your frequently used custom filters by clicking Save Filter from the Filter Journeys window.
Assign Label to Journeys
Labels help categorize engagements with meaningful names or themes, making it easier to organize, analyze performance, and understand user behavior across multiple journeys. Here are some of the examples for Journey Labels:
- Onboarding: Group all Journeys related to new user onboarding.
- Re-engage: Categorize Journeys designed to re-engage users who have become inactive.
Key Benefits of Journey Labels
- Simplified Organization: Use labels to group Journeys with similar objectives, themes, or target audiences.
- Enhanced Analysis: Leverage labels to track notifications and analyze Journey performance effectively.
To assign labels to the journeys, perform the following steps:
- Select the required journey from the All Journeys page.
- Click
 icon. The Add Label popup opens.
 - Select the label you want to assign from the list and click Add. OR
To add a new label, type the desired name, select it, and click Add.
Assign Journey Label
You can also utilize Journey Labels to analyze Journey performance from the Analytics section for the Notifications Sent event. This helps track the total number of notifications sent by Journeys tagged with specific labels, thereby gaining deeper insights into user segmentation and Journey effectiveness.
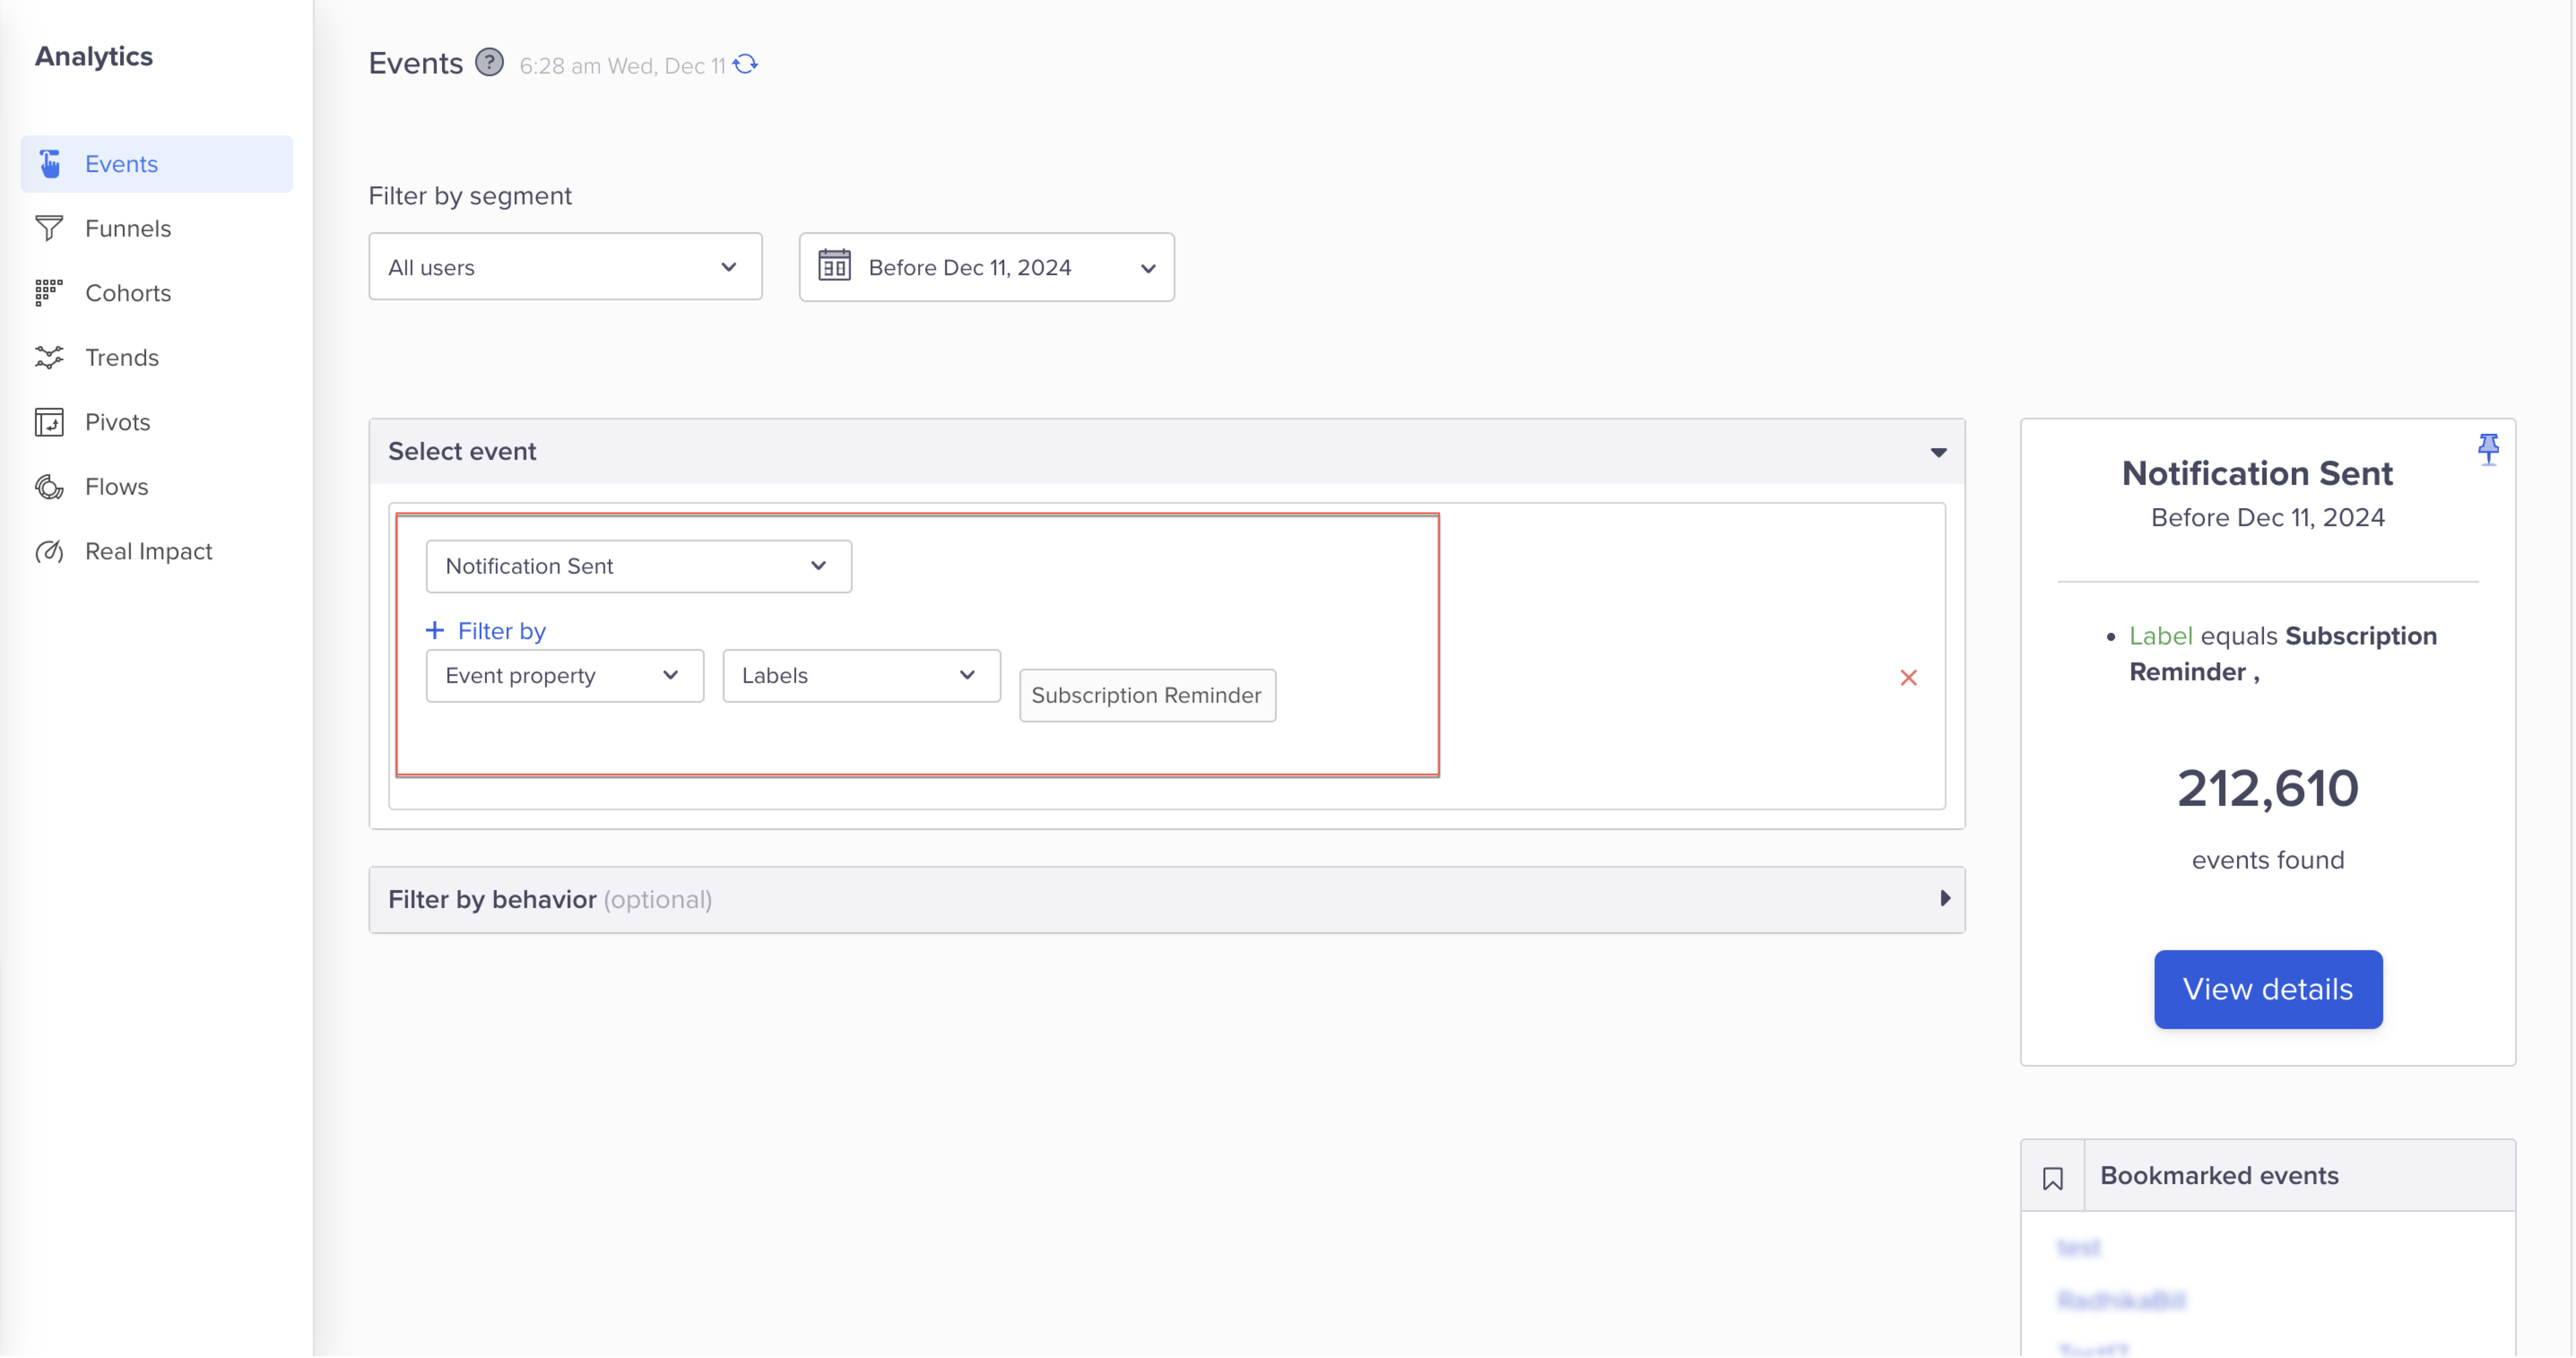
Analyze Journey Performance Using Journey Label
This empowers you to analyze performance data more granularly and refine your Journey strategies based on actionable insights.