Smashpops
Workflow Automation
Overview
SmashPops provides gamified pop-ups to attract new subscribers and grow your customer base through your website or app. With coupons, weighted rewards, and customizable game rules, SmashPops helps brands increase engagement while collecting valuable customer data.
Integrating SmashPops with CleverTap via Zapier enables you to:
- Sync User Profiles in Real Time: Update user attributes in CleverTap whenever a game is played.
- Trigger Automated Engagement: Fetch events from SmashPops to CleverTap to trigger journeys and personalized campaigns.
- Retarget Dormant Users: Build custom CleverTap segments from SmashPops data and run win-back campaigns.
Prerequisites for Integration
The following are the prerequisites for this integration:
- Access to your SmashPops account
- Access to an active Zapier account
- A CleverTap account with Account ID and Passcode.
Integrate SmashPops with CleverTap Using Zapier
The integration involves the following four major steps:
- Create Passcode on CleverTap Dashboard
- Create Game in SmashPops
- Connect SmashPops and CleverTap via Zapier
- Add Integration Code to Your Website
Create Passcode on CleverTap Dashboard
CleverTap uses a header-based authentication model to authenticate requests to the API. Every CleverTap API call must include Account ID and Passcode as request headers. To create a passcode, refer to Create Account Passcode.
Create Game in SmashPops
Consider an example where you want to run a gamified pop-up on your website, collect emails, and sync those users into CleverTap for retargeting. To do so, perform the following steps:
- Go to the SmashPops dashboard and create a game you want to display on your website.
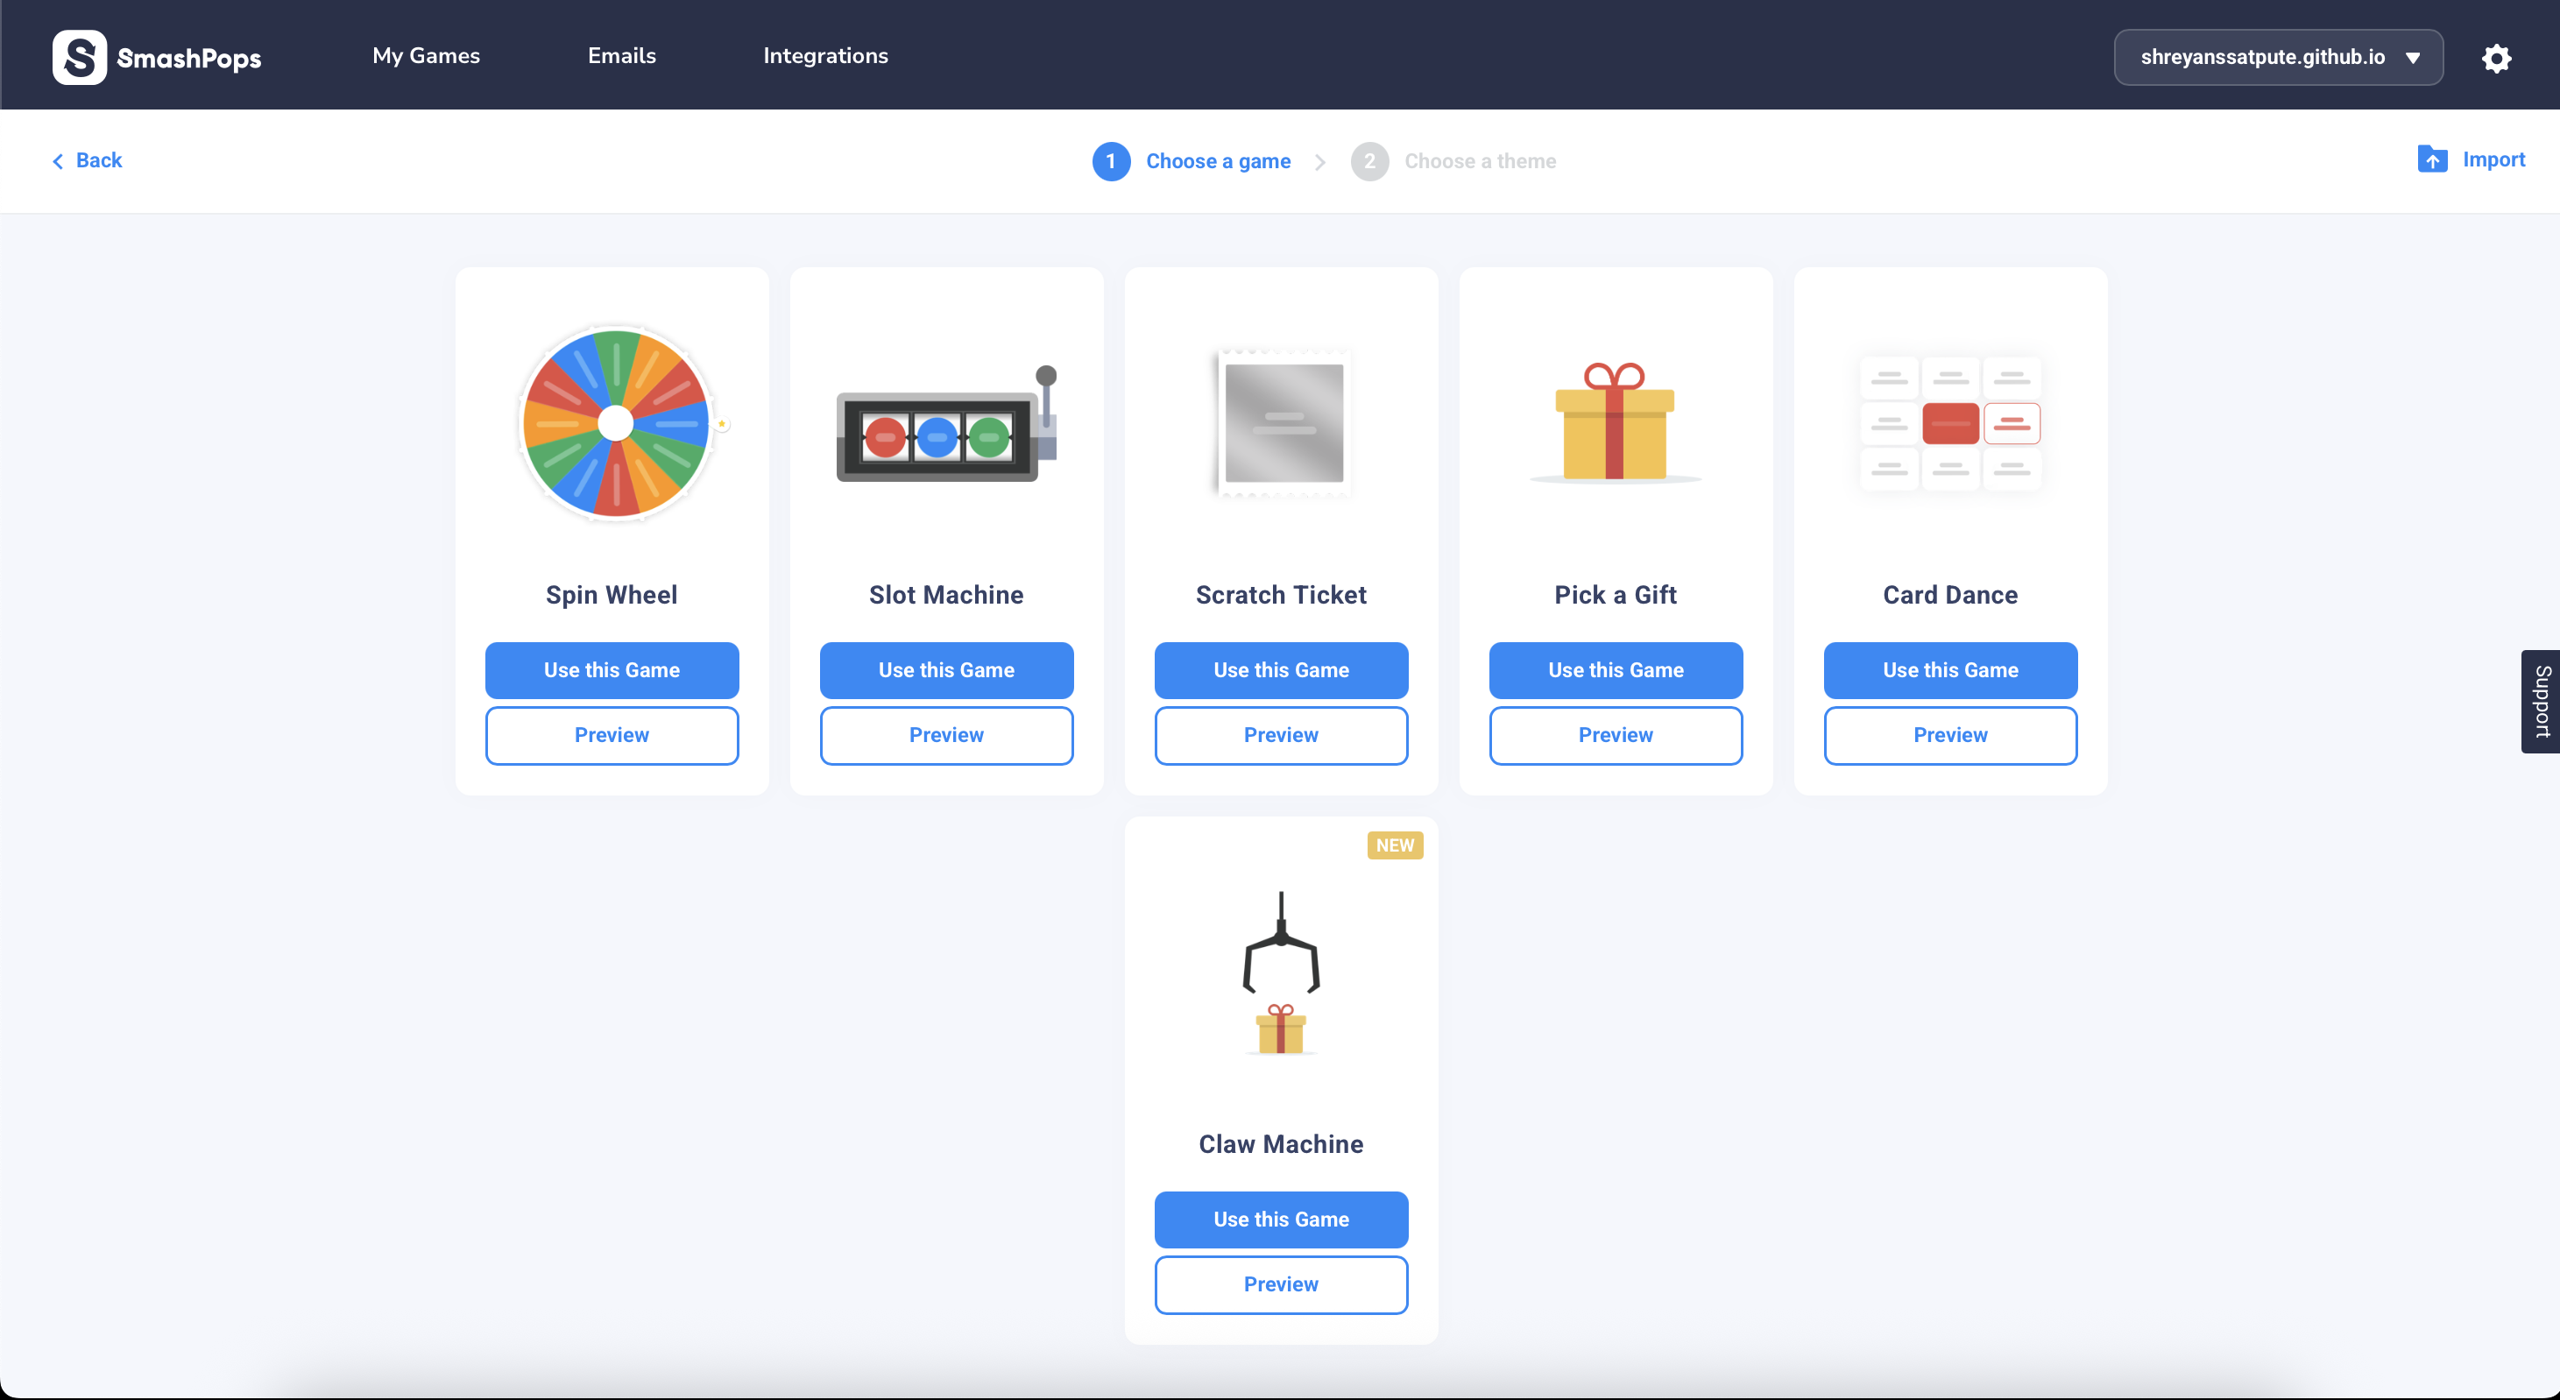
SmashPops Dashboard
- Configure game rules such as display settings, coupon codes, and reward weights.
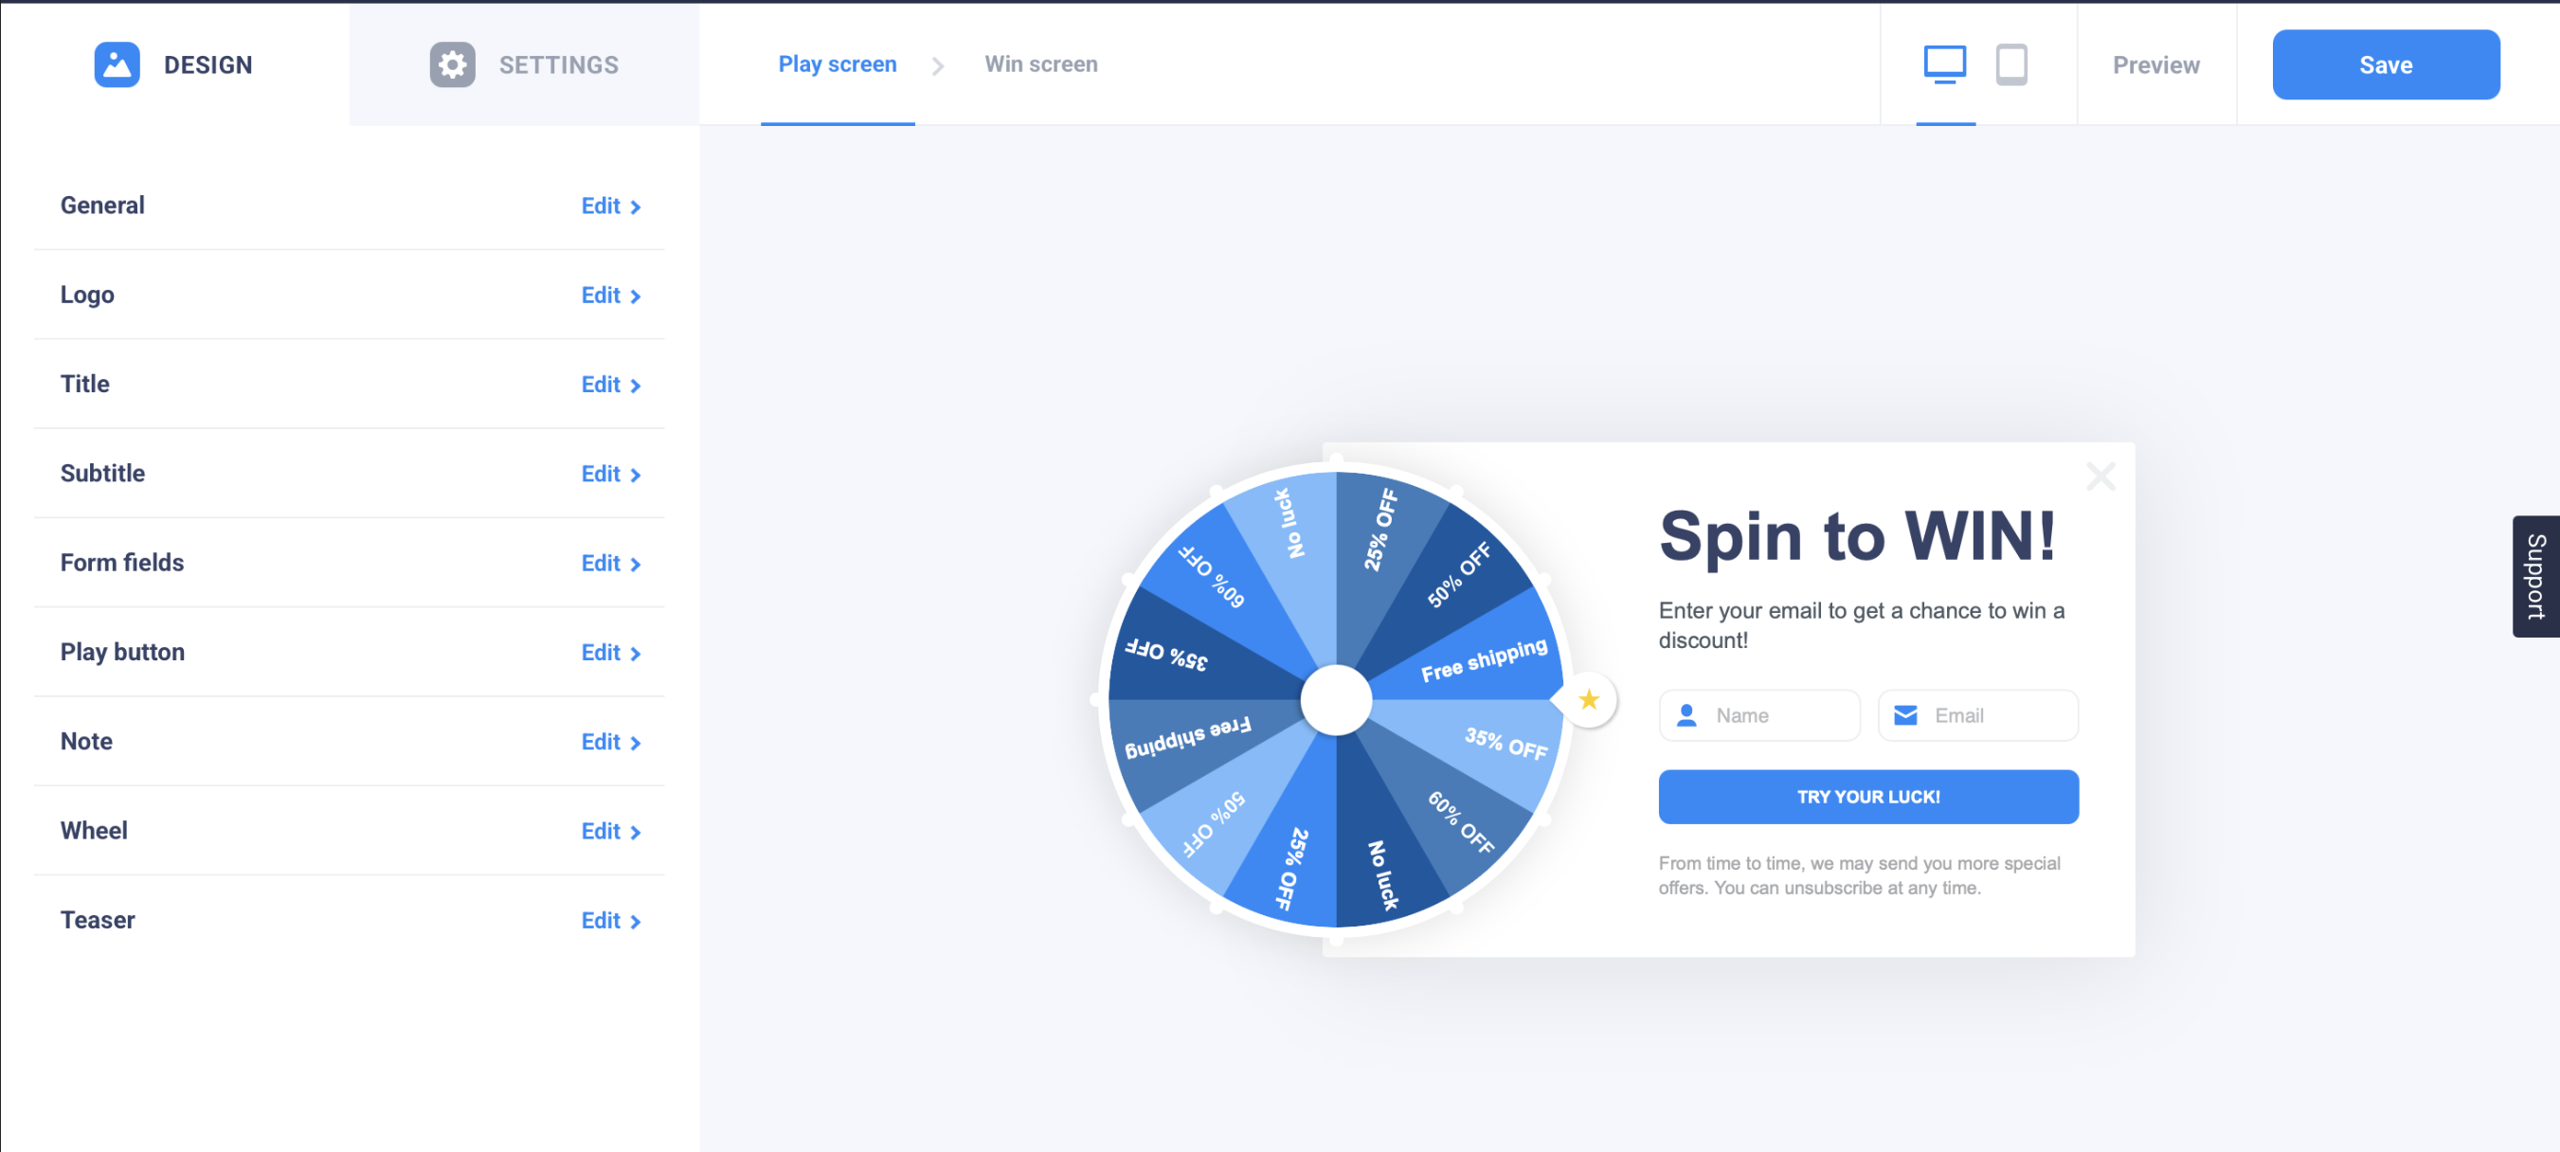
Configure Game
- Go to the Data Collection section, click + Link Another Integration, and select Zapier.
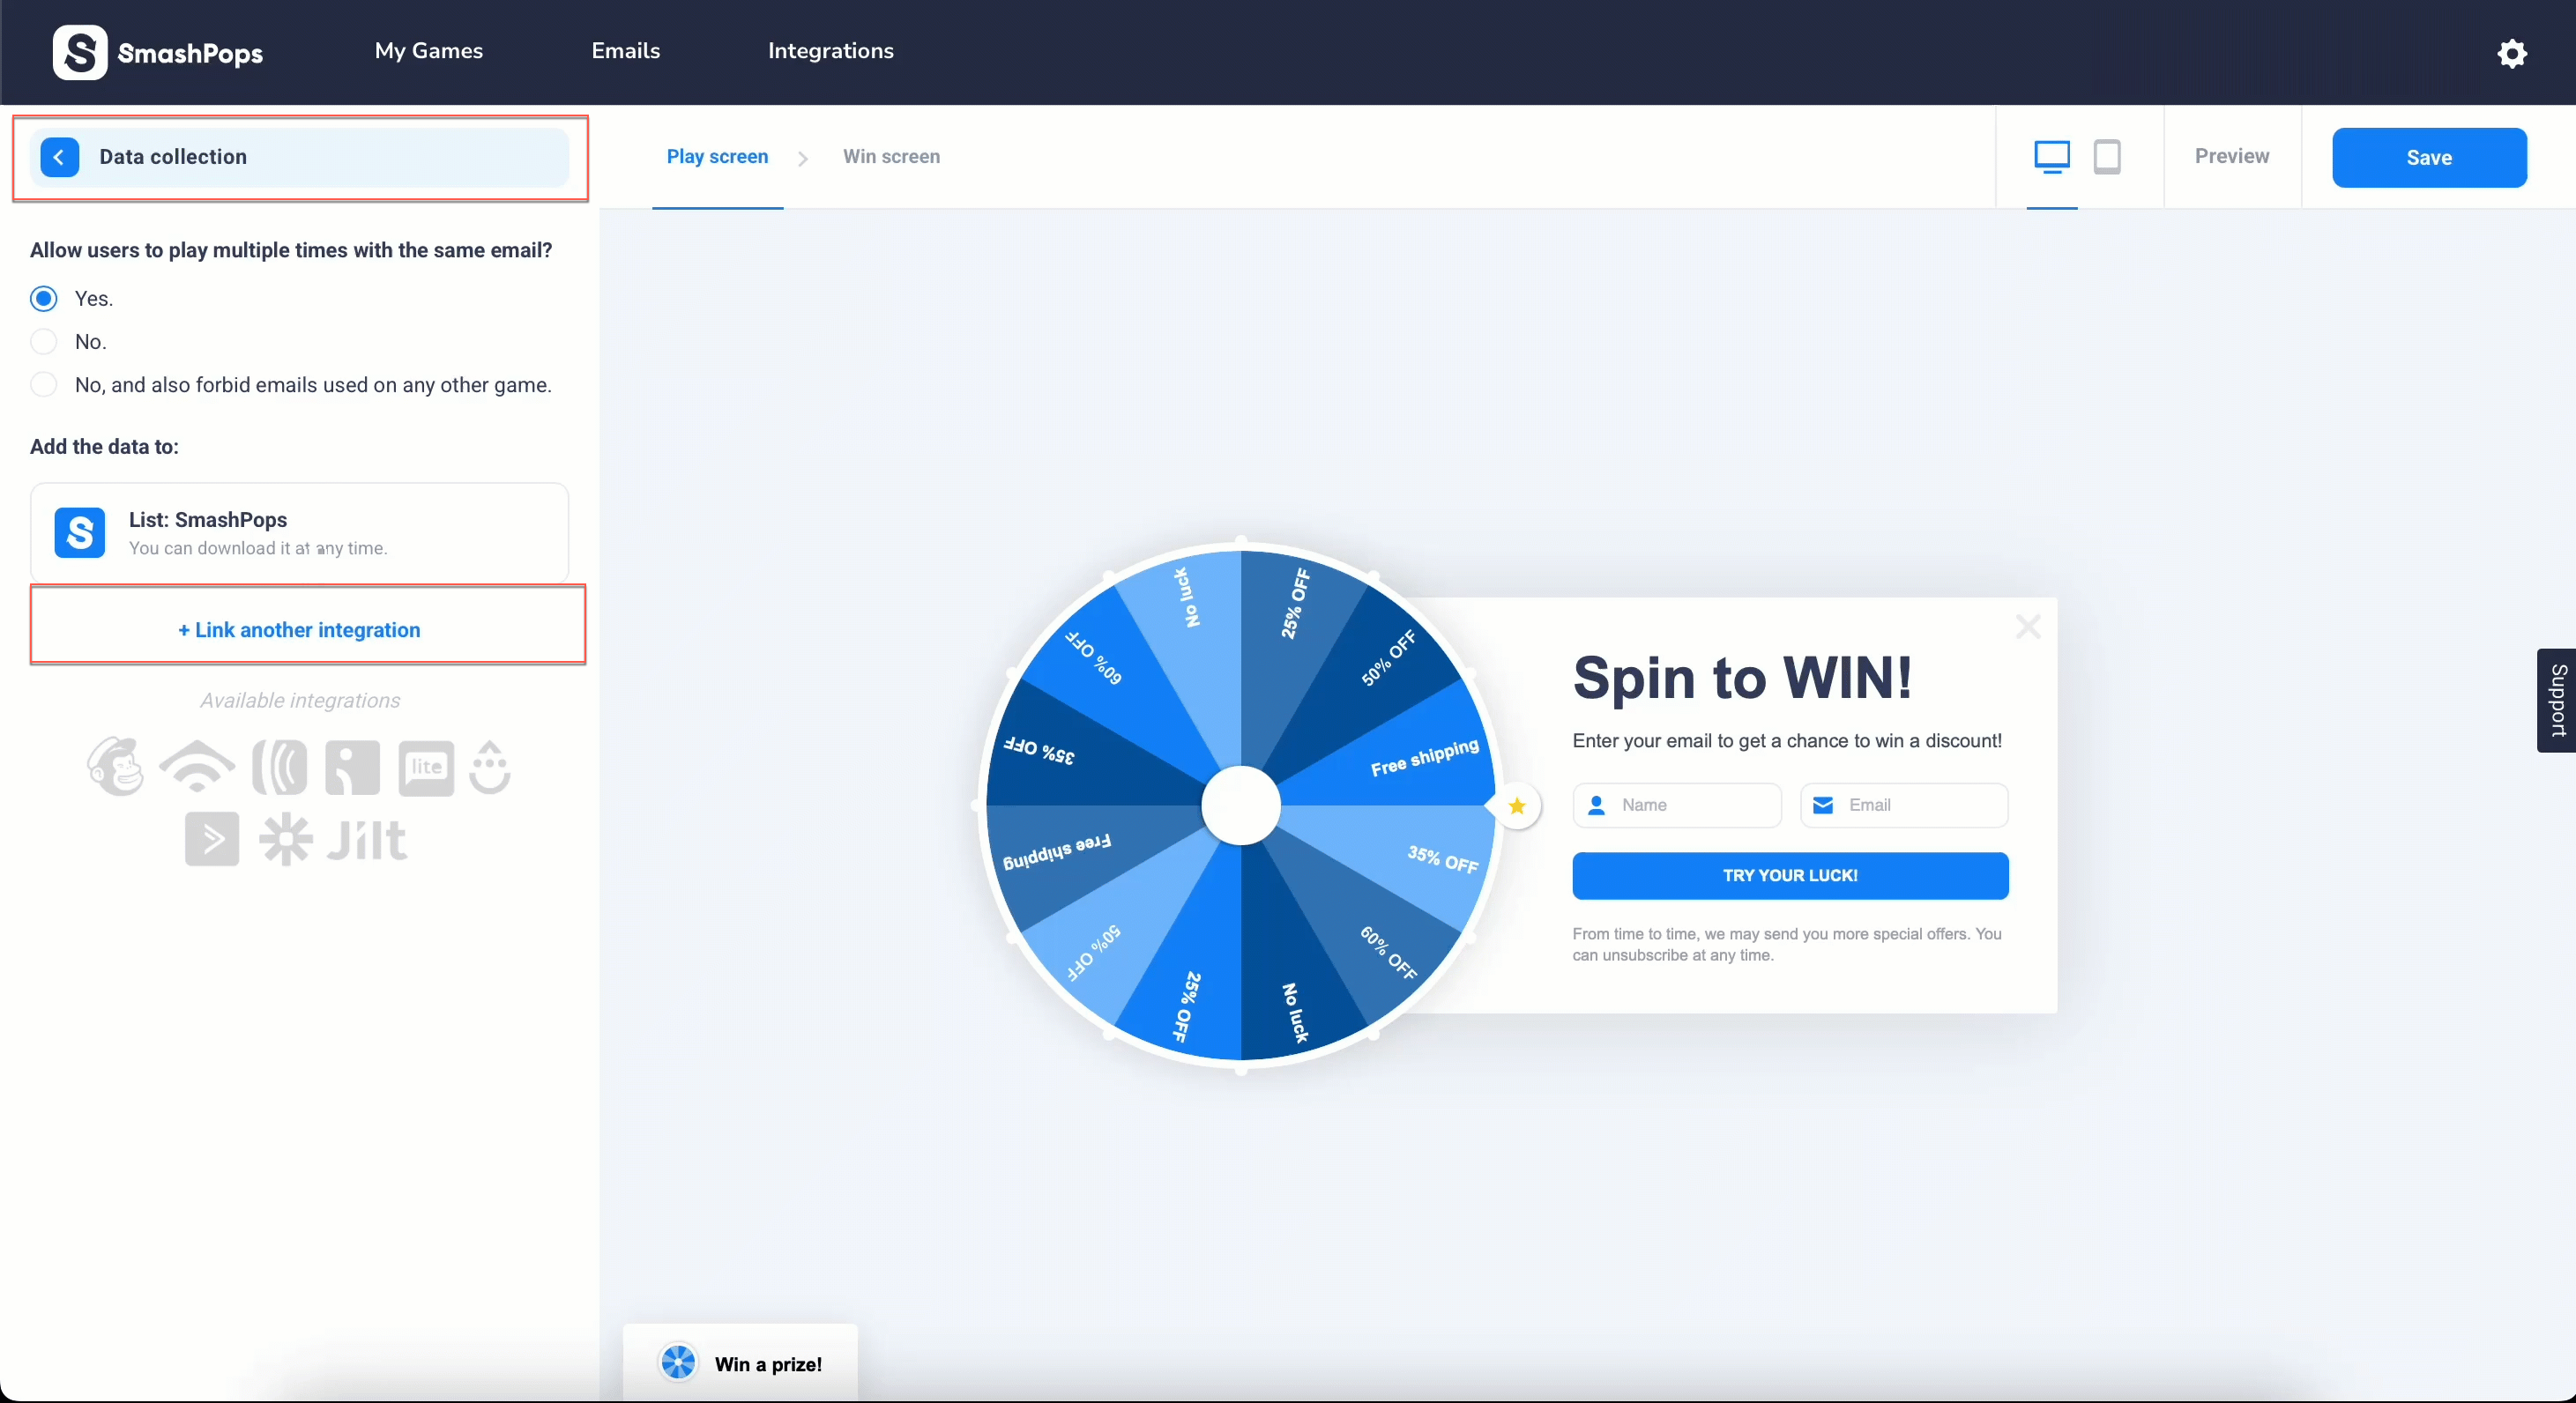
Link Another Integration
- You will be invited to Zapier. Click Accept Invite & Build a Zap.
Accept Invite & Build a Zap
Once Zapier is integrated into Smashpops, it can connect to SmashPops with CleverTap via Zapier.
Connect SmashPops and CleverTap via Zapier
Zapier acts as the automation bridge between SmashPops and CleverTap. Each time a user plays a game, SmashPops sends interaction data to CleverTap through Zapier. This enables businesses to either:
- Create or update user profiles with player details such as email, coupons, or scores.
OR
- Log each play as an event to power segmentation, analytics, and personalized engagement campaigns.
The integration supports two options depending on your use case:
Create or Update User Profiles
Consider an example where you want to sync game player data into CleverTap so that each new play updates or creates a user profile for personalized engagement. To do so, perform the following steps:
- Log in to the Zapier dashboard and click + Create Zap. Zapier can connect different applications, such as SmashPops.
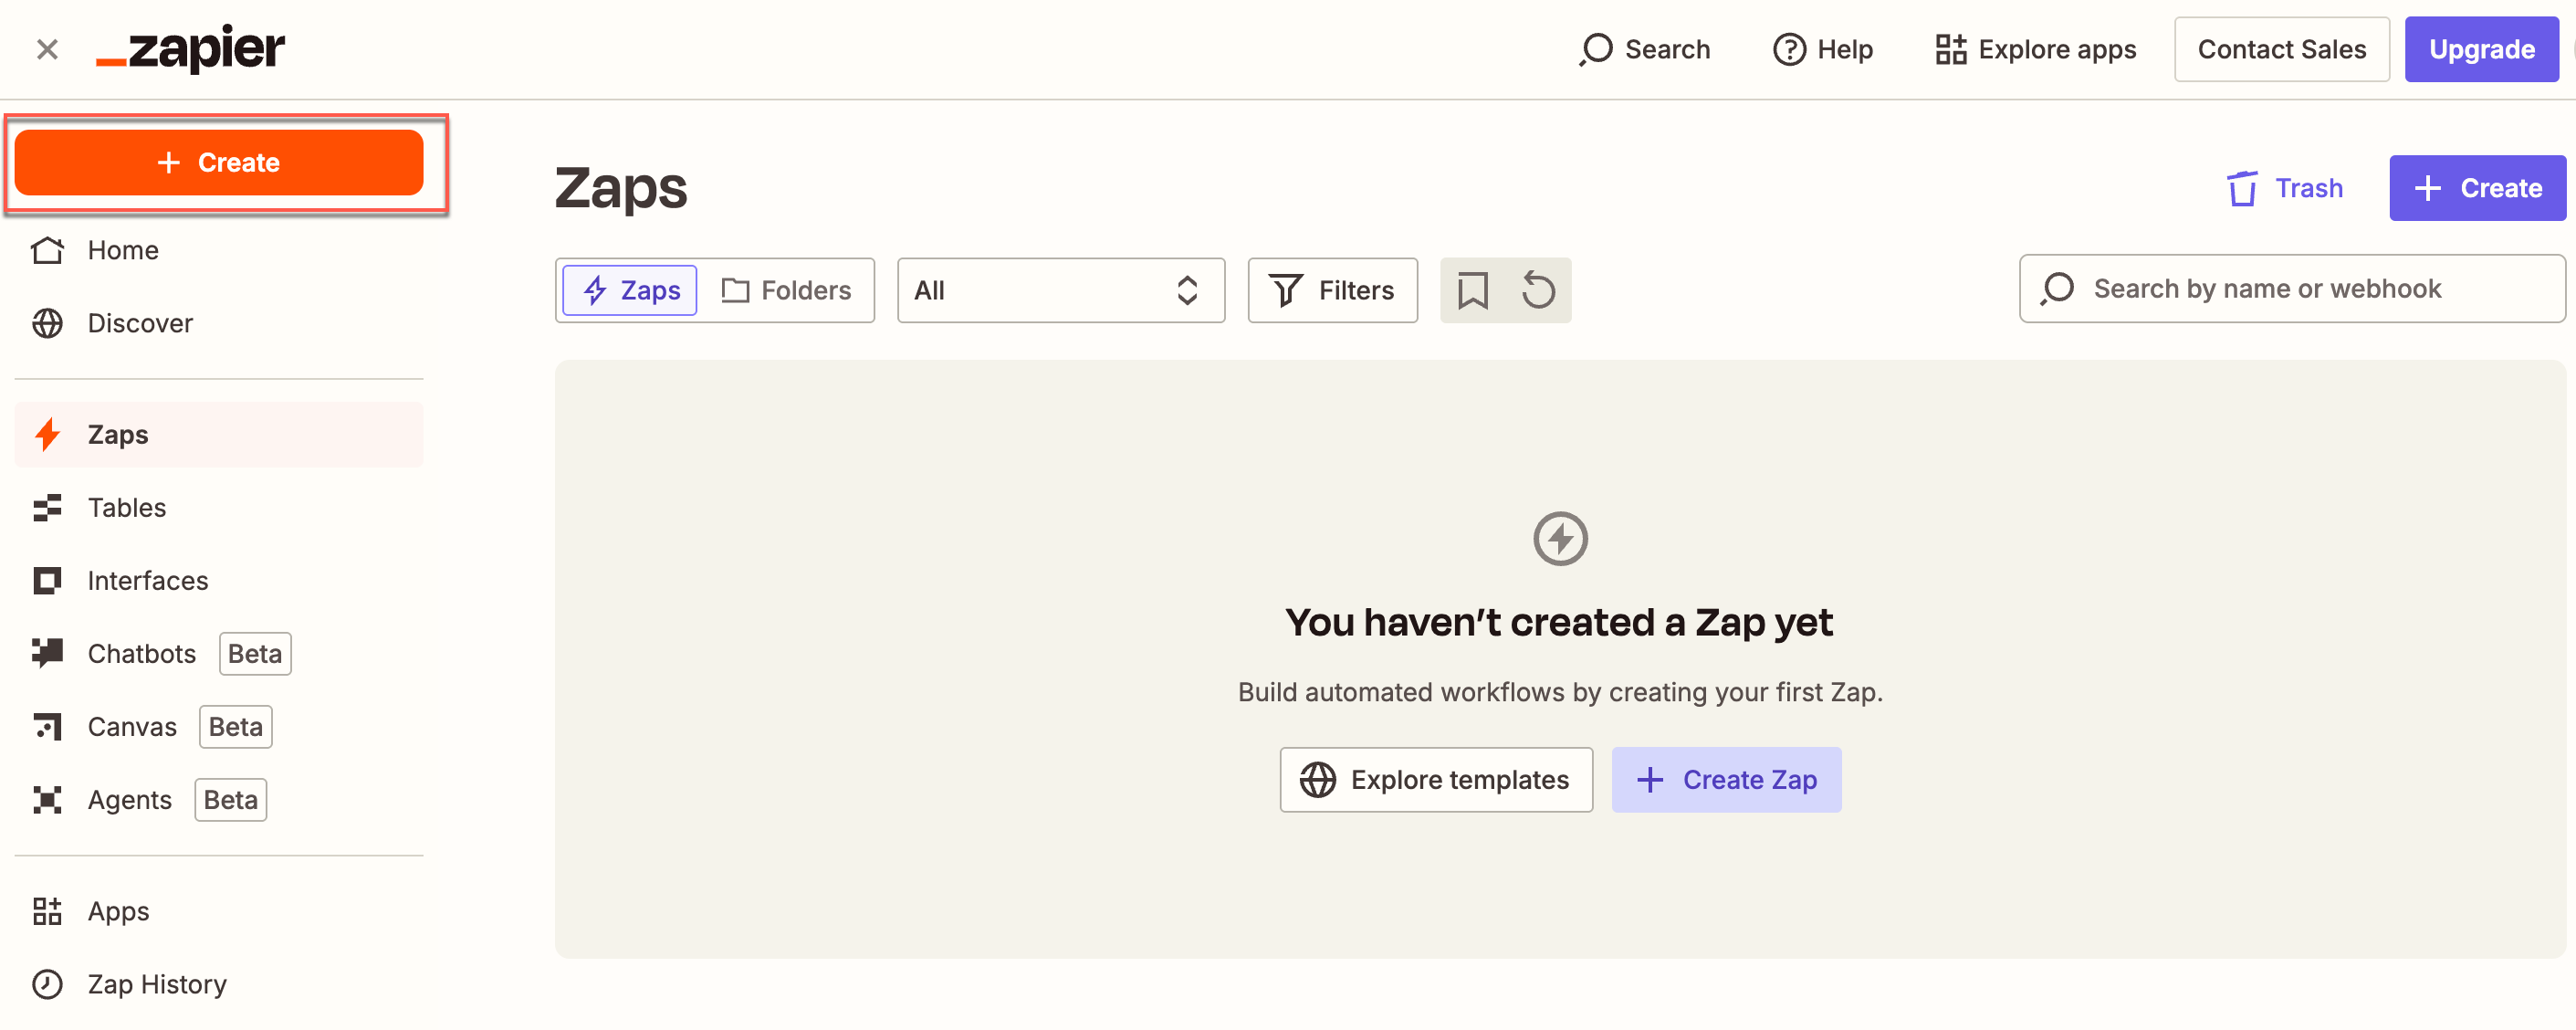
Create a Zap on Zapier Dashboard
- Set up a Trigger. To do so, perform the following steps:
- Select SmashPops from the App section. This starts the Zap when a trigger event occurs on SmashPops.
- Select Trigger Event from the dropdown list and then select New Data for this use case.
- Select Account and sign in using your SmashPops account credentials.
- Enter your SmashPops API key. A link is provided in the popup to help you locate the API key in your SmashPops dashboard.
Set Up Trigger Event
- Click Test Trigger. This ensures that the correct account is connected and the trigger is set up correctly.
Skip Test if Trigger FailsIf Zapier cannot pull sample data during the test, click Skip Test. The Zap will still run correctly once published and connected to live data.
- Click Publish.
- Select the Action that the zap must perform after the trigger event occurs. To do so, perform the following steps:
- Select CleverTap from the App dropdown.
- Select Create/Update User Profile from the Action event dropdown. This implies that whenever new data is generated, a new user profile is created, or an existing user profile is updated with the new information on the CleverTap dashboard.
- Select Account to connect the CleverTap account. The Zapier window opens. Enter all the required details to connect to the CleverTap account. Enter the same passcode you obtained during the Create Passcode on CleverTap Dashboard step.
- Click Continue after your account is successfully connected.
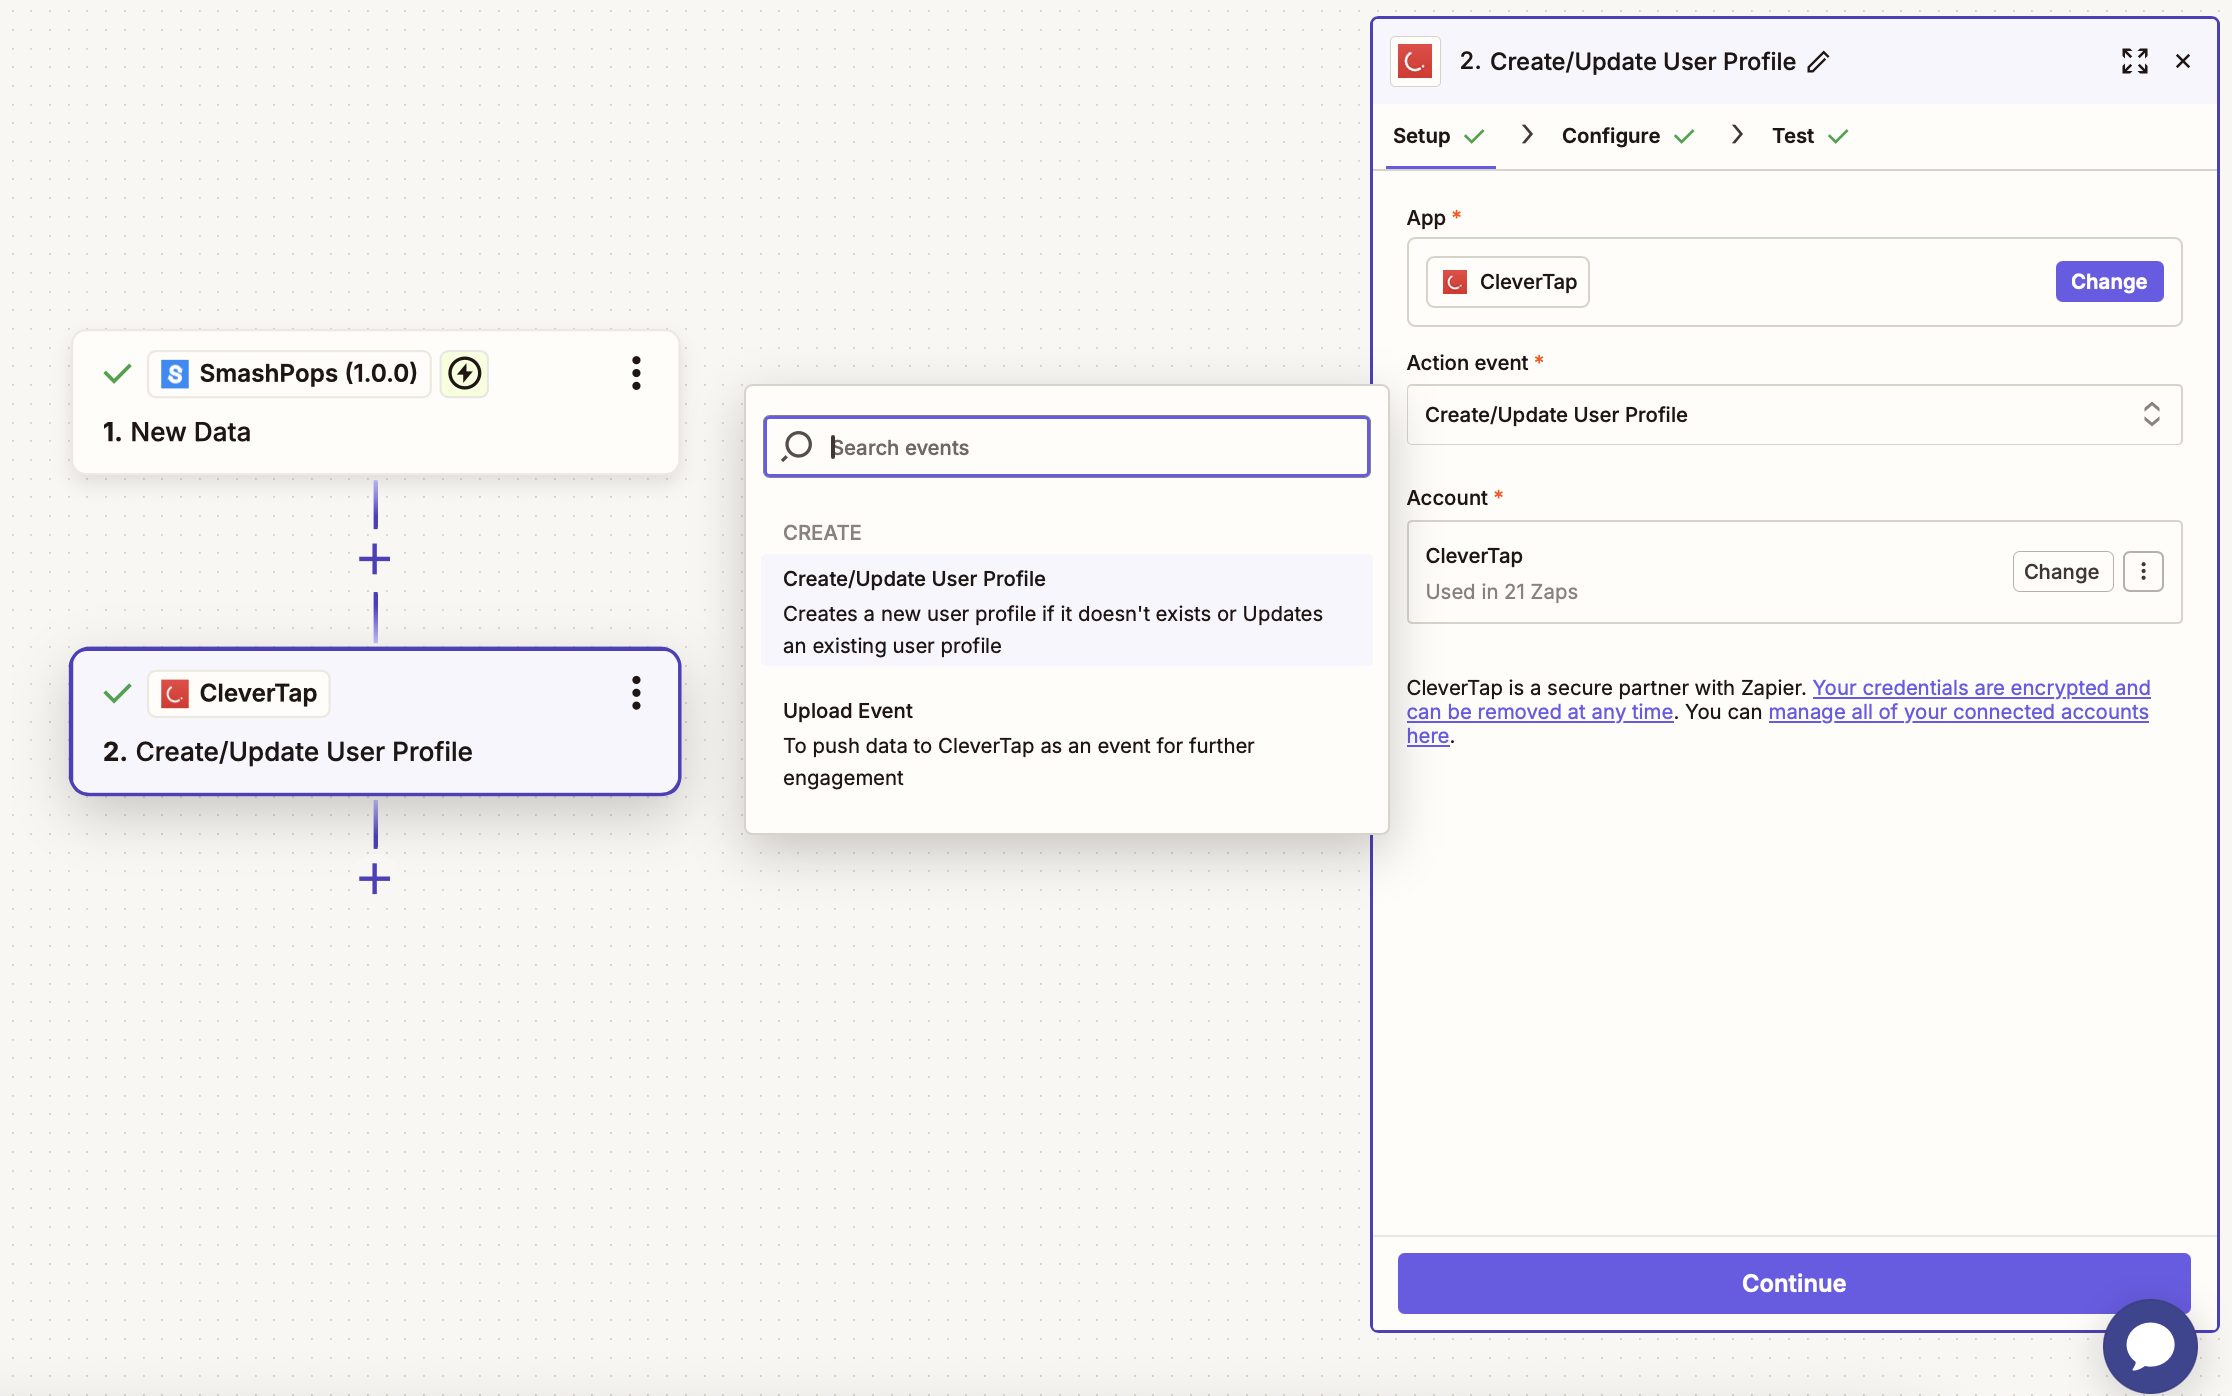
Select the Action for Zap
- Configure the Action. Map SmashPops data fields to CleverTap fields as follows:
| CleverTap Field | SmashPops Field |
|---|---|
| Identity | Email or unique user ID collected via the game. |
| Object ID | Leave blank if Identity is provided. |
| Creation Date | Date or time of gameplay. |
| Profile Properties | Game data in JSON format (for example: {"name": "Alex", "email": "[email protected]", "coupon": "WELCOME10"}) |
Mapping Identity and Object IDYou can keep the Identity field blank if you provide an Object ID, and vice versa.
- Click Continue, and click Test Step to test the Zap after mapping the fields.
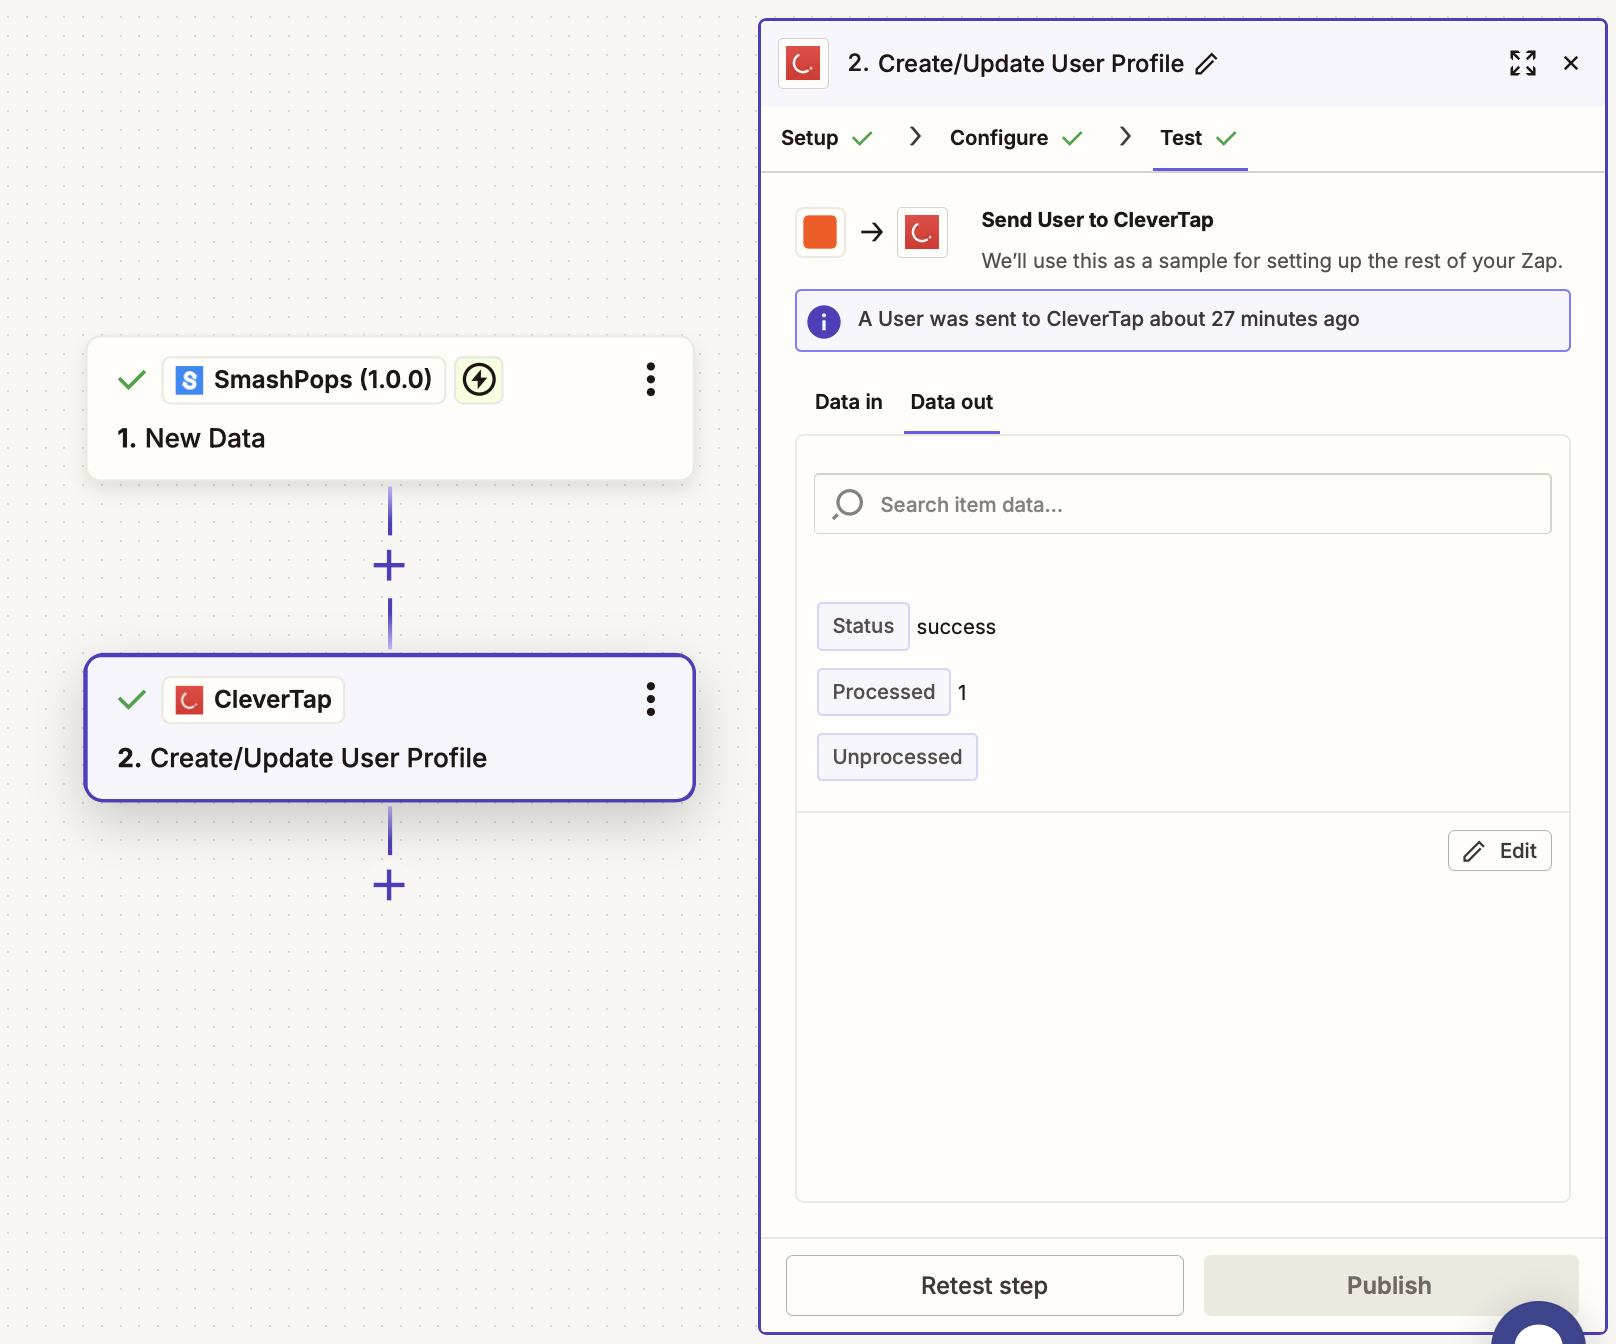
Test Zap
- Check the CleverTap dashboard to confirm the user profile has been created or updated.
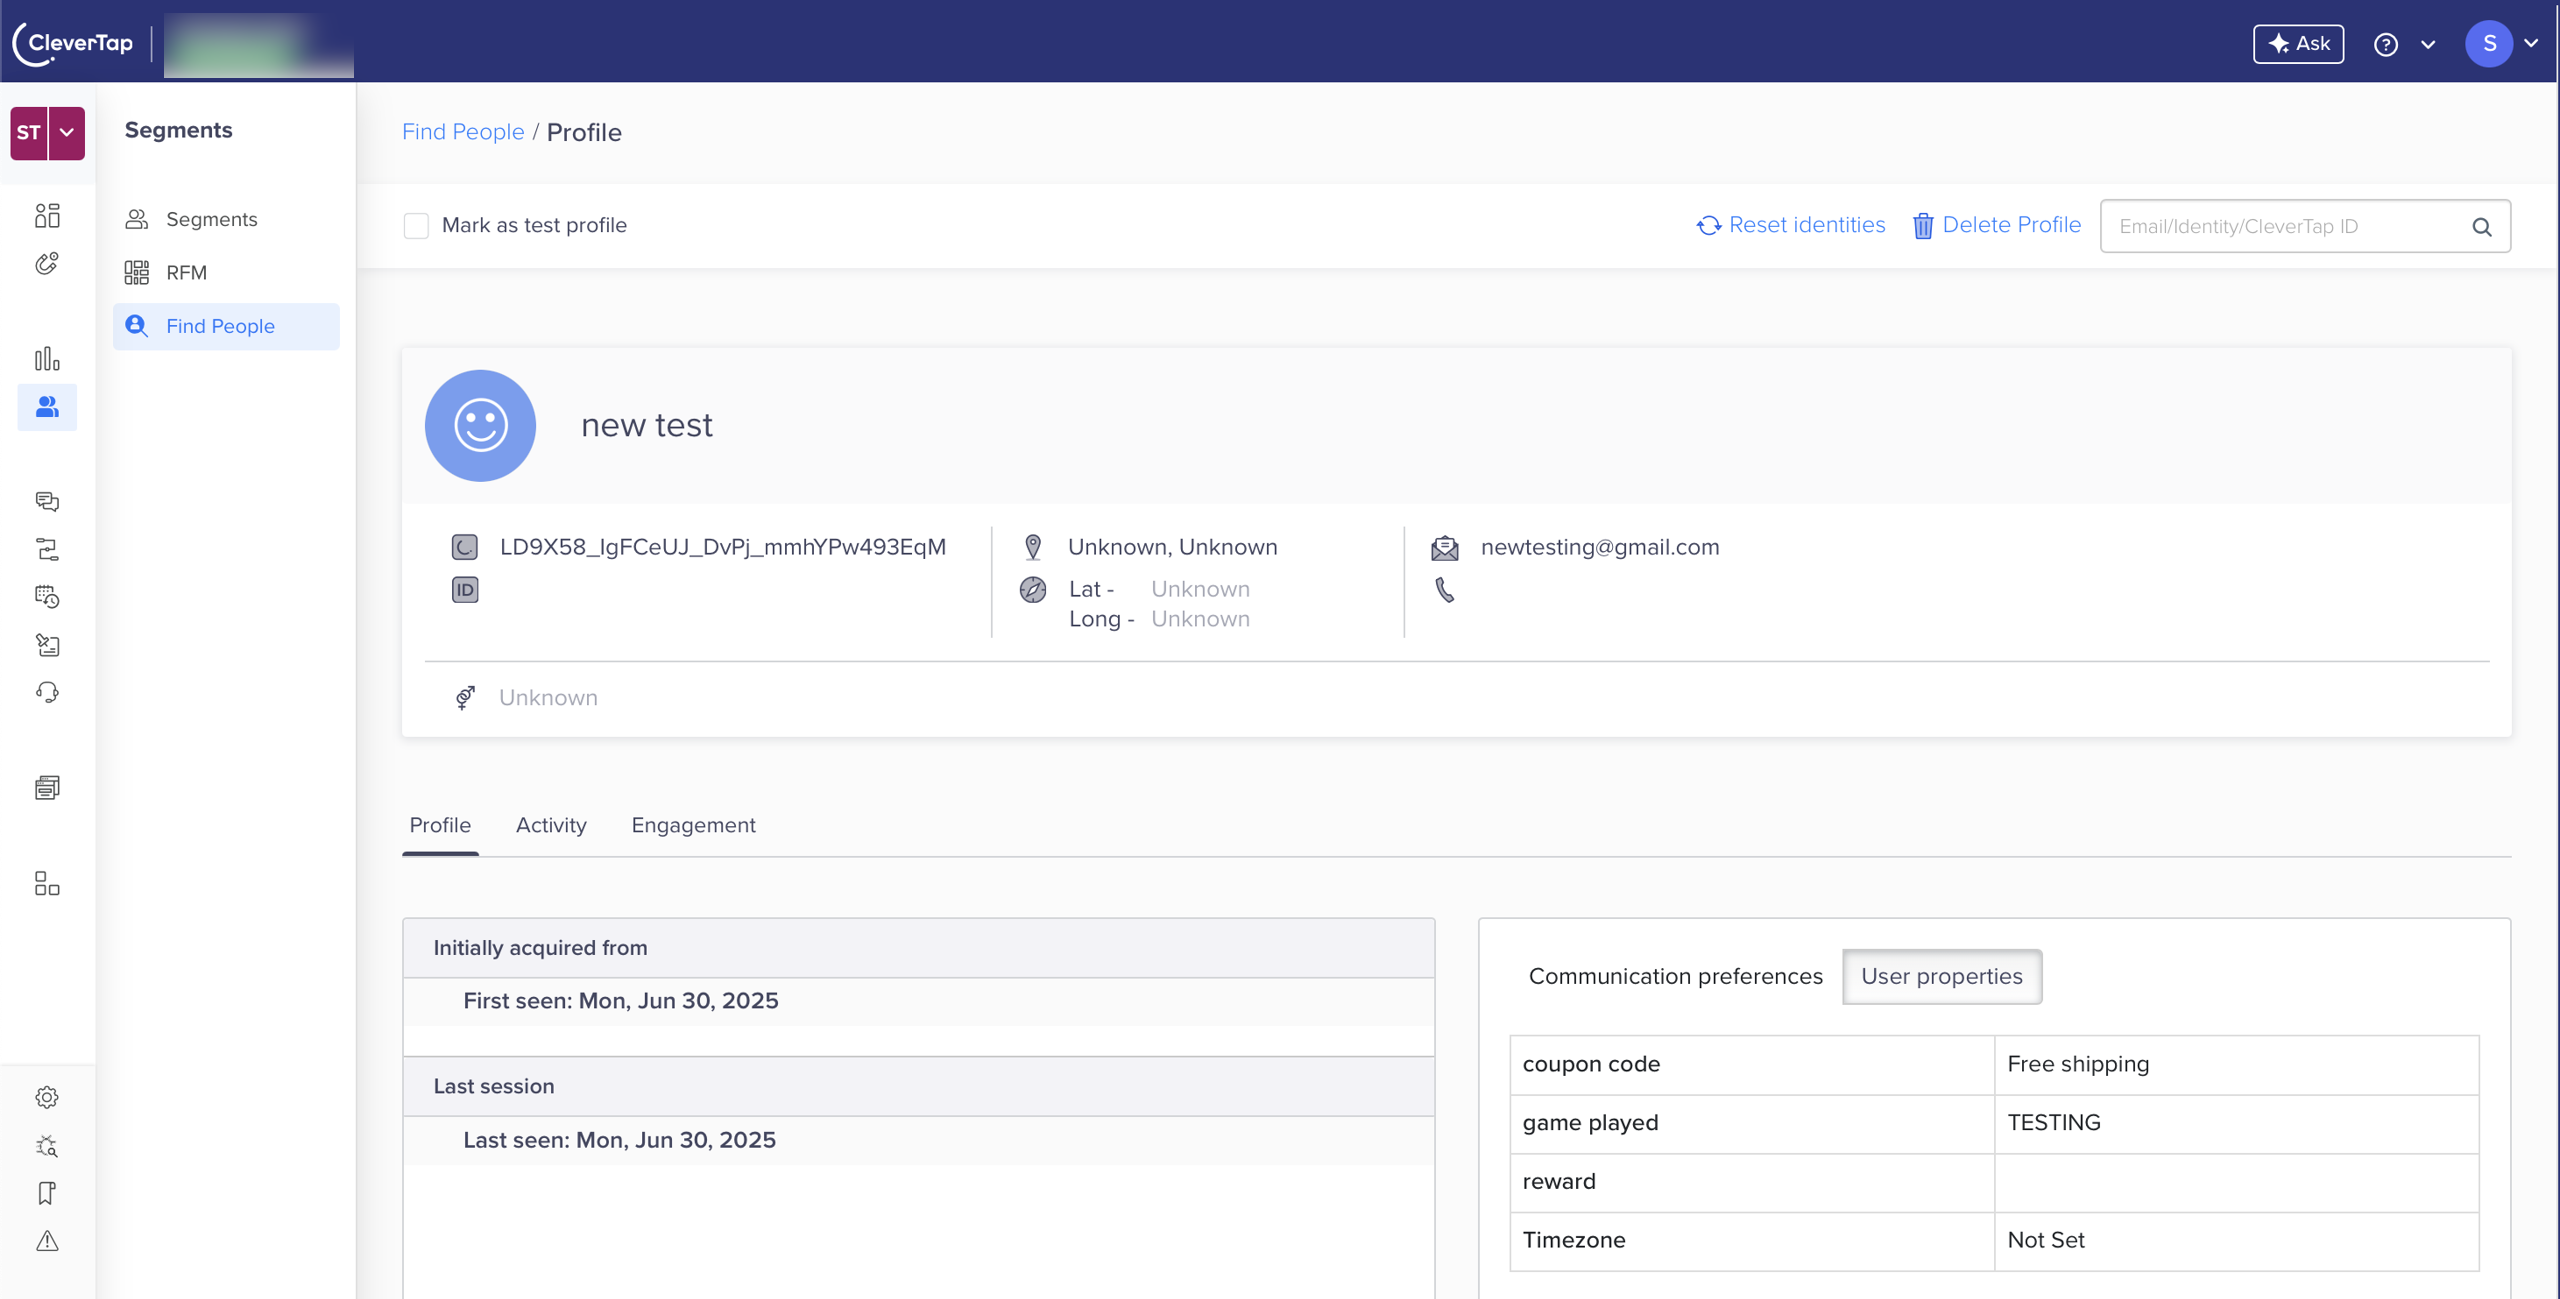
Verify on the CleverTap dashboard
- Once validated, click Publish to activate the Zap.
Upload Event
Consider an example where you want to track game interactions in CleverTap as events, rather than updating user profiles. This ensures each play is logged for analytics, segmentation, and engagement campaigns. To do so, perform the following steps:
-
Follow Step 1 to Step 4 from Create or Update User Profiles to configure SmashPops as the trigger.
-
Select the Action that the zap must perform after the trigger event occurs. To do so, perform the following steps:
- Select CleverTap from the App dropdown.
- Select Upload Event from the Action event dropdown.
- Select Account to connect the CleverTap account. The Zapier window opens. Enter all the required details to connect to the CleverTap account. Enter the same passcode you obtained during the Create Passcode on CleverTap Dashboard step.
- Click Continue after your account is successfully connected.
Select the Action for Zap
- Configure the Action. Map SmashPops data fields to CleverTap fields as follows:
| CleverTap Field | SmashPops Field |
|---|---|
| User ID | Email or unique identifier. |
| Event Name | Descriptive event name, such as "Game Played" or "Reward Won". |
| Creation Date | Date or time of gameplay. |
| Event Properties | Event data in JSON format (for example, {"reward": "10%OFF", "score": 450, "level": "Spin Wheel"}). |
Mapping Identity and Object IDYou can keep the Identity field blank if you provide an Object ID, and vice versa.
- Click Continue and click Test Step to test the zap after mapping the fields.
- Click Publish.
Once published, each SmashPops play will be logged as an event in CleverTap.
Add Integration Code to Website
For the integration to work as intended, you must add the SmashPops integration code to your website. To do so, perform the following steps:
- In your SmashPops account, go to Settings > My Account > Show Integration Code.
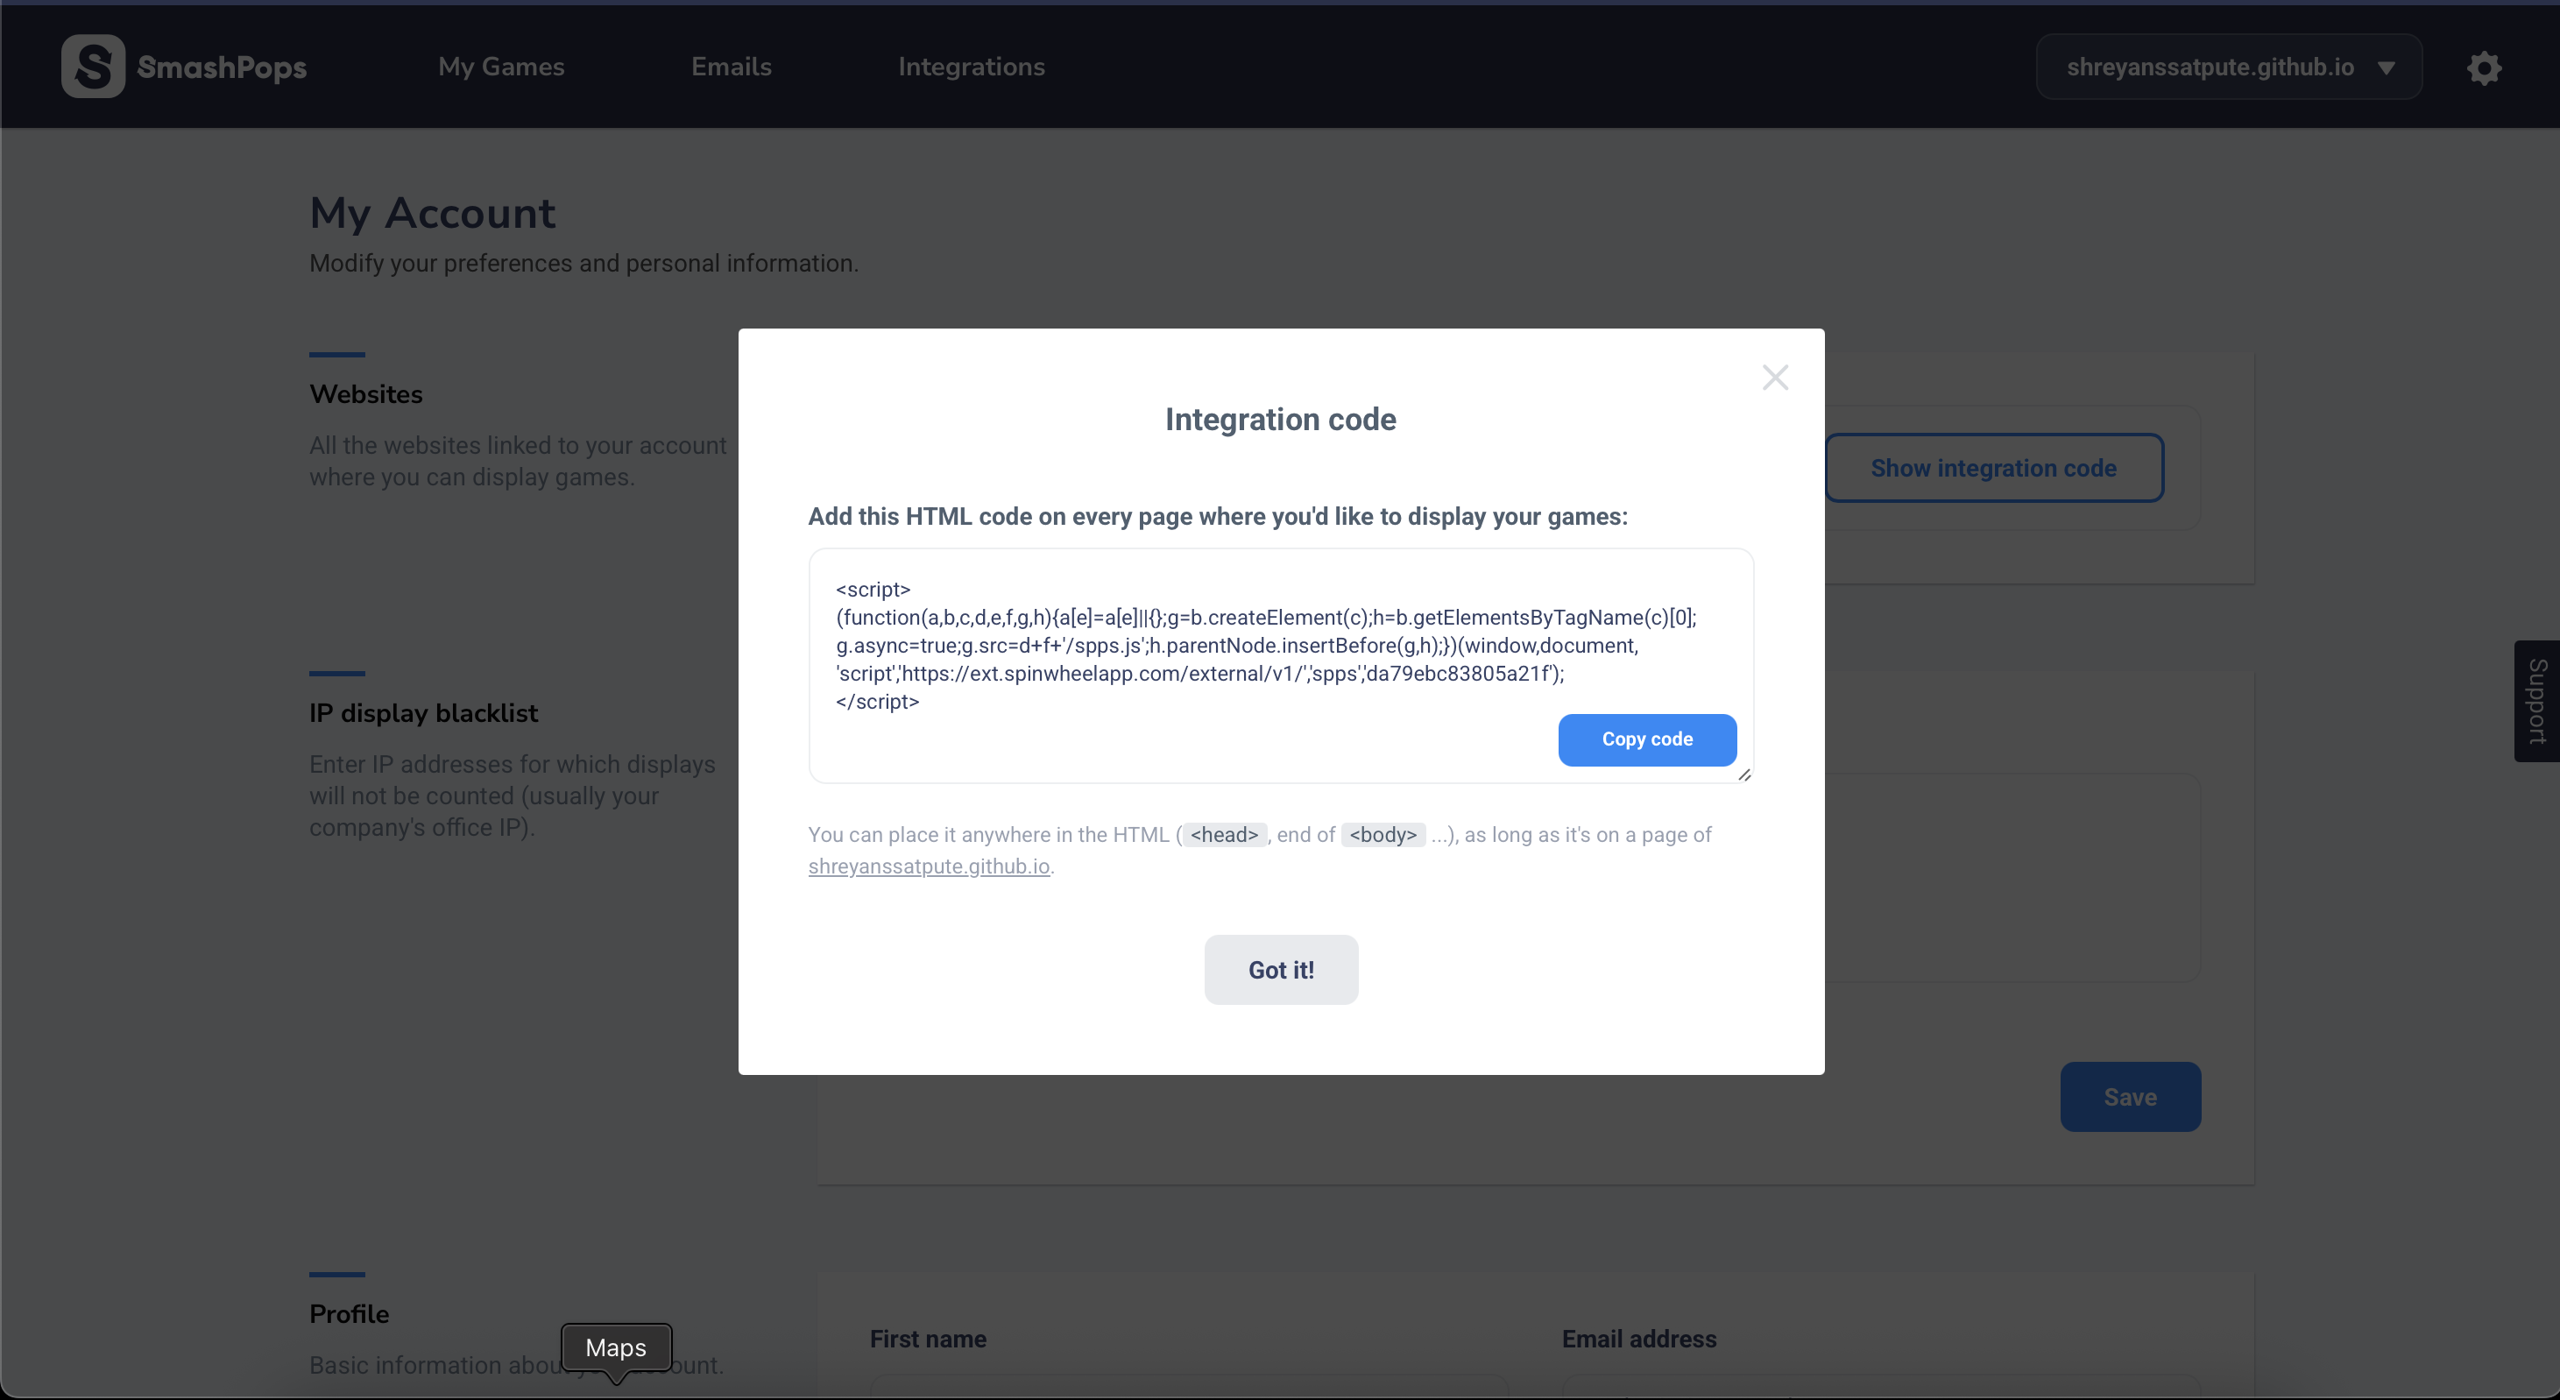
Integration Code
- Copy the snippet and paste it into your website’s HTML (
<head>or end of<body>). Ensure the website URL you configure in SmashPops matches the domain where you deploy the snippet. SmashPops only works on the registered domain. - Once added, your game will display according to the rules you have configured, and user actions will be tracked in the CleverTap dashboard.

Example workflow
You can also set up coupon codes and configure weights or chances of each reward in the SmashPops game settings.
FAQs
Can I use SmashPops with CleverTap Email Campaigns?
Yes. You can sync users who played games in SmashPops with CleverTap and then target them through email, push notifications, or In-App campaigns.
Updated 7 months ago