Microsoft Azure
Understand how to export data from CleverTap dashboard to Microsoft Azure.
Overview
Microsoft Azure, a Microsoft cloud computing platform, offers access to, management of, and development of applications and services through global data centers. The Microsoft Azure data export feature provides the capability to bulk export your CleverTap event data to Azure Blob Storage. You can use this for analysis in BI tools or storage in your data warehouse for analysis in the future.
Feature AvailabilityThis capability is a part of the Enterprise, Advanced, and Cutting Edge plan. To activate this for your account, contact your Account Manager.
Setup
The following are the two major steps involved in enabling this feature for your account:
- Create a Microsoft Azure Storage Account.
- Create a Blob Service Container.
- Generate a SAS Token.
- Configure Microsoft Azure Blob Container details on the CleverTap Dashboard.
Data ExportOnce you have set up both dashboards, you can configure export from the CleverTap dashboard. For more information, refer to the following:
- Data Exports for Legacy Profile and Event Export flow
- Profile Exports for Enhanced Profile Export flow
Create a Microsoft Azure Storage Account
To create a Microsoft Azure Storage Account:
- Log in to your Microsoft Azure account and select Storage Accounts from the left menu.
- Click + Create to create a new storage account.
Select Storage Account from Left Manu
- Enter the Storage account name, and do not modify the default settings.
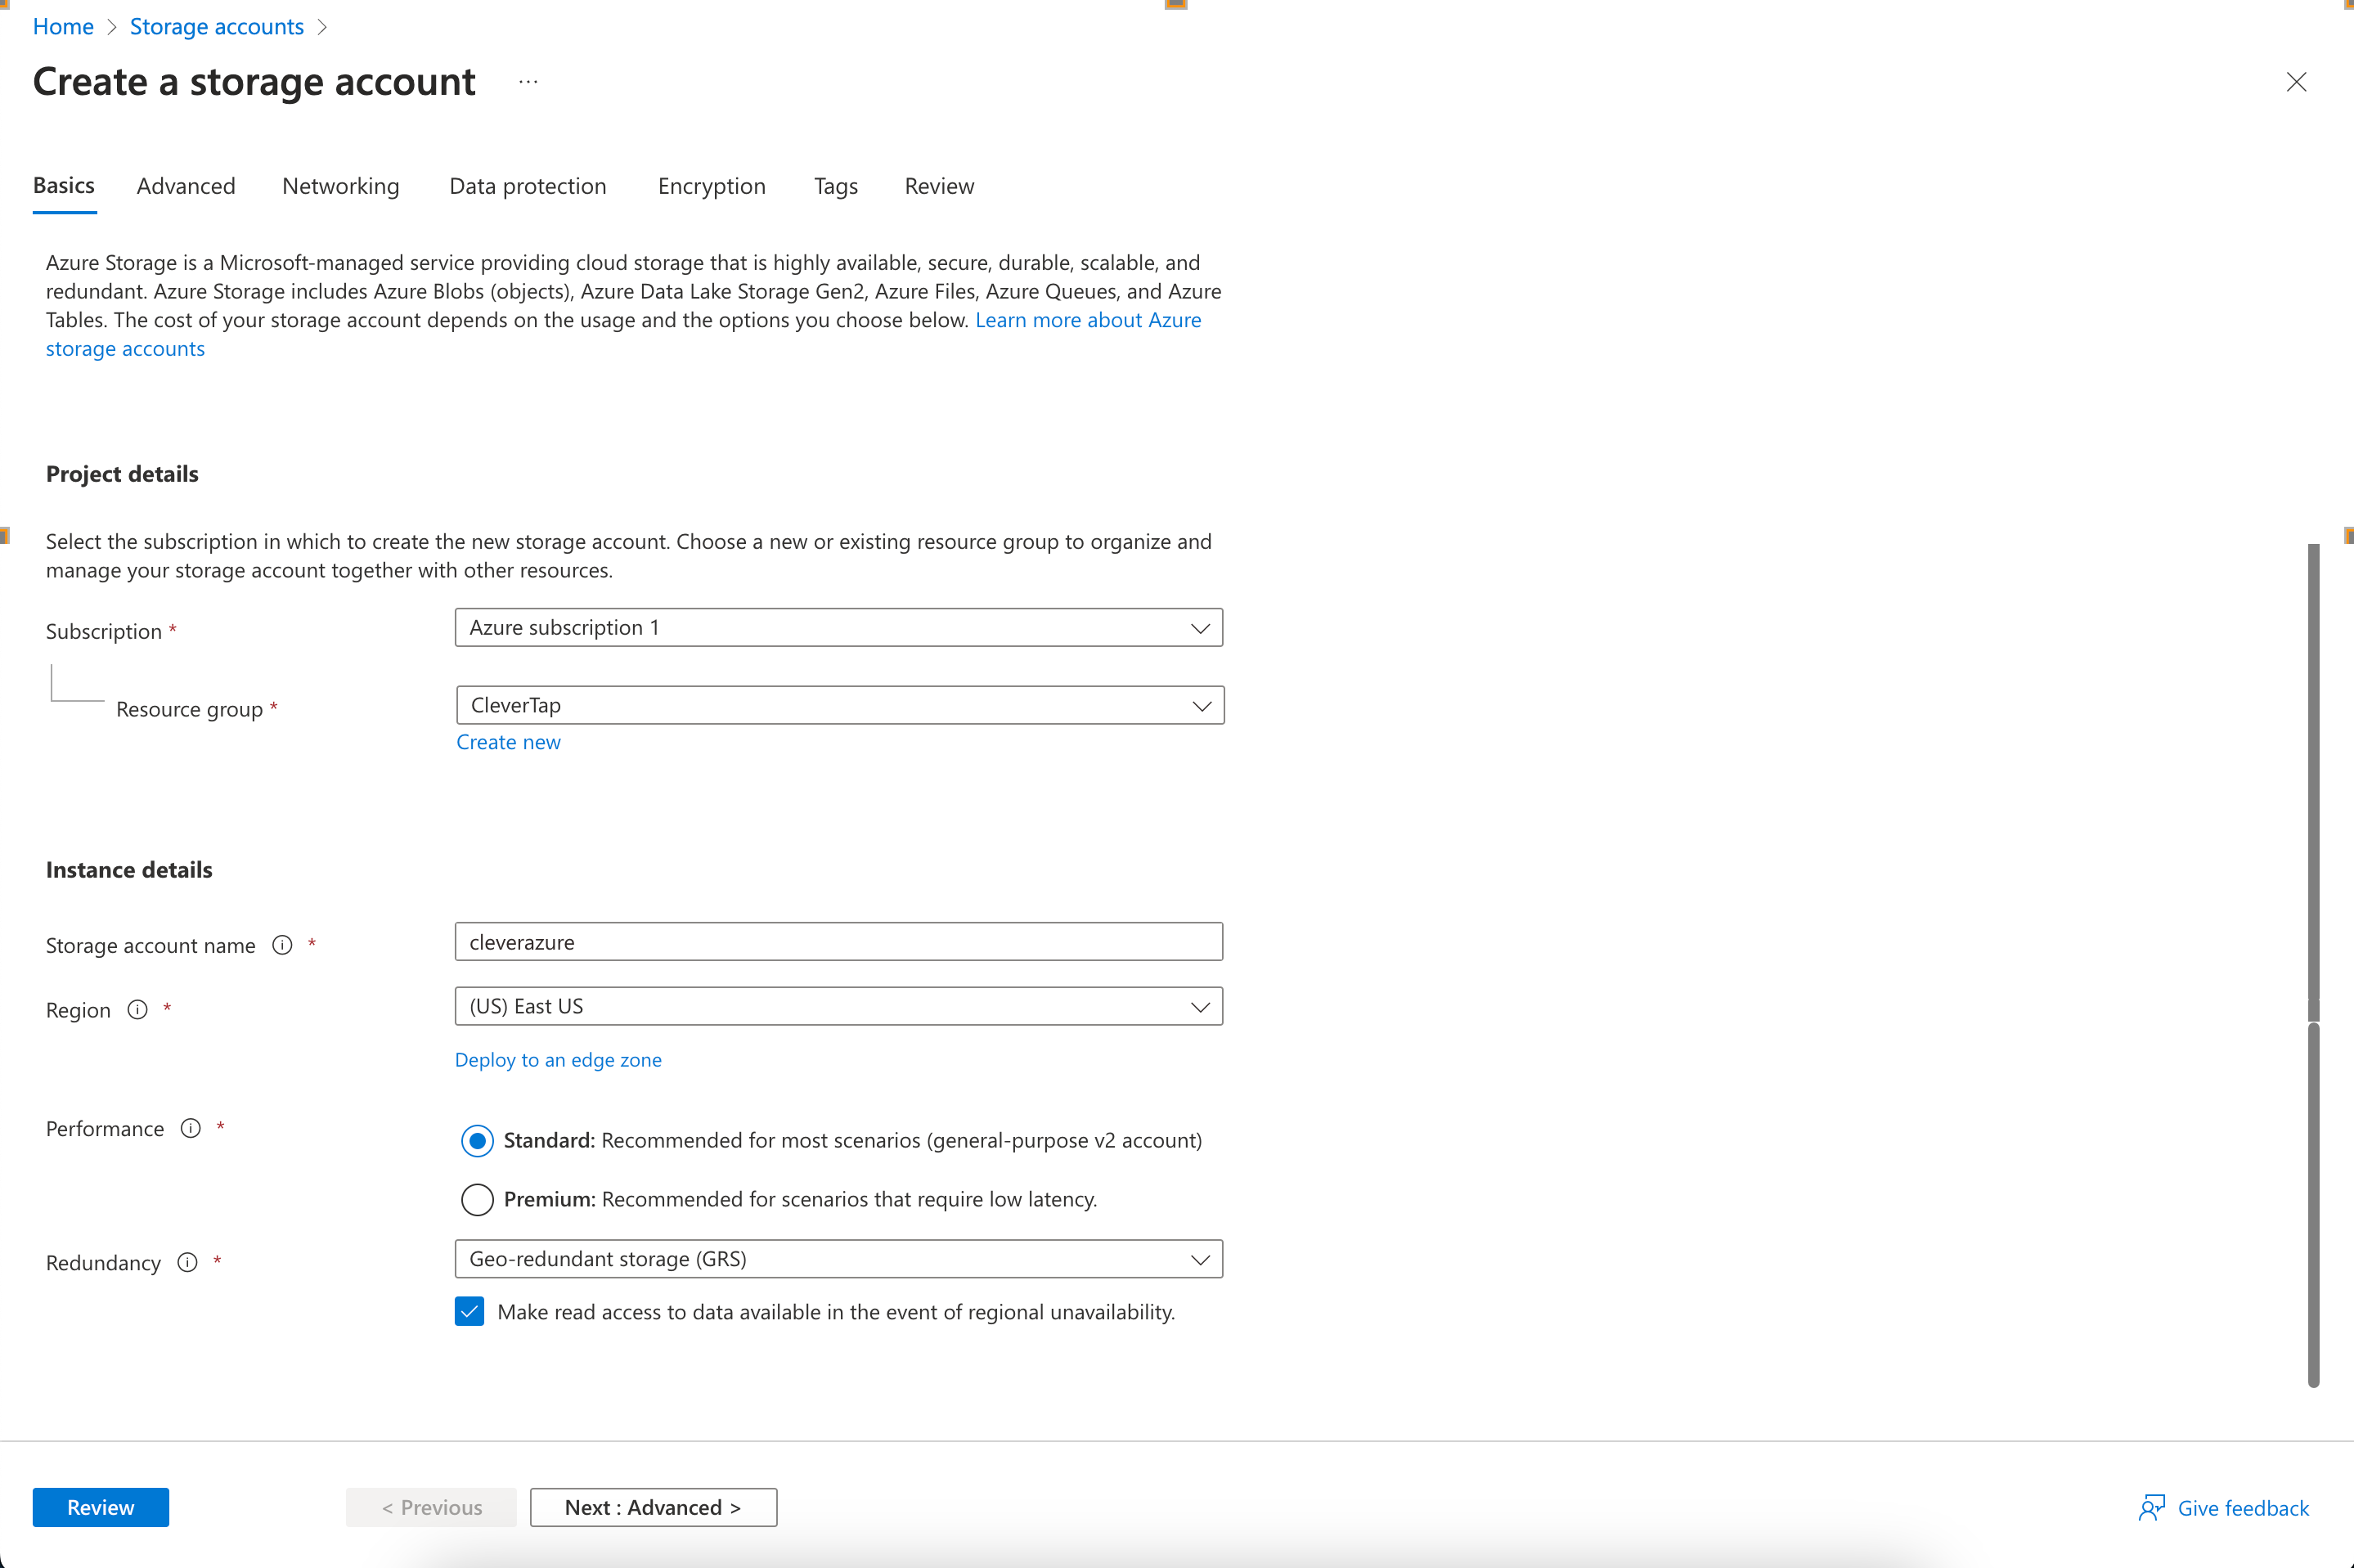
Enter Storage Account Name
- Click Review and click Create. The following screen displays once the storage account is created:
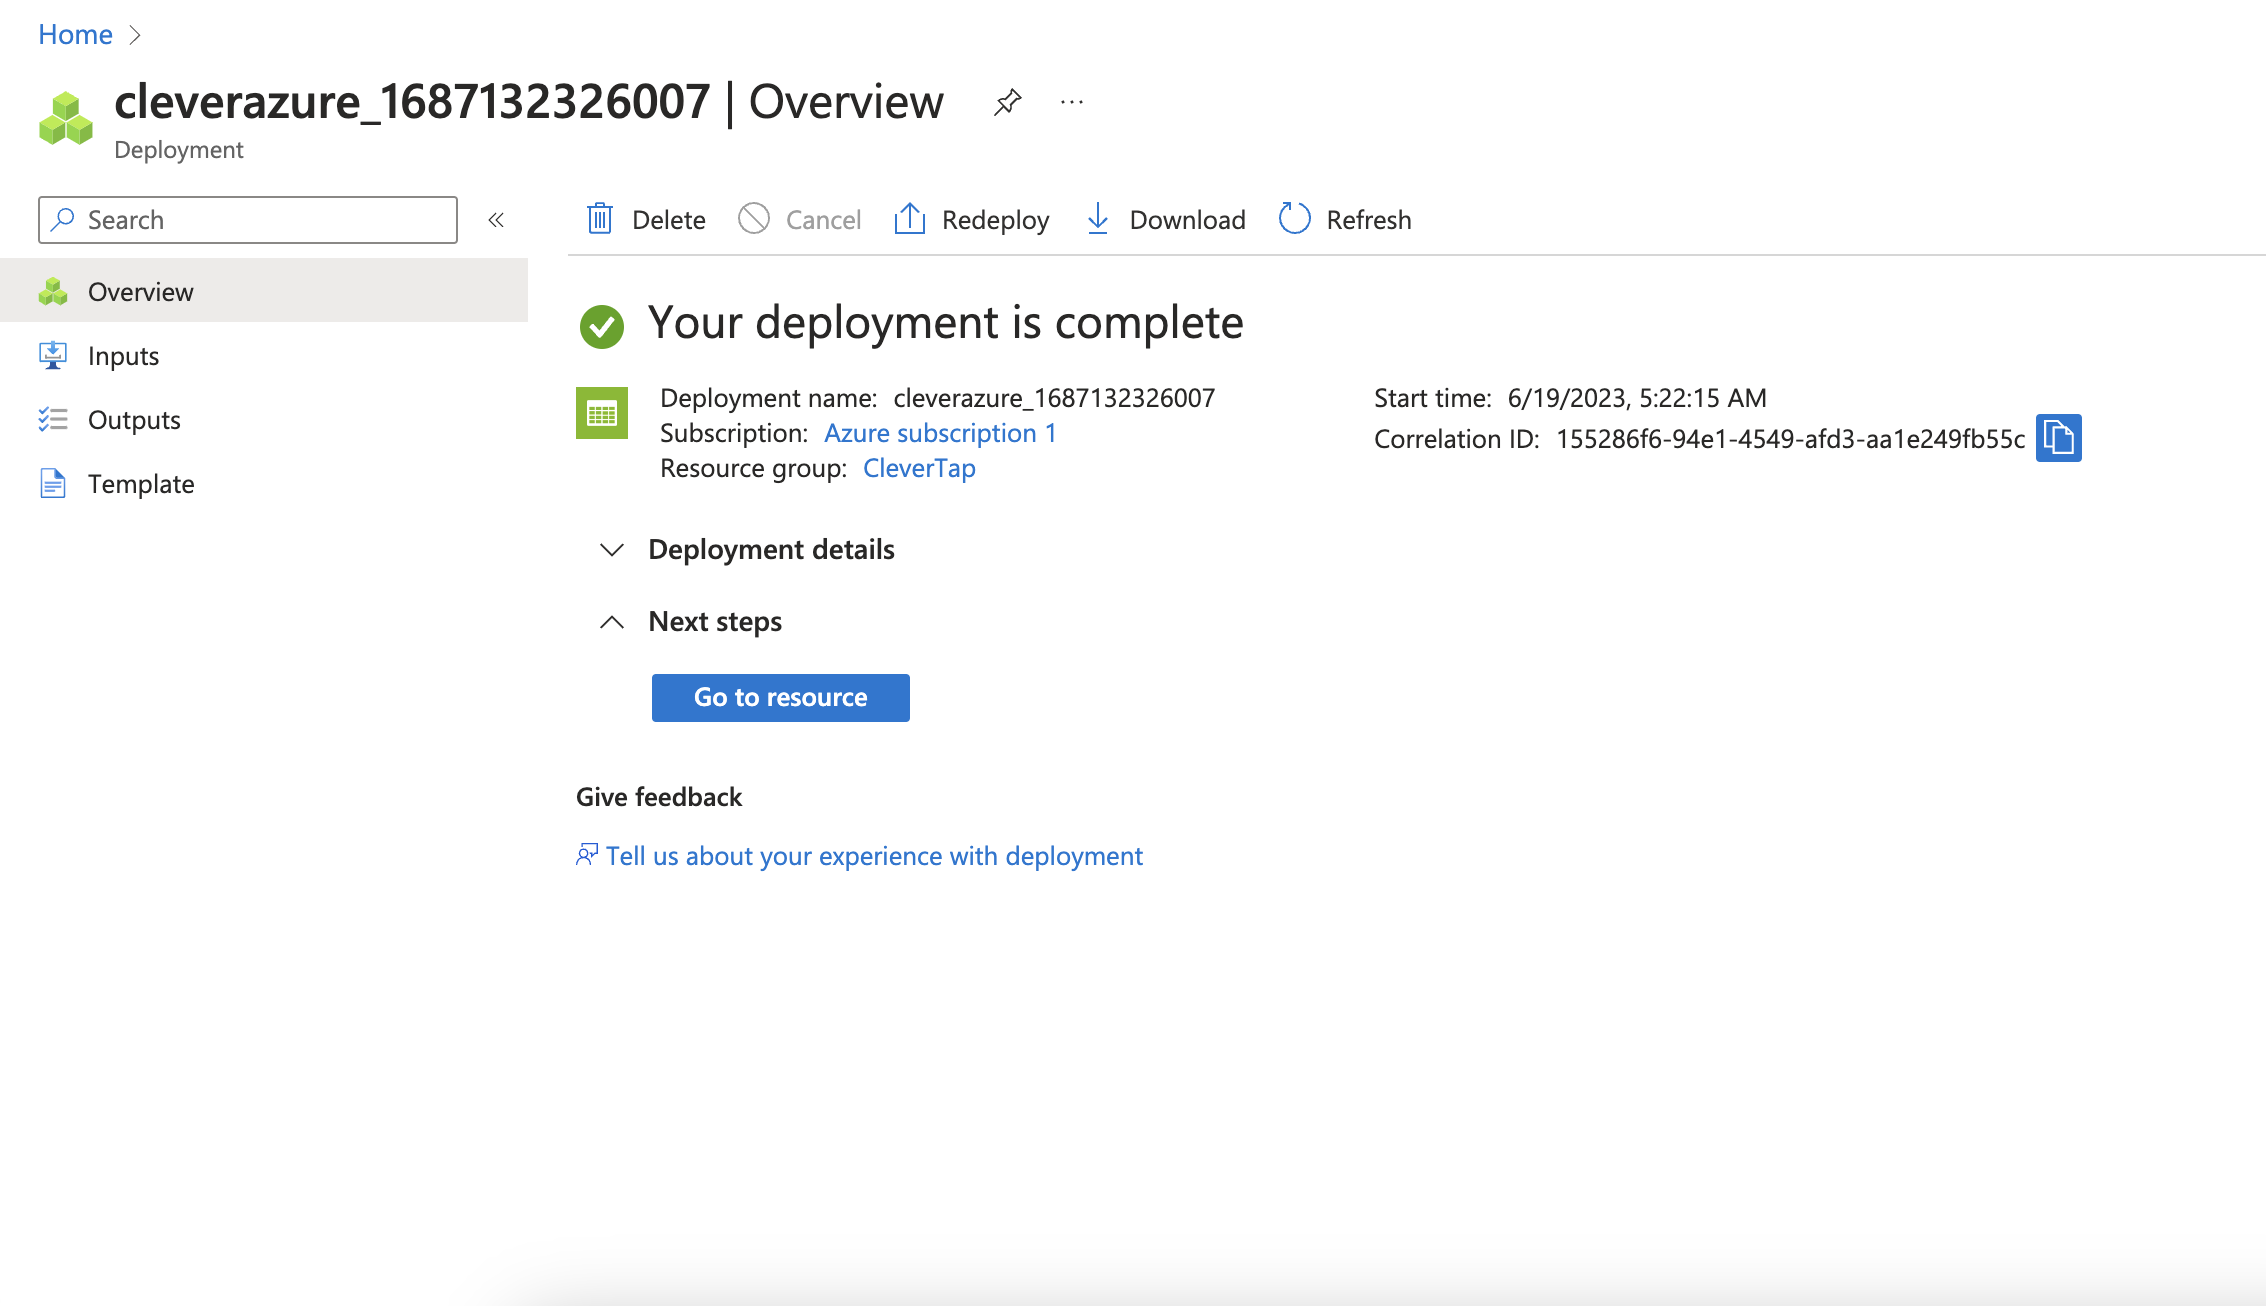
Storage Account Created Successfully
The storage account you created now appears under the Storage accounts page.
Create a Blob Service Container
To create a Blob Service Container:
- Navigate to the Blobs menu under the Blob Service section of your storage account.
- Create + Container to create a Blob Service Container within the storage account you created in the previous section.
Create a Blob Storage Container
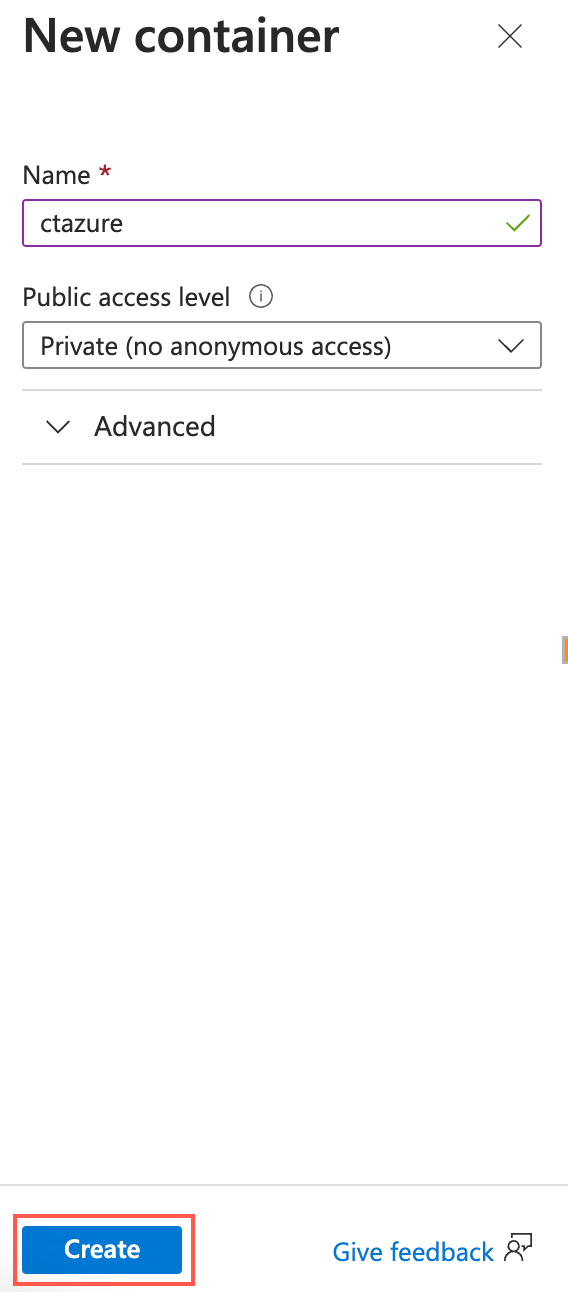
- Enter the Name of your Blob Service Container, and do not modify the other default settings.
- Click Create.
Generate a SAS Token
A Shared Access Signature (SAS) Token is a Uniform Resource Identifier (URI) that provides limited access to an Azure Storage container. It is used when you want to authorize access to storage account assets within a defined time frame while keeping your storage account key confidential. For more information about SAS, refer to Delegate access by using a SAS Token.
To generate a SAS Token:
- Select the Container and click the
 icon.
icon. - Select Generate SAS from the dropdown list. The Generate SAS window opens on the right side of the screen.
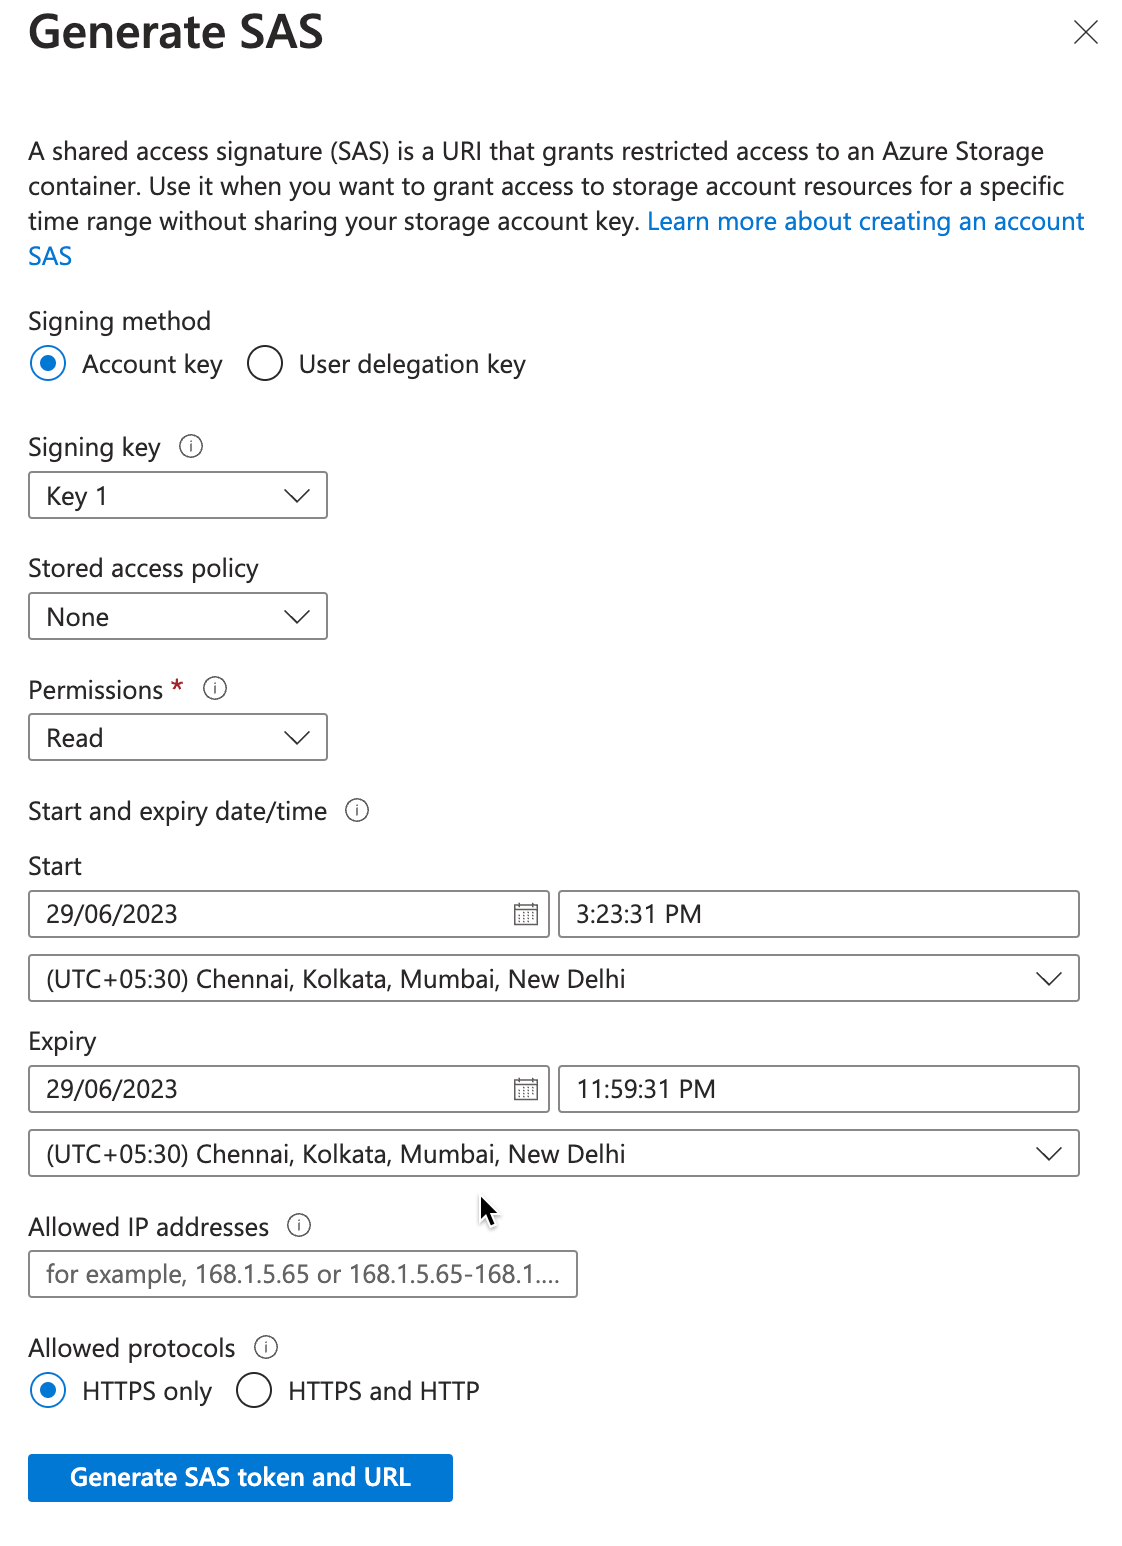
Generate SAS Popup
- Enter the following details:
| Field | Description |
|---|---|
| Signing method | Select Account key from the Signing method list. The Signing method provides secure delegated access to resources in your storage account. For more information, refer to Types of shared access signatures. |
| Signing key | Select any one key from the following options: |
| Stored access policy | Select the Stored access policy you want to define for your storage. When defining a policy, you need to define the following: start time, expiry time, and permissions for the signature. To export data from CleverTap to Microsoft Azure, you need Read and Write permissions for the container. When defined on a container, it grants permissions to the container itself or to the blobs that it contains. For more information, refer to Define a stored access policy. |
| Permissions | This is a mandatory field. Select the permission for the request made with the service SAS. To export data from CleverTap to Microsoft Azure, you need Read and Write permissions for the container. If you have already assigned the required permissions to your stored access policy, the same permissions will be assigned to the request made with the service SAS. For more information, refer to Account SAS Permissions by Operation. |
| Start and expiry date/time | Indicates the start and end date/time during which the blob SAS is valid. CleverTap recommends setting the expiration time to the maximum duration available. This is because you cannot export any data to the container if the expiration date has passed. For more information, refer to Configure a SAS Expiration Policy. |
| Allowed IP address | CleverTap recommends not adding any IP address range in this field. It indicates that Microsoft will accept export requests only from the IP address or range of IP addresses defined under this field. If you still want to add the IP address(es), you must whitelist the IP addresses listed under CleverTap IP Ranges. |
| Allowed protocols | Allowing requests over HTTPS only is recommended. This field indicates the protocols permitted for a request made with the service SAS. |
- Click Generate SAS token and URL.
Copy the generated SAS token and URL, as you cannot access it later.
Configure Microsoft Azure Blob Container on CleverTap Dashboard
To add your Microsoft Azure Blob Container to Clevertap:
- Navigate to Settings > Partners and click Integrate against Mircosoft Azure. The Integrate analytics partner - Microsoft Azure window displays on the right side of the screen.
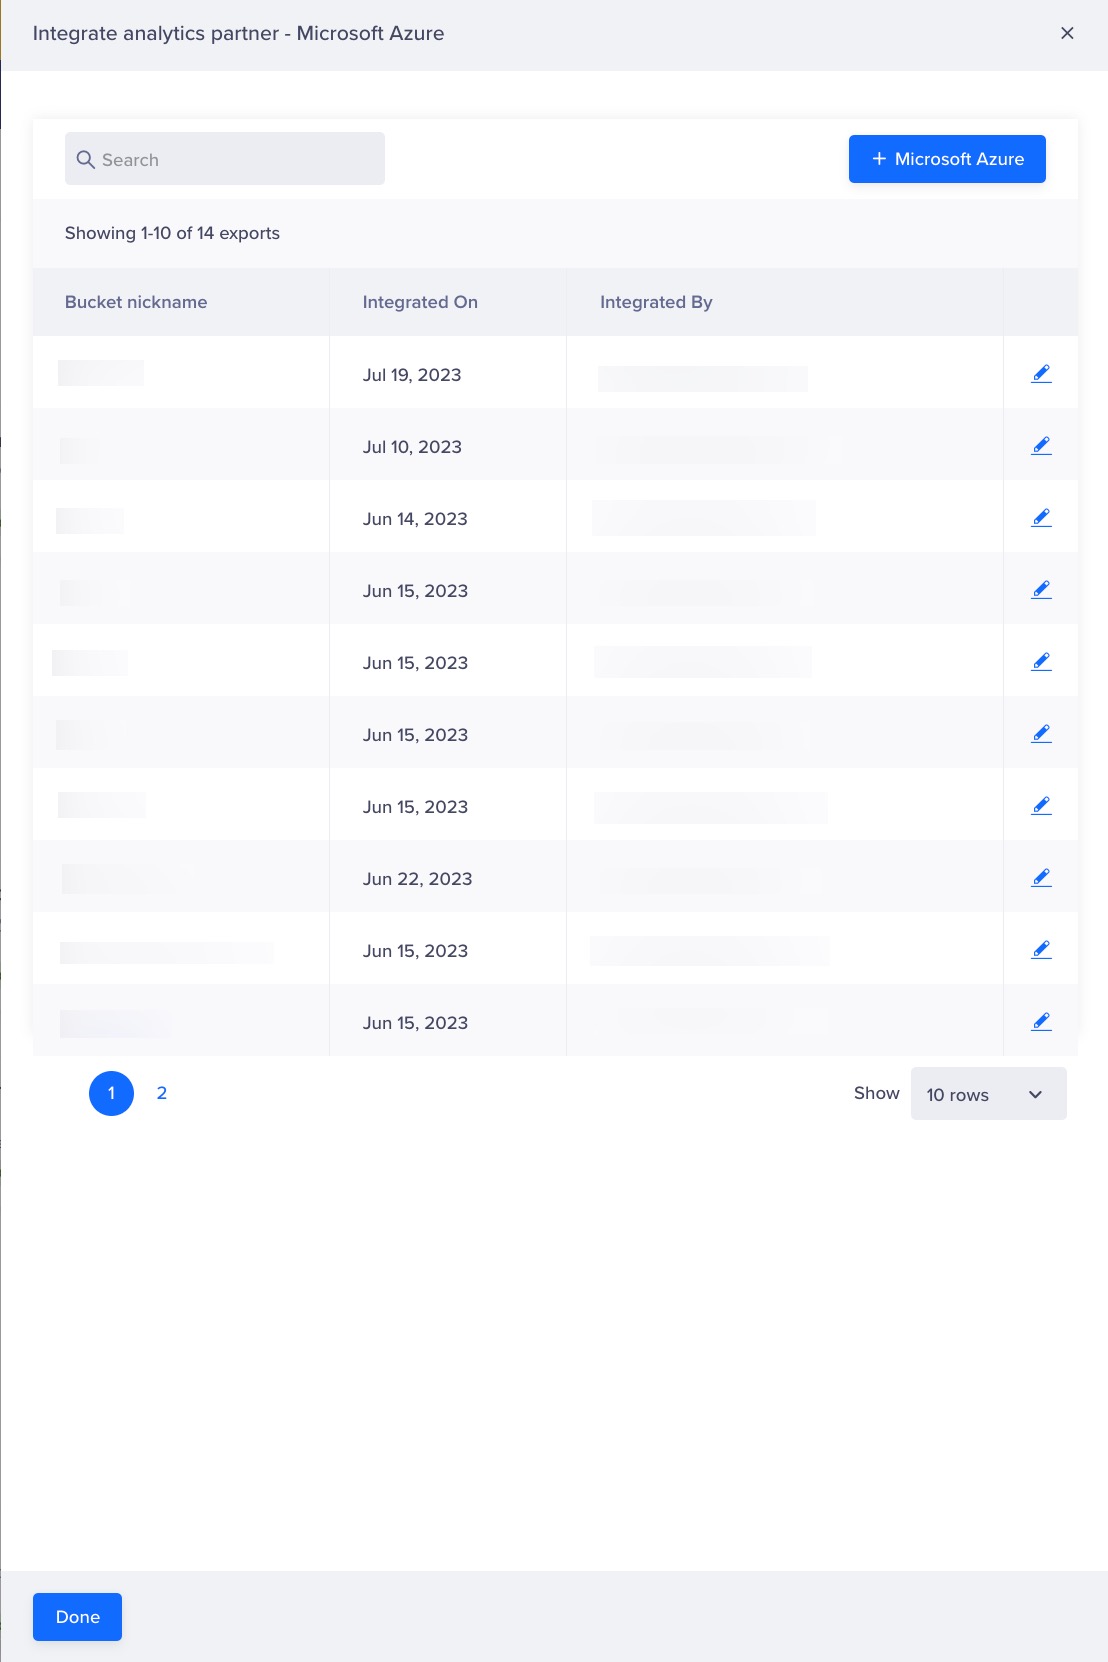
Integrate analytics partner - Microsoft Azure
- Click + Microsoft Azure to create a new bucket. The Integrate Microsoft Azure Bucket window opens on the right side of the screen.
- Enter the Bucket Nickname.
- Select the Azure Blob Storage Endpoint.
- Default: Enter the Blob Storage Account name.
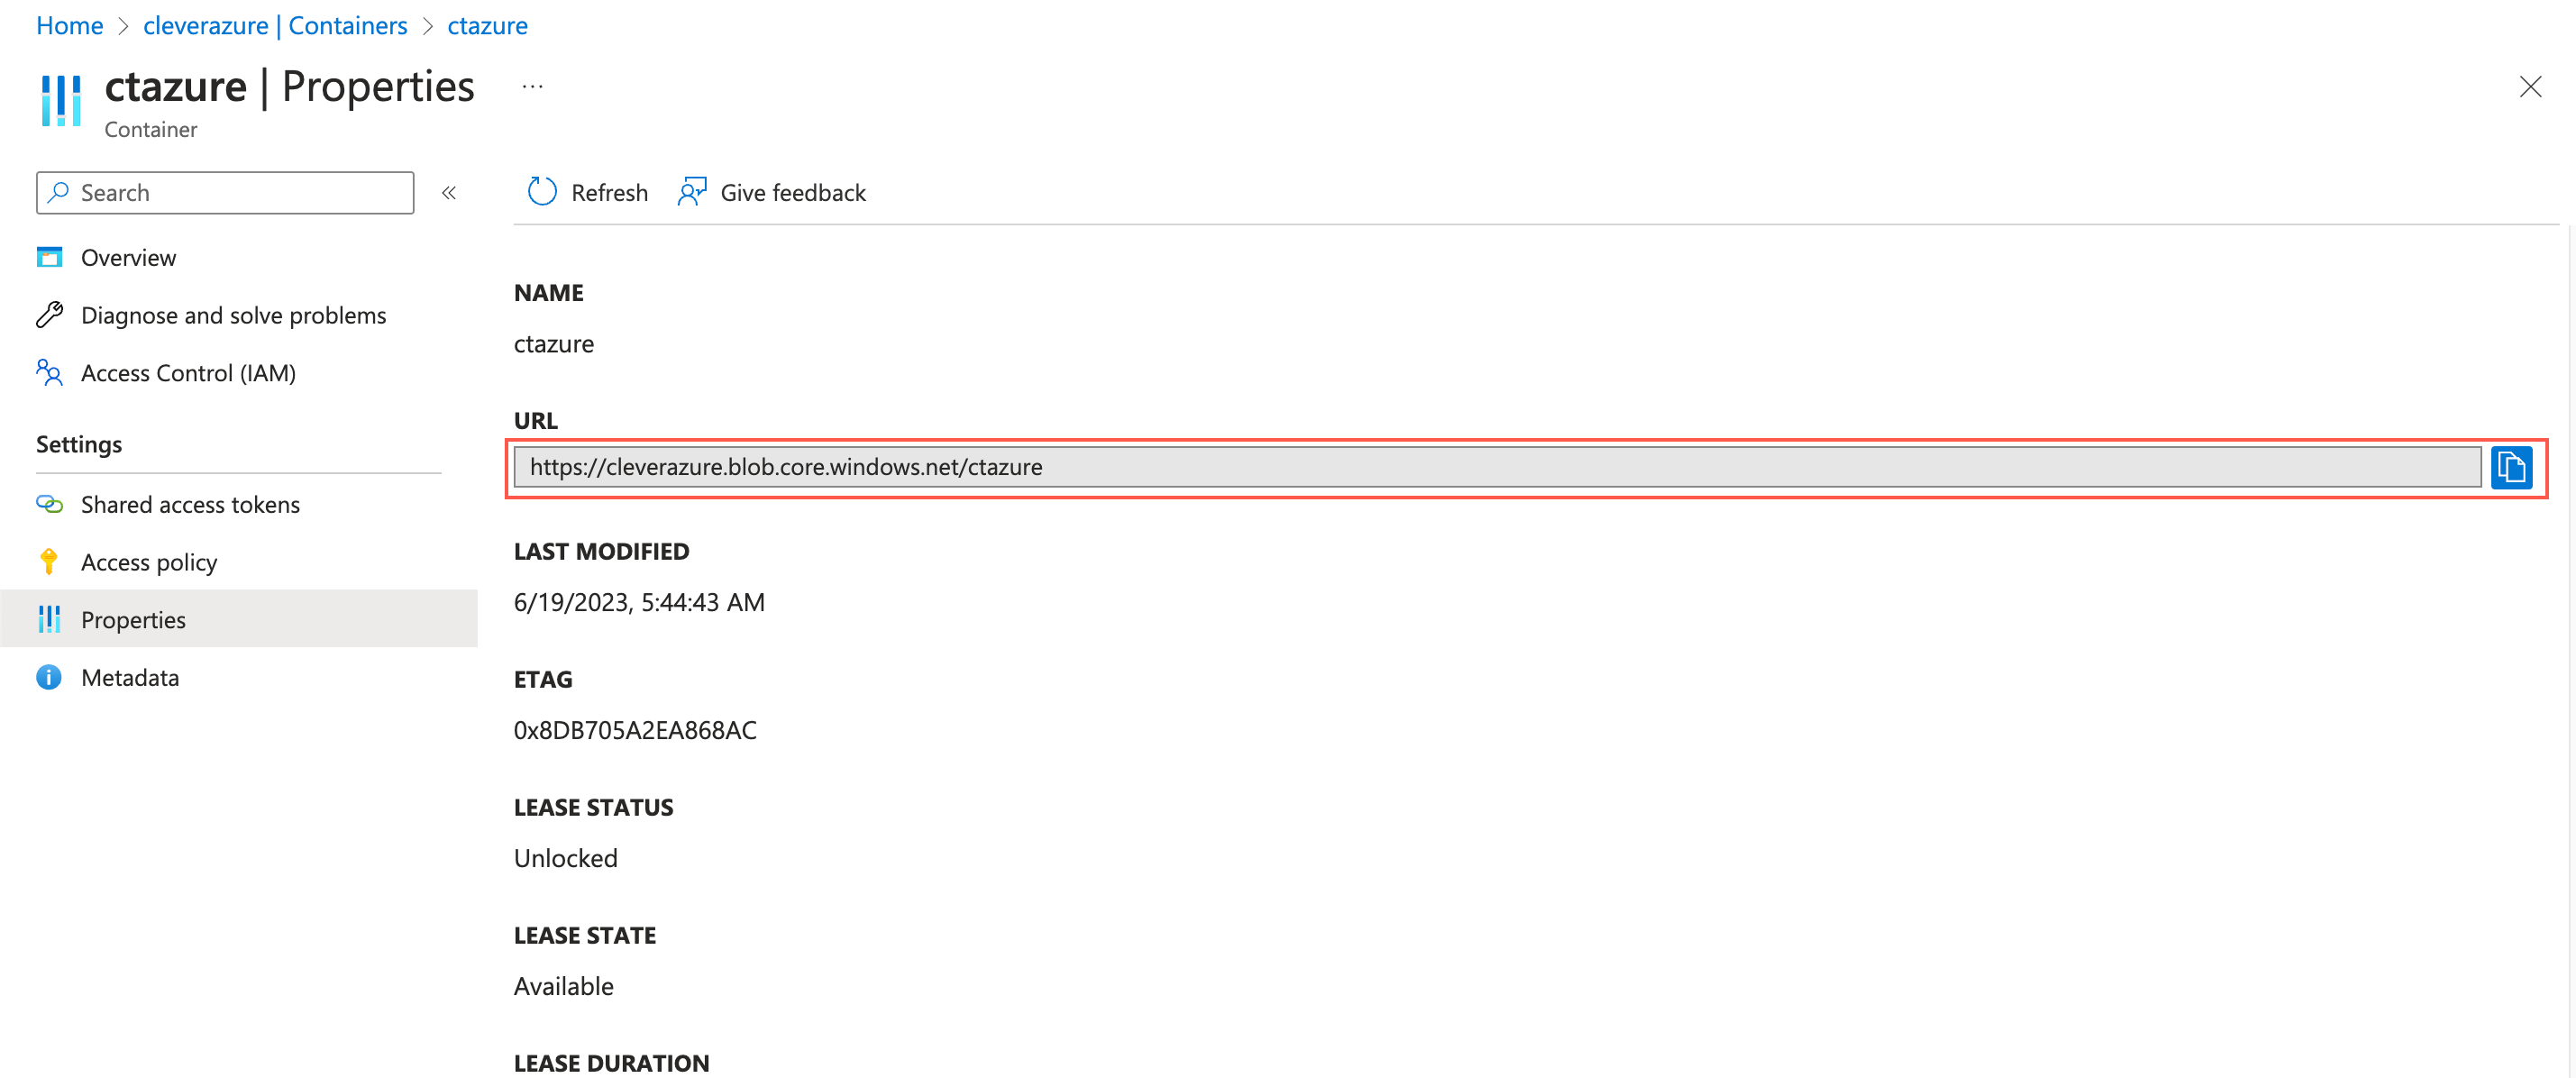
Default Blob Storage Account on Microsoft Azure Portal
- Custom: Add a custom domain mapped to your Azure Blob Storage Endpoint. For more information about defining a custom endpoint, refer to Map a Custom Domain.
- Enter the container name that stores data on Azure and the SAS token we obtained in Step 4 of the Generate a SAS Token section.
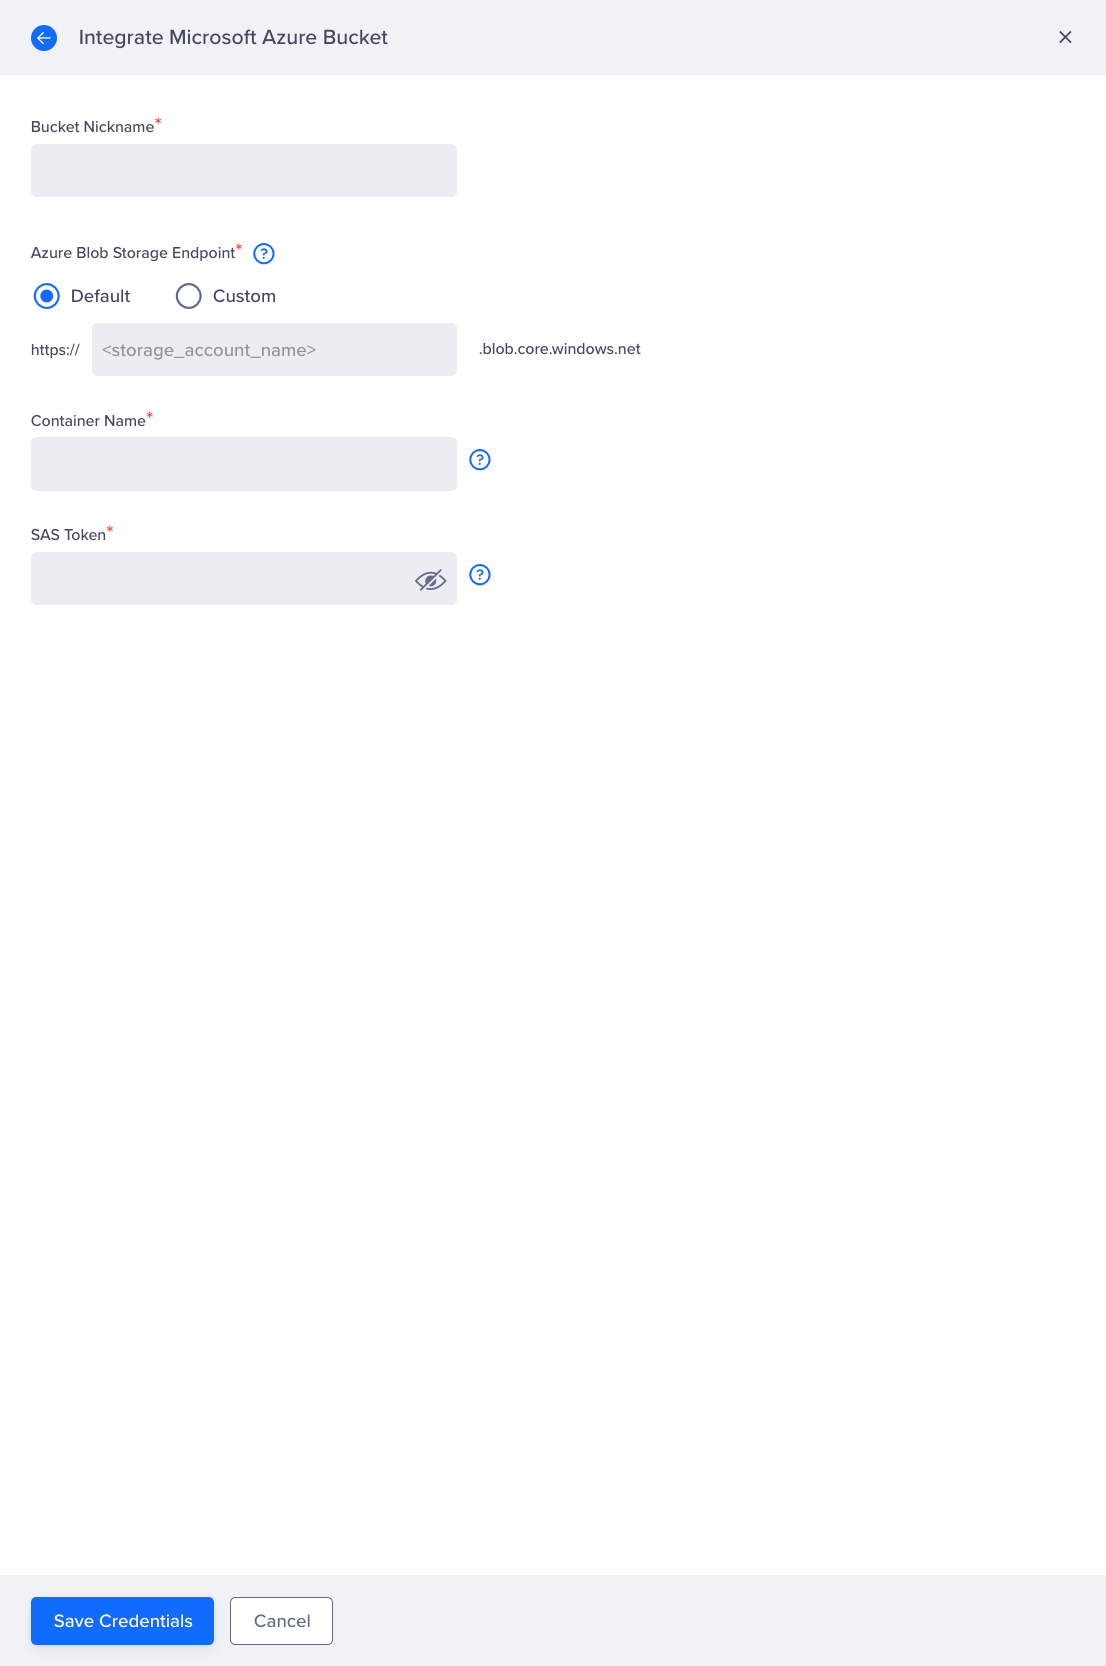
Integrate Microsoft Azure Bucket
Updated 6 months ago