Google Cloud Platform (GCP)
Data Warehousing and Analytics Platform
Overview
The GCP Export feature enables you to bulk export your CleverTap event or profile data to a GCP bucket. You can export your CleverTap data to analyze it with Business Intelligence (BI) tools or store it in your data warehouse for future analysis.
Feature AvailabilityThis capability is a part of the Enterprise, Advanced, and Cutting Edge plan. To activate this for your account, contact your Account Manager.
Integrate GCP with CleverTap
The integration involves the following steps:
Data ExportOnce you have set up both dashboards, you can configure export from the CleverTap dashboard. For more information, refer to the following:
- Data Exports for Legacy Profile and Event Export flow
- Profile Exports for Enhanced Profile Export flow
Create a Service Account for your Project
To create a service account, perform the following steps:
- Log in to your GCP account and select the project where you want to export your CleverTap data. Create a new project if you do not already have one.
- From the left panel, select IAM and then navigate to Admin > Service Accounts.
- Create a new Service Account linked to the selected project and enter the Service account name and description, respectively.
This is the account that you will use to authenticate and authorize CleverTap to upload exports to your GCP project.
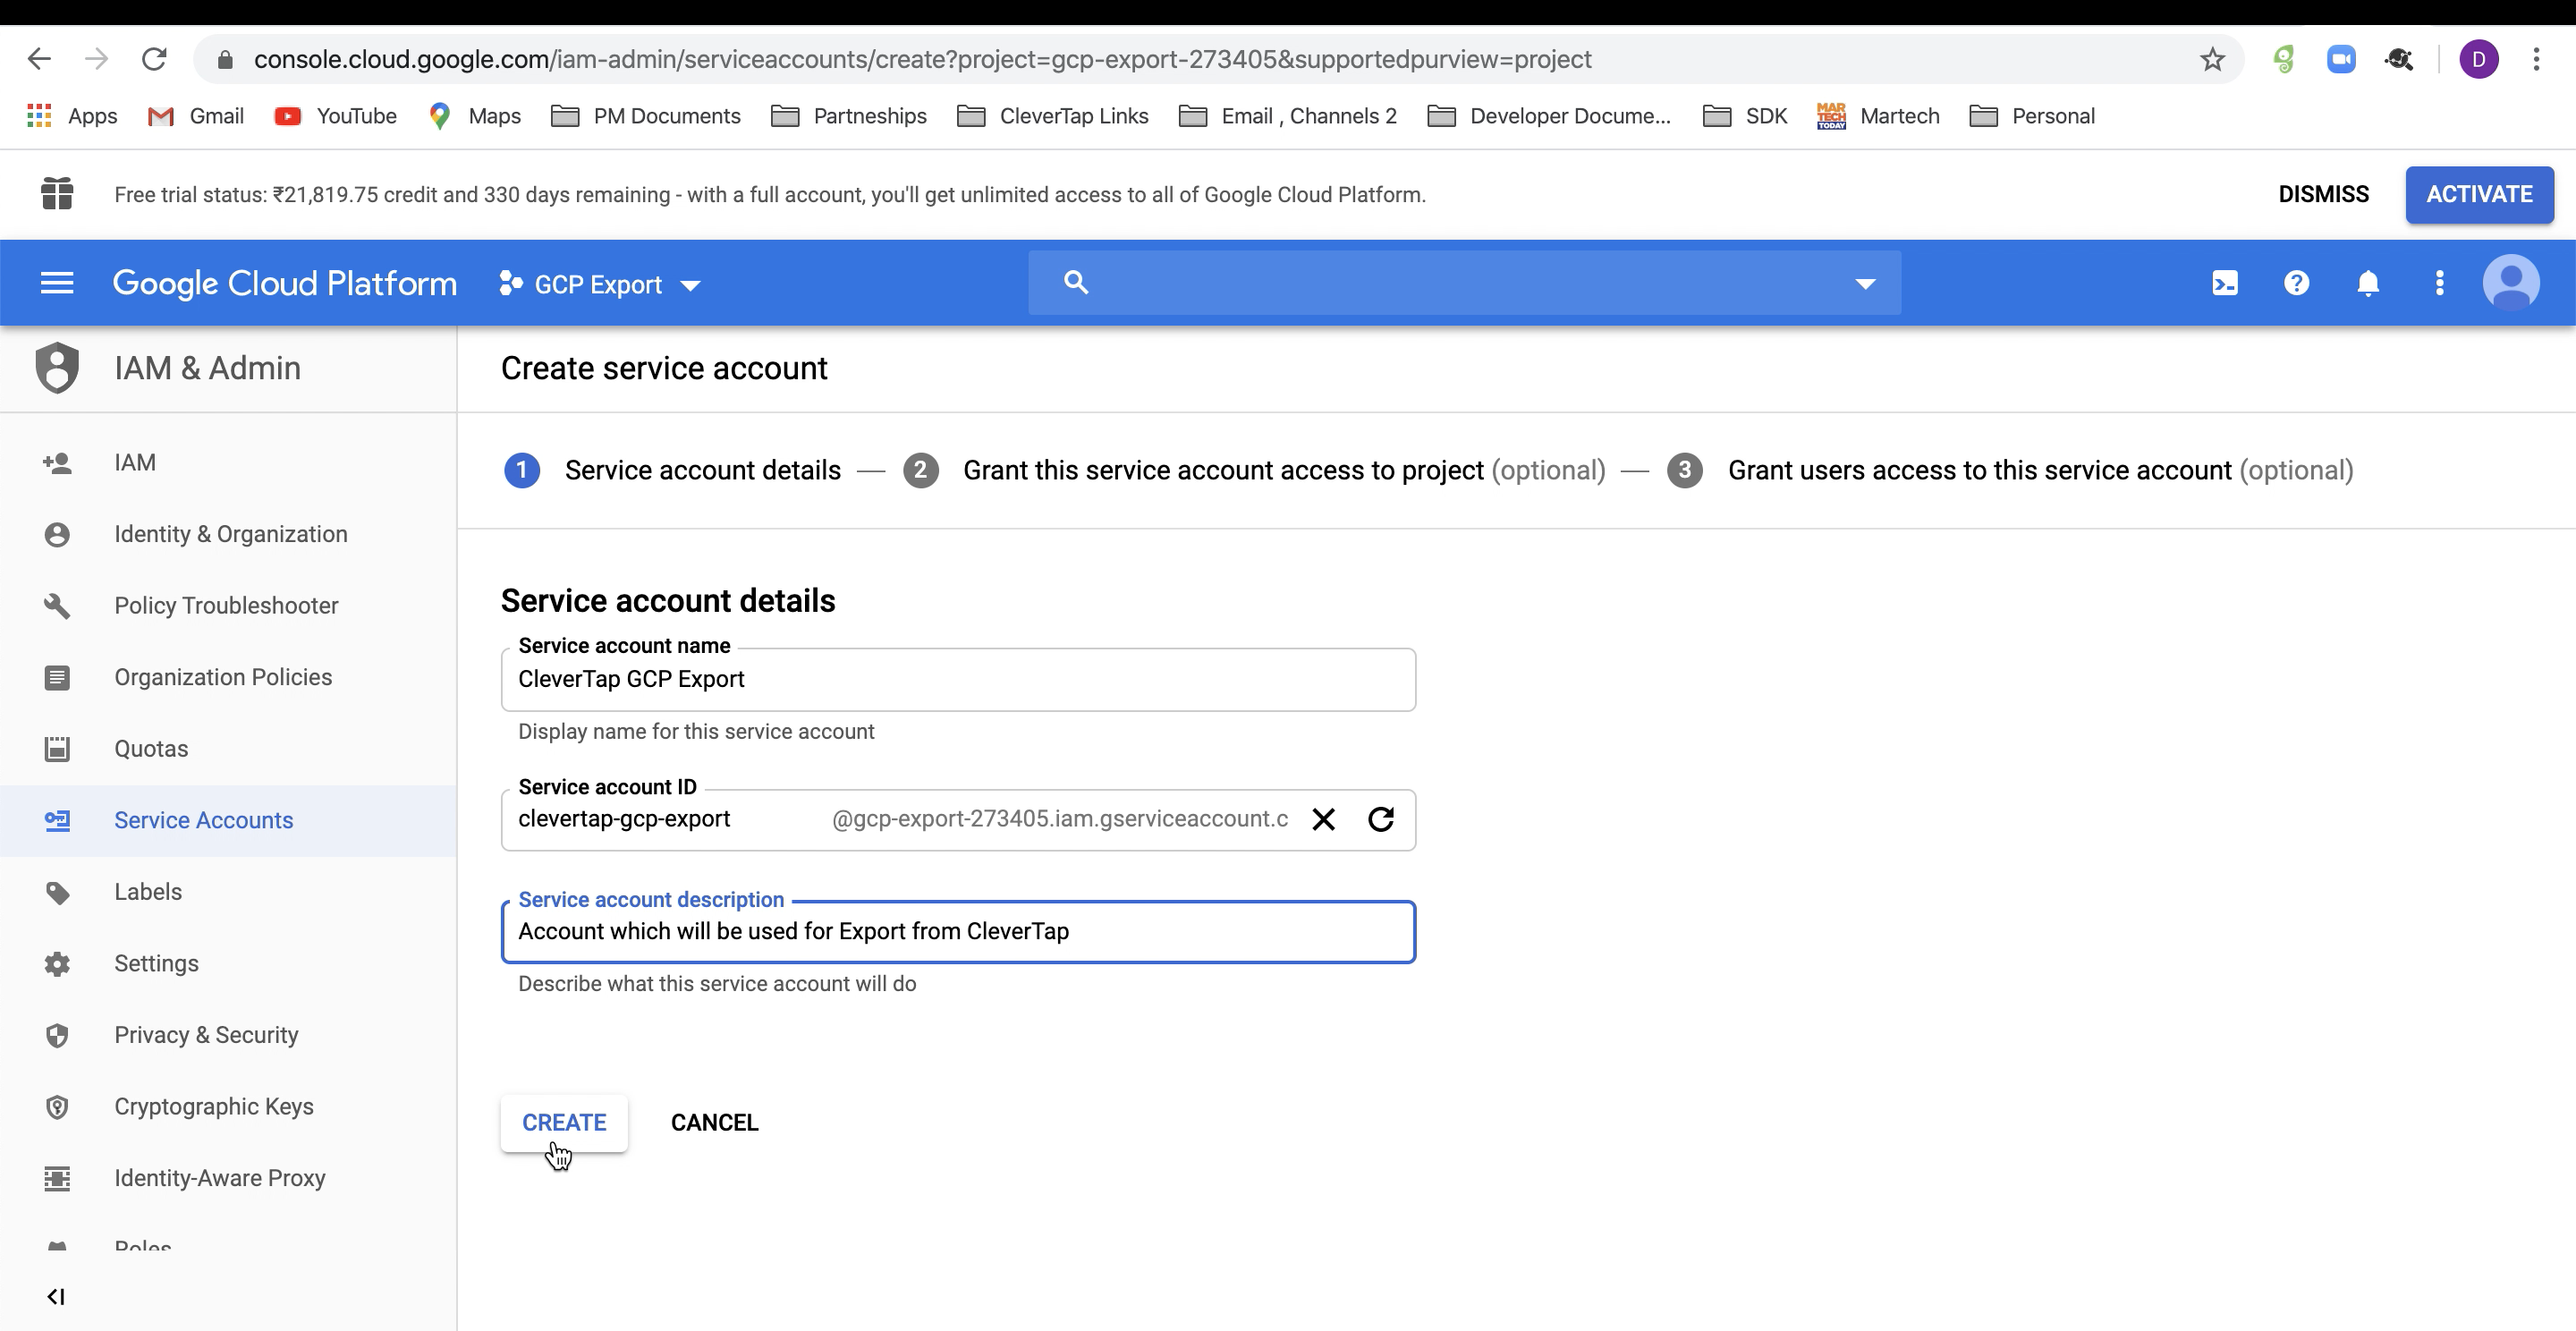
Create a New Service Account
- Navigate to Permissions > Storage Admin and continue.
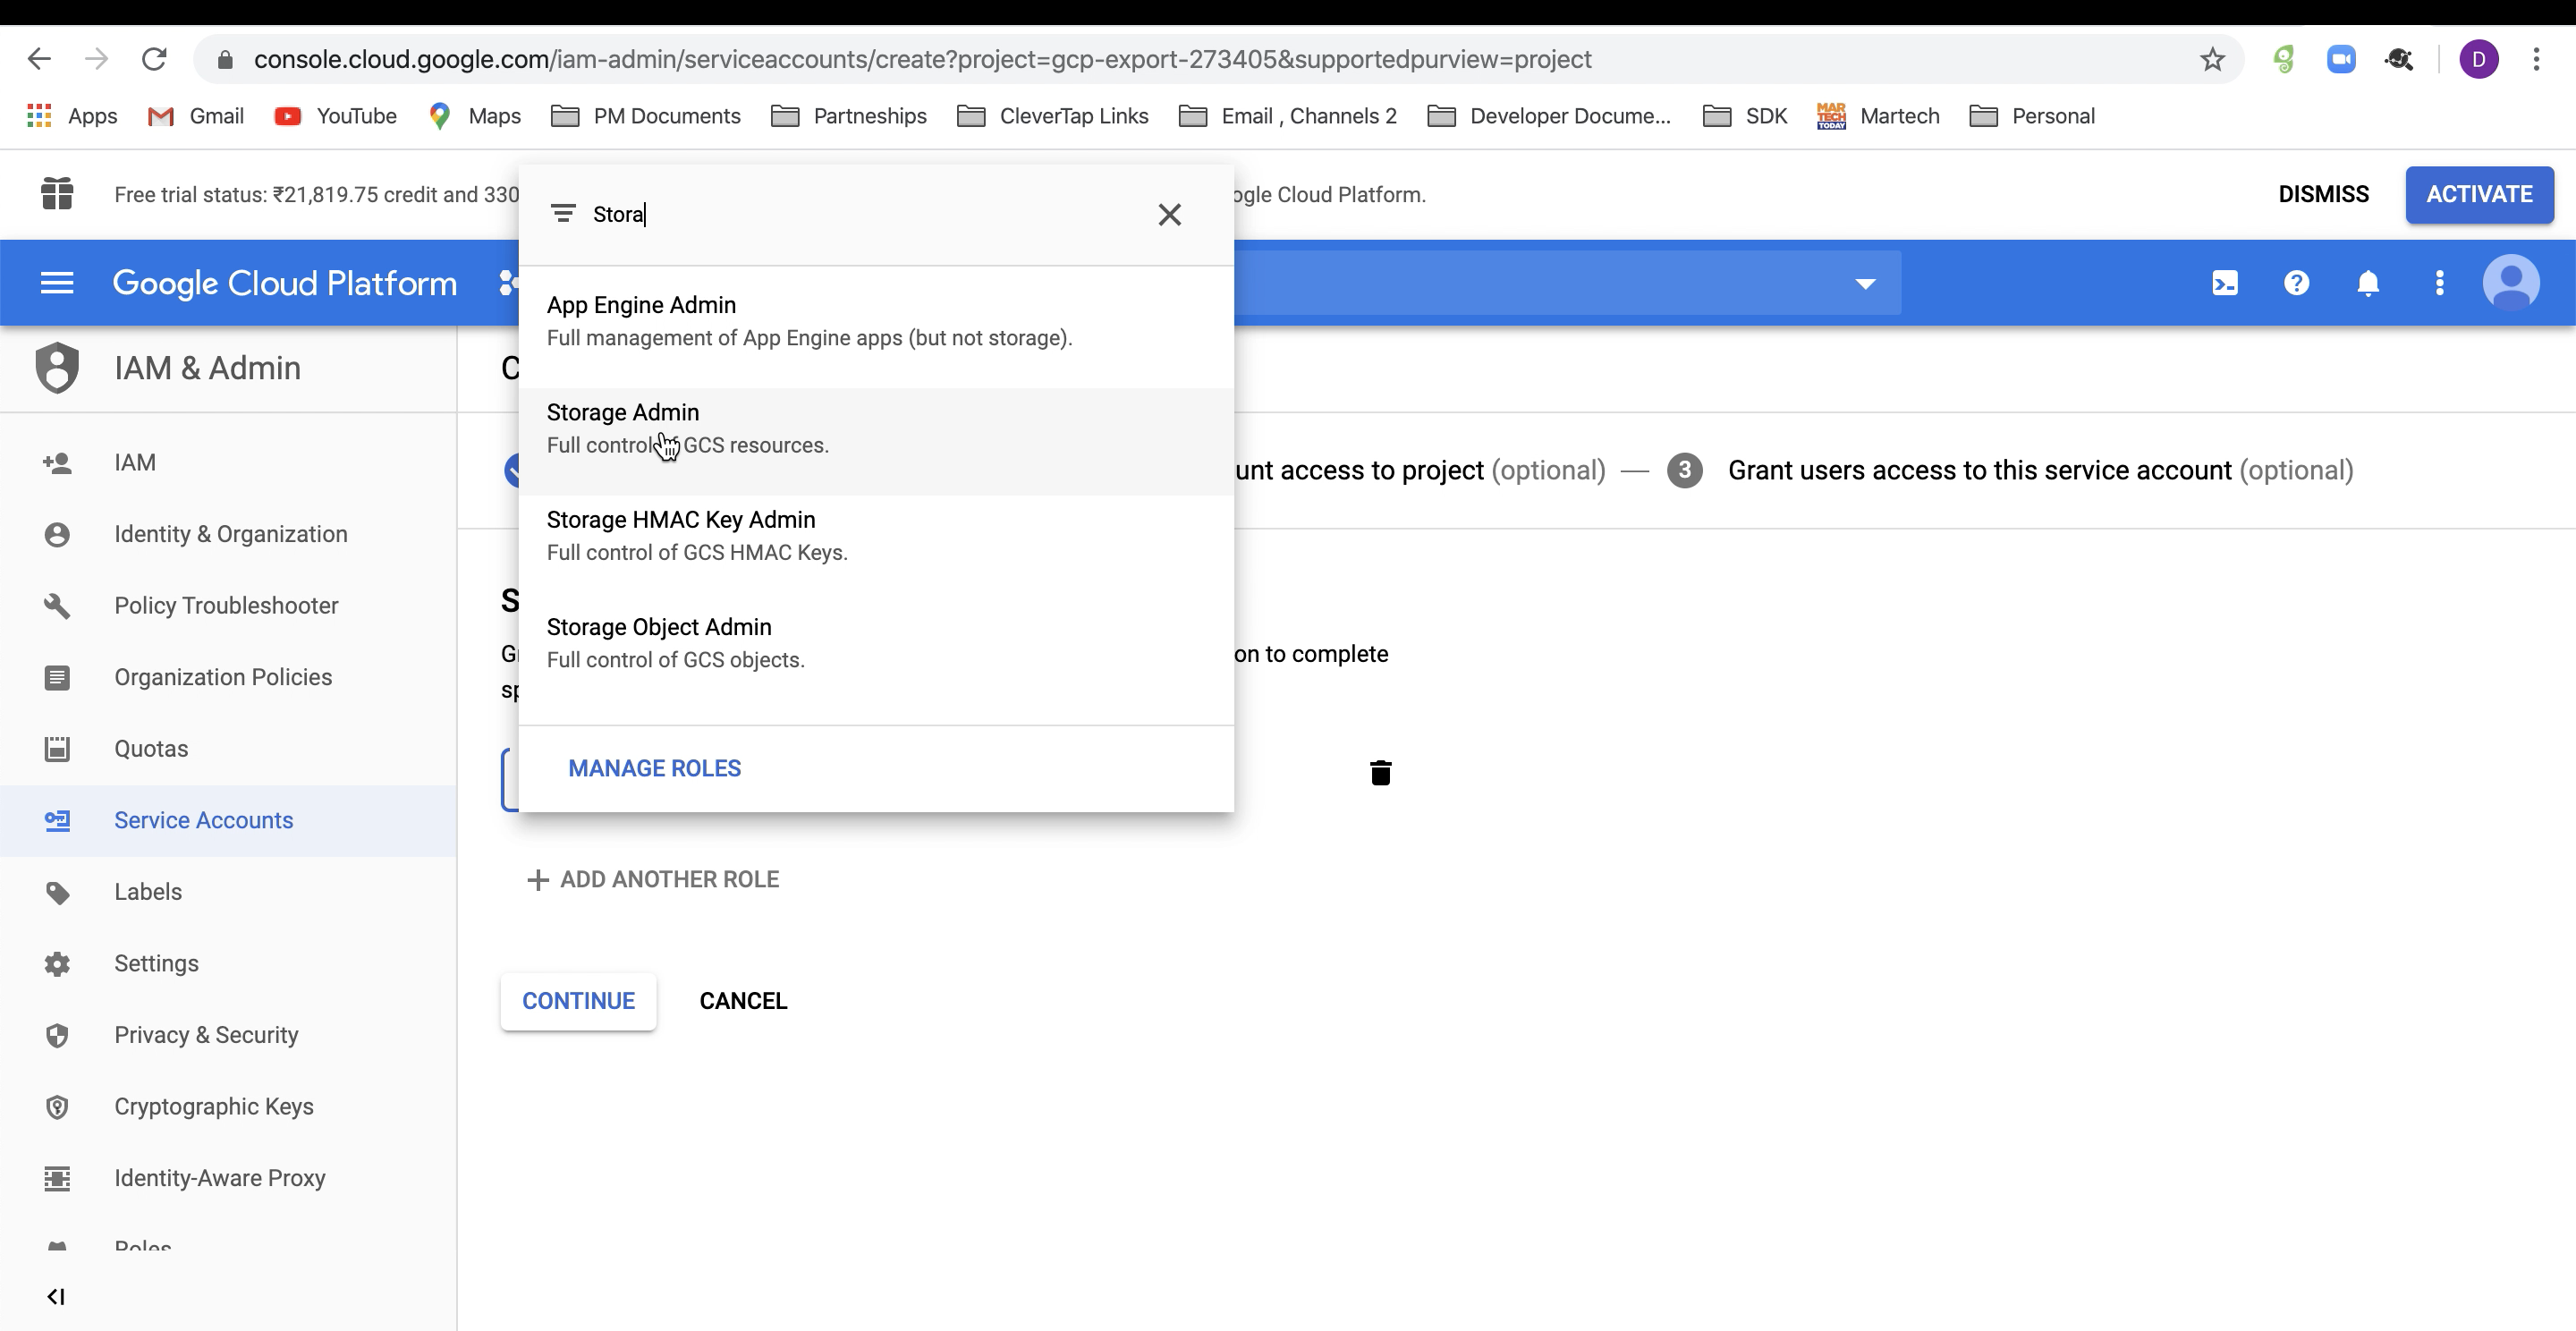
Navigate to Storage Admin
- Click + Create Key and select JSON for the Service account.
The JSON key downloads to your machine automatically. Save this key, as you will need to upload it to the CleverTap dashboard later.
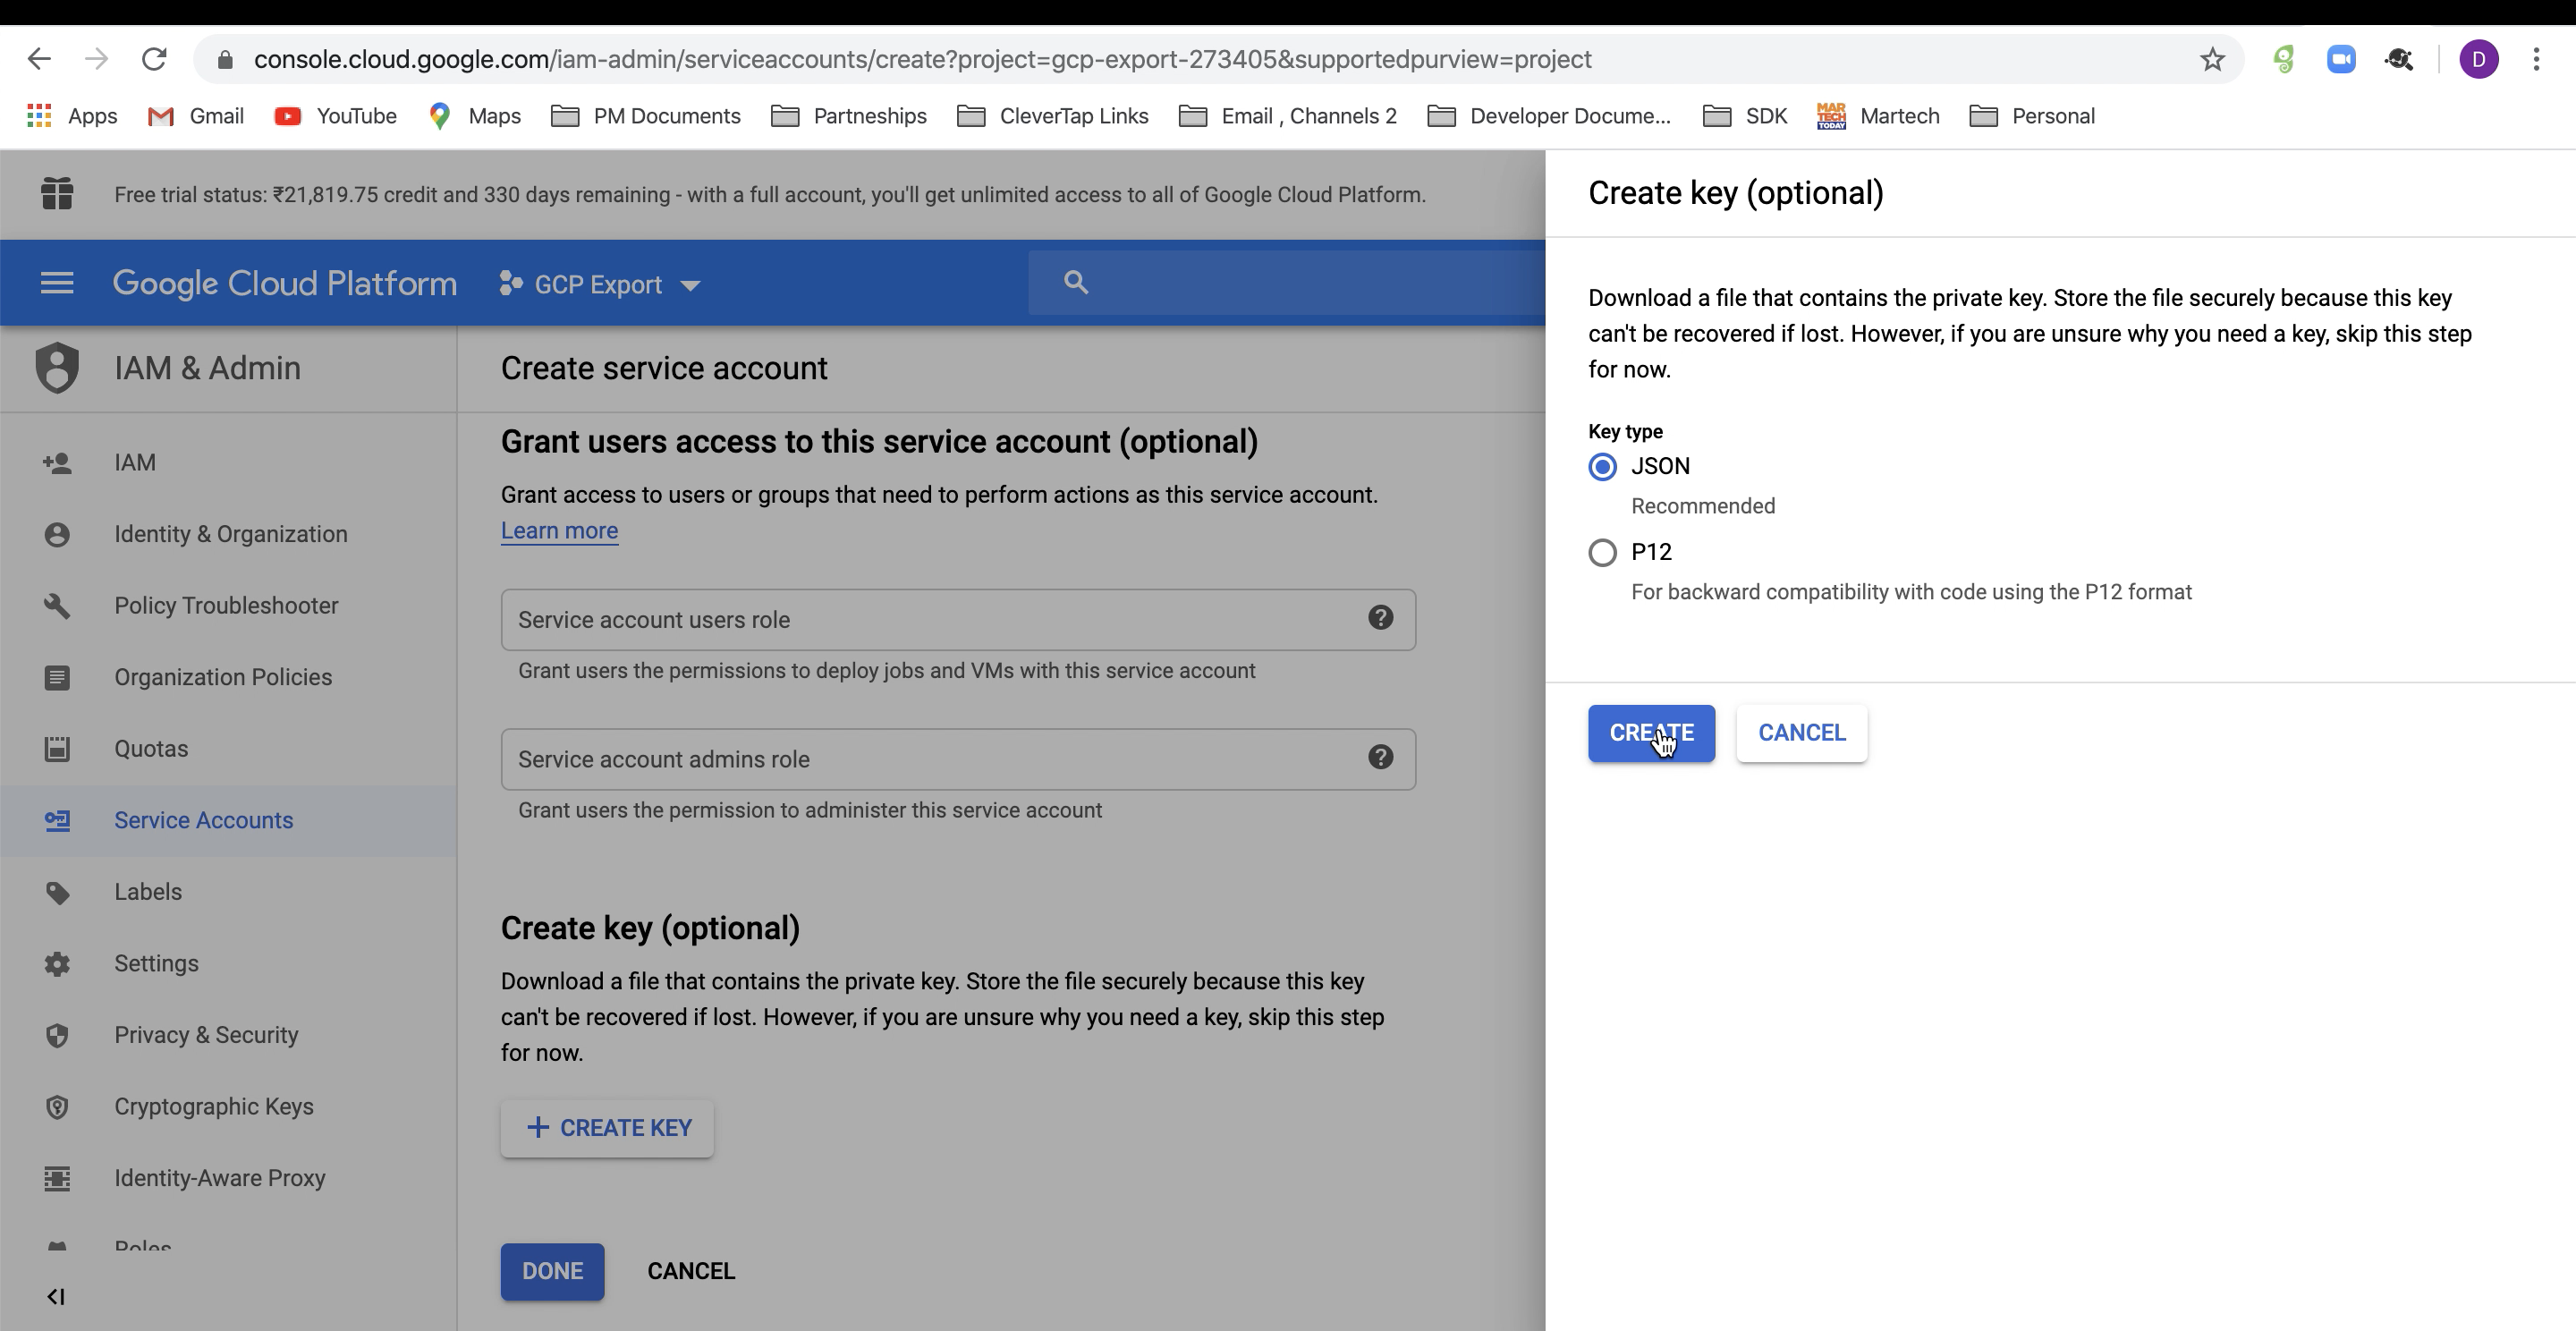
Create Key
Create a Bucket
Create a bucket to store the export files from CleverTap. To do so, perform the following steps:
- From the left navigation, go to Storage and click Create Bucket.
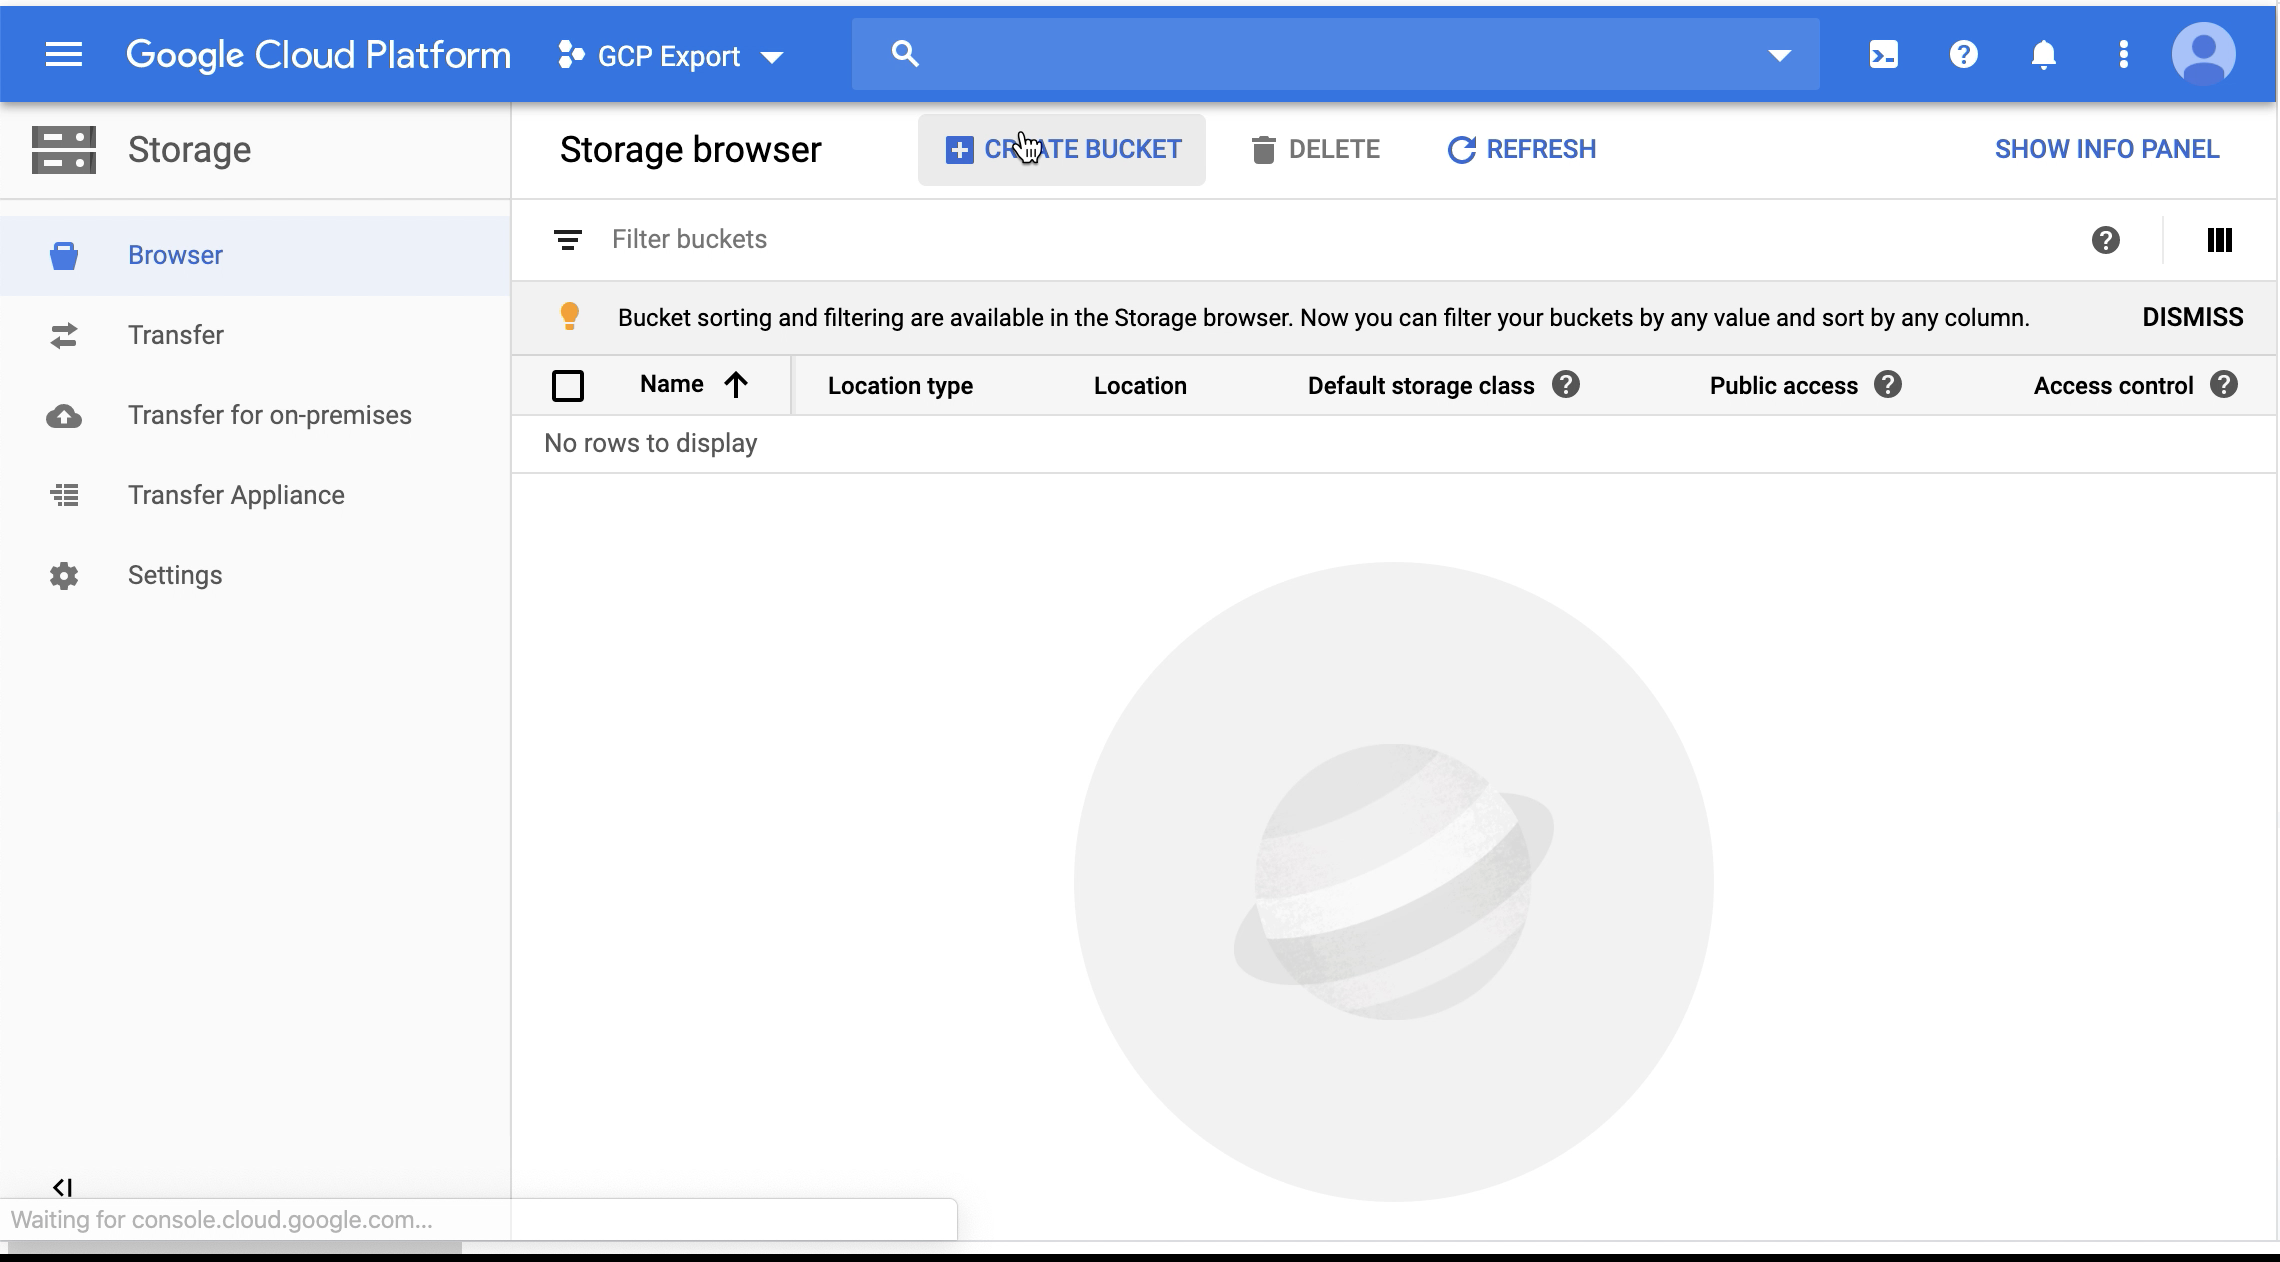
Navigate to Storage Browser from GCP Dashboard
On clicking, Create a bucket page opens.
- Name your bucket and fill in the other details as per your requirements.
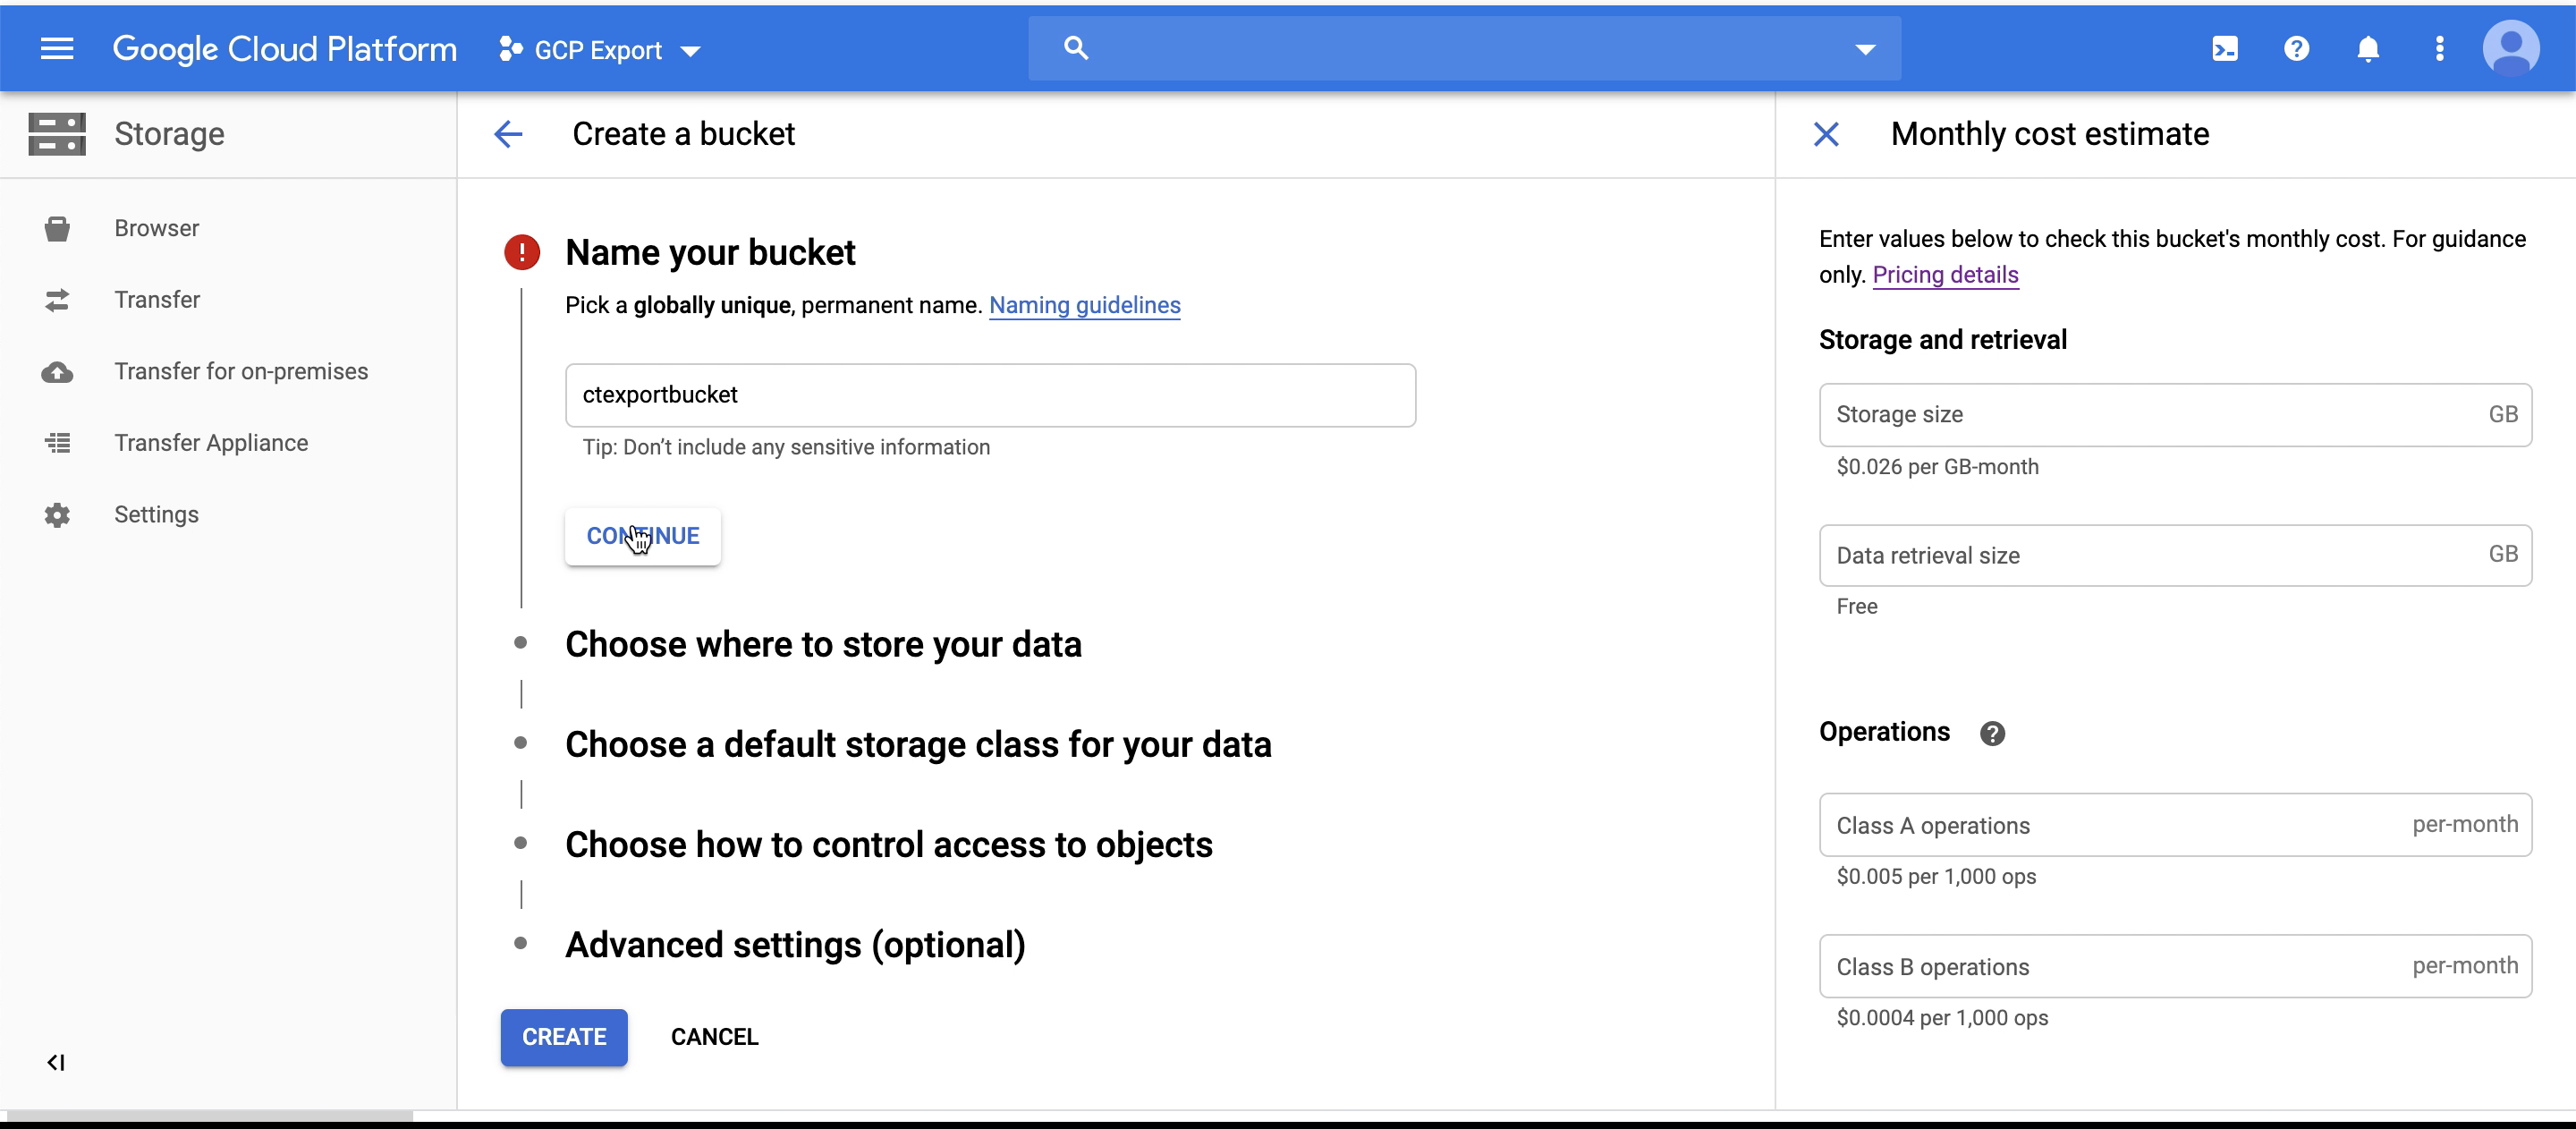
Enter your Bucket Details and Create a Bucket
- Click Create. Following is an image for a successfully created bucket:
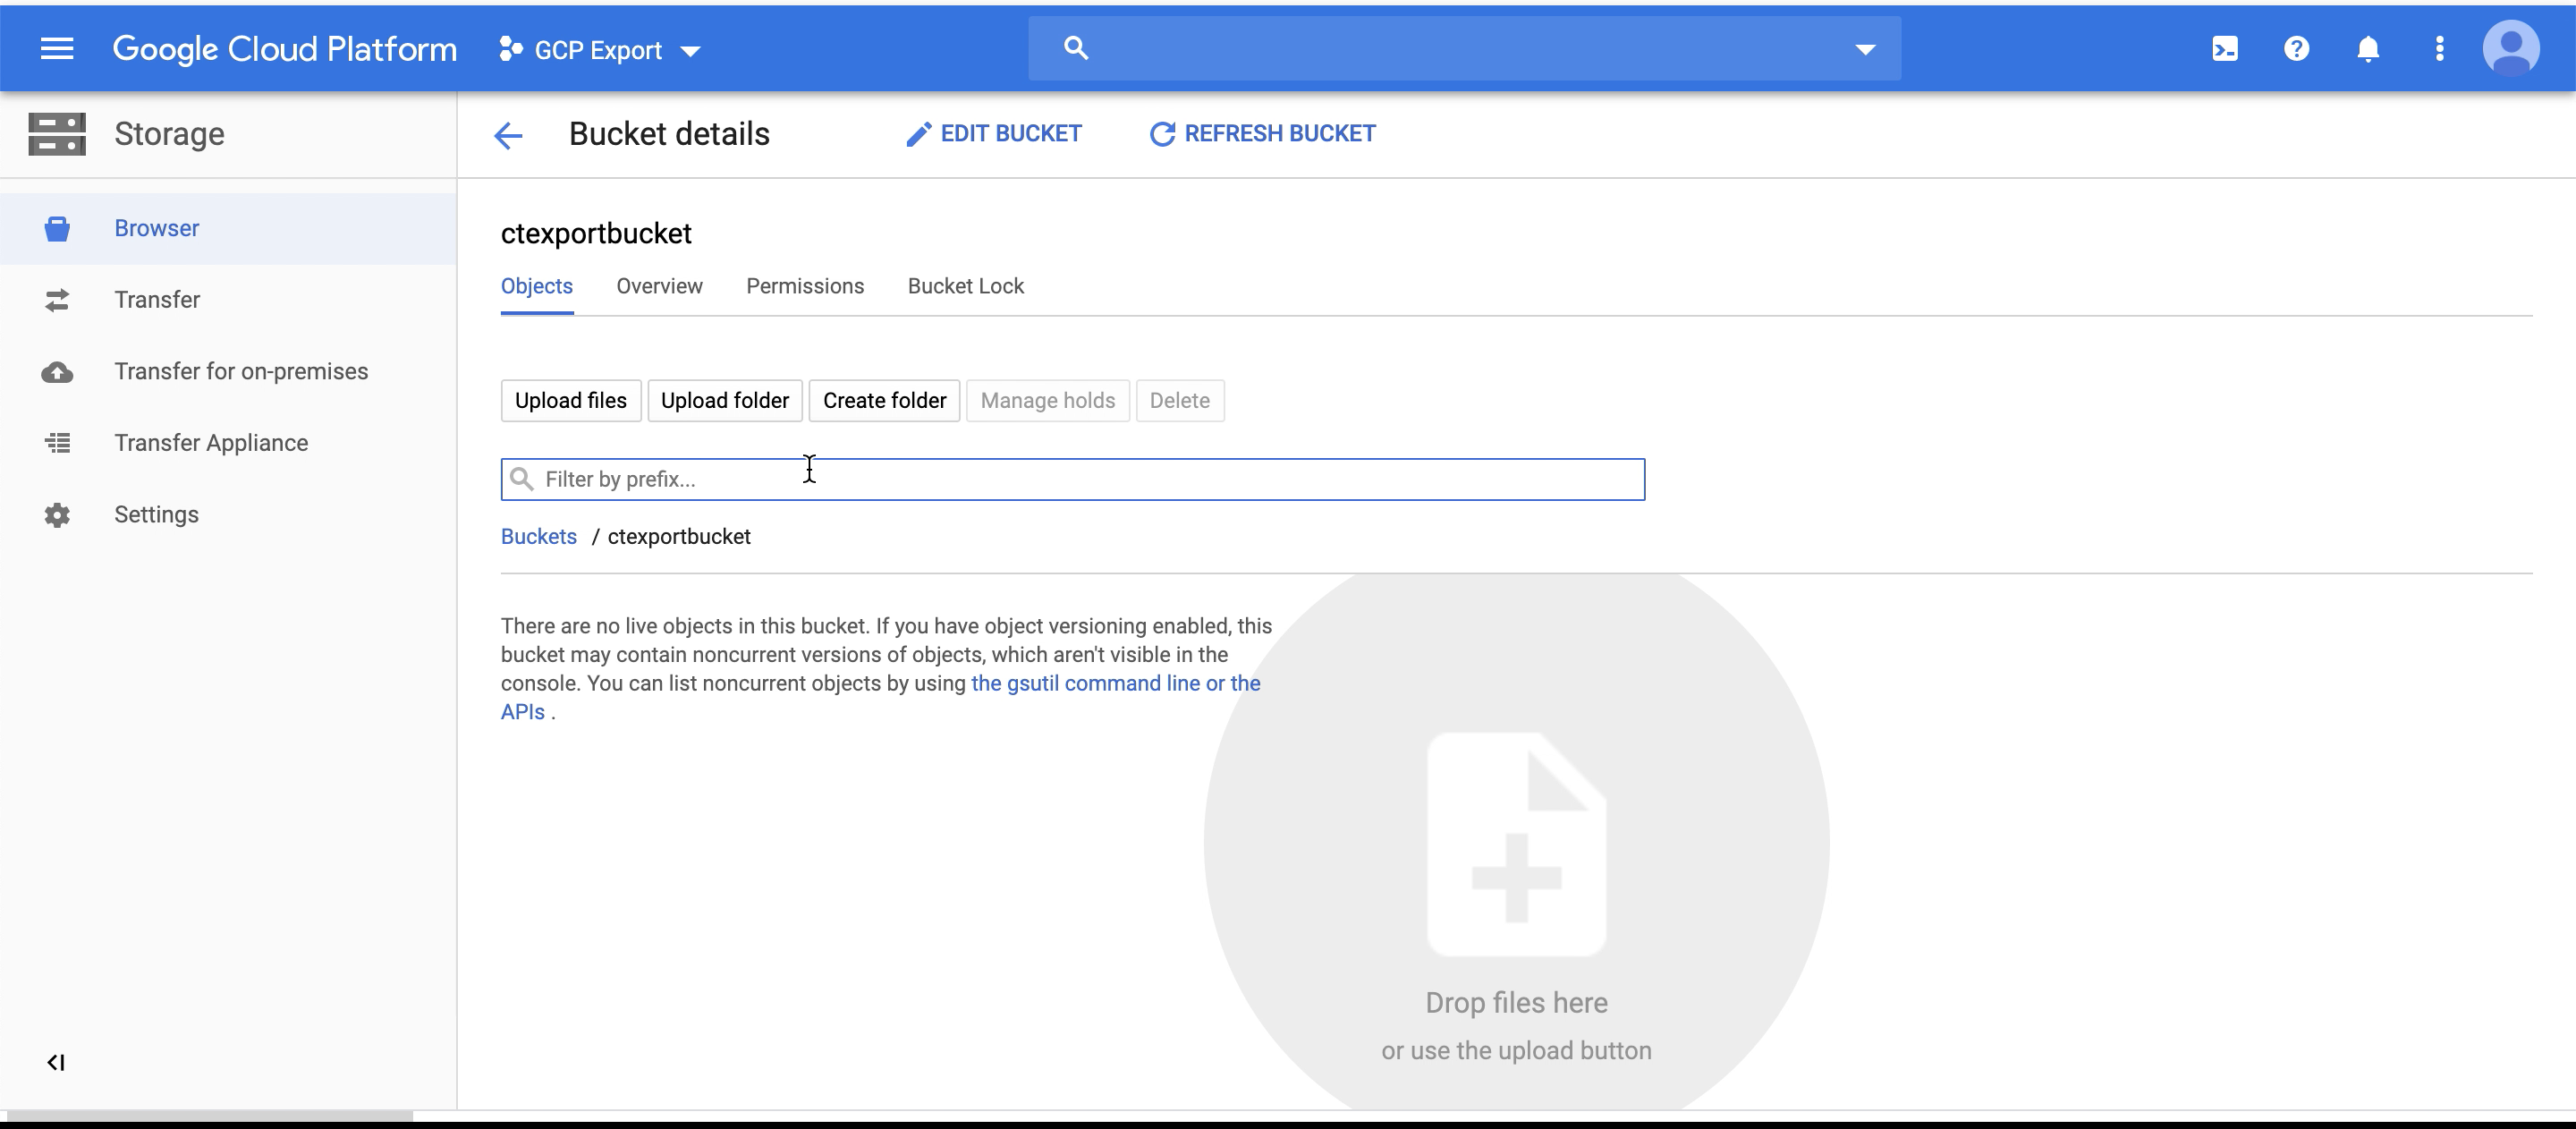
Bucket Created Successfully
Configure CleverTap Dashboard
Add the Service account credentials (created in Step 1 and bucket name to CleverTap. To configure the dashboard:
- Go to Settings > Partners > Integrations from the CleverTap dashboard.
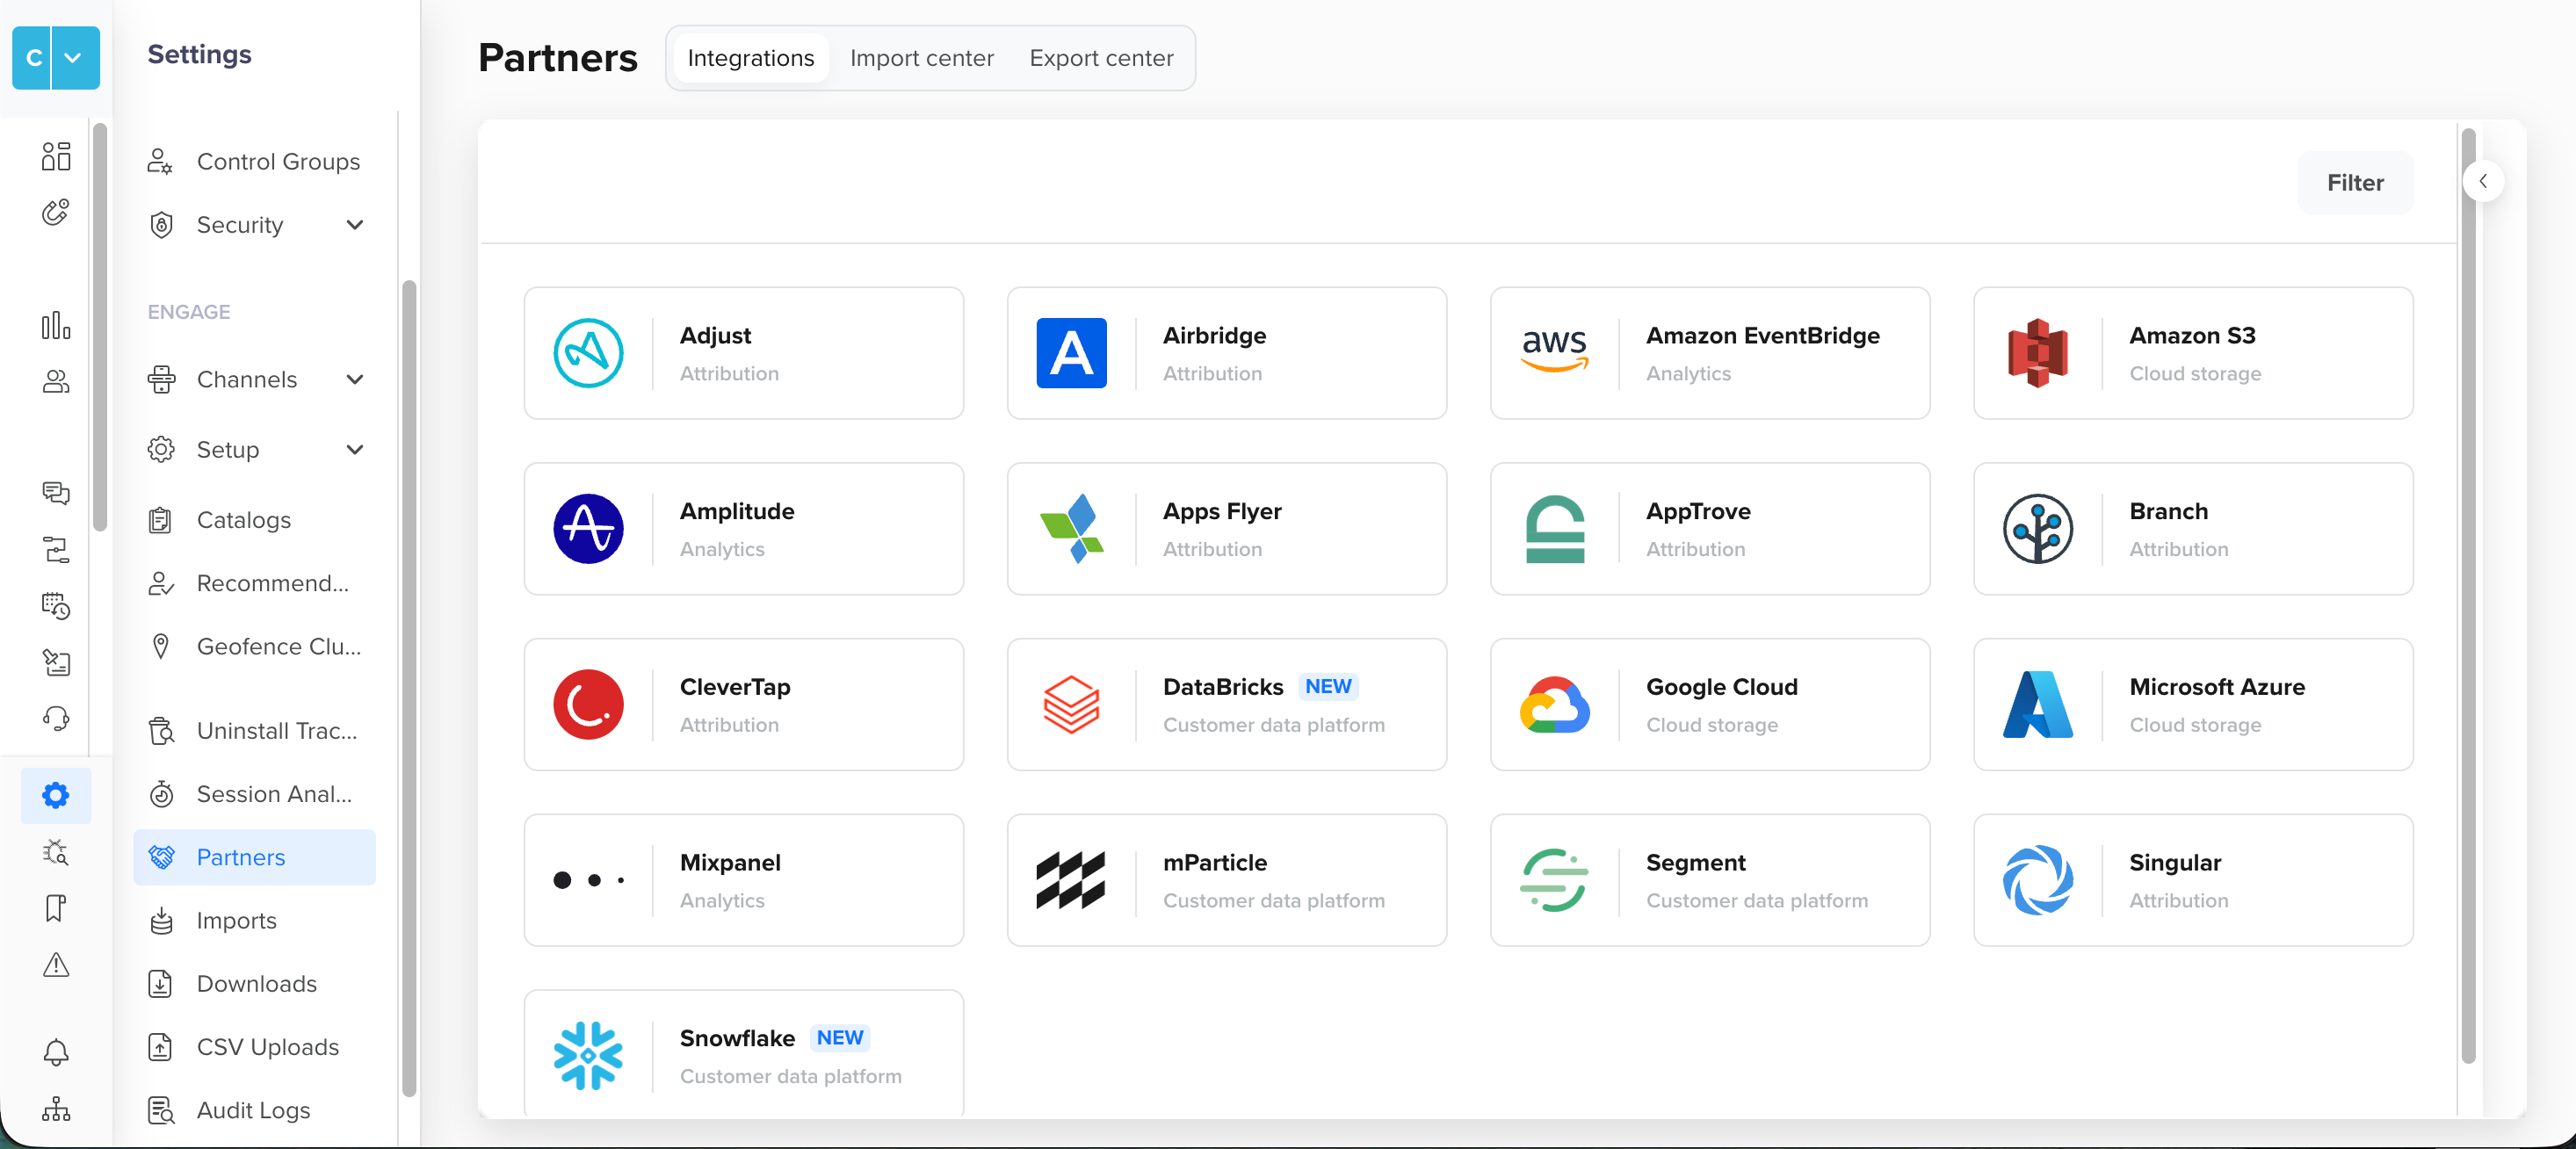
Navigating to Partners
- Select the Google Cloud partner. The Integrate analytics partner - Google Cloud window opens on the right side of the screen.
- Click + Google Cloud Bucket to add a bucket. You can also add multiple buckets from this popup.
- Enter the following details and click Save Credentials:
| Field | Description |
|---|---|
| Bucket nickname | Enter the nickname for your bucket. |
| Service Account Key | Enter the contents of the downloaded Service Account Key JSON file (obtained in Step 1) into the Service Key. |
| Bucket name | Add the name of the bucket as given in the project. |
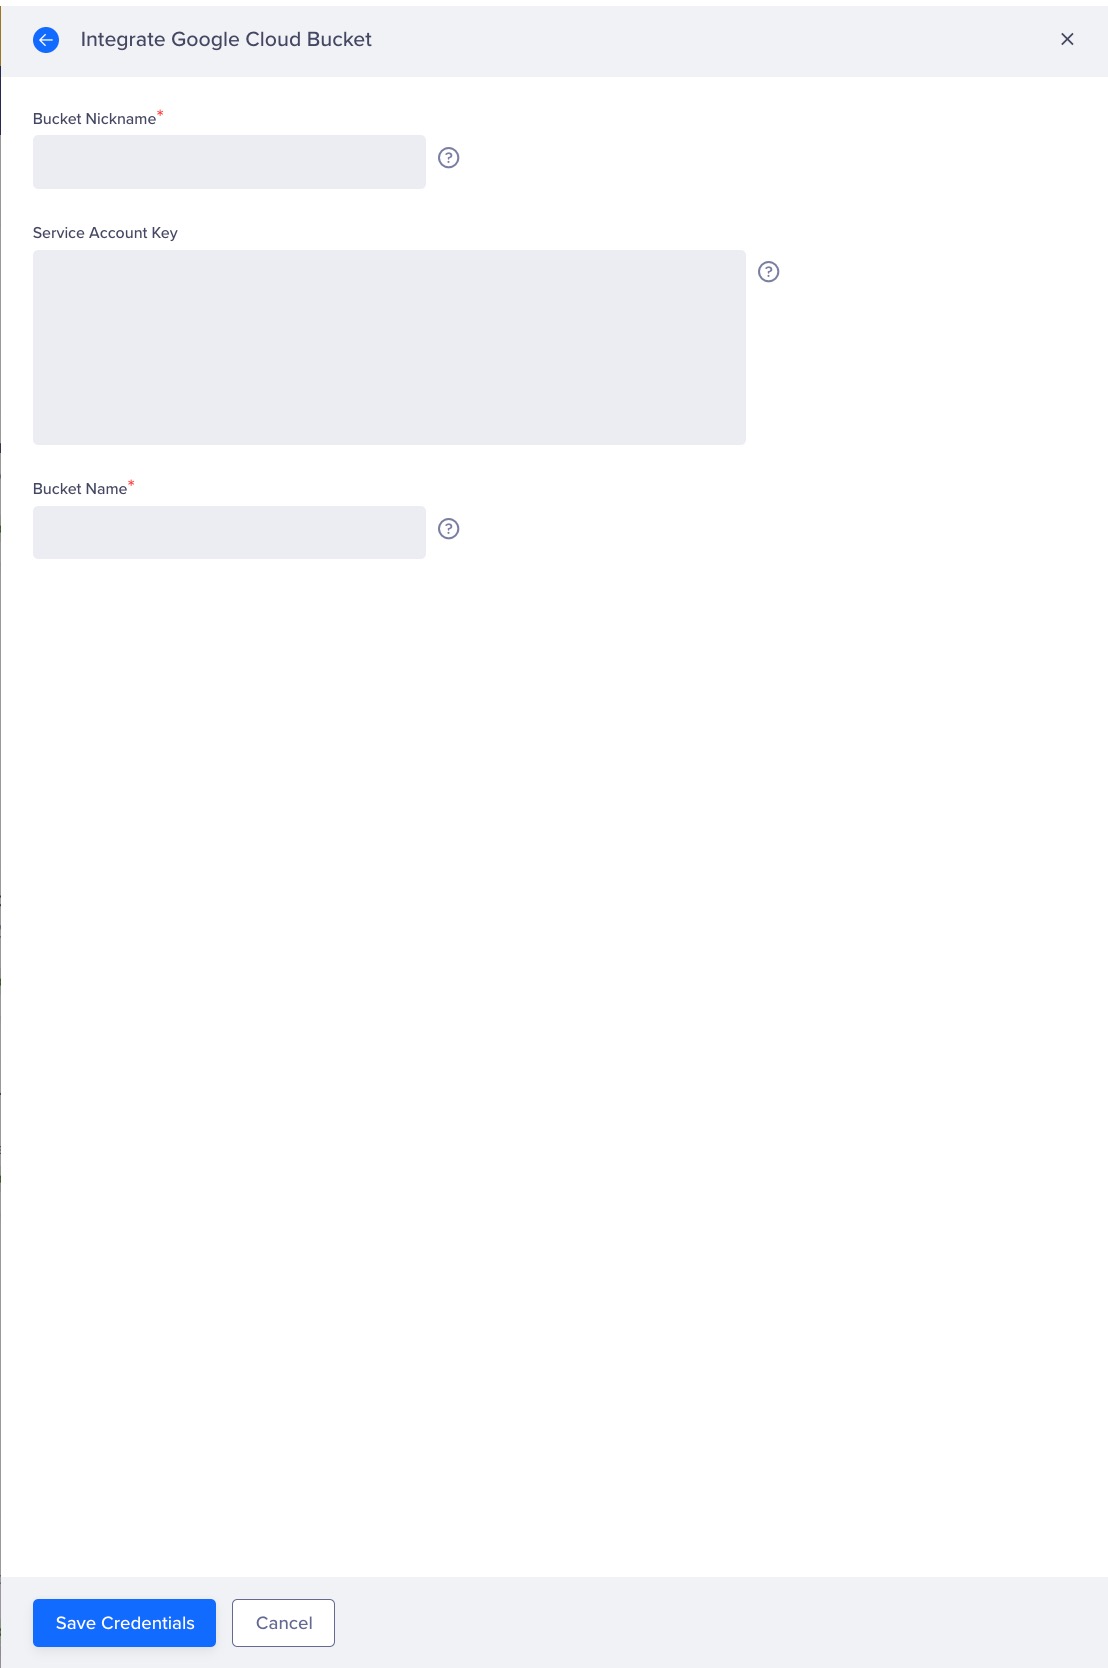
Enter Google Cloud Bucket Details
Error When Saving Credential
- Check if the bucket name is the same as in GCP. Bucket names need to be an exact match.
- Generate the Service Account key again, copy and paste the new key into the Service Account Key field on the Integrate analytics partner - Google Cloud window.
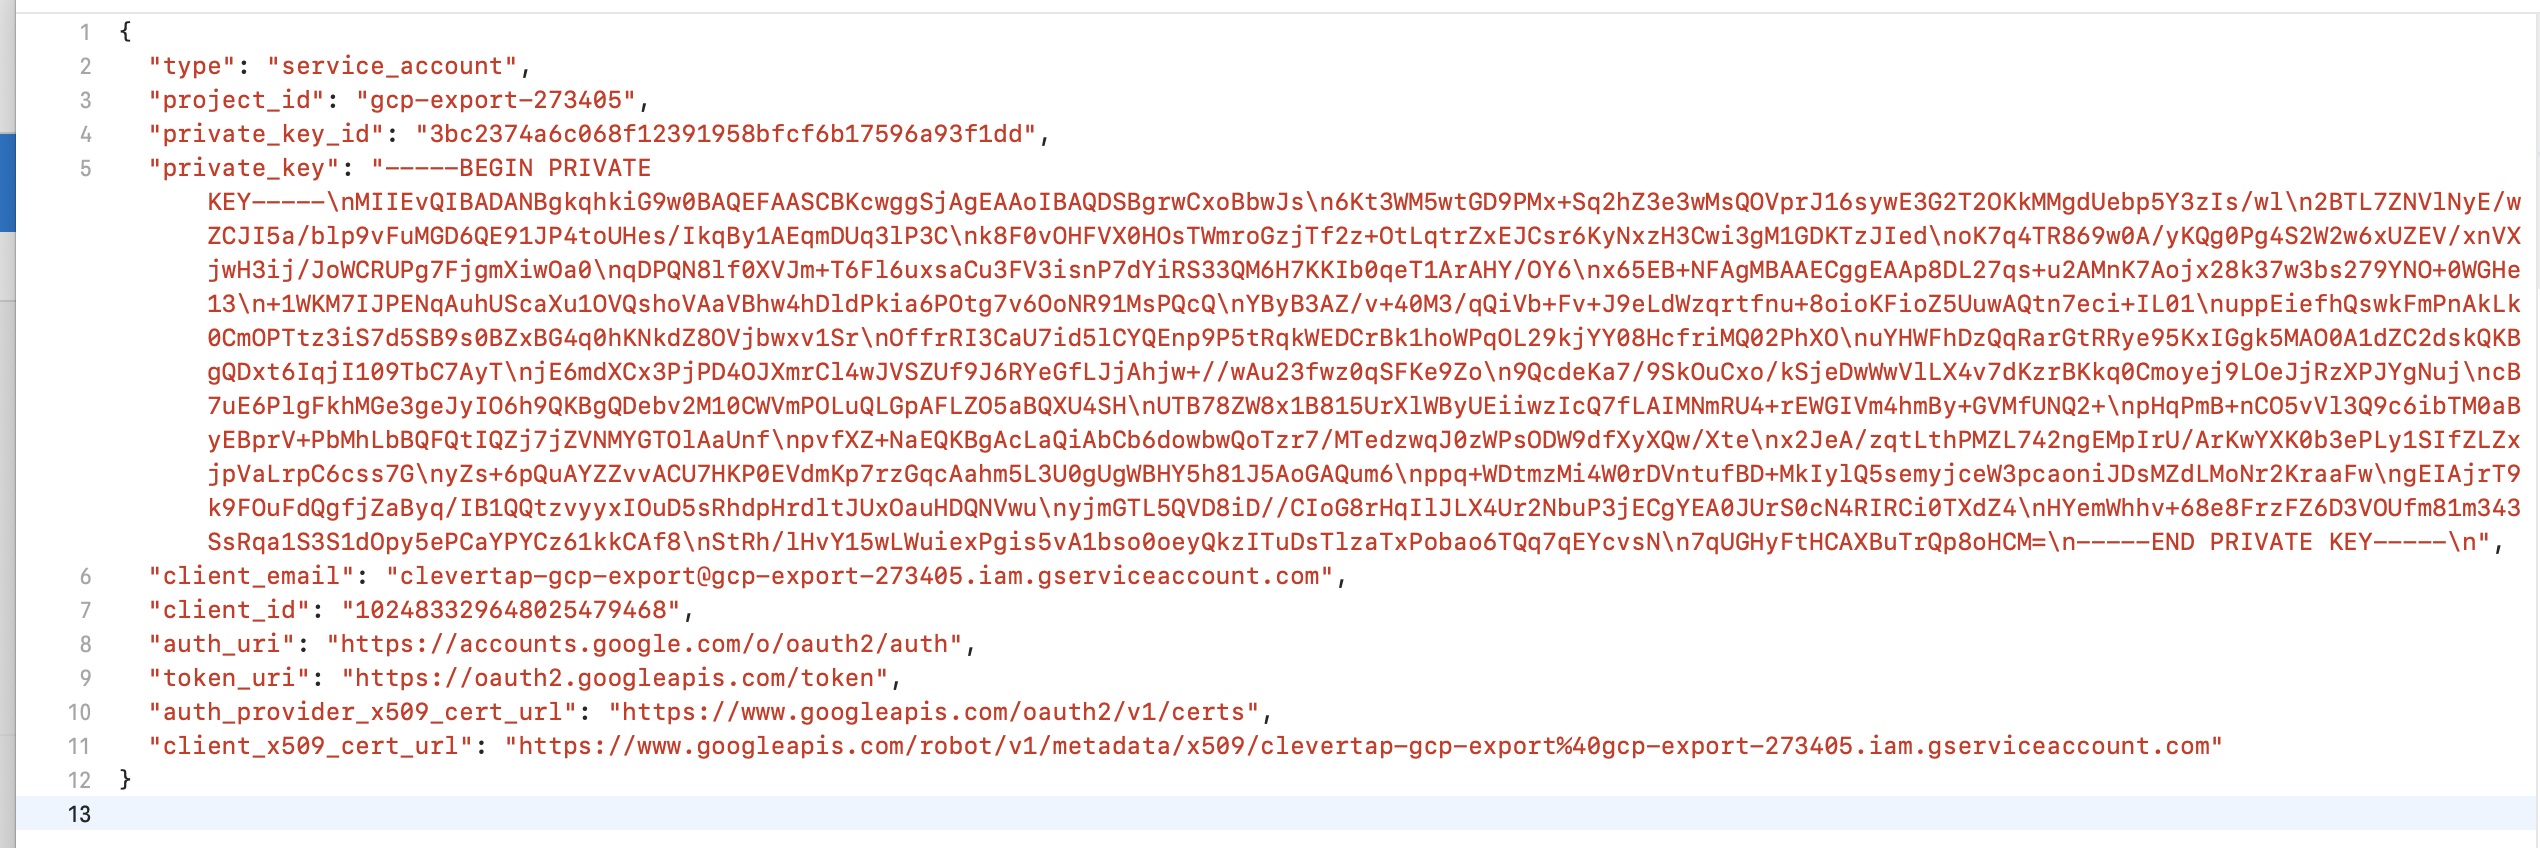
Service Account Key
FAQs
How to secure the data exports from CleverTap to GCP?
You can whitelist IPs to ensure that CleverTap has access to push data only to your GCP bucket. To get the list of IP whitelisting, refer to the IP Whitelisting documentation.
How to resolve a 403: retentionPolicyNotMet error during data export to GCP?
403: retentionPolicyNotMet error during data export to GCP?A 403: retentionPolicyNotMet error can occur when exporting data to GCP. It could be because of a locked retention policy. To resolve this error:
- Open the GCP Console.
- Go to Menu > Cloud Storage > Buckets.
- Select the required bucket.
- Go to the Protection tab.
- Check the Retention policy (for compliance) section. If any policy is active, the Edit, Delete, and Lock icons are enabled.
- Click the Delete icon to delete the retention policy. If the Delete icon is not enabled, the retention policy is locked on the bucket. In this case, you have no option but to change the bucket to which CleverTap uploads export data.
Do CleverTap data exports allow special characters?
Yes, CleverTap data exports allow the following special characters:
- Supports Unicode (UTF-8) character encoding. It facilitates the accurate representation of text in various languages and scripts. For example, Indian regional languages, Arabic, Korean, Russian, Japanese, Chinese, Spanish, Greek, Indonesian, etc.
- Replaces the following characters with a hyphen to avoid issues in output file generation: Whitespace, Tab, Slash, and null (\0).
- Replaces control characters with ?. For more information, refer to Control Character.
- Supports emoji characters; however, some emojis (UTF-16) may not render properly.
What customer-related errors can stop exports, and how are customers notified when interruptions occur?
Export processes can stop due to customer-related errors. For example, invalid/expired credentials or a missing partner bucket. CleverTap sends emails to customers about the issue to ensure a timely resolution.
Here is the customer-related error that can stop a GCP export:
| Error Code | Error Message | Cause and Resolution |
|---|---|---|
| 403 | Credentials are incorrect, GCP account is forbidden. | Your Service Account Key has expired or is invalid. There could be various reasons why your key is incorrect. Recheck all the steps, and you can refer to Integrate GCP with CleverTap. |
Exports are checked every hour for failures. If an error occurs, CleverTap sends three emails to the export creator within three days. Emails 1 and 2 include the error details and a link to resolve the issue. It warns that the export will stop if the problem is not resolved within three days. The third email notifies the creator that CleverTap has stopped the export.
Updated 8 days ago
