Snowflake
Learn how configuring Snowflake with CleverTap enables data sync for personalized engagement and growth.
Overview
Configuring Snowflake with CleverTap enables seamless data import and export, ensuring synchronization and access to relevant information for analysis, personalized engagement, and data-driven growth.
Quick Start Guide for Existing Users
Expand for quick setup if you have previously configured a Snowflake workspace and are familiar with the CleverTap dashboard. If you are setting up Snowflake for the first time, skip to Prerequisites for Integration below.
Prerequisites
Before you begin, ensure you have the following details:
- Snowflake Account Identifier
- Warehouse
- Database
- Role (Optional): If not provided, the Snowflake user's DEFAULT_ROLE is used. Ensure the DEFAULT_ROLE has the required privileges listed in thissection.
- Schema (Mandatory for exports)
- Username
Configure Snowflake Credentials in CleverTap
To set up the Snowflake credentials in CleverTap, perform the following steps:
- Go to CleverTap Dashboard > Settings > Partners > Snowflake.
- Enter the following details: Account Identifier, Warehouse, Database, Role, Schema and Username.
- Generate the key pair and assign it to your user.
- Click Test Connection and Save
After setting up the configuration, you can import or export data from Snowflake into CleverTap.
Prerequisites for Integration
If you are setting up Snowflake for the first time, ensure you have the following before proceeding with the CleverTap configuration:
- CleverTap Access to configure Snowflake
- Snowflake Account Details:
- Account Identifier: Go to Admin > Accounts in Snowflake and copy the account Identifier from the URL.
- Role: For exports, the necessary permissions for database access and query execution must be included.
- Warehouse: Use an existing warehouse or create a new one.
- Database and Schema: Ensure a database and schema are available (existing or newly created)
- Snowflake User Account Requirements:
-
Permissions: The user should have read/write access to the specified database and schema.
-
Authentication Method: Key Pair Authentication.
Key Pair AuthenticationIf your organization requires Key Rotation, refer to Snowflake's Key Rotation Guide.
-
Set Up Snowflake for Integration
You can set up Snowflake using one of the following ways:
- For new users who need to provision Snowflake resources from scratch: Create a new Database, Warehouse, Role, Schema, and User.
- For users who already have configured resources in Snowflake: Use Existing Snowflake Credentials
Create New Snowflake Setup
If you do not already have a Database, Warehouse, Role, Schema, and User configured in Snowflake, you must create them before proceeding. These components are required to ensure CleverTap can securely access, store, and process your data.
To create each resource, perform the following steps:
- Create a Database
- Create a Warehouse
- Create a Role
- Create a Schema : Mandatory for exporting data and optional for importing data.
- Create a User
Create Database
To get your Snowflake data in CleverTap, you first need to create a database. Follow these steps:
-
Log in to your Snowflake account and open a new SQL worksheet.
-
Run the following SQL command to create a database:
-- Create a new database for CleverTap data storage
CREATE DATABASE CLEVERTAP_DB;

-- Verify database creation
SHOW DATABASES;
Create Warehouse
To avoid conflicts with other operations in your cluster, CleverTap recommends creating a new warehouse specifically for CleverTap loads. An X-Small warehouse is large enough for most CleverTap customers when they first configure their Snowflake.
Run the following command to create a warehouse:
-- Create a warehouse for query execution

CREATE WAREHOUSE CLEVERTAP_WH WITH

WAREHOUSE_SIZE = 'XSMALL'

AUTO_SUSPEND = 600

AUTO_RESUME = TRUE;

-- Verify warehouse creation

SHOW WAREHOUSES;
NoteTo avoid extra costs, set
AUTO_SUSPENDto ~10 minutes on the Snowflake dashboard (or 600 if using SQL) and enableAUTO_RESUME. This ensures efficient usage since Snowflake charges on a per-second billing model.
Create Schema
After creating the database, you must create a schema to organize CleverTap-related objects. This step is required only to export data from CleverTap to Snowflake. To do so, perform the following steps:
-
Ensure you are using the correct database context:
-- Switch to the CleverTap database USE DATABASE CLEVERTAP_DB; -
Execute the following SQL command to create a schema:
-- Create a new schema for CleverTap data
CREATE SCHEMA ClEVERTAP_SCHEMA;

-- Verify schema creation
SHOW SCHEMAS IN DATABASE CLEVERTAP_DB;
Create Role
To ensure proper access control, assign a role specifically for CleverTap integration:
- Create a role for CleverTap integration:
CREATE ROLE CLEVERTAP_ROLE; - Grant necessary privileges as follows
- Using Public Schema:
-- Grant required privileges GRANT USAGE ON DATABASE CLEVERTAP_DB TO ROLE CLEVERTAP_ROLE; GRANT USAGE ON WAREHOUSE CLEVERTAP_WH TO ROLE CLEVERTAP_ROLE; GRANT ALL PRIVILEGES ON SCHEMA CLEVERTAP_DB.PUBLIC TO ROLE CLEVERTAP_ROLE; GRANT SELECT, INSERT, UPDATE, DELETE ON ALL TABLES IN SCHEMA CLEVERTAP_DB.PUBLIC TO ROLE CLEVERTAP_ROLE; GRANT SELECT, INSERT, UPDATE, DELETE ON FUTURE TABLES IN SCHEMA CLEVERTAP_DB.PUBLIC TO ROLE CLEVERTAP_ROLE;-
Using Other Schema:
If you are using thePUBLICschema, the permission listed above is sufficient.
However, if you are using a custom schema, replace the<schema name>with the actual schema name and grant the following privileges:-- Grant required privileges GRANT USAGE ON DATABASE CLEVERTAP_DB TO ROLE CLEVERTAP_ROLE; GRANT USAGE ON WAREHOUSE CLEVERTAP_WH TO ROLE CLEVERTAP_ROLE; GRANT USAGE ON SCHEMA CLEVERTAP_DB.<schema_name> TO ROLE CLEVERTAP_ROLE; GRANT CREATE TABLE ON SCHEMA CLEVERTAP_DB.<schema_name> TO ROLE CLEVERTAP_ROLE; GRANT CREATE STAGE ON SCHEMA CLEVERTAP_DB.<schema_name> TO ROLE CLEVERTAP_ROLE; GRANT CREATE FILE FORMAT ON SCHEMA CLEVERTAP_DB.<schema_name> TO ROLE CLEVERTAP_ROLE; GRANT SELECT, INSERT, UPDATE, DELETE ON ALL TABLES IN SCHEMA CLEVERTAP_DB.<schema_name> TO ROLE CLEVERTAP_ROLE; GRANT SELECT, INSERT, UPDATE, DELETE ON FUTURE TABLES IN SCHEMA CLEVERTAP_DB.<schema_name> TO ROLE CLEVERTAP_ROLE;Understand required privileges:
Privilege Required For USAGE ON SCHEMAAccessing objects within the schema CREATE TABLECleverTap creates export destination tables at runtime CREATE STAGECleverTap creates internal stages to upload data files before loading CREATE FILE FORMATCleverTap creates JSON file formats to parse .json.gzexport filesSELECT, INSERT, UPDATE, DELETEReading and writing data in export tables
Create User
To manage access securely, create a dedicated user for the CleverTap configuration by executing the following SQL query:
-- Create a dedicated user for CleverTap integration

CREATE USER CleverTap_USER WITH DEFAULT_ROLE = CLEVERTAP_ROLE DEFAULT_WAREHOUSE = CLEVERTAP_WH;

-- Grant the role to the user

GRANT ROLE CLEVERTAP_ROLE TO USER ClEVERTAP_USER;
Use Existing Snowflake Credentials
If you already have Snowflake set up, perform the following steps to find each detail on the Snowflake dashboard.
- Obtain Your Snowflake Account Identifier
- Find Existing Database
- Find Existing Warehouse
- Find and Assign Existing Role
- Find Existing Schema (for exports)
Obtain Your Snowflake Account Identifier
To configure the integration, you need your Snowflake account identifier. Follow these steps to find it:
-
Log in to Snowflake and navigate to Admin > Accounts.
-
Click
 and select Manage URL from the dropdown and copy the Account identifier, which is typically in the following format:
https://<organization_name>-<account_id>.snowflakecomputing.comFind Existing Database
If you need to check for existing databases in your Snowflake account, follow these steps:
- Log in to Snowflake and open the Snowflake Web UI.
- Select the Databases tab from the left panel to view a list of all available databases.
- Alternatively, run the following SQL command to retrieve the database names:
SHOW DATABASES;Find Existing Warehouse
Instead of creating a new warehouse, you can use an existing one by retrieving the name:
- Log in to Snowflake and open the Snowflake Web UI.
- Select the Warehouses tab from the left panel to view a list of all available warehouses.
- Alternatively, run the following SQL command to retrieve the warehouse names:
SHOW WAREHOUSE;Find and Assign Existing Role
To verify or assign a role to a user, perform the following steps:
- Log in to Snowflake and go to Admin > Users & Roles.
- Select the Users tab to view all users.
- Select the CleverTap user and go to the Privileges section.
- Check the assigned roles and update if necessary using the following SQL command:
GRANT ROLE clevertap_role TO USER clevertap_user;Find Existing Schema
To find existing schemas in a specific database that are needed for CleverTap exports, perform the following steps:
- Log in to Snowflake and open the Snowflake Web UI.
- Select the Databases tab on the left panel and select the desired database.
- Select the Schemas tab to view all available schemas within that database.
- Alternatively, run the following SQL command to retrieve the schema names:
SHOW SCHEMAS IN DATABASE CLEVERTAP_DB;Set Up CleverTap Dashboard for Integration
To connect Snowflake with CleverTap, go to Settings > Partners > Snowflake from the CleverTap dashboard and select Add Database and configure the following:
Database Details
Enter the Database Details in the integration setup form. To create or retrieve details from your Snowflake account, refer to create a new Database, Warehouse, Role, Schema, and User or use existing Snowflake credentials.
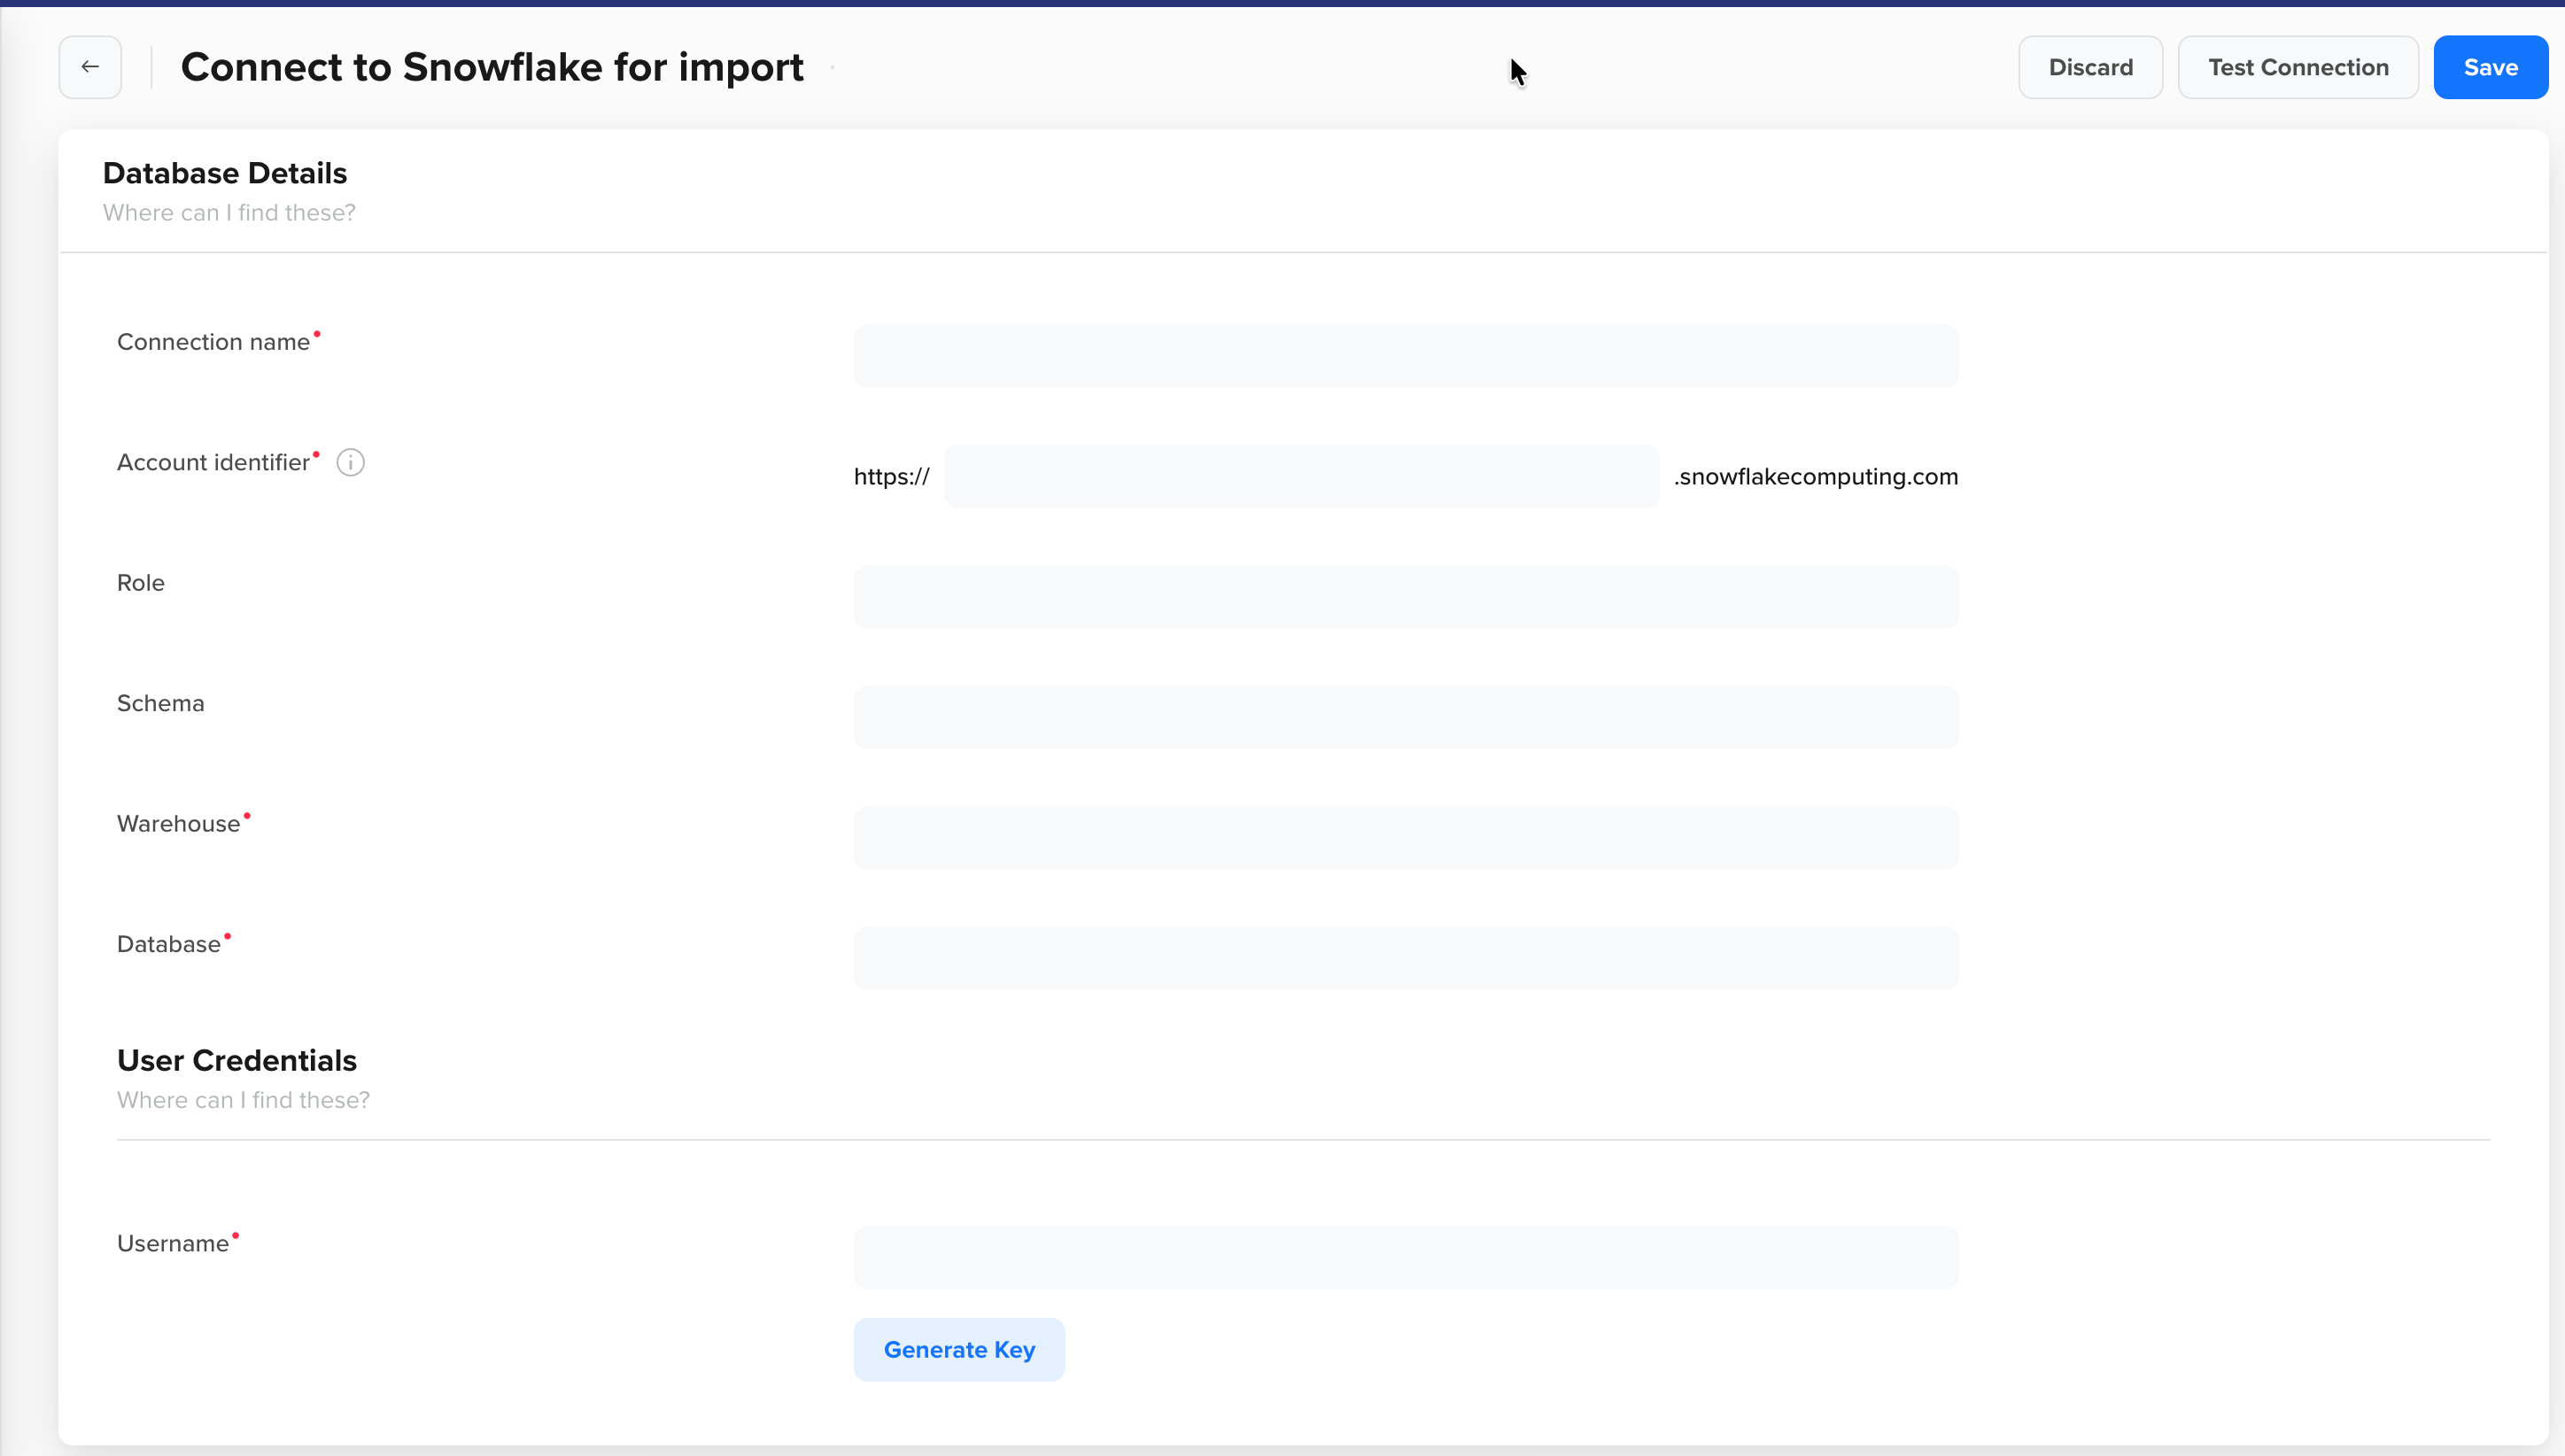
Database Details
| Field | Description |
|---|---|
| Connection name | A unique name that you will use further to identify your configuration while setting up imports or exports. |
| Account Identifier | The unique identifier for your Snowflake account. It usually follows the format:<organization_name>-<account_id>. |
| Role | The Snowflake role CleverTap uses to connect to the database. This field is optional for imports and compulsory for exports. For exports, ensure the role (whether explicitly provided or the default) has ALL PRIVILEGES on the target schema, or at minimum, USAGE, CREATE TABLE, CREATE STAGE, CREATE FILE FORMAT, and DML privileges. |
| Warehouse | The compute warehouse for processing queries. |
| Database | The name of the Snowflake database being integrated. |
| Schema |
|
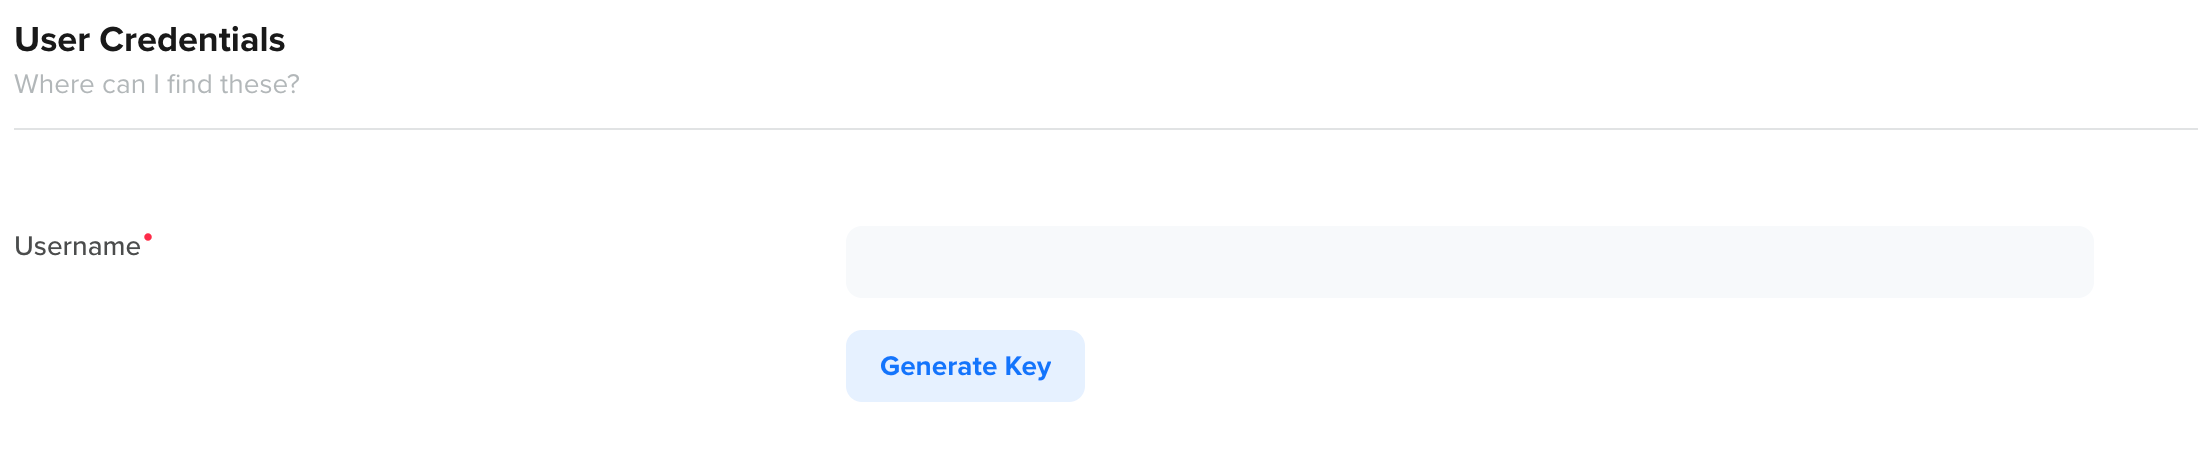
User Details
Provide the Username and generate the Key during setup in the CleverTap dashboard.
Key Pair Authentication
To generate a Key for Key Pair Authentication, perform the following steps:
-
Select Key as your authentication method.
-
Click Generate Key to display the public key.
-
Add this public key to your Snowflake database user using the following SQL command:
ALTER USER ClEVERTAP_USER SET RSA_PUBLIC_KEY='MIIBIjANBgkqh...'; -
(Optional) Rotate keys using CleverTap's Regenerate Key option if your IT policies require periodic key changes. Using the Edit option, go to the same section and click Regenerate Key on the CleverTap dashboard. Attach the newly generated public key to your Snowflake database user as an additional RSA key. For more information about this, refer to Snowflake Key Rotation document.
Saving Regenerated Key
- Once you save the connection with the new key, the previous key will no longer be used.
- If you generate a new key but close the edit form without saving, CleverTap will continue using the existing key, and the newly generated key will be deleted.
- If the new key is not attached to the Snowflake user before saving, imports and exports may fail.
- For detailed guidance on setting up and managing key pair authentication in Snowflake, refer to Snowflake’s Key Pair Authentication Documentation.
Generate Key
- Click Test Connection or Save to start the import or export after adding the details:
- Test Connection: Verifies if the database credentials and setup are correct. A successful test confirms the connection, while a failure prompts you to review your settings.
- Save: Saves the connection details, enabling you to proceed with the data import or export process.
FAQs
How can I delete a connection that has running imports?
Go to Import Connections and select the connection. Click on Delete and review any active imports. If there are any imports in Ready, Schedule, paused, or running states, stop all active imports associated with that connection. Ensuring all imports are stopped, click Delete again and confirm your action.
How can I filter import connections?
Use the Filter option on Import Connections to refine displayed databases:
- Connected On: Select a date range to view connections created within that timeframe.
- Connected By: Filter by email IDs of users who created the connections.
How can I whitelist IPs for export and import integrations in CleverTap?
To ensure seamless communication between CleverTap and your systems, whitelist the required IP ranges:
- Export integrations: Refer to CleverTap IP Ranges
- Import integrations: Refer to CleverTap IP Ranges for Import
Next Steps
Updated 3 months ago