Geofencing Campaign
Send messages to your users based on their location.
Overview
A geofence is a virtual geographic area, represented as latitude and longitude pairs combined with a radius, forming a circle in a specific position on a map. CleverTap offers geofencing, a GPS location-based service. Customers can use this service to engage their audience by sending relevant messages to Android and iOS users. Geofences can vary in size, and a geofence cluster can contain up to 100 geofences.
Customers can define geofences around the world from the CleverTap dashboard. Campaigns are delivered in real-time to users as they exit or enter geofences or sent as follow-ups hours or days later. CleverTap's location analytics create user data as the users enter or exit geofences. This data can be used for re-targeting. Geofence-specific analytics can generate insight into activities or locations of interest.
Create Geofences
To create geofences, perform the following steps:
- From the CleverTap dashboard, navigate to Settings > Geofences.
- Click + Geofence Cluster to create a new geofence cluster.

Geofence Cluster
Geofence and Cluster LimitsYou can create up to 100 geofences in each cluster and up to 100 clusters for your app.
- Select the preferred unit of measure for tracking the location of the geofence clusters. For example, select the distance in kilometers or miles.
- Click Save.
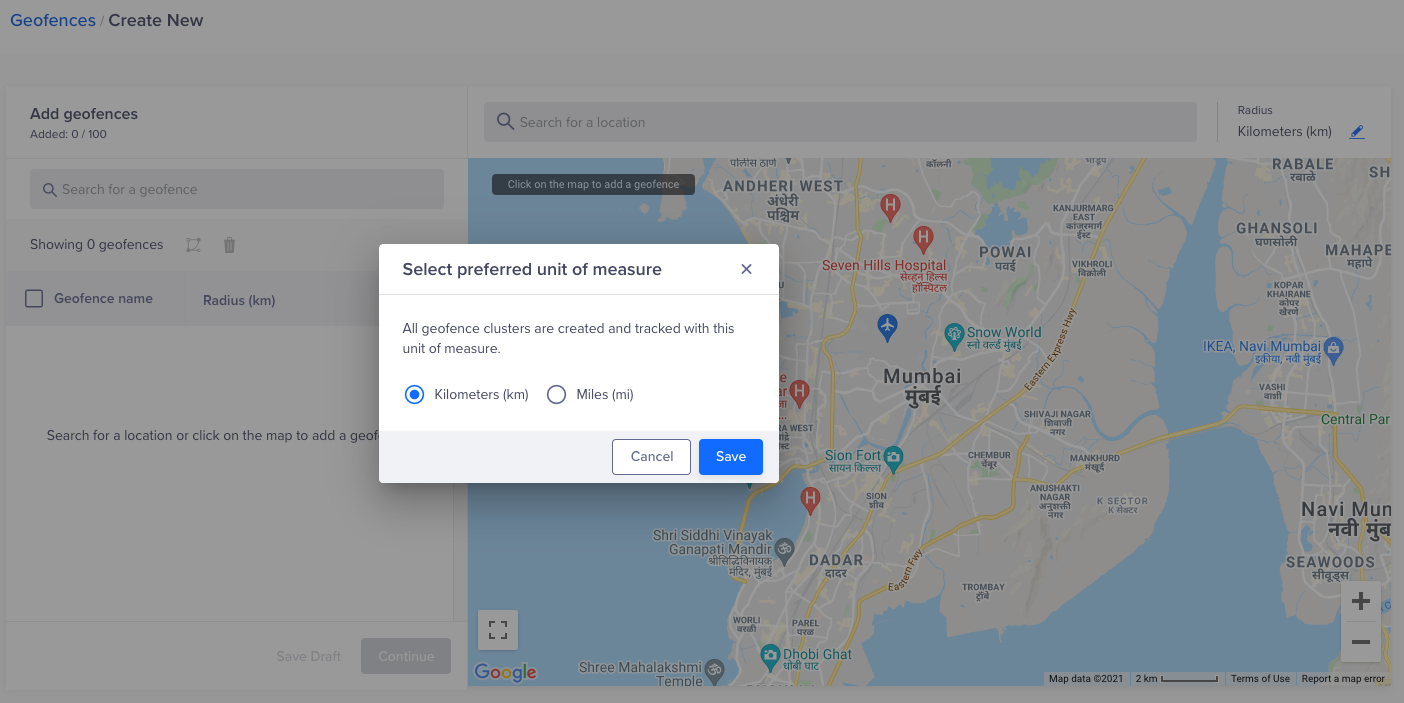
Set Up Geofence
- Click the Search for location window to select the area you want to display on the map or enter a location in the search bar. A setting pop-up window displays.
- Enter a Geofence name.
- Determine the radius that the geofence must cover.
- Click Add on the pop-up window.
- Click Continue.
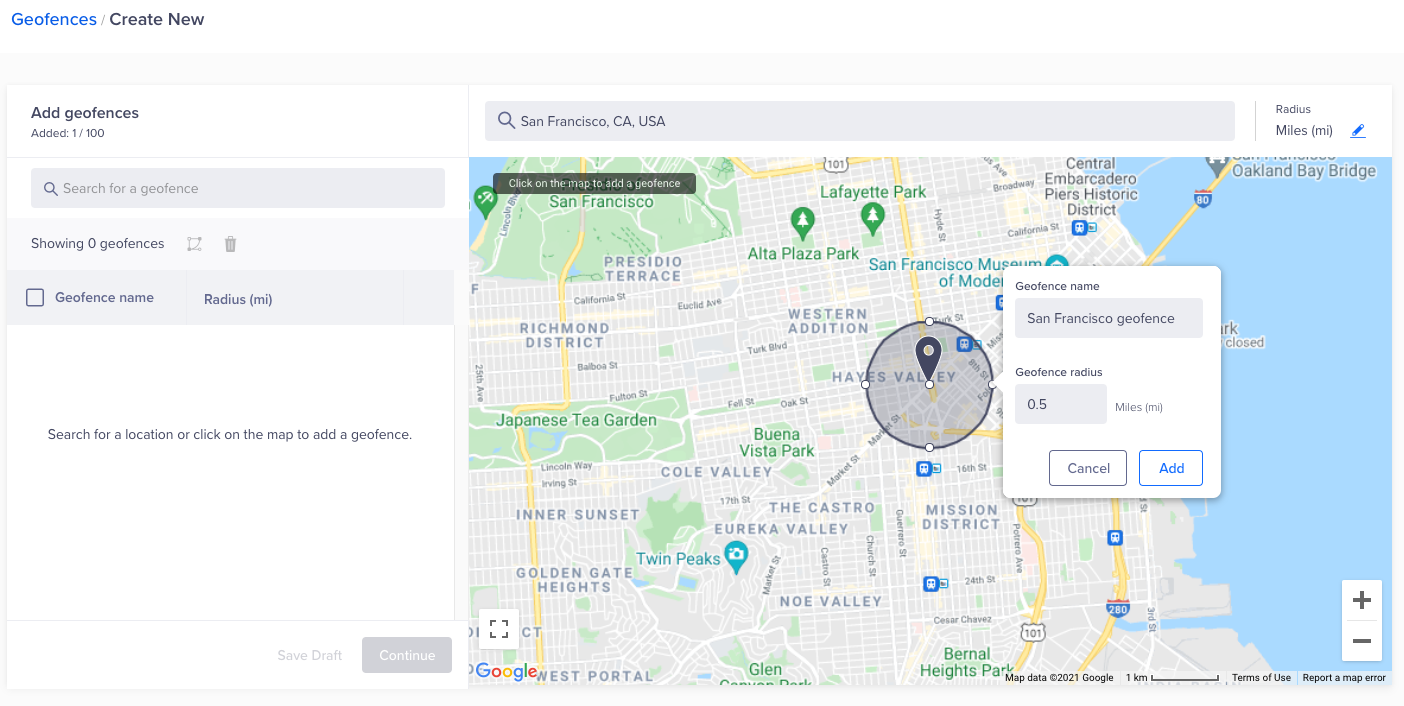
Define Geofence Radius
- Enter a geofence cluster name.
- Select the start and end time of tracking the users. If you select Select date and time, day and time options display beneath the radio buttons where you can choose a future start and end date and time.
- Click Activate or Schedule.
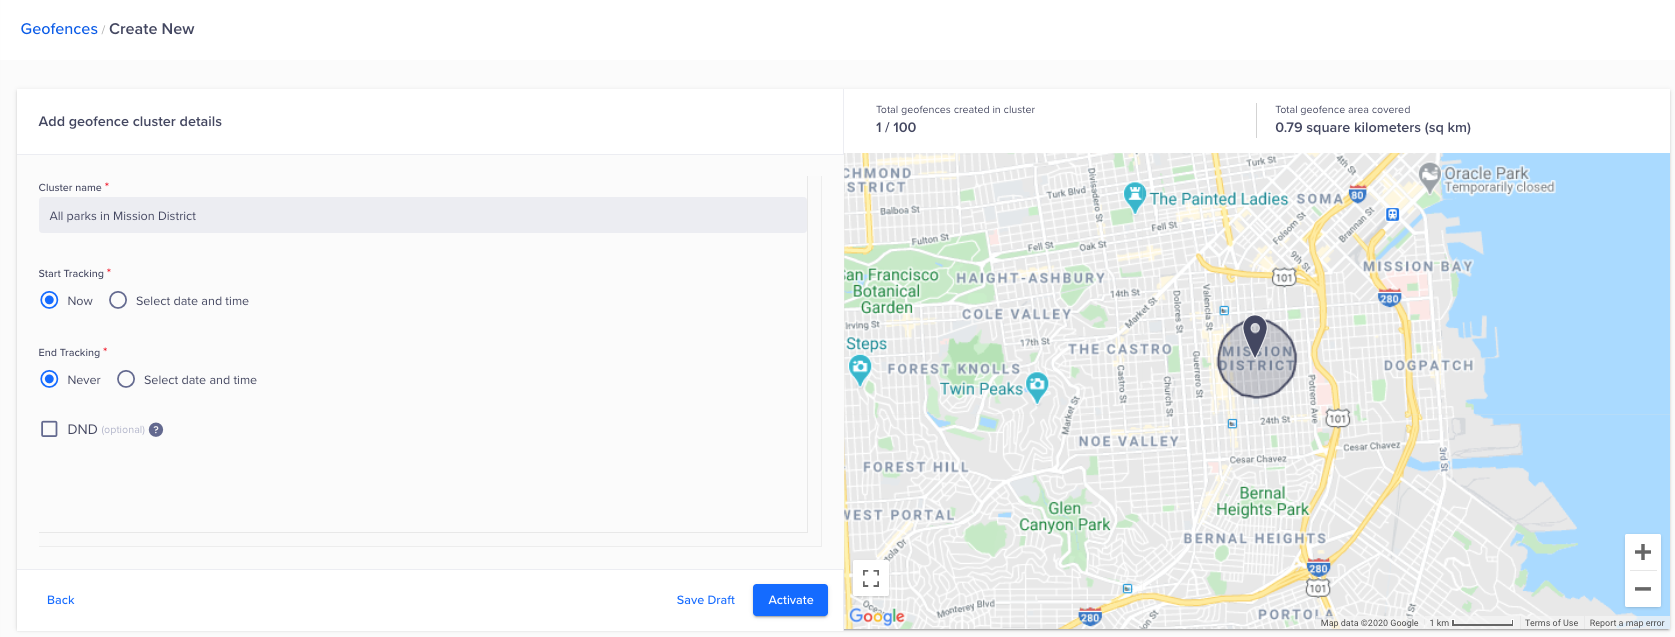
Activate Geofence
Do Not Disturb Feature (Optional)
When entering the details for the geofence cluster, you can select a Do Not Disturb (DND) window. The DND option prevents triggering an engagement for users who enter the geofence on specified days and times.
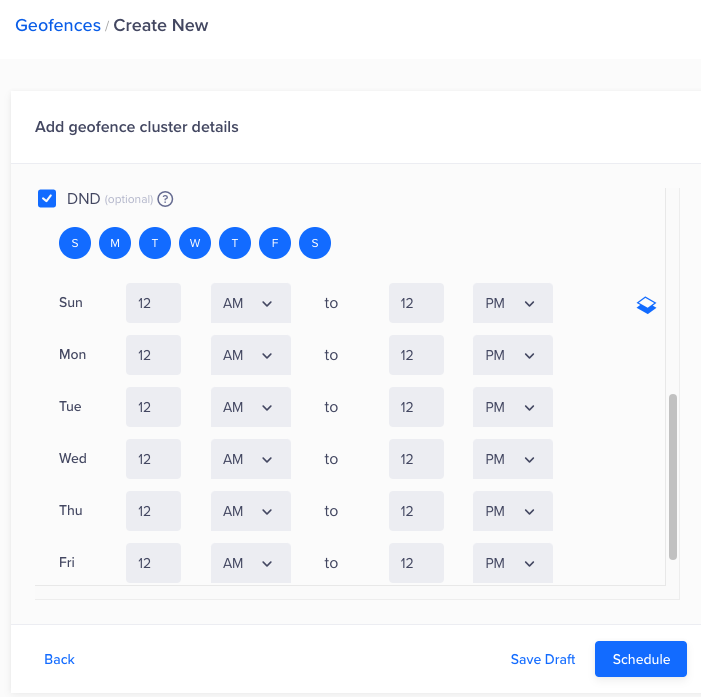
Set Up Do Not Disturb Details
Add, Edit, or Delete GeofencesRepeat the steps to add more geofences to your cluster. You can have up to 100 geofences in a cluster. In addition, you can edit or delete a geofence by clicking the location and clicking the edit or delete icon, respectively. You can also edit or delete geofences by selecting them from the list on the left.
Use Geofence Events
CleverTap raises two system events every time a device enters or exits a geofence. The following events can be used to run campaigns, analytics, and segmentation:
- Geocluster Entered
- Geocluster Exited
NoteThe geocluster name displays under event properties if the event has at least one occurrence.
For more information, refer to System Events.
Example Use Case
A retail company that sells apparel wants to increase traffic to its physical stores in Mumbai. They have multiple store locations and want to send personalized promotions to customers close to their stores. Using CleverTap's geofence campaign, the retail company can target users who enter the specified radius around their store locations with real-time and location-based messages.
Create a Geofence Campaign
To solve the above business use case, create a push notification campaign adding the geofence cluster. The retail company can target users most likely to visit their physical stores and increase footfall. By using CleverTap's geofence campaign, they can send real-time, location-based messages that are personalized and relevant to the user.
The following are the steps to create a push notification campaign with a geofence cluster for users who enter the geofence:
1. Set Up a Geofence Cluster
Set up a geofence cluster around the store locations from the CleverTap dashboard. You can specify the radius and location coordinates of each store location. To set up a geofence cluster, refer to Create Geofences.
2. Create a Campaign
After you have set up the geofence cluster and created the segment, you can create a geofence campaign from the CleverTap dashboard. To do so, perform the following steps:
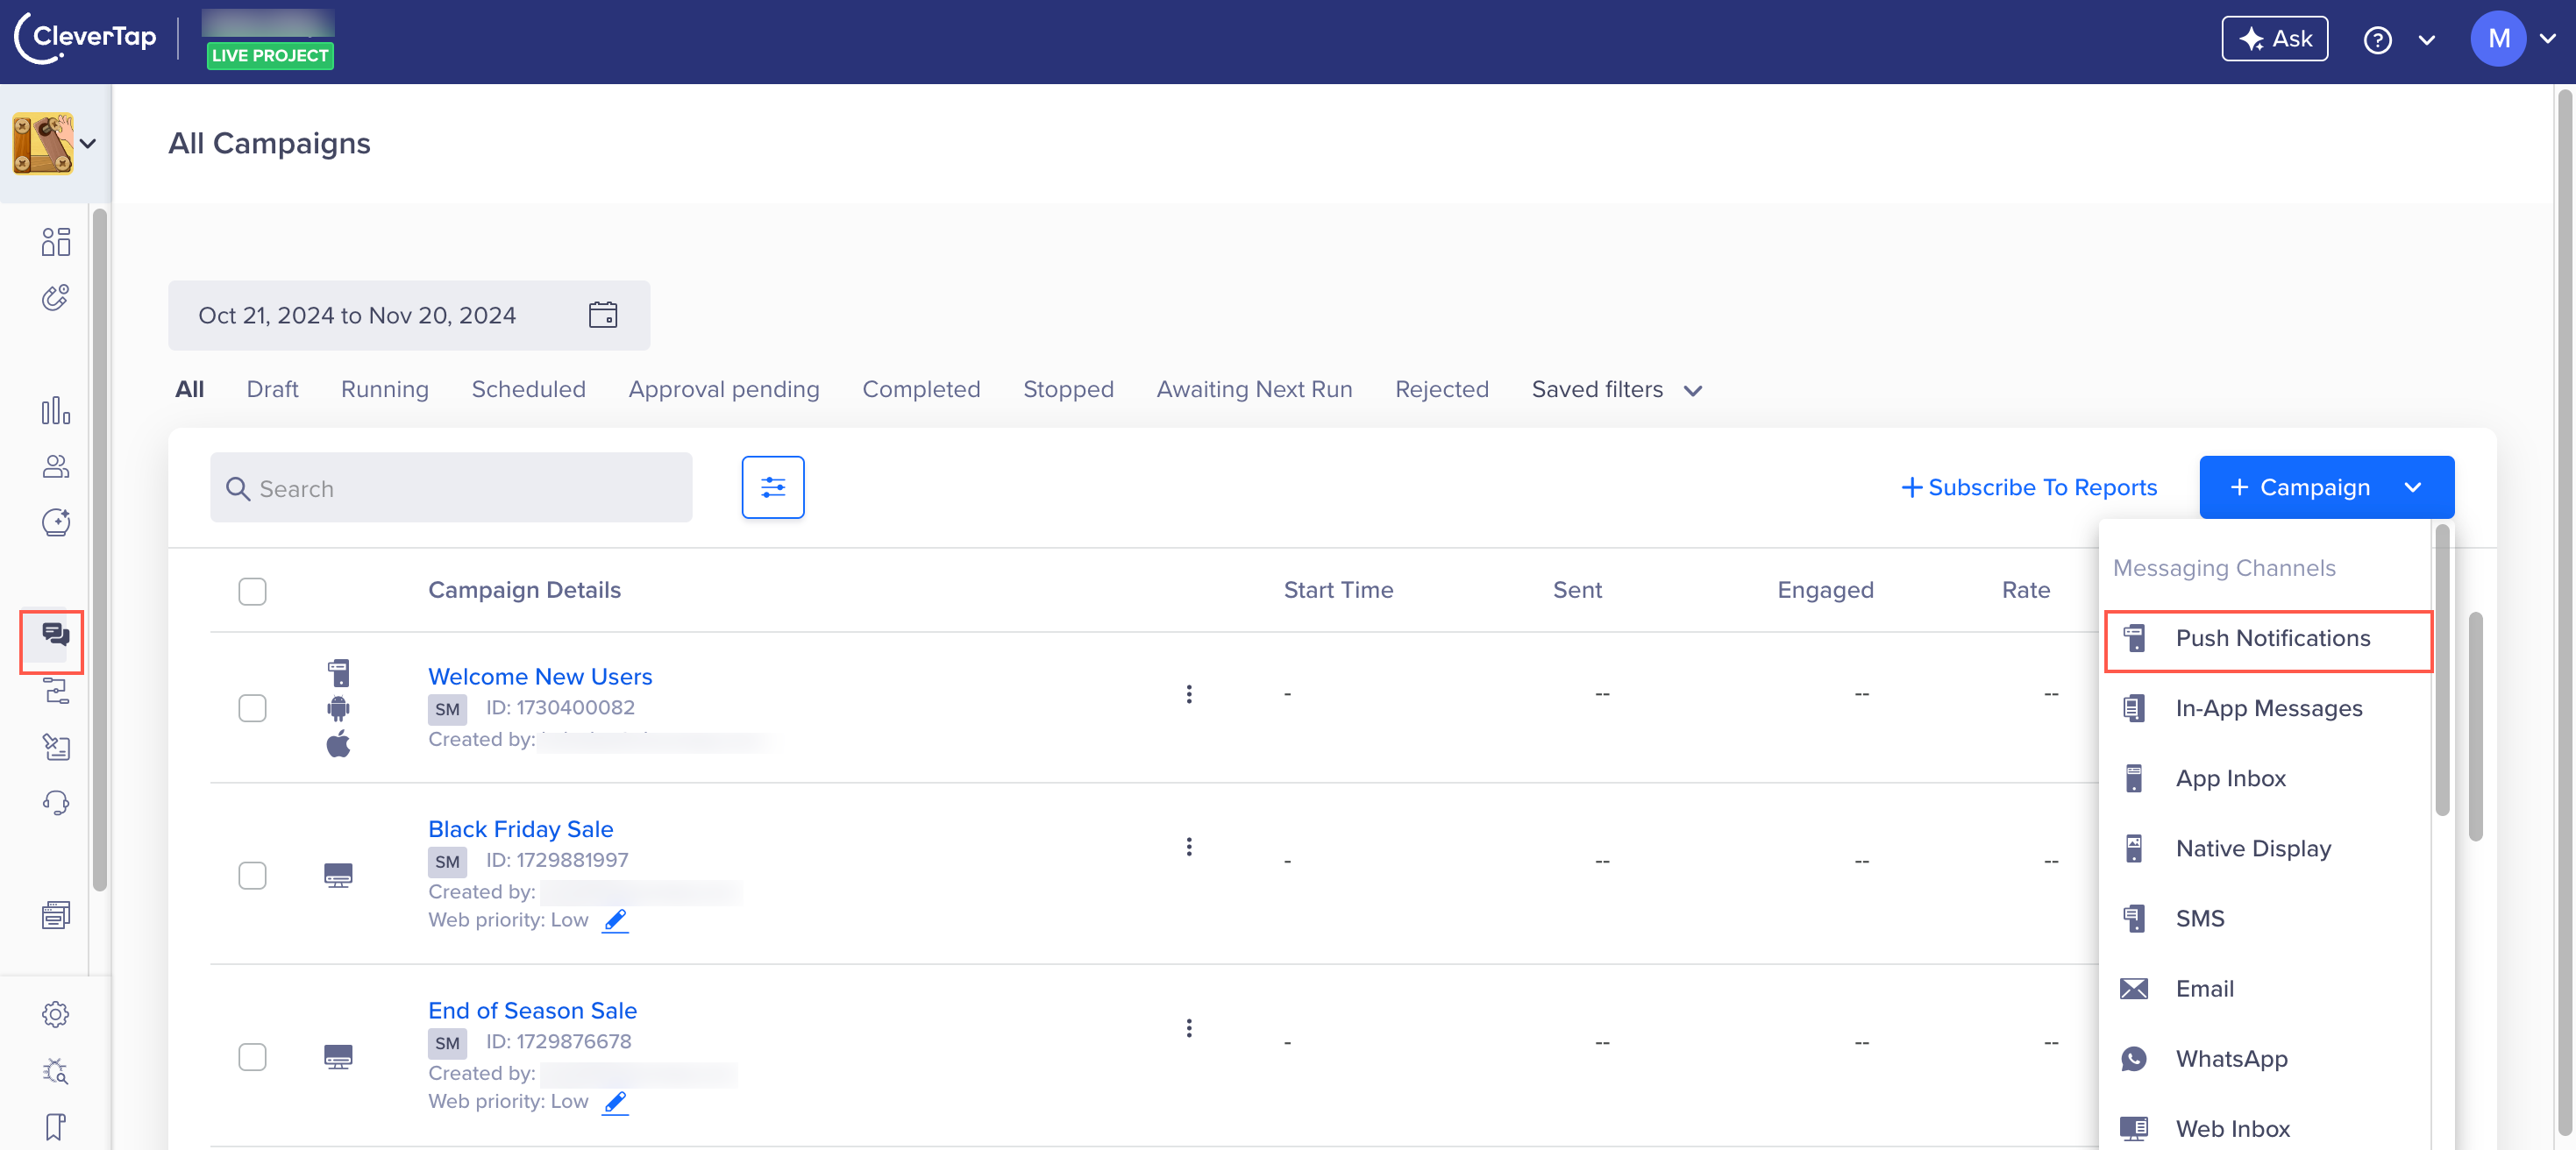
- From the dashboard, navigate to Campaigns.
- Click + Campaign.
- Select Push Notifications as a messaging channel.
Create Campaign
- Select the Live Behavior.
- Click Done.

Set Qualification Criteria
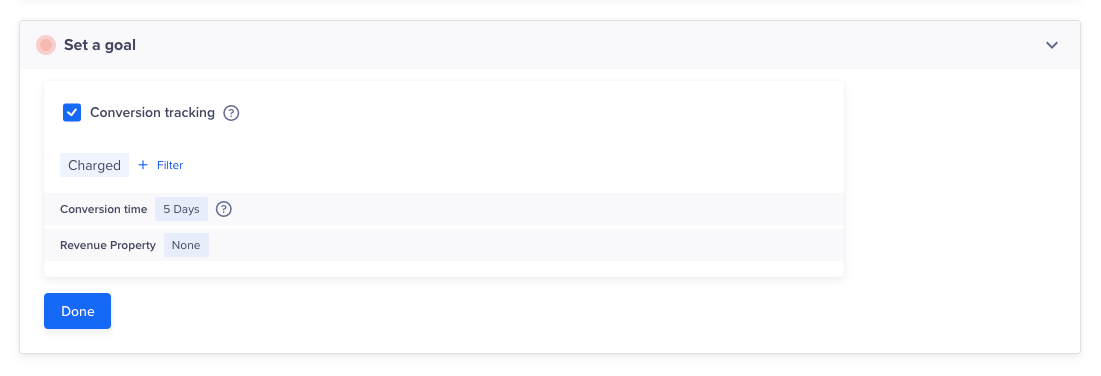
- Select Conversion Tracking under the Set a goal section.
- Select the conversion event, time, and revenue property.
- Click Done.
Set a Goal
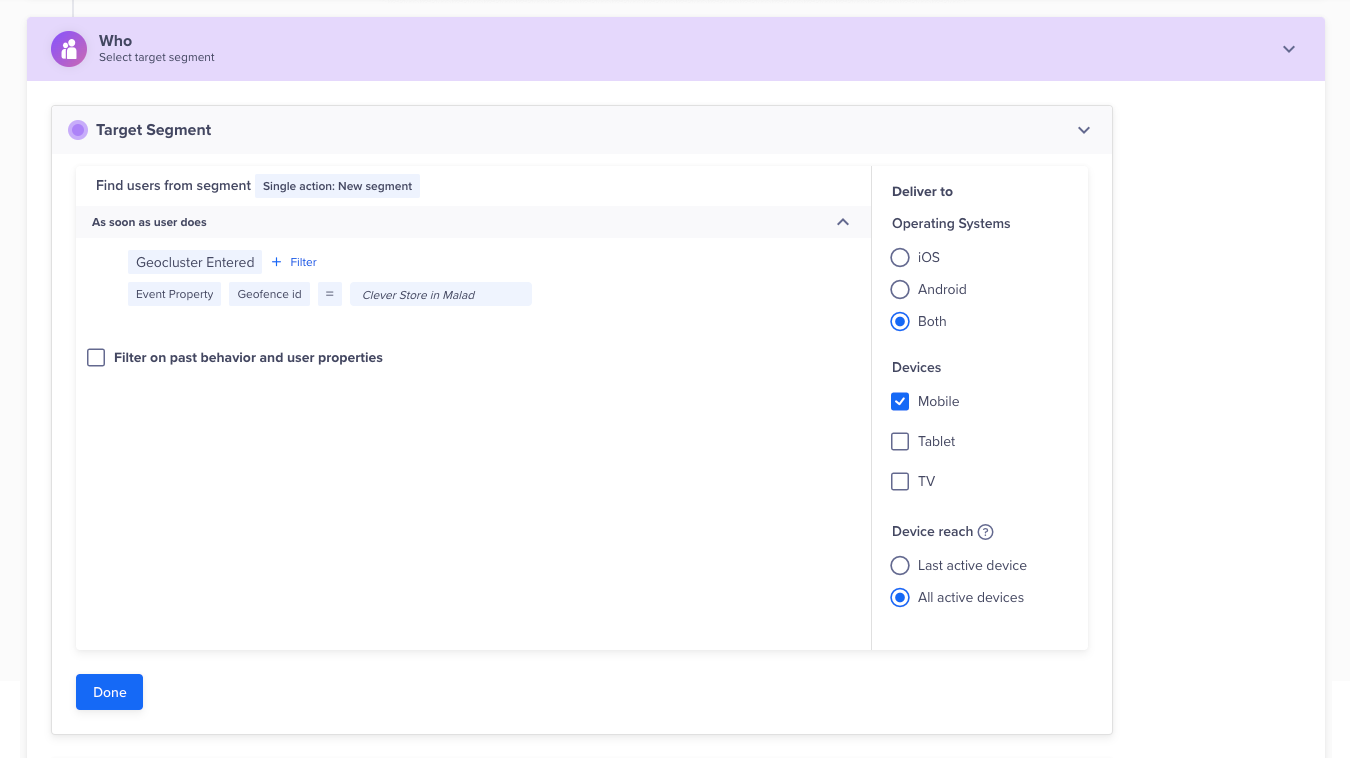
- Select the Geofence Entered event with event property as Geofence ID from the Who section of campaign creation.
Define - Who
This ensures that the message is only sent to users close to the store locations.
- Set up the message content and design. For more information, refer to Define Message Content.
3. Personalize the Message
You can also use CleverTap's personalization features to make the message more relevant to the user. For example, you can include the user's name or previous purchase history in the message. For more information, refer to Personalize Meessage.
4. Schedule the Campaign
Finally, schedule the campaign to be sent at a specific time or based on particular triggers; for example, send a campaign when the user enters the geofence for the first time.
Updated about 1 month ago
