Campaigns promote products through various media types and are designed with specific goals, such as building brand awareness, introducing new products, or driving conversions.
The campaign listing page in CleverTap helps you manage all your campaigns efficiently. It allows you to filter them, edit columns, view performance, organize using labels, and more. This guide walks you through all key operations on the new campaigns page.
Video Tutorial
Campaigns Operations
You can perform different actions on the campaigns from the All Campaigns page, including filtering, labeling, editing, archiving, stopping, cloning, and analyzing performance. The following sections provide a brief overview of each operation.
Filter Campaigns
You can use filters to quickly search your campaigns by Status, Channel, Time Period, creator, and more. To do so:
Go to Messages > Campaigns from the CleverTap dashboard. The All Campaigns page opens.
Click the icon. The Filters window opens on the left side of the screen.
Filter Campaigns
Select the required filters and click Apply to view results on the All Campaigns page. If you create a filter and do not select Apply, the filter criteria are still displayed but not applied directly in the listing view. Filters are organized separately for Active and Archived campaigns.
The following table covers the operations you can perform from the listing page:
Filter Section
Options
Filter Description
Saved Filters
List of Custom Filters
Select from a list of saved filters. In that case, all the fields will be automatically populated. You can also create a new filter and click Save. Filters are saved at the account level and are available for the Active campaigns.
Status
Scheduled, Running, Stopped, Completed, Approval Pending, Rejected, Draft, Awaiting Next Run
Filters campaigns based on their current status. These options are available only for active campaigns. For more information, refer to Campaign States.
Time Period
Campaigns Created, Started
Filters based on the time period when the campaigns were created or started. The list is automatically sorted in descending order, based on either the start time or the creation date, depending on the selected filter.
Stats Period
Choose stats duration
Filters based on the stats period of the campaigns.
Web Popup, Exit Intent, Web Push Notification, Web Native Display, Web Inbox
Filters based on the type of web channel used.
Direct-to-User Channel
Email, SMS, WhatsApp
Filters based on the type of Direct-to-User channel used.
Streaming Channel
Facebook Audiences, Webhook, Google Adwords, Amazon EB, mParticle, Segment, TikTok
Filters based on the type of streaming channel used.
Created By
Filter by email ID of campaign creator
Filters based on the email ID of the person who created the campaign.
Label
Based on labels assigned to campaigns
Filters based on the labels assigned to the campaign. Clicking Manage Labels will redirect you to the Labels page under Account Setup. You can create or manage labels as per your assigned roles.
Delivery Type
One Time, Recurring, Multiple Dates
Filters based on the campaign delivery type.
Segment Type
In-Action, Action, On Date/Time, External Trigger
Filters based on the type of segment used.
External Campaigns
API Campaigns, Bulletins, Notification via Server API
Filters based on the type of external campaign.
Click Reset to reset all the applied filters.
All filters except the Delivery Type and Segment Type filters also have individual reset options. You can reset a specific filter and click Apply to view the updated results in the campaign list immediately.
Time Period Filters
The Time Period filter has three modes: Created, Started, and All Campaigns. By default, the Time Period filter for the Started and Created date is set to All time.
When All Campaigns mode is selected, the default for Time Period in this mode is Last 30 days. All Time is not applicable here.
Resetting reverts the Time Period filters to default values.
Date ranges saved in filters are relative to the current date. For example, a past 2 days filter saved on July 2nd shows July 1st–2nd as the date range. When the same filter is applied on July 20th, it automatically shows July 19th–20th as the date range.
How Time Period filters interact across the Campaign page
Stats Period defaults to ±15 days to stay in sync with Campaign Reports.
Stats Period follows the campaign Time Period selection. Changing the campaign date range automatically updates the Stats Period to match, but not vice versa.
In All Campaigns mode, the Stats Period date picker is disabled (non-editable). The Stats Period is automatically set to the same Last 30 days range as the campaign Time Period.
Edit Columns
You can customize the campaign listing view to match your preferences. Click the Edit Columns icon to select and reorder the columns you want to show on the campaign list page. You can view up to 2000 campaigns on the listing page.
The Sent column is toggled off by default.
Edit Columns
📘
Note
The Campaigns listing page also displays the team each campaign is associated with. This feature is currently in Private Beta. For more information, refer to Teams Setup.
Users can view and manage only the campaigns associated with their assigned teams. This ensures campaign visibility and actions align with the configured Role-Based Access Control (RBAC).
Add Labels
Labels allow you to tag campaigns with descriptive names or themes. Once applied, labels enable you to group your various messaging campaigns, allowing you to view their performance or identify user behaviors. For example, you can create a label called Onboarding to identify all the messaging campaigns (across all channels) related to onboarding your new users.
You can select up to 10 labels for a campaign. If a campaign already has more than 10 labels assigned from earlier configurations, they will still be visible under Selected Labels. However, in such cases, the user will not be able to select any additional labels.
📘
Naming Labels
The labels cannot start with or contain the following symbols: ”, , %, >, <, and !.
You can create and apply labels from the All Campaigns or the All Journeys page. Labels can be applied to individual campaigns from the All Campaigns page during creation. To do so:
Go to Messages > Campaigns from the CleverTap dashboard. The All Campaigns page opens.
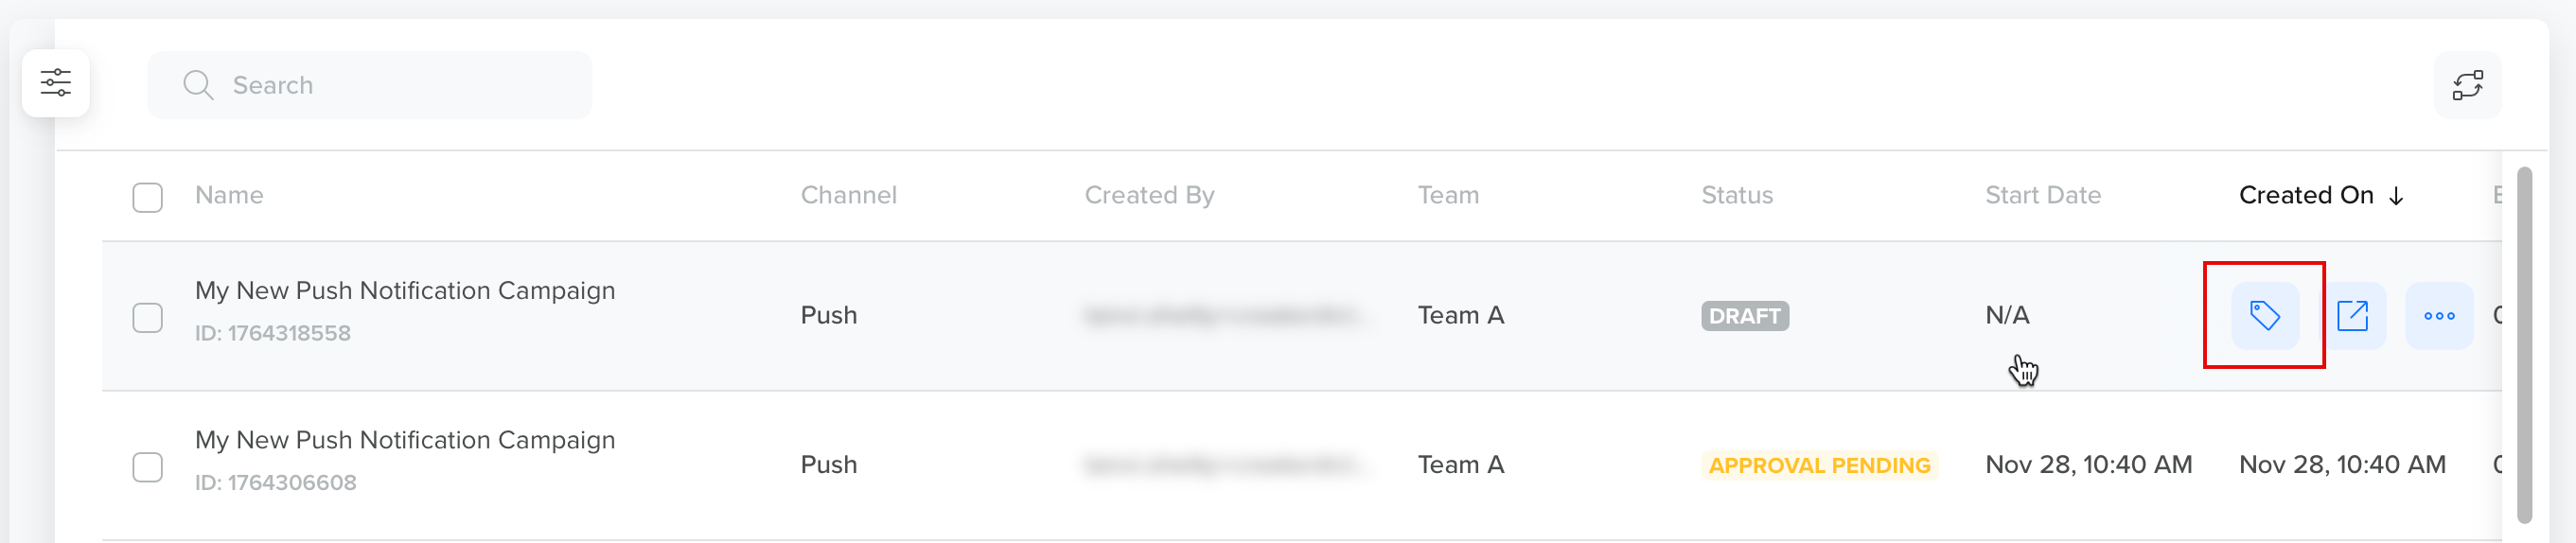
Select the campaigns you may want to label and click the Add Label icon.
Select the labels you want to add. These labels are moved to the Selected Tag ID section. Click Deselect to remove any label.
Click Apply.
Create and Assign Multiple Message Labels
📘
Note
When applying labels in bulk, the selected labels are applied to all selected campaigns. However, if you later select an individual campaign from that group, the bulk-applied labels do not automatically appear in the Selected Tag ID section.
To view or manage the labels for a specific campaign, click the Labels icon next to the campaign.
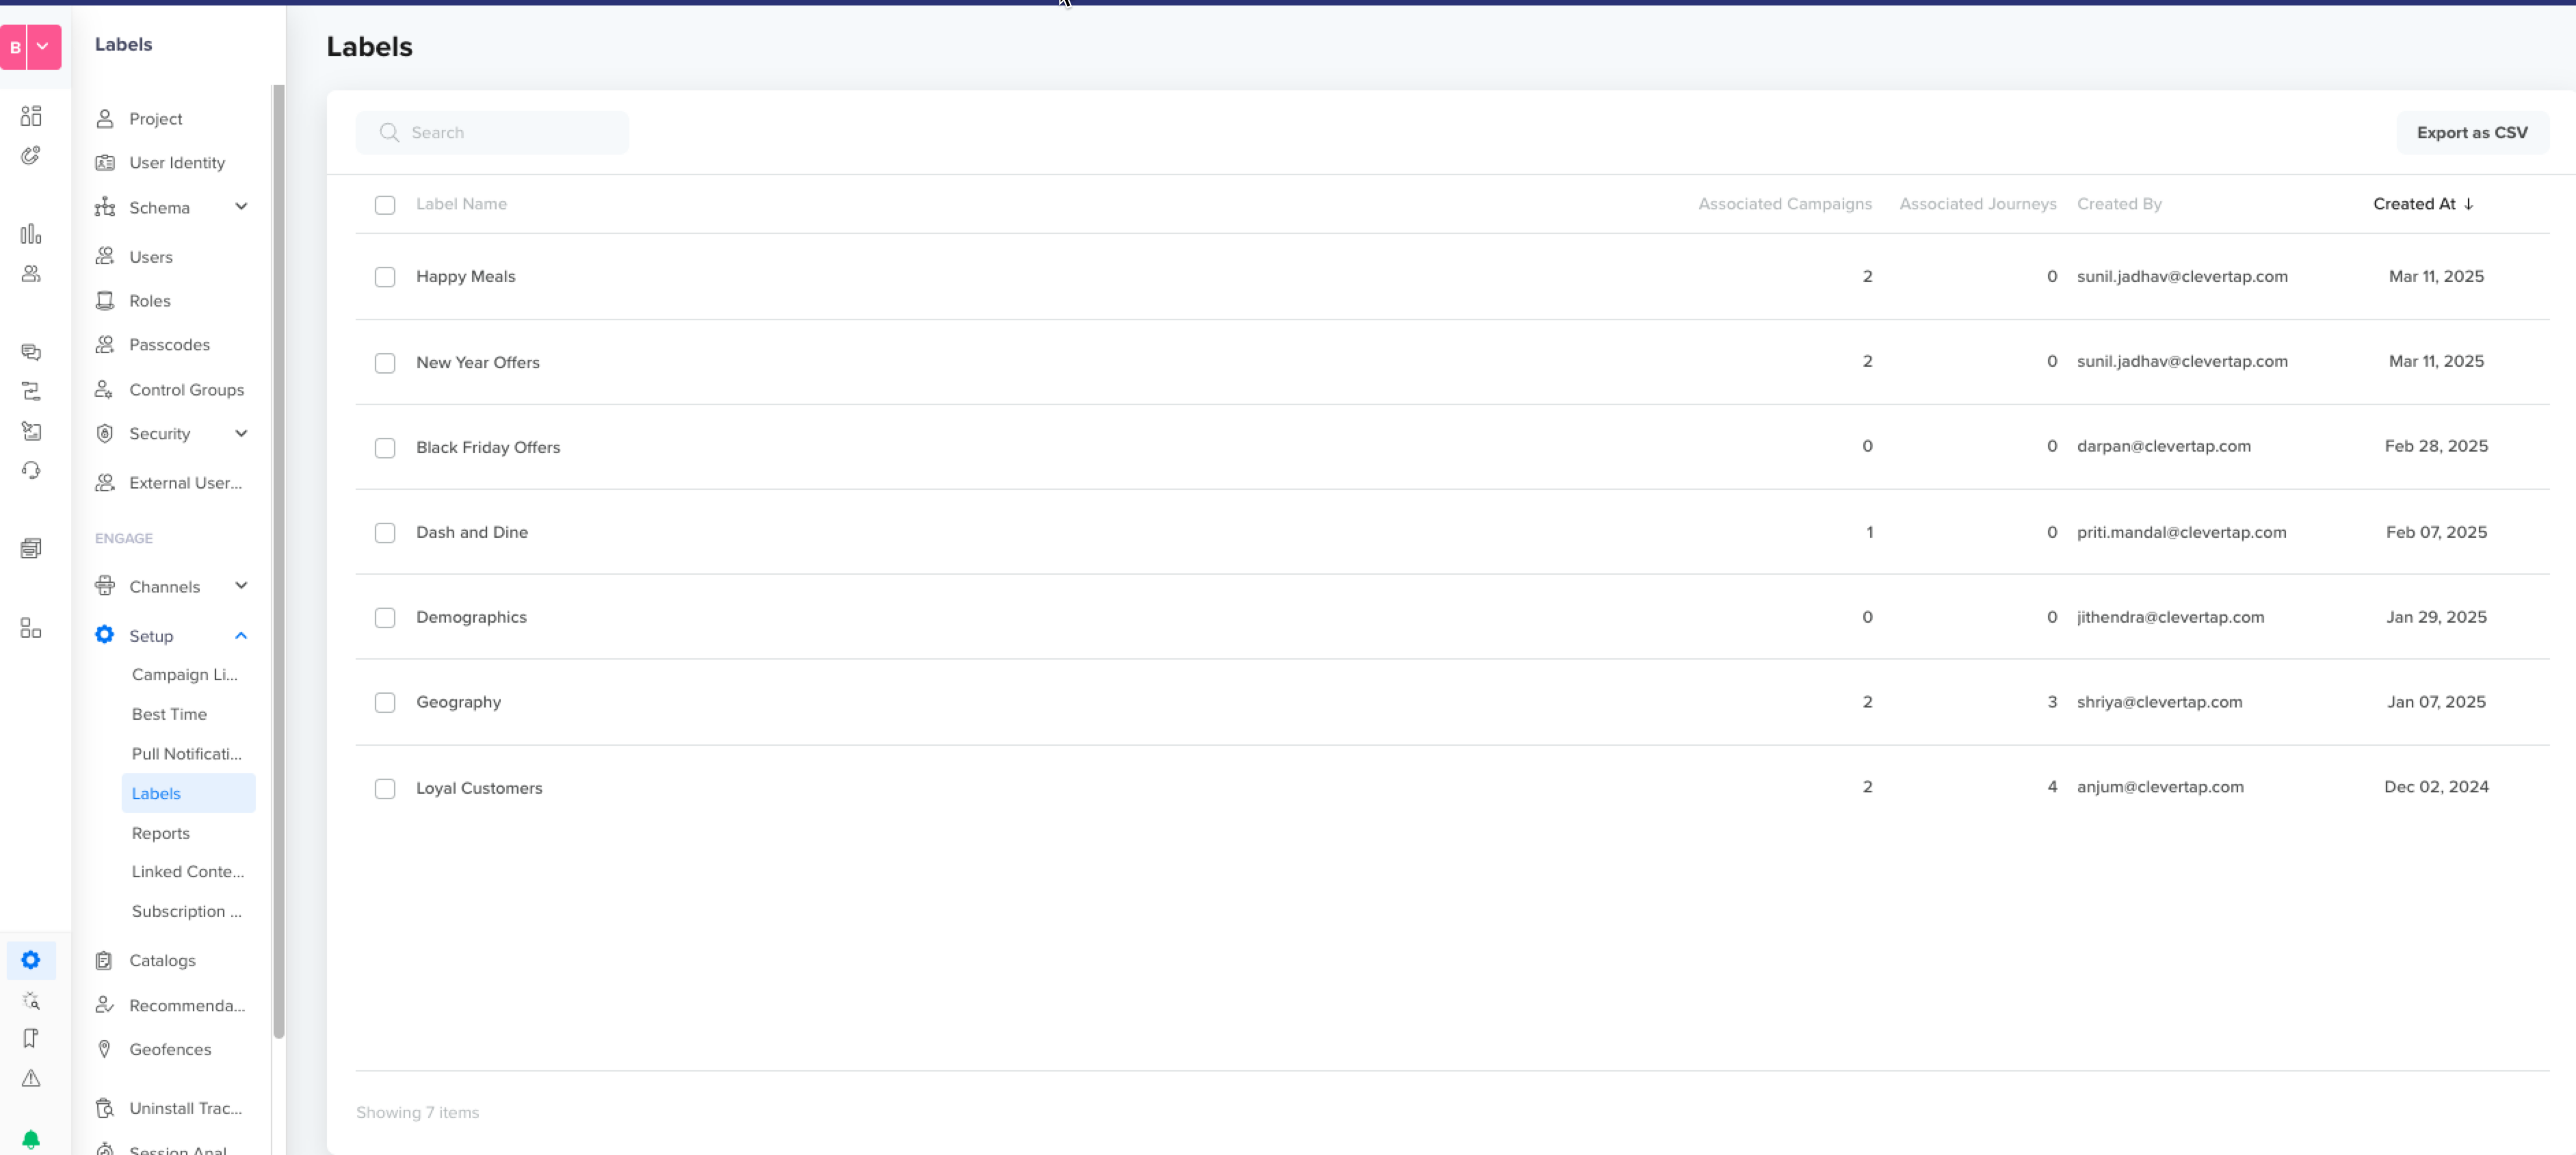
You can view and export all labels to a CSV file from the Settings > Setup > Labels page. You can also edit or delete labels from this page.
View Labels
Archive Campaigns
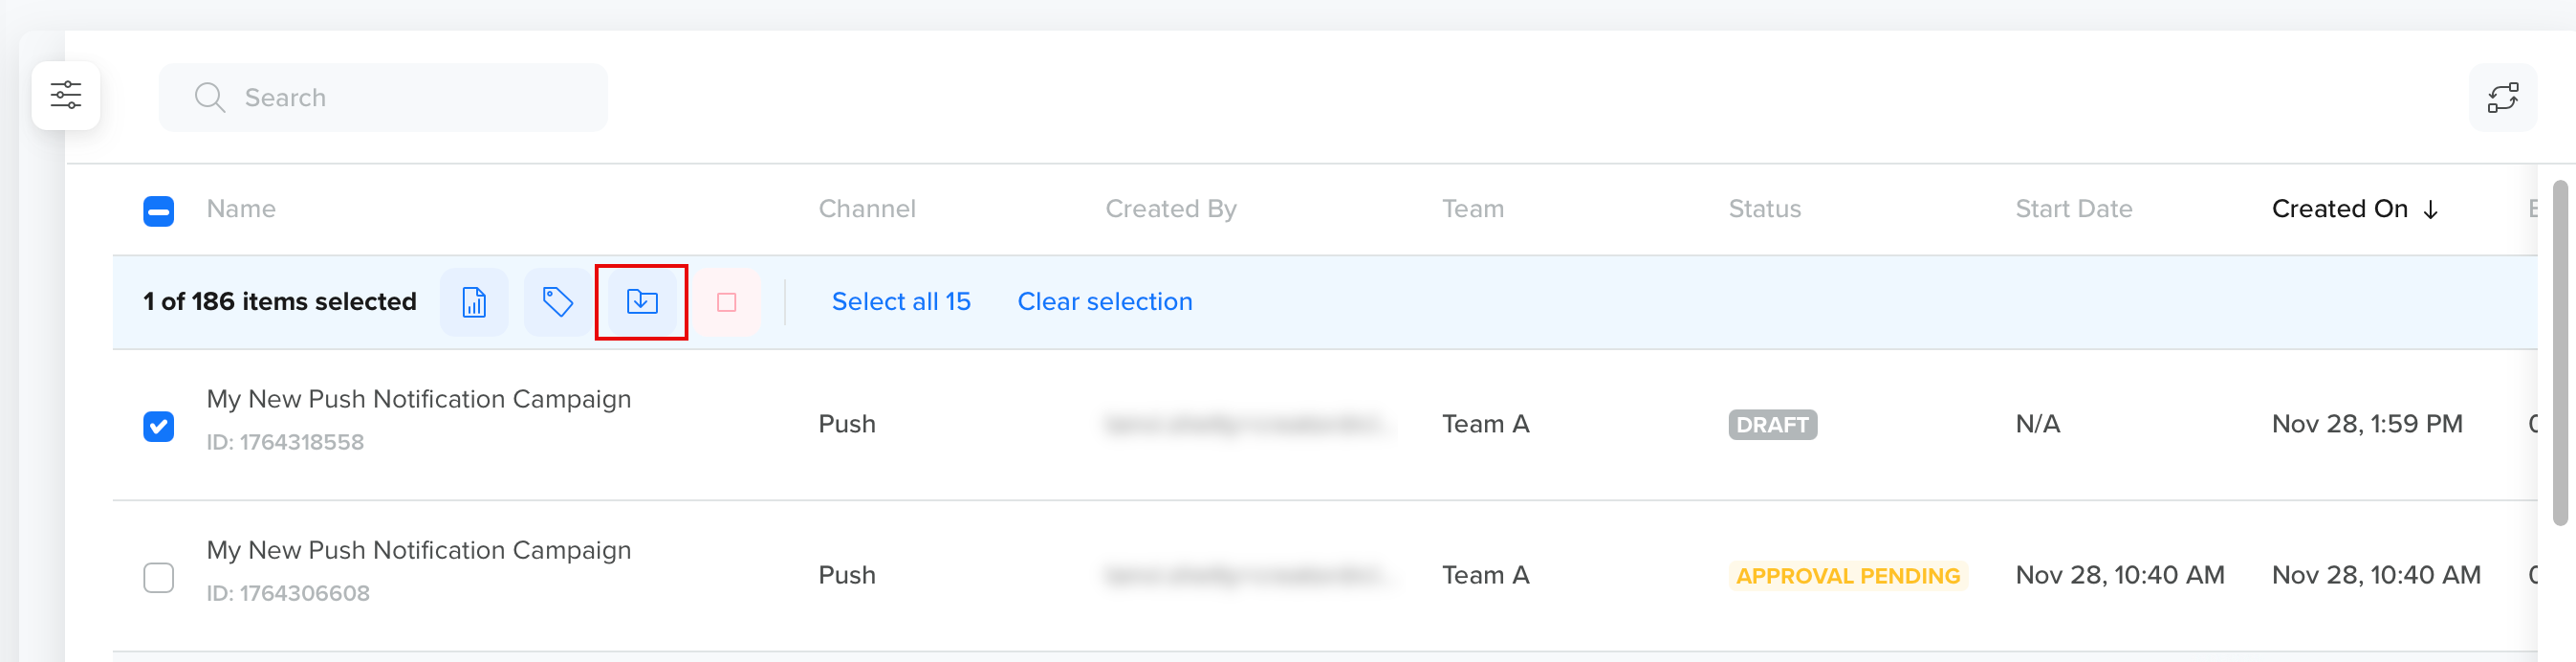
Archiving campaigns helps to keep your CleverTap account organized and clutter-free, making it easy to find and view the campaigns you want. To do so:
Go to Messages > Campaigns from the CleverTap dashboard. The All Campaigns page opens.
Select the campaigns you may want to archive and click the Archive icon.
Click Save to archive the selected campaigns or click Cancel to undo the action.
Running campaigns cannot be archived.
Archive Selected Campaigns
📘
Note
Campaigns in Completed or Stopped state are automatically archived after 6 months. To view archived campaigns, click Filters and select the Archived filter.
Archived campaigns cannot be unarchived.
All archived campaigns (including drafts) are read‑only and cannot be published. To continue working on an archived campaign, clone it. The clone is treated as a new campaign. You can Save as draft, Schedule, or Publish the cloned campaign.
Stop Campaigns
You may want to stop a particular campaign after monitoring and evaluating its efficacy. To do so:
Go to Messages > Campaigns from the CleverTap dashboard. The All Campaigns page opens.
Select the running campaigns you may want to stop and click the icon.
Stop Selected Campaigns
Click Save to stop the selected campaigns or click Cancel to undo the action.
Once a campaign is published, you can stop it, but you cannot pause it. Click the icon for the campaign you want to stop and click Stop.
Stop Campaign
Clone Campaign
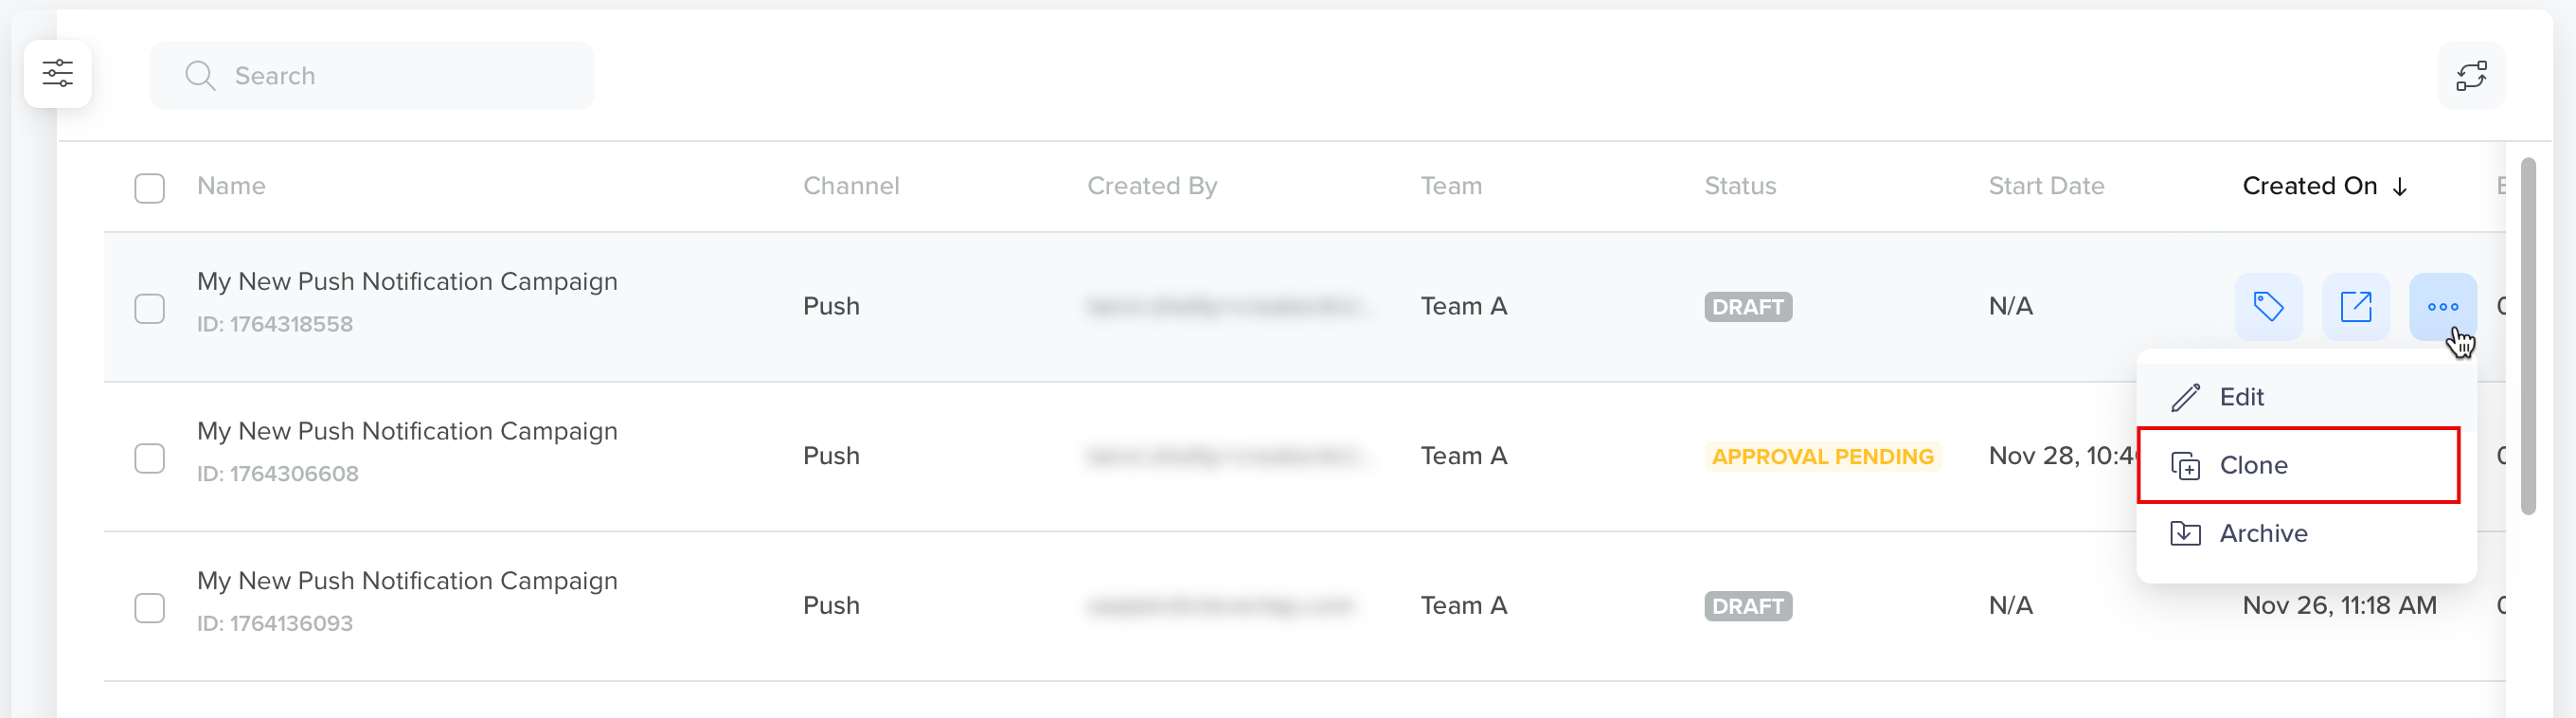
Cloning a campaign allows you to create a new campaign from an existing one with minimal or no modifications. To do so:
Go to Messages > Campaigns from the CleverTap dashboard. The All Campaigns page opens.
Click the icon for the campaign you want to clone and click Clone.
Clone Selected Campaign
Edit Campaigns
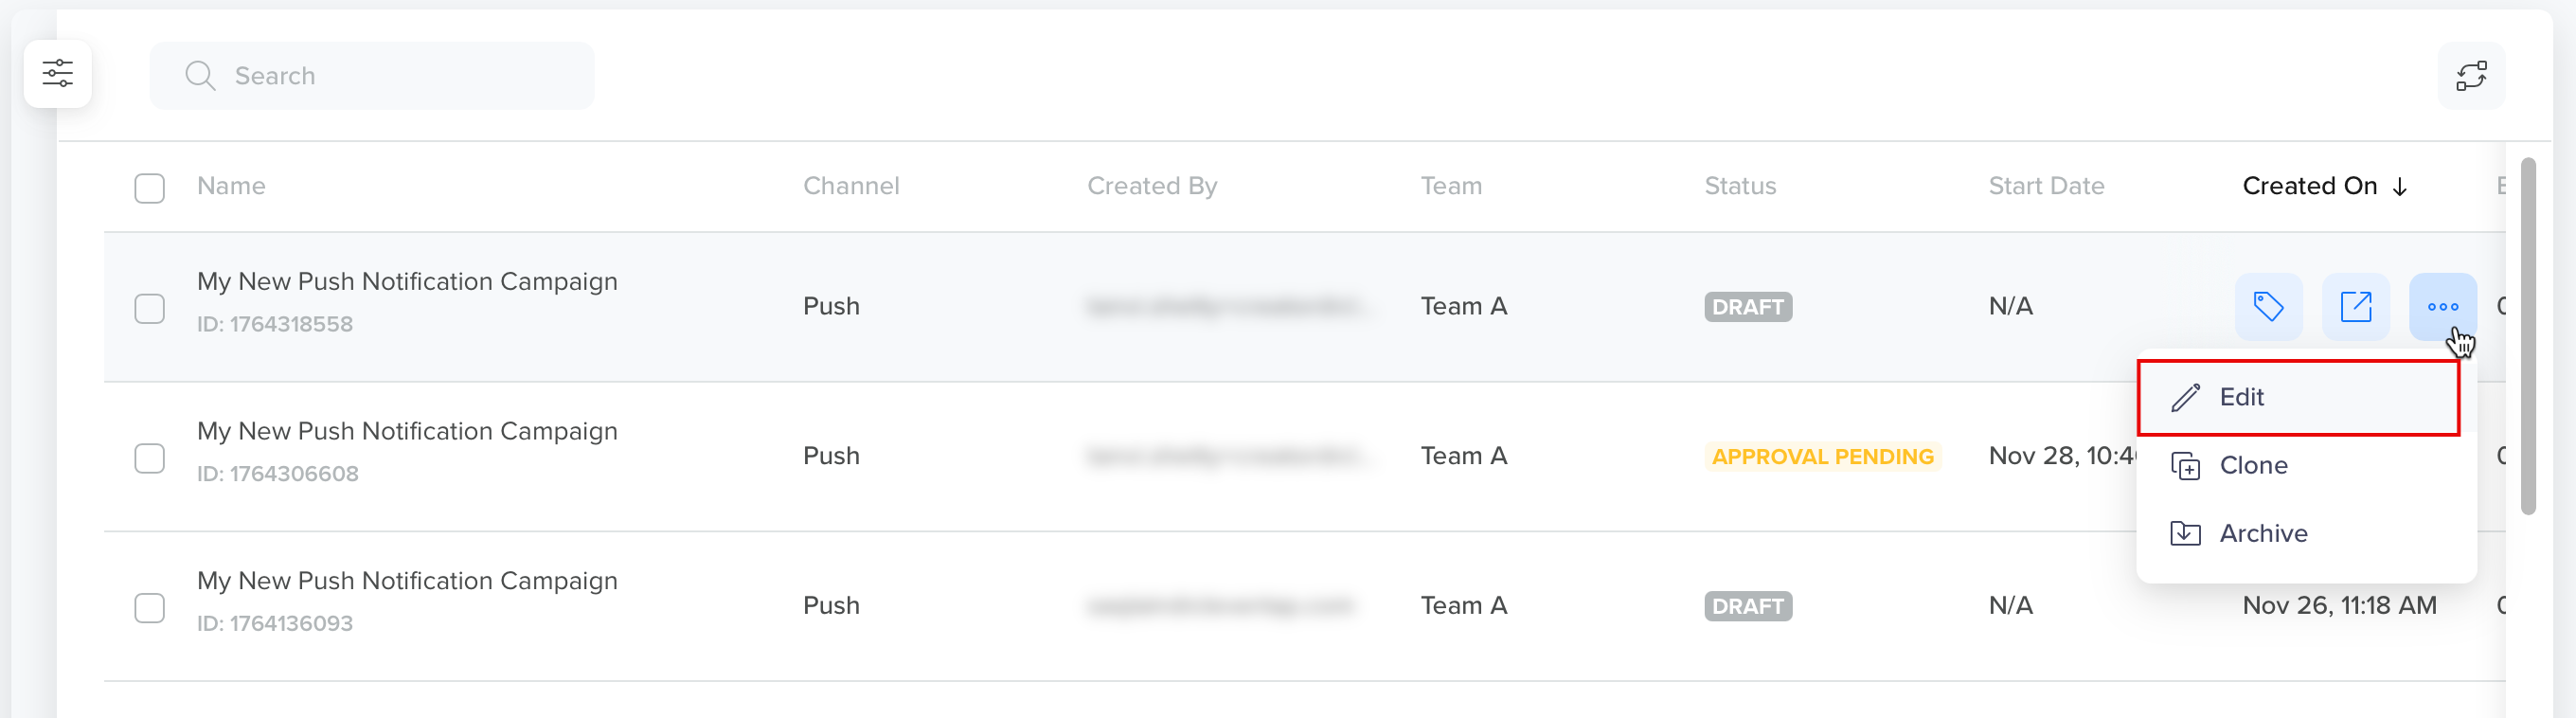
All active campaigns except those in the Stopped, Completed, Rejected, or Draft state can be edited. To do so:
Go to Messages > Campaigns from the CleverTap dashboard. The All Campaigns page opens.
Click the icon for the campaign you want to edit and click Edit.
Edit
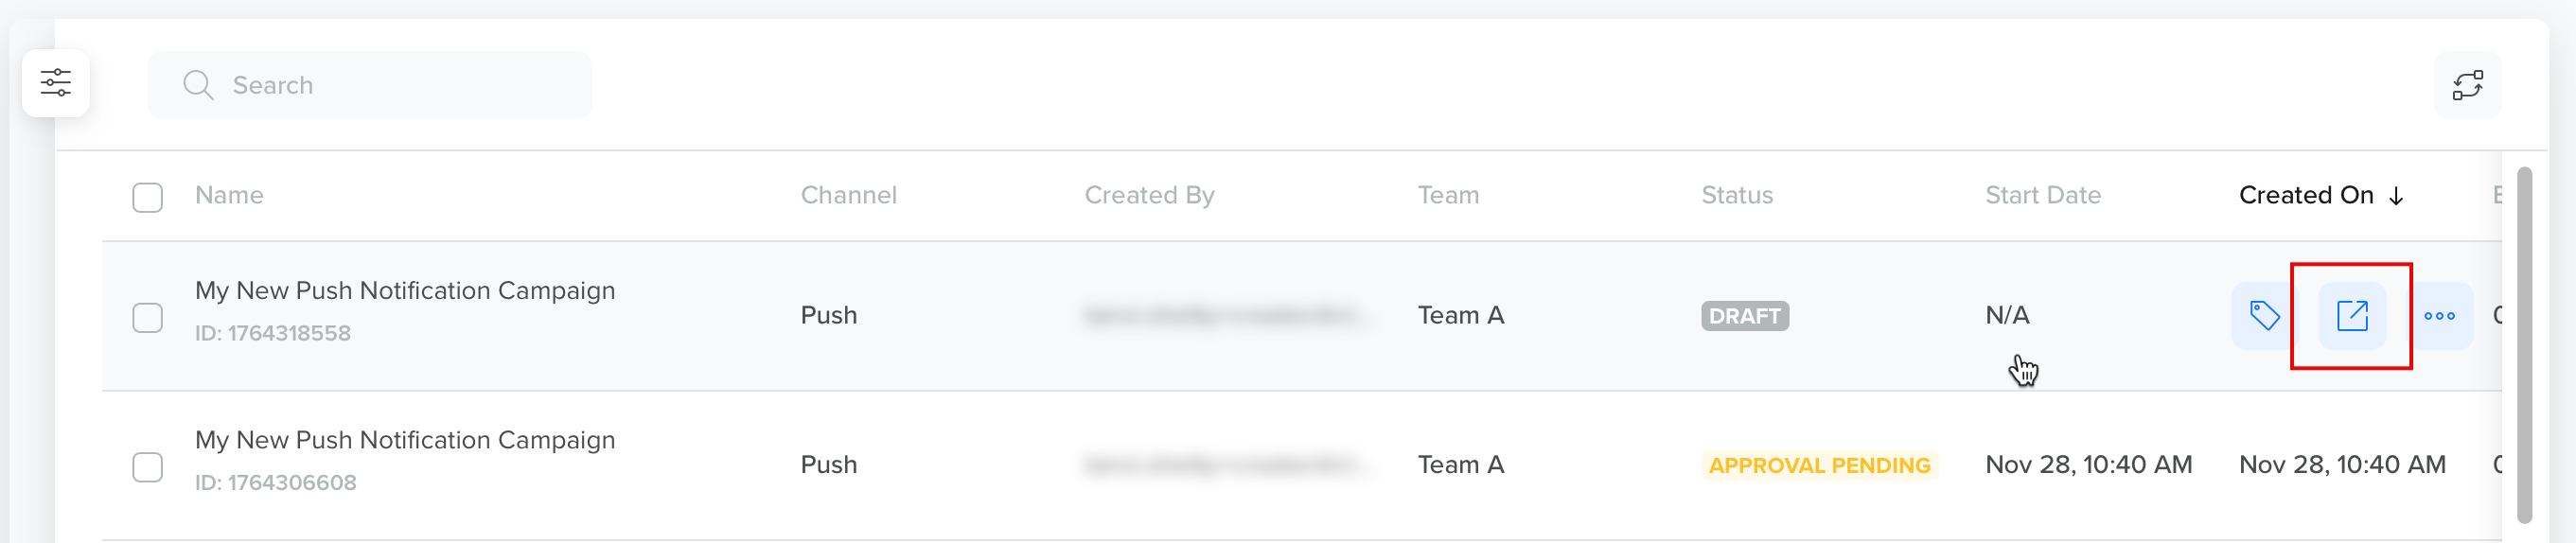
You can also click icon to open the campaign in a new tab and edit it. If the campaign is completed, you can view the statistics.
Open Campaigns
Campaign Reports
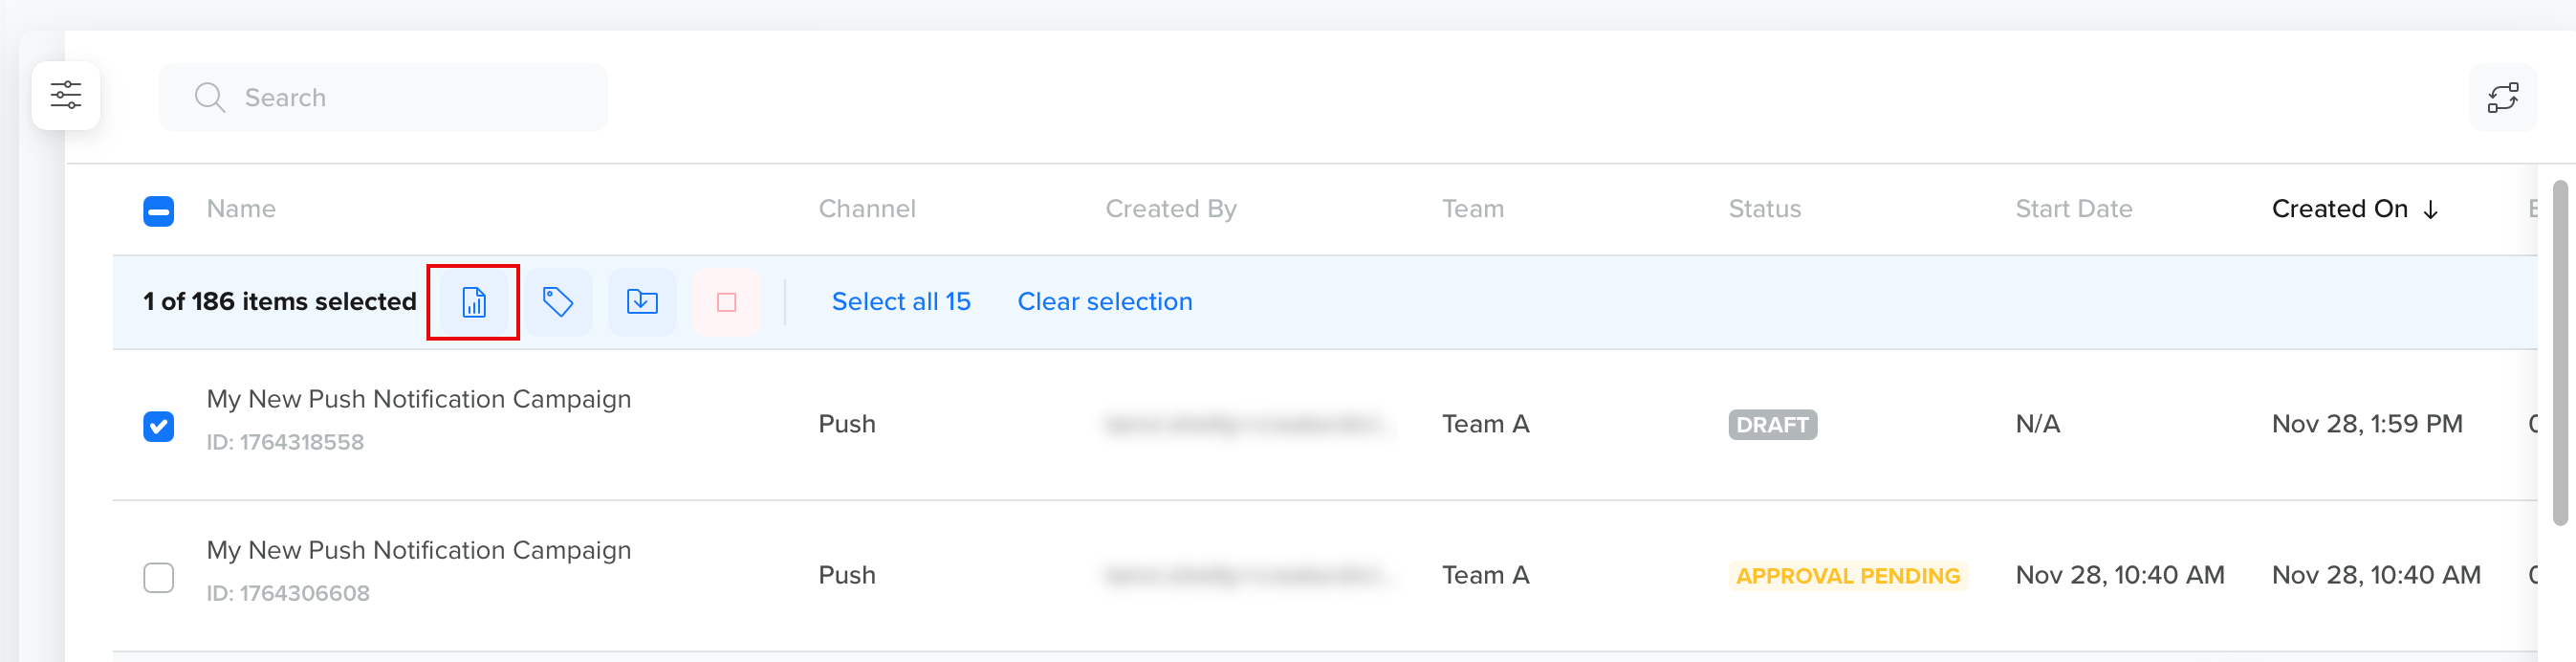
Selecting Campaigns from the CleverTap Dashboard opens the Campaign Reports table, where you can see all your campaigns across every channel in one consolidated view. Campaign Reports include the channel, delivery status, and key statistics to assess and compare performance.
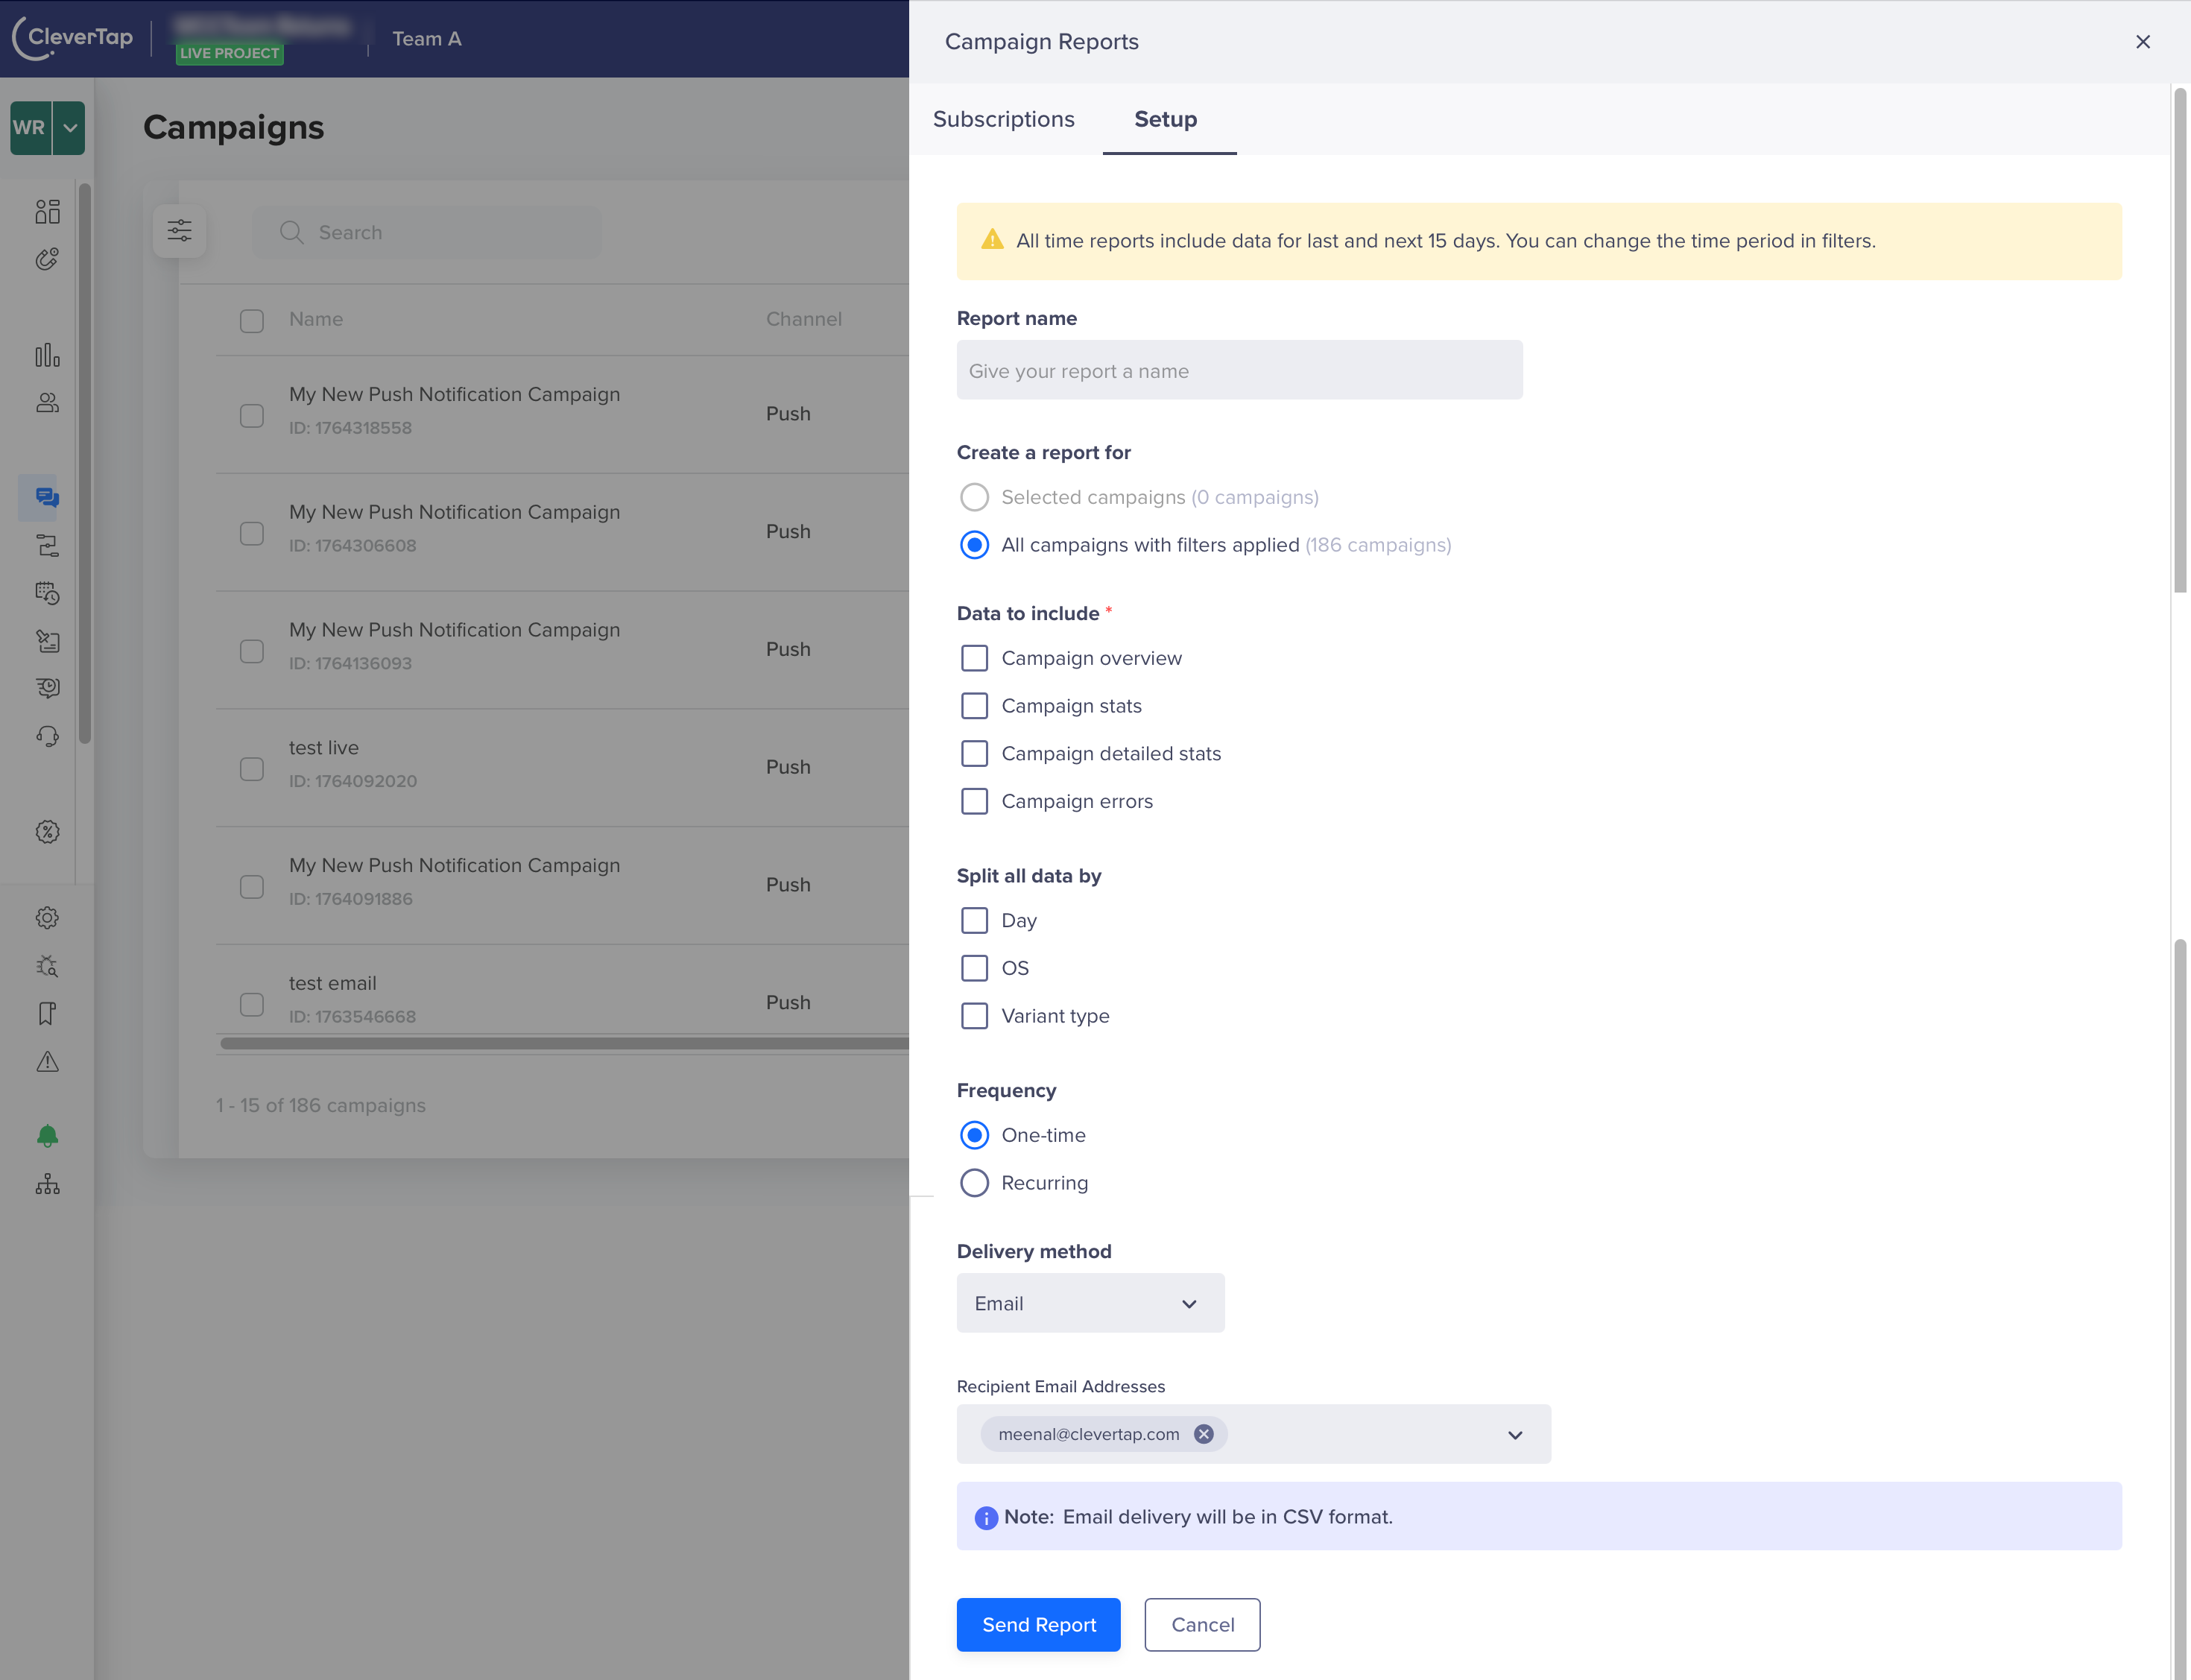
Click Subscribe to Reports and configure the columns you want to include in the report.
Filter Campaigns and View Campaign Reports
You can also email a report by selecting the campaign and clicking Send Report from the Campaign Reports window or by clicking the icon from the campaign listing page.
Email Report
If the report section opens with All Time as the selected time period, requesting the report automatically adjusts the date range to ±15 days. A warning message is displayed to inform the user of this change. For more information, refer to Campaign Reports.
📘
RBAC Enforcement for Campaign Operations
The campaign listing page supports Role-Based Access Control (RBAC) to ensure users can only perform actions that align with their assigned roles and team permissions. A user should first have access to the Campaigns or Journeys in general. From there, their channel-level permissions determine their role within each channel:
Read access: If users have read access to Push Campaigns, they can view content for all Push Campaigns.
Write access: If users have write access to certain Campaigns, they can create, edit, clone, publish, or delete content, but only for channels where they have been explicitly granted channel-level write access.
Refer to the following table for access behaviour. This applies to all actions across both Active and Archived campaigns.
Access Type
Allowed Operations
Write Access
Full control over campaigns: Create, Edit, Clone, Archive, Stop, Start, Add Labels
Read Access
View campaign details, apply filters, and email campaign reports
Error Handling
If a user attempts an action they do not have permission for (for example, editing a campaign without write access), an error message is shown indicating insufficient permissions.
Limited Access
Campaign States
Campaign Status helps track progress and manage campaigns efficiently as follows:
State
Description
Draft
Campaign is created but not yet published.
Scheduled
Campaign is set to go live at a future time.
Running
Campaign is currently live and executing.
Awaiting Next Run
Recurring campaign has completed a run and is waiting for the next scheduled execution.
Completed
Campaign has finished running and is no longer active.
Stopped
Campaign has been permanently halted.
For Campaigns with Creator-Approver Workflow
The following additional states apply only to campaigns created with the Creator-Approver workflow. These additional states help track the approval status of a campaign before it goes live.
State
What it means
Pending for Approval
Campaign is awaiting review and approval from the designated approver before it can be published or scheduled.
Rejected
Campaign is not approved by the designated approver.
Editable Fields by Campaign State
For Campaigns Scheduled for Later, you can edit the following sections of the campaign:
Who
What
When
For Live Campaigns Awaiting Next Run, you can edit the following:
What section
Campaign name
Message labels
Editing Rules by Campaign State
Each campaign state has distinct characteristics that determine what actions can be performed, as follows:
Campaign State
Scenario
Creator's Action
Approver's Action
Scheduled
Before scheduled time
Can edit all campaign information and send it for approval.
Can only approve; popup indicating discarded changes.
Running
During execution
Can modify only the What section of Live campaigns and send them for approval.
Can modify only the What section of Live campaigns and publish.
Pending For Approval
Before First run
Can edit all campaign information before and after the scheduled time and send it for approval.
Can edit all the campaign information before the scheduled time and approve the campaign.
Popup indicating that the campaign was scheduled in the past time; The approver can edit all the campaign information and publish the campaign.
First run was completed, and awaiting the next run
Can only edit the What section before the next scheduled time.
The creator can edit only the WHAT section before the scheduled time and send it to the approver for approval.
The approver can edit only the WHAT section before the scheduled time and publish the campaign.
If the creator tries to edit the campaign after the scheduled time, a popup opens. The popup indicates that the changes made by the creator will be discarded.
If the approver tries to edit the campaign after the scheduled time, a popup opens. The popup indicates that the changes made by the creator will be discarded.
Rejected
First run is yet to start
The creator can edit all the campaign information before the scheduled time and send it to the approver for approval.
The approver can edit only the WHAT section before the scheduled time and send it to the approver for approval.
The creator can edit all the campaign information after the scheduled time and send it to the approver for approval.
If the approver tries to edit the campaign after the scheduled time, a popup opens. The popup indicates that the changes made by the approver will be discarded.
First run was completed, and awaiting the next run
The creator can edit only the WHAT section before the scheduled time and send it to the approver for approval.
The approver can edit only the WHAT section before the scheduled time and publish the campaign.
If the creator tries to edit the campaign after the scheduled time, they can edit only the WHAT section and send it to the approver for approval.
The approver can only edit the WHAT section of the campaign after the scheduled time. Also, a popup indicates that the campaign can be run today or tomorrow.
 icon. The Filters window opens on the left side of the screen.
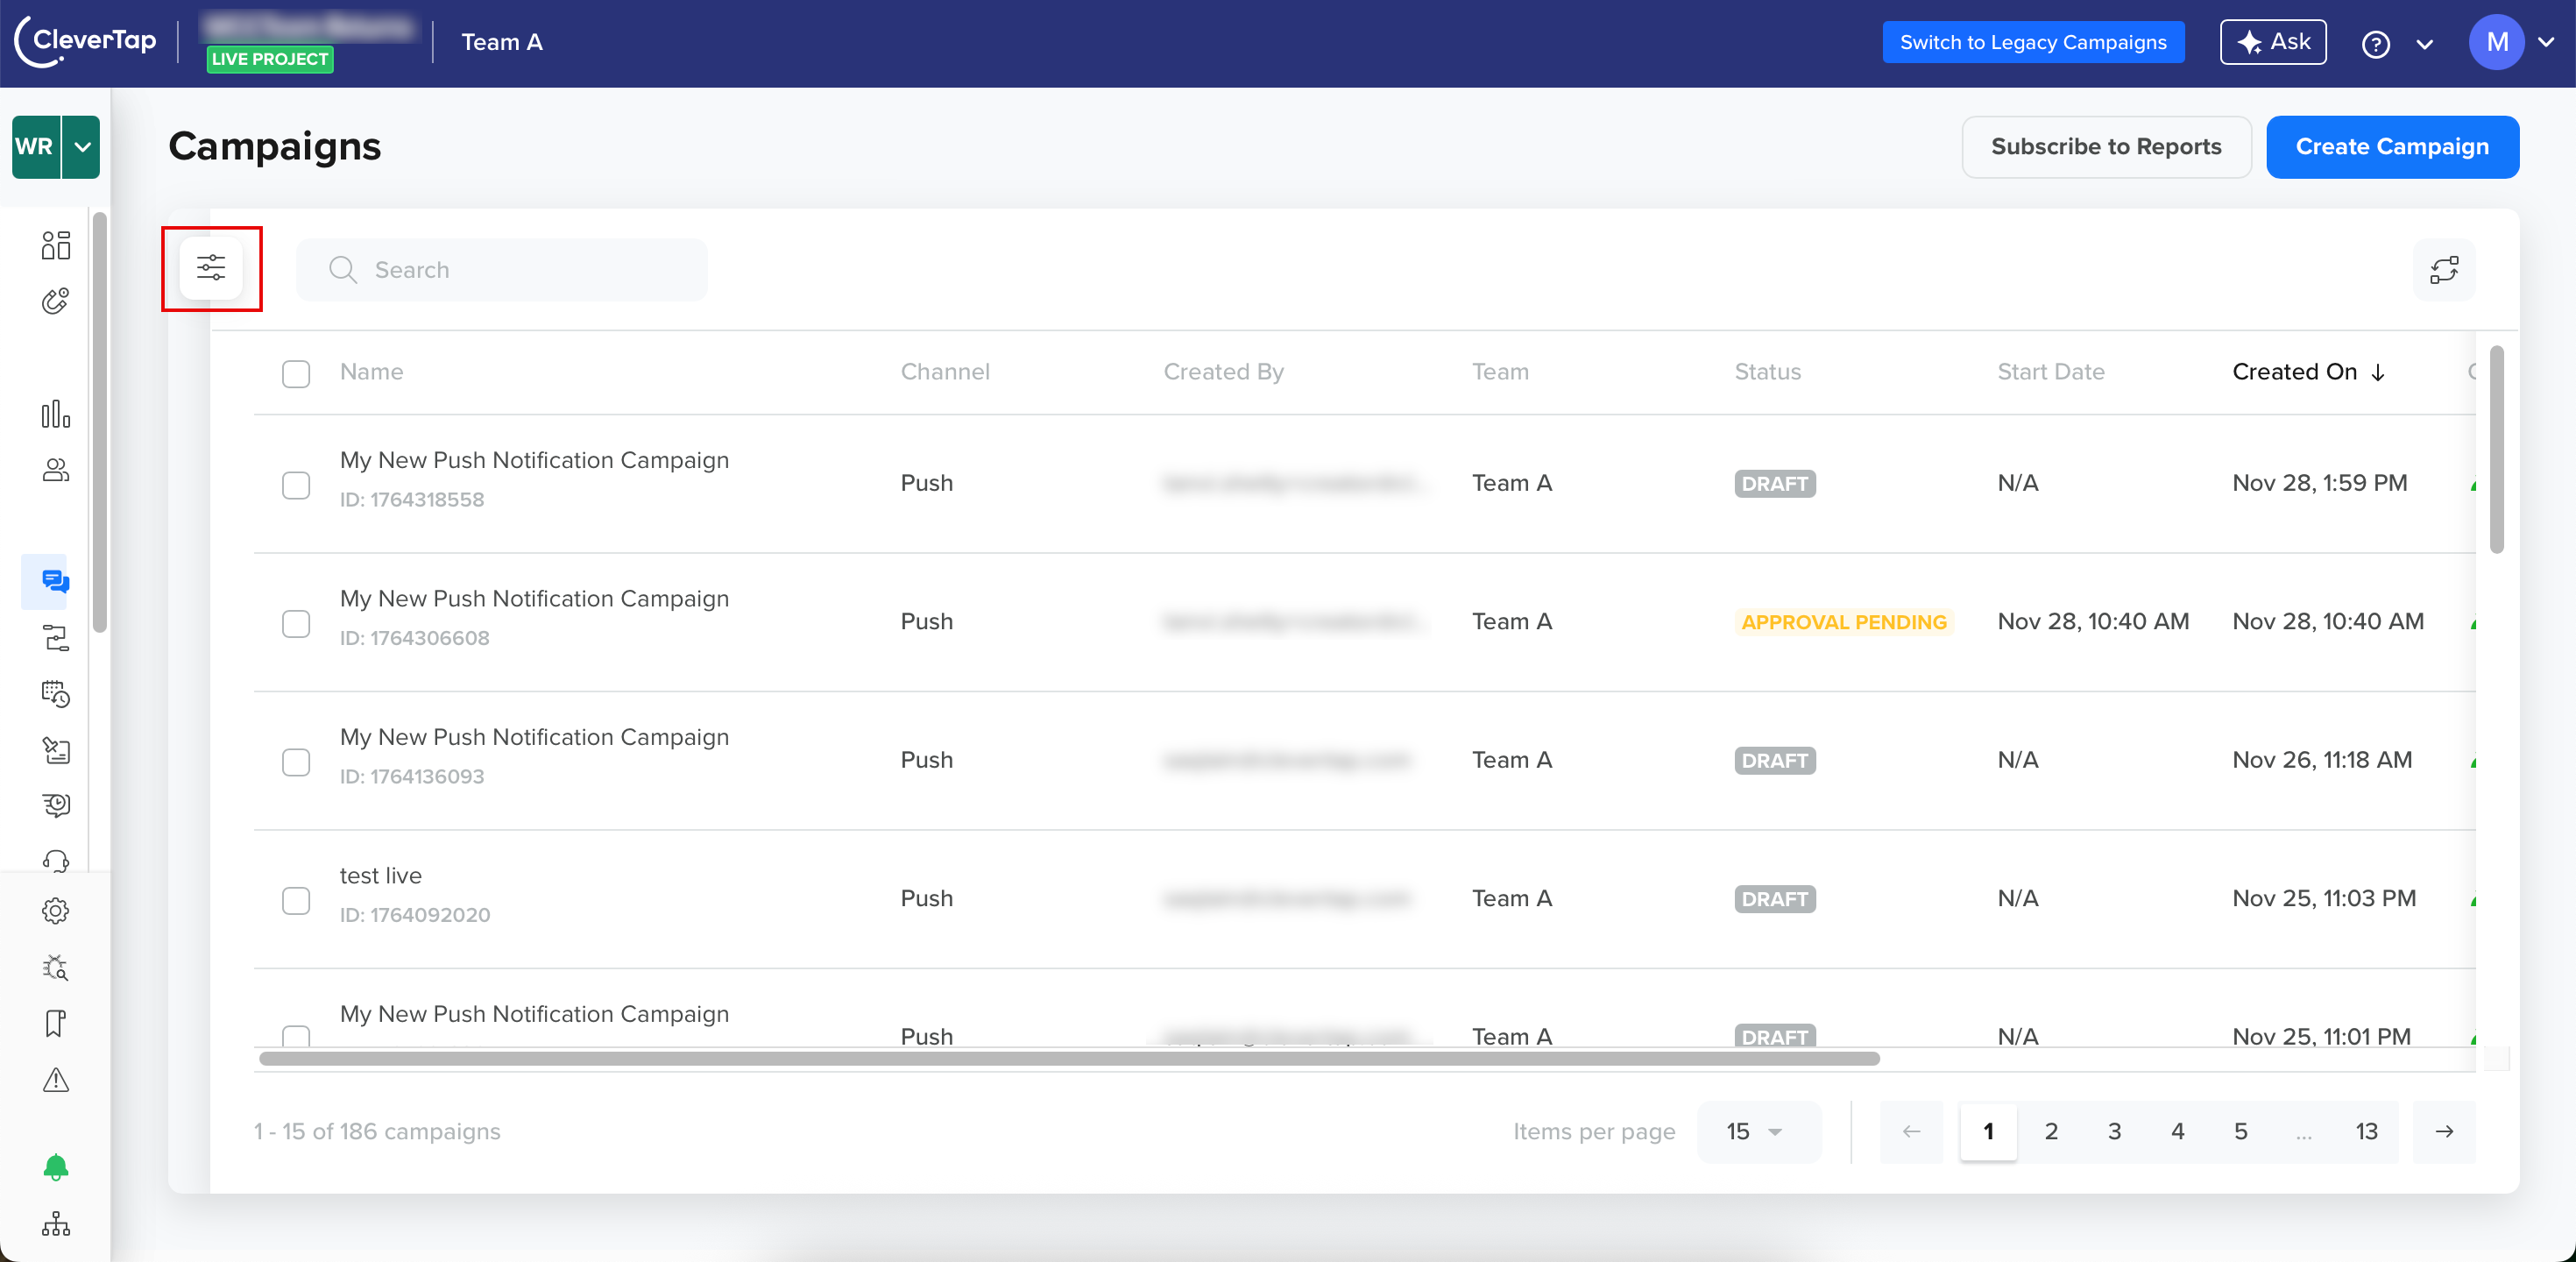
 icon.
icon.
 icon for the campaign you want to stop and click Stop.
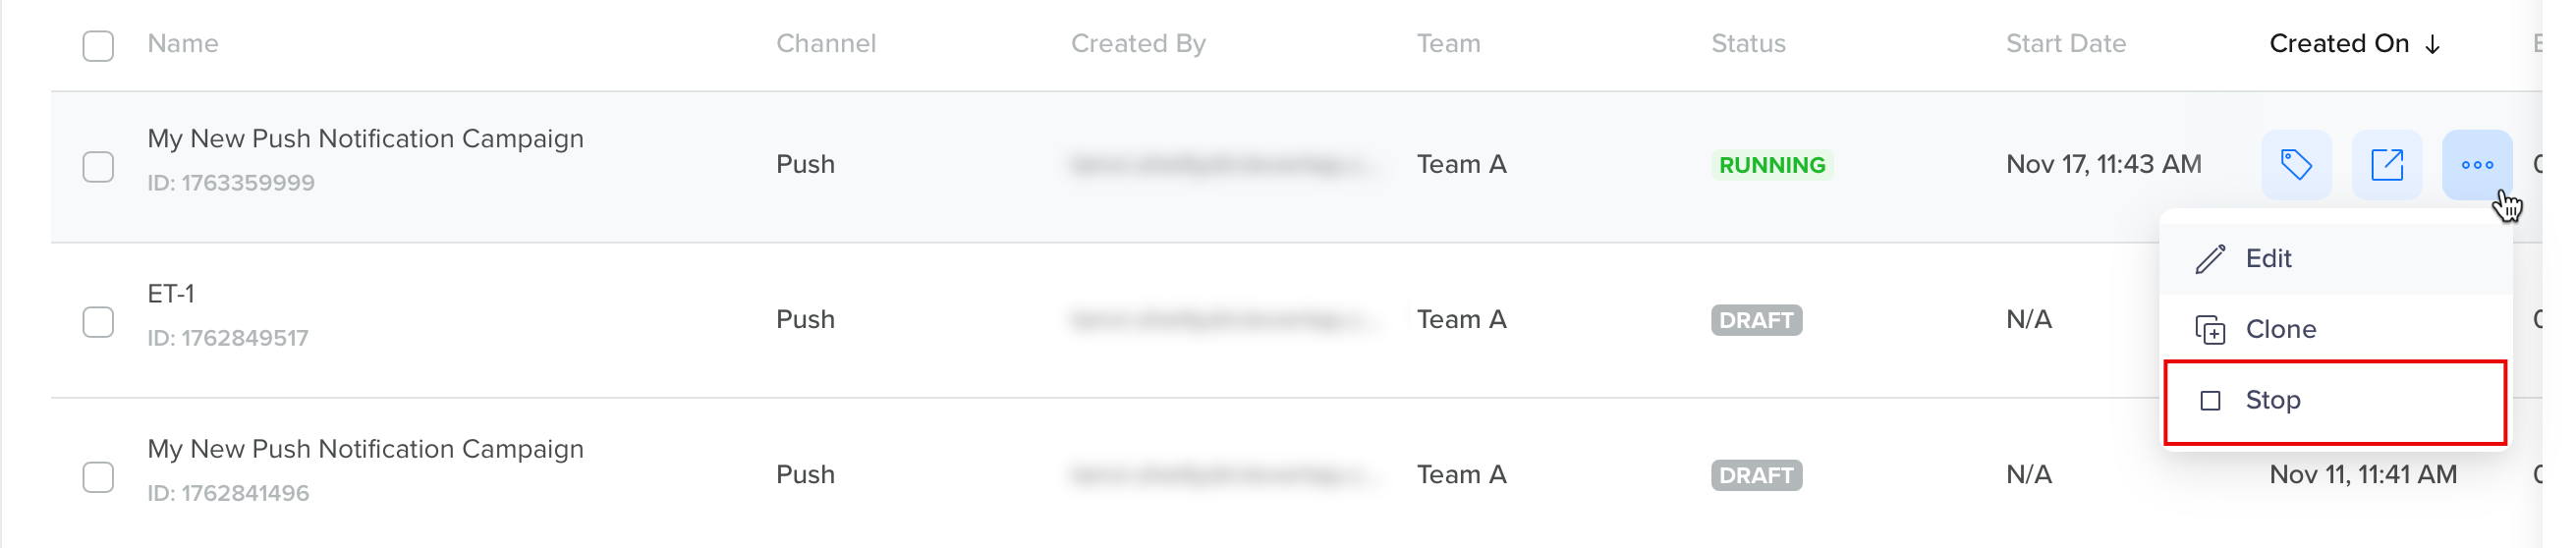
 icon to open the campaign in a new tab and edit it. If the campaign is completed, you can view the statistics.