Custom List Segment
Introduction
Custom List Segments are custom segments that you can create based on your requirements and analytics. These can be users with the required interests, demographics, and so on. You can use these segments to re-engage your users without having to apply the same conditions or filters again.
Examples
A custom list segment can be handy in many scenarios. Typical use cases can be any of the following and more:
-
A retail business running SMS campaigns:
As a retail business, you may be generating user lists at your point of sale across different cities. You can upload city-based segments and run personalized campaigns to re-engage these users. -
Engagement integrated with your segmentation engine:
You may have a segmentation engine or a data science engine that has created a user set to engage with a specific message. In this case, you can use custom list segments to seamlessly create segments from your custom lists and schedule engagement for them. -
Real-time sync for engagement with your in-house segments:
For example, an app streaming a football match can have millions of users. However, let us assume that the target audience is 10,000 users. The next match is even more interesting and you are expecting a surge in the number of users. You have a list of 15,000 users handy that you can use to run the campaign. You create a segment on this list and run a campaign immediately.
Create a Custom List Segment
You can create a custom list segment by uploading user lists via the dashboard or API.
File SizeYou can upload a maximum file size of 50 MB from the dashboard. The maximum file size allowed from an API upload is 5GB.
File Format
Only CSV file format is supported for upload. Also, the list of users for your segment must follow a specific format. You can upload the profiles with identity type as CleverTap ID (g) or GUID and identity (i).
The format of the CSV file is as follows:
| Type | Identity |
|---|---|
| g | a1e2723cba7c4518bea8ef95b036ac83 |
| i | [email protected] |
In the above format, the Type and Identity columns are mandatory for successfully uploading a custom list segment.
The Type field specifies the type of identity used for each segment user. This can be either g for CleverTap ID or GUID for a third-party identifier, and i for identity.
The Identity field contains the sample value of the identifier for each user, which can be a string or a number depending on the identifier type. For example, if using the i type, the identity field might contain email addresses, phone numbers, or your custom identifier for each user.
User ProfilesA Custom List Segment can only contain user profiles that are on the CleverTap dashboard. It does not create any new profiles or update the attributes for the existing user profiles.
Create from Dashboard
- Navigate to Segments > Segments.
- Click + Segment.
- Click Custom list segments.
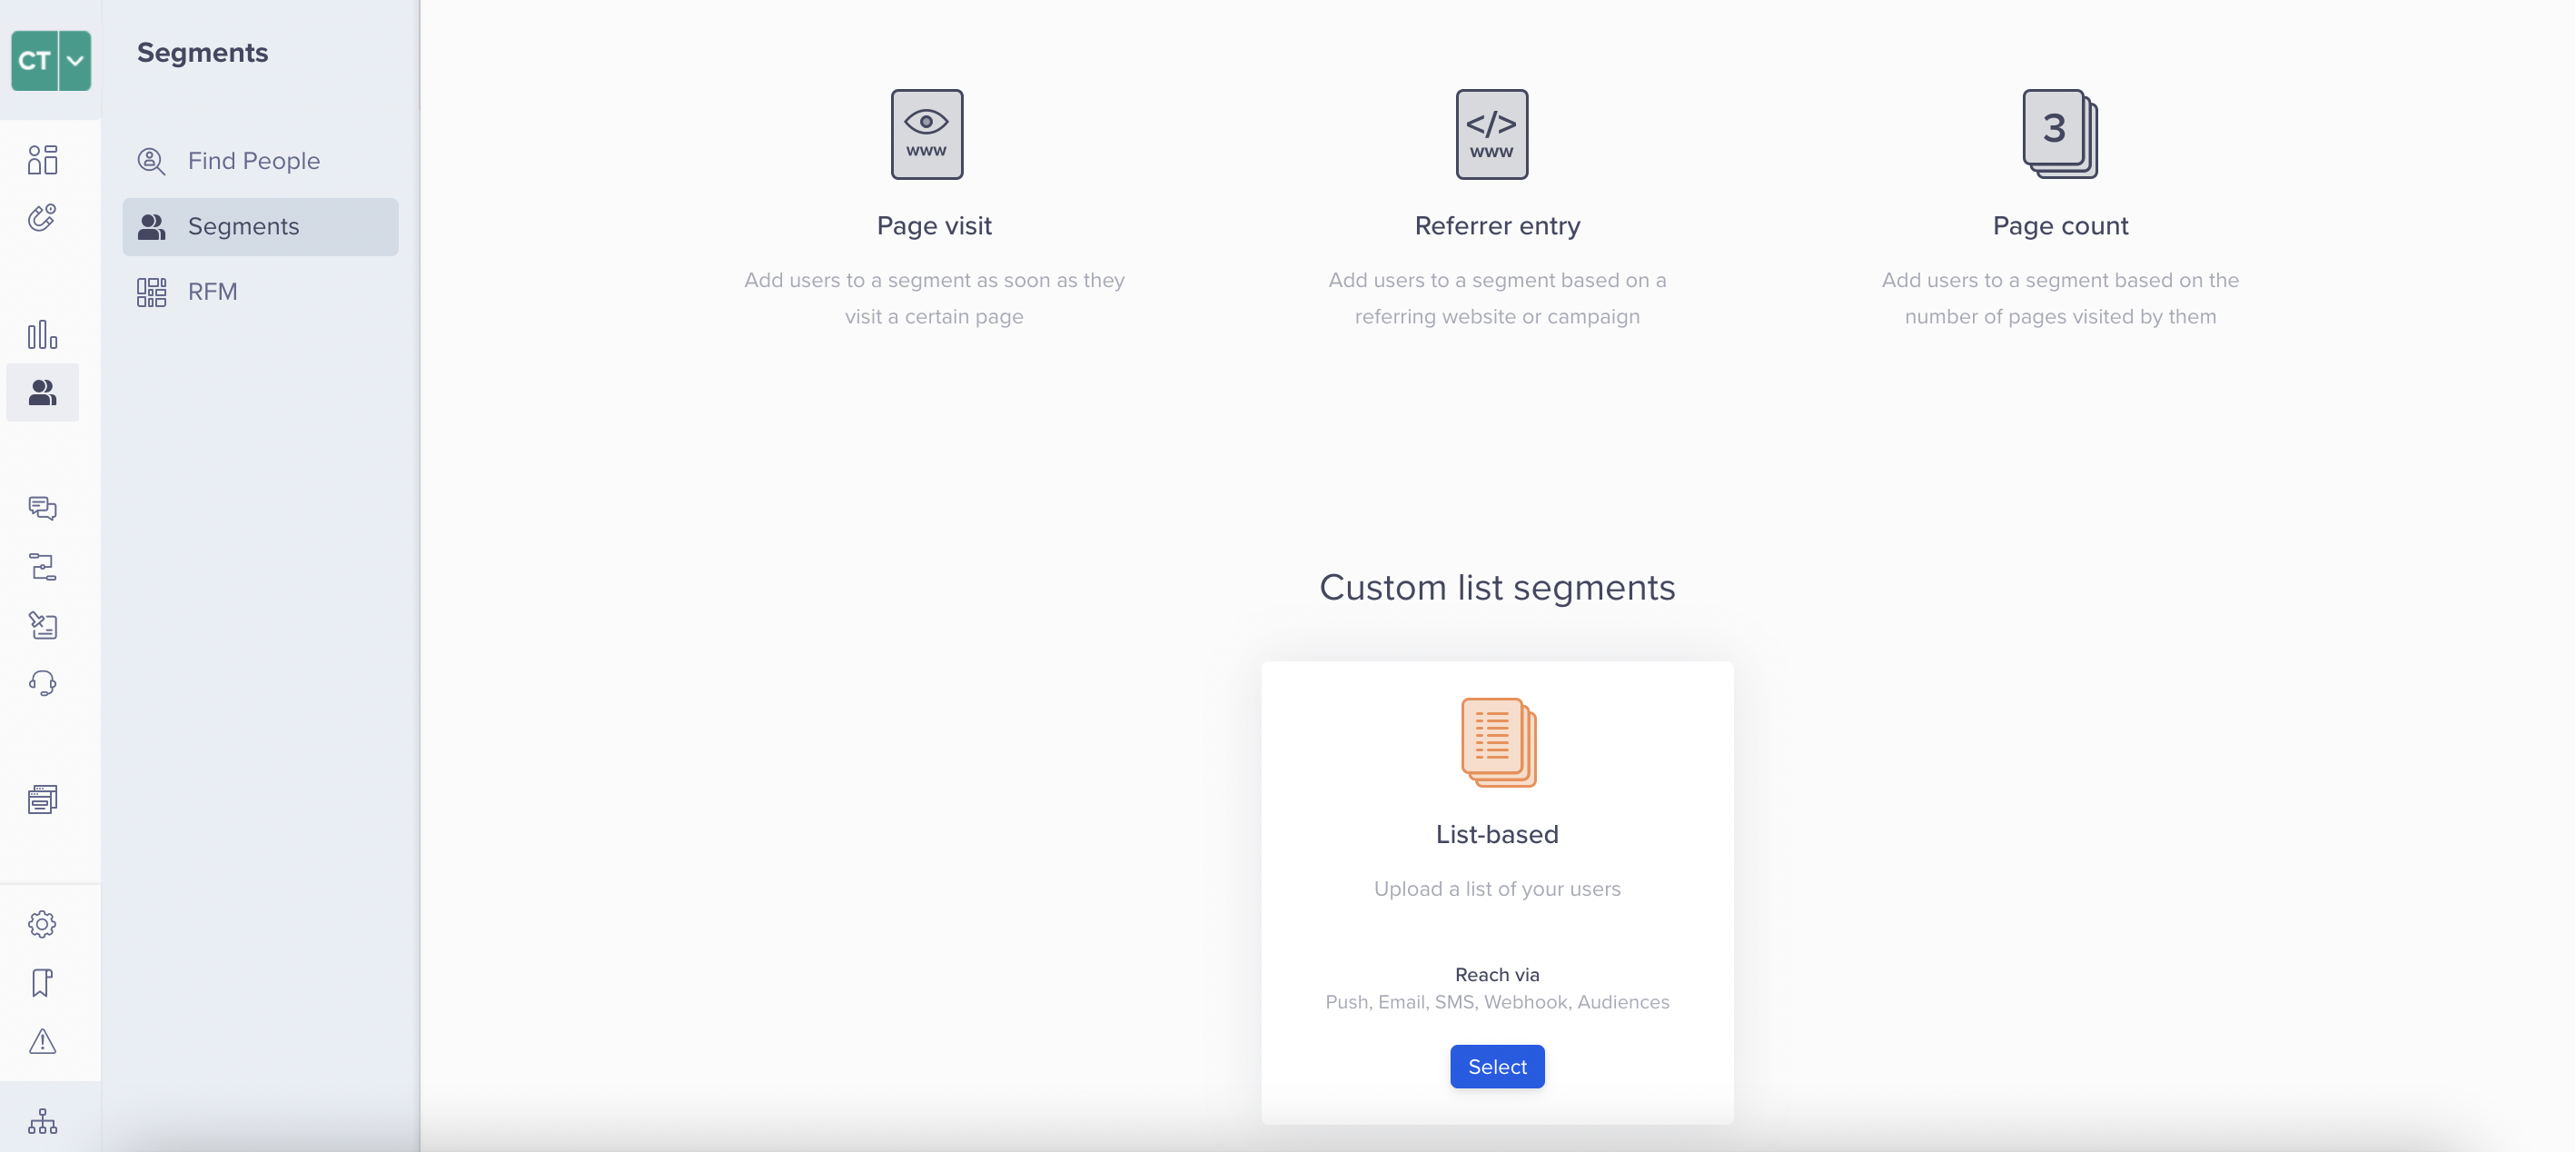 Custom List Segments
The Create new page is displayed.
- Enter the Segment name.
- Click Browse and select the CSV file to be uploaded.
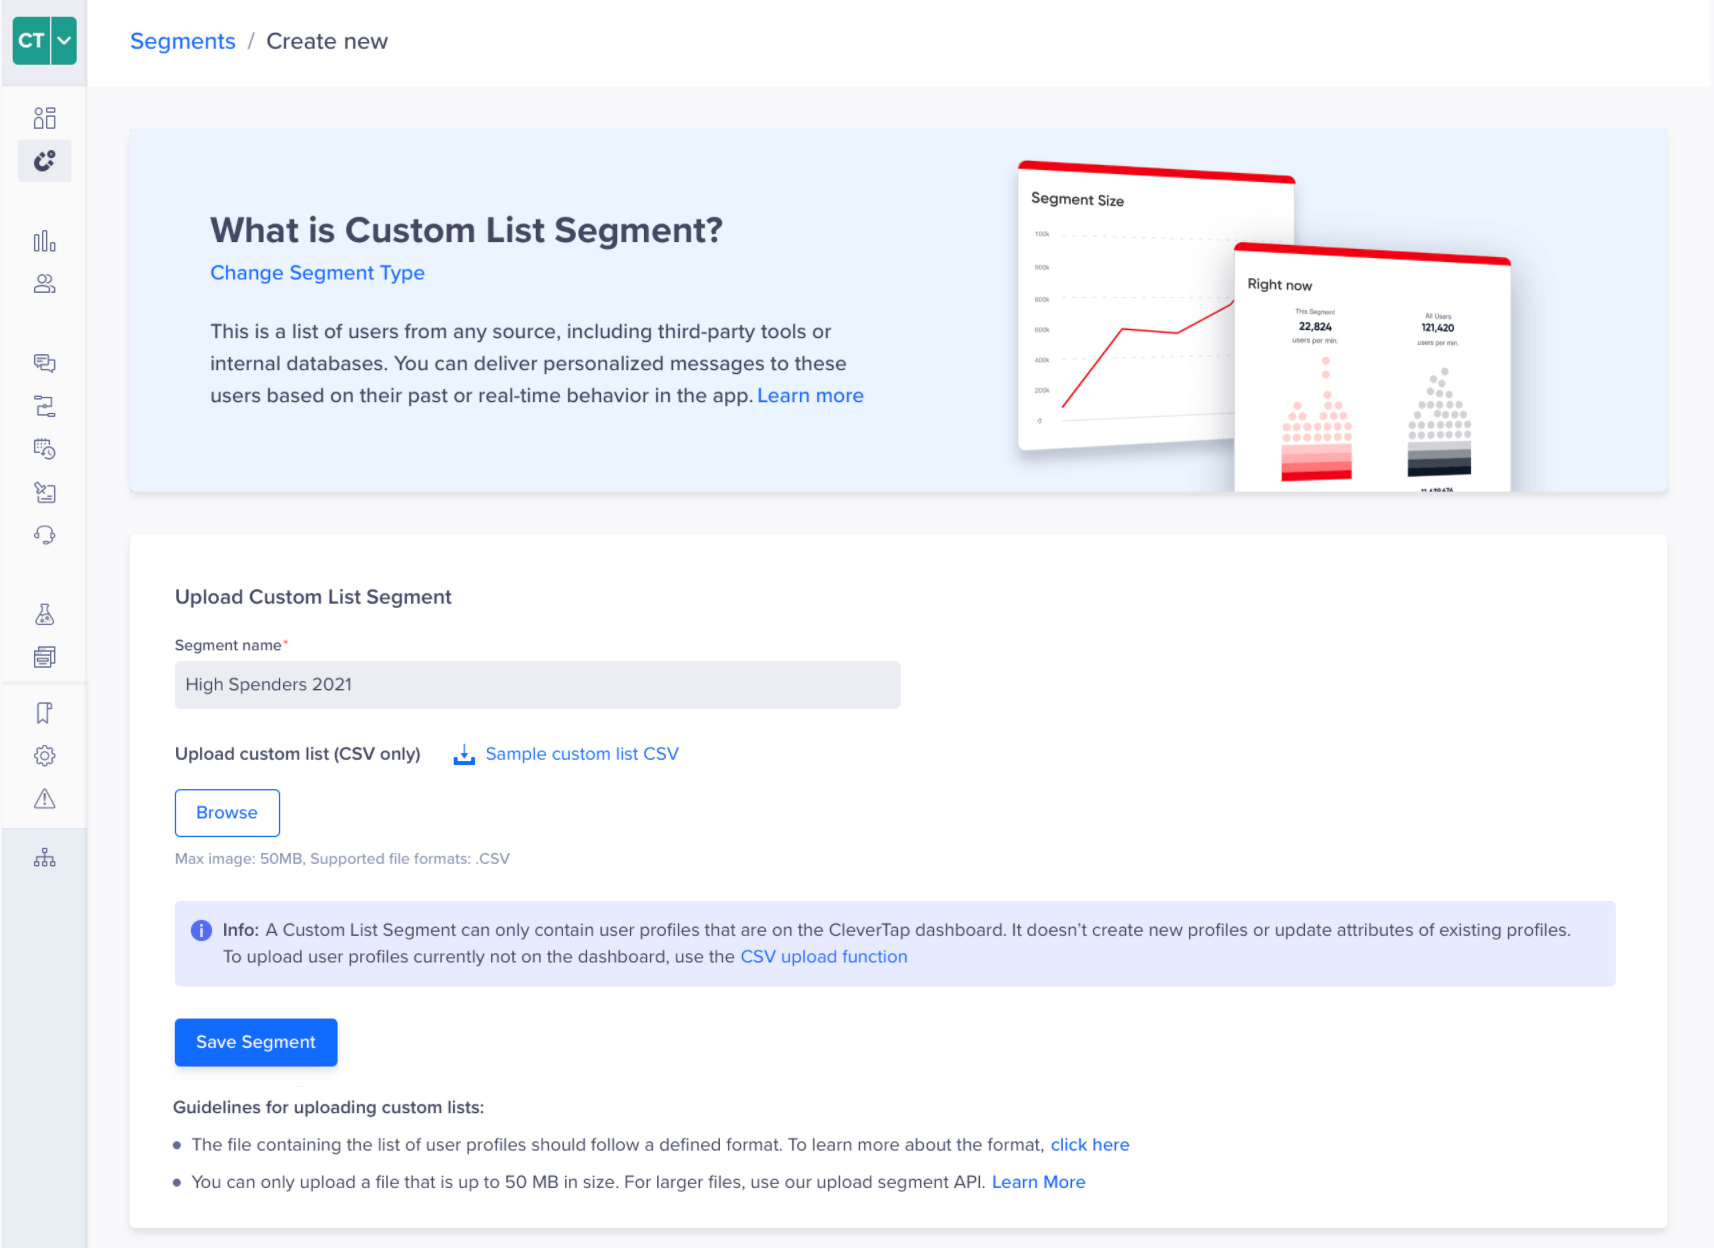 Upload CSV File
Sample custom list CSVIt is recommended to download the Sample custom list CSV file and format your custom list information as per the downloaded sample file.
- Click Save Segment.
You will receive an email with the details after the file is processed.
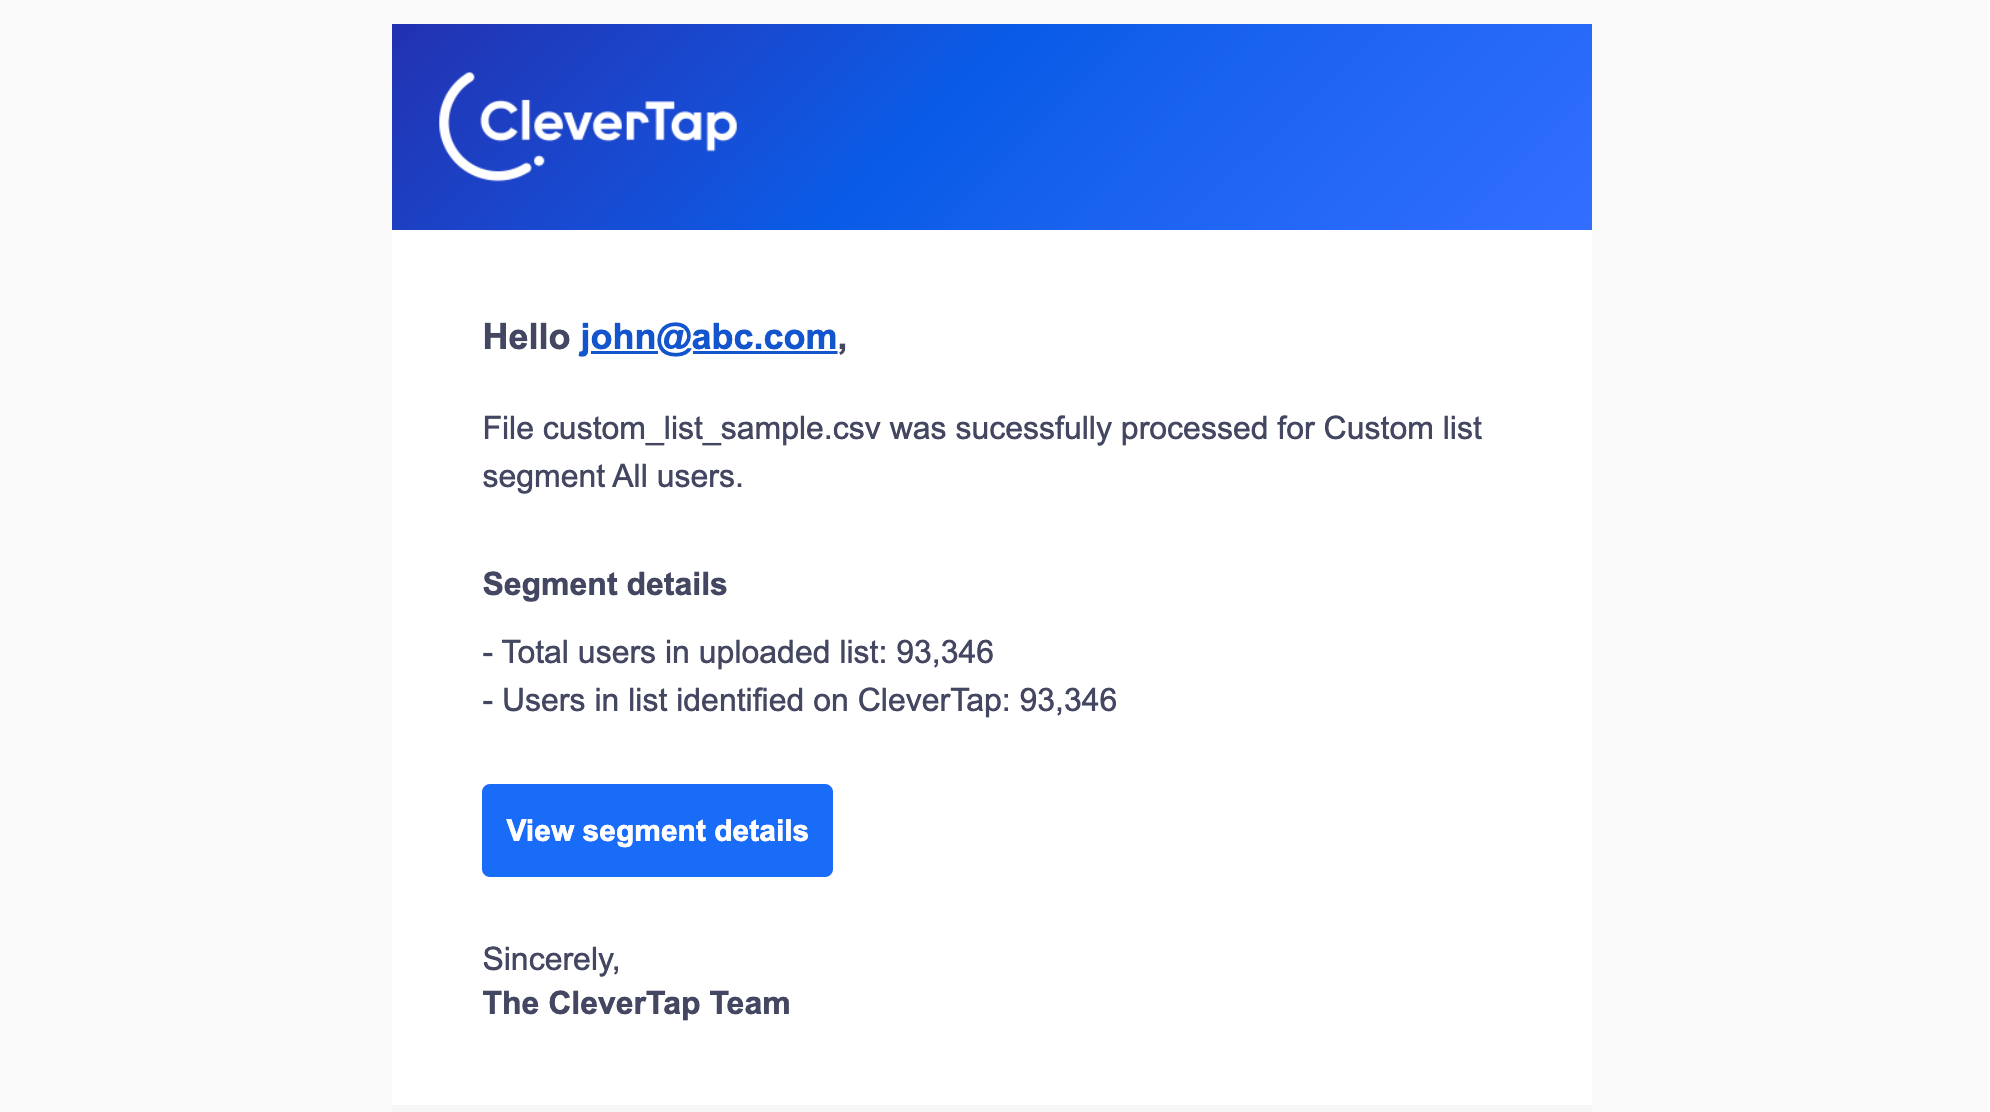 View Segment Details - Emai
The uploaded segment is now available for use.
Create from API
You can create a custom list segment from API. For detailed steps, refer to Custom list API.
Replace via Dashboard
You can replace a custom list segment from the dashboard. However, if the segment is currently in use for engagement through a Campaign or Journey, then you must stop the Campaign or Journey before replacing the segment.
To replace a segment:
-
Click the ellipsis for segment action from the Segments dashboard.
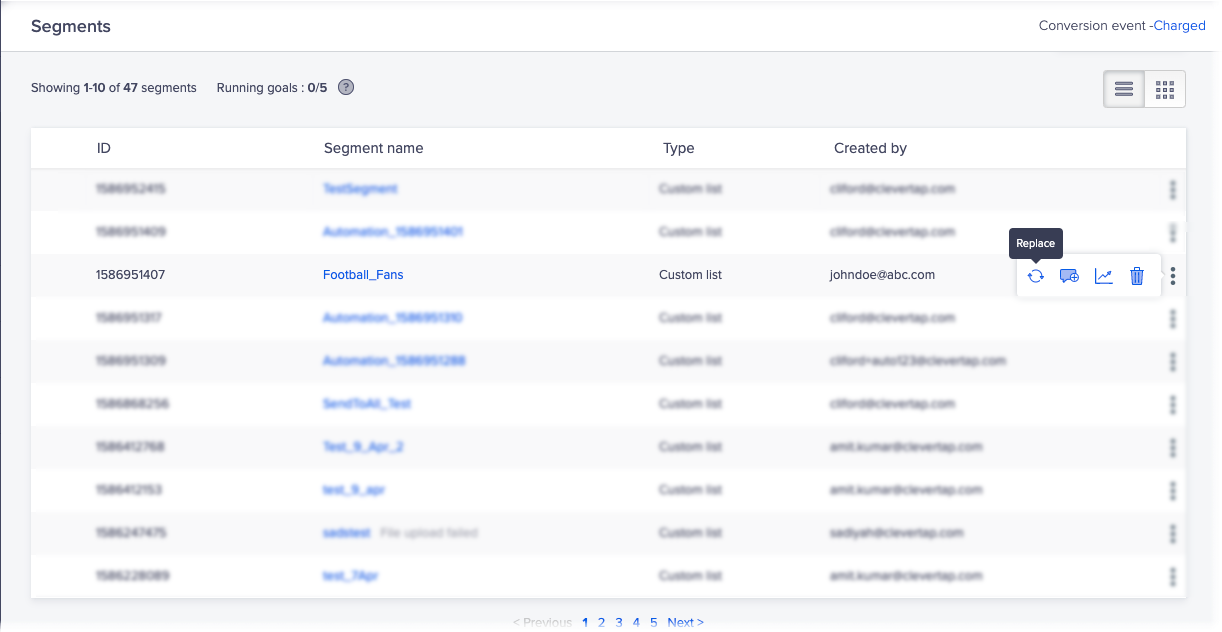 Replace a Segment
 -
Click the replace icon

-
Click the Re-upload user list and select the CSV file.
-
Upload the CSV file.
-
Name the file and save it. Wait for it to be processed.
-
You will receive an email with the details after the file is processed.
The uploaded segment is now available for use.
Troubleshoot Upload
File size exceeds 50 MB
This error occurs when the file size exceeds 50 MB.
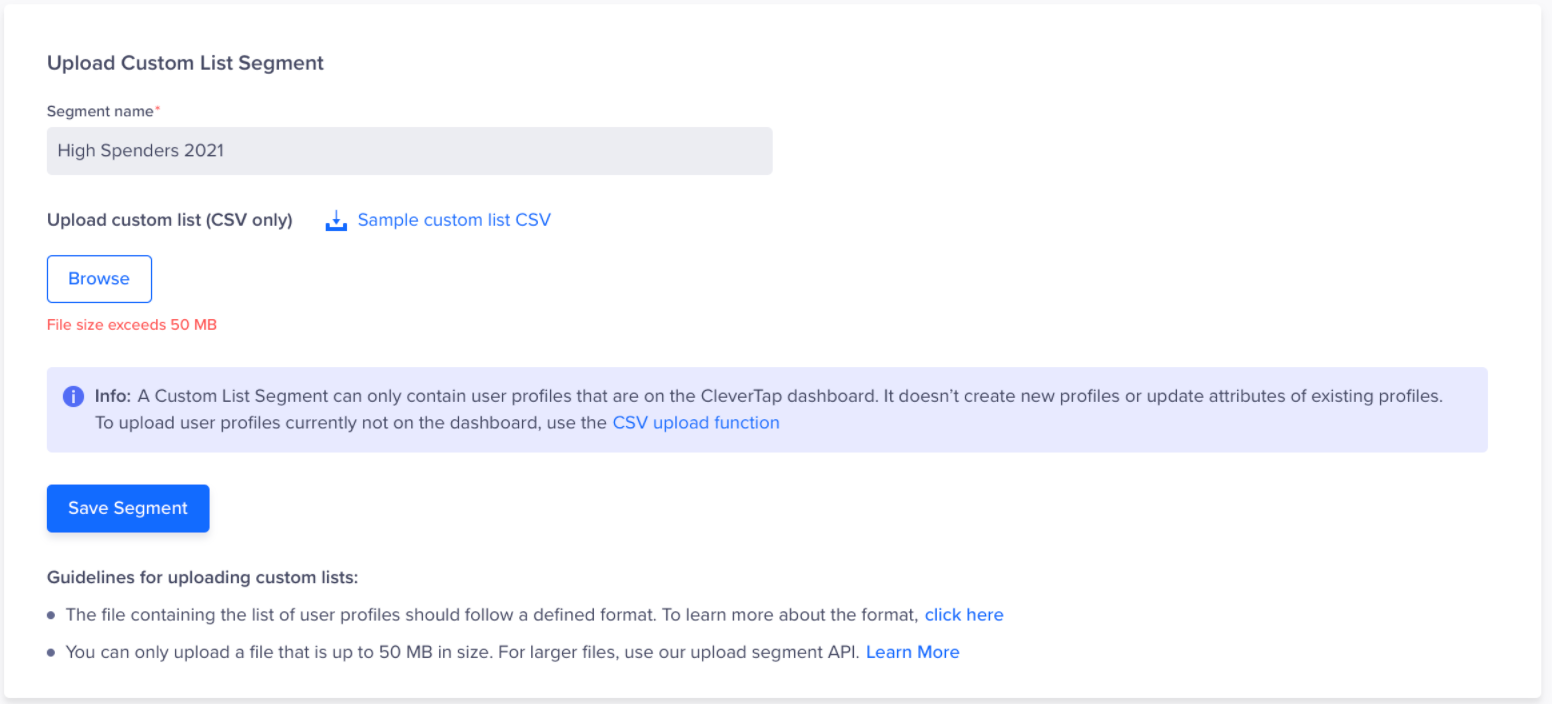 File Size Exeeds 50 MB - Error
If the file size is more than 50 MB, it can be uploaded via Custom list API.
Error uploading the file
You can see the following message when trying to upload the file.
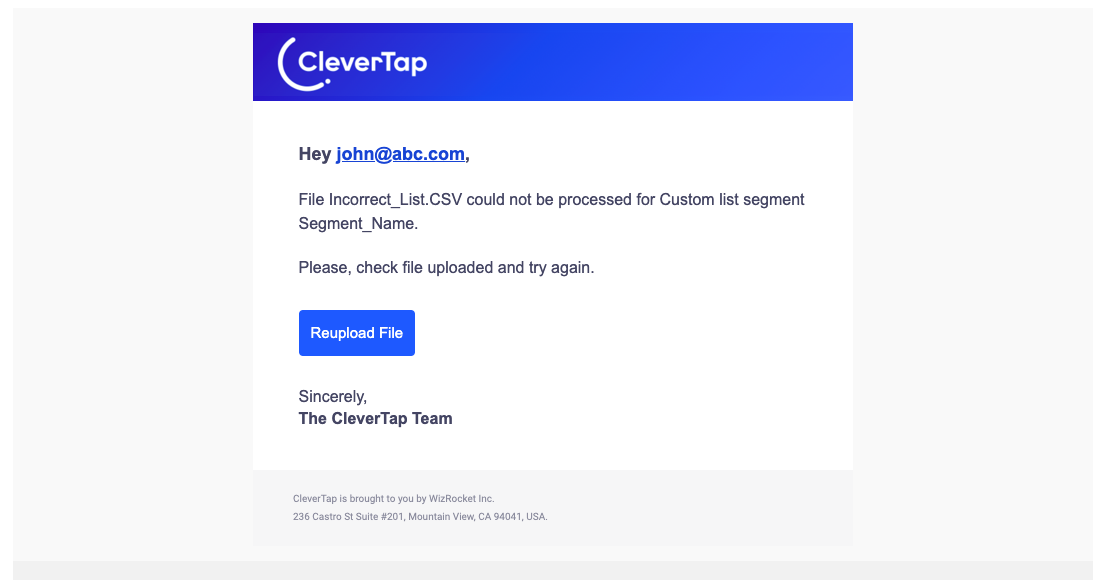 File Upload Error - Email
If the file is not uploaded correctly, you can upload it again.
| Segment issue | Resolution |
|---|---|
| File upload failed | The segment could not be created from the uploaded file. Fix the errors and re-upload the file. |
| File re-upload failed | The segment could not be refreshed with the latest file. The segment will be available with the last successful update. Refer to the View Segment Details page for the last updated file. |
Segment processingThe custom list segment is available for use only after the process of creating or updating is complete.
Segment details
The segment details can be viewed from the Segment dashboard.
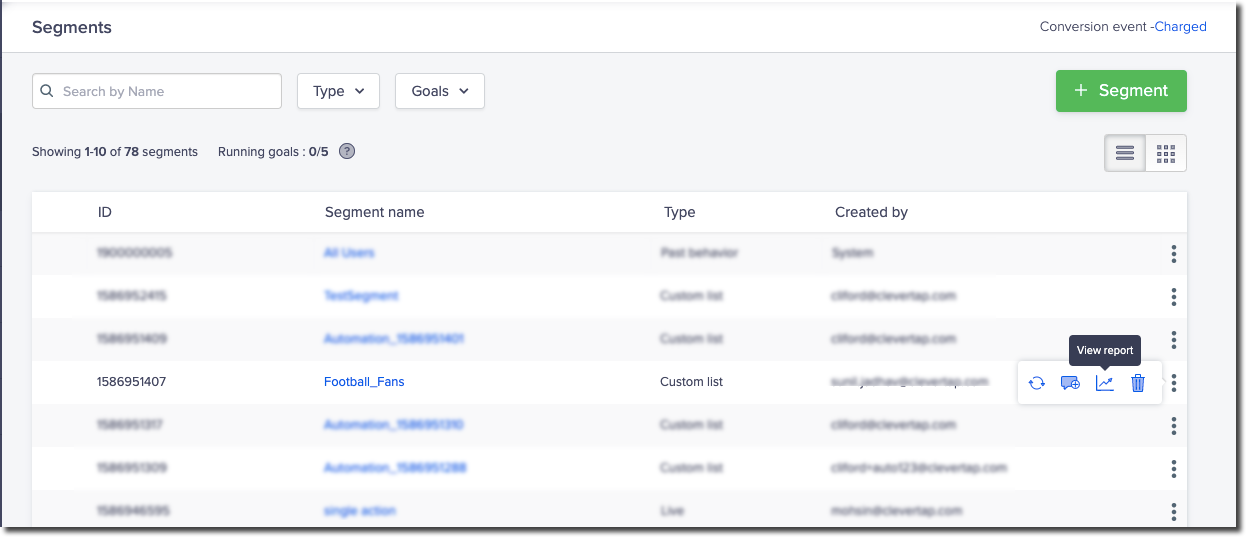 View Segment Report
The segment details page shows all the available information for the segment such as:
- Trend - If the users have increased or decreased over time.
- Campaigns and Journeys - The number of campaigns and Journeys currently using the custom list segment.
- Segment size and reachability - The total number of users in the segment and their reachability across various engagement channels.
- Sample Users - These are samples from your list. You can open any of them to check their details.
TipHover over sample users to find the
download icon.
Click this button to download all the users in your segment.
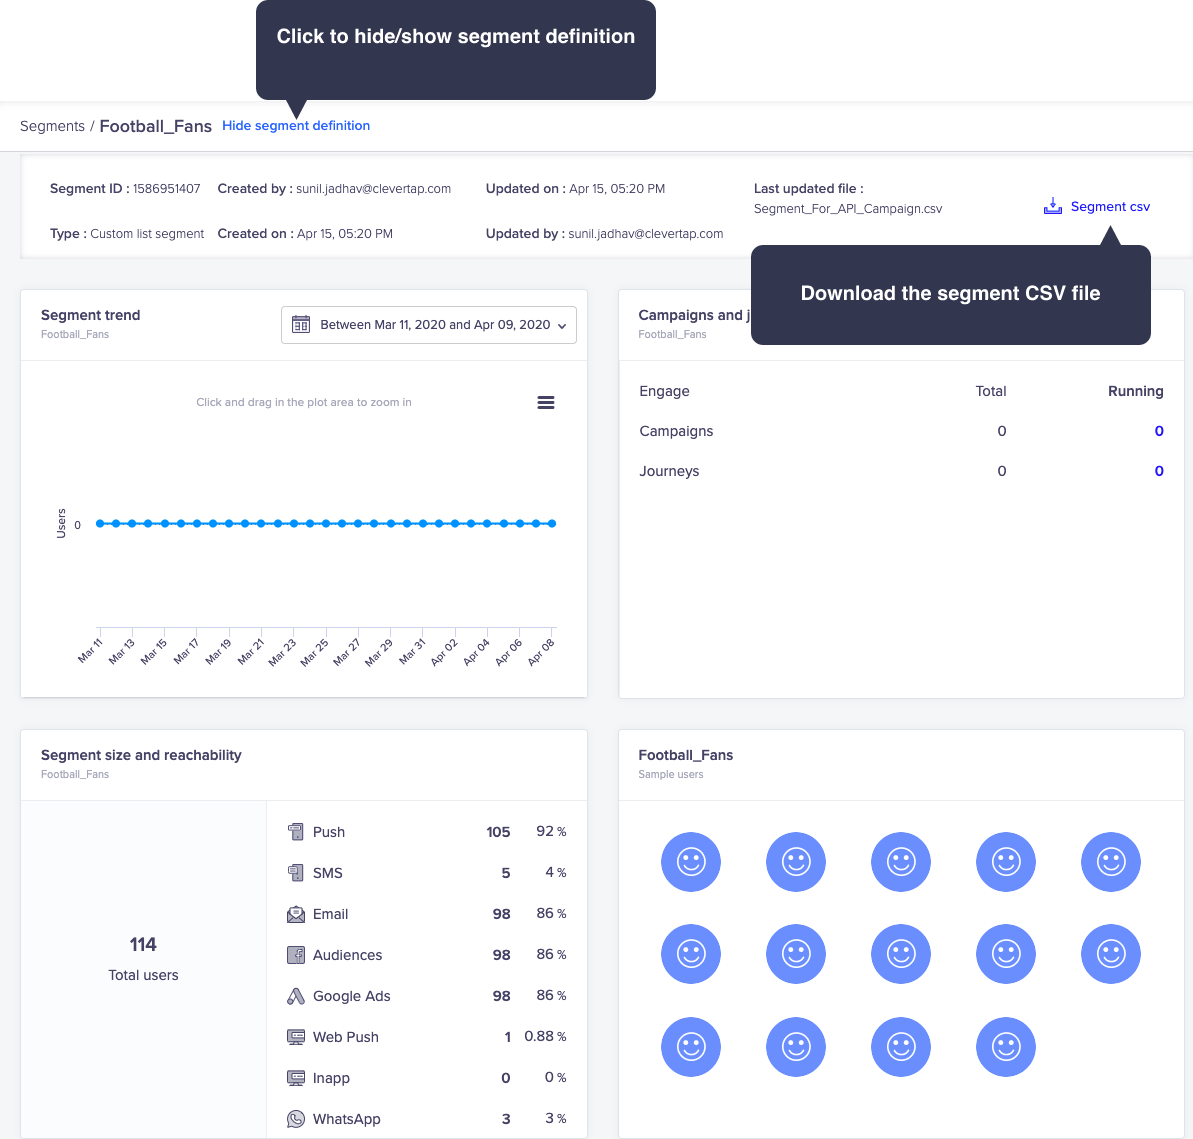 Hide/Show Segment or Download as CSV
Use Custom List Segment
You can use the custom list segment from the Who section when creating a campaign. All the custom list segments are listed under the WHO section of the Campaigns page.
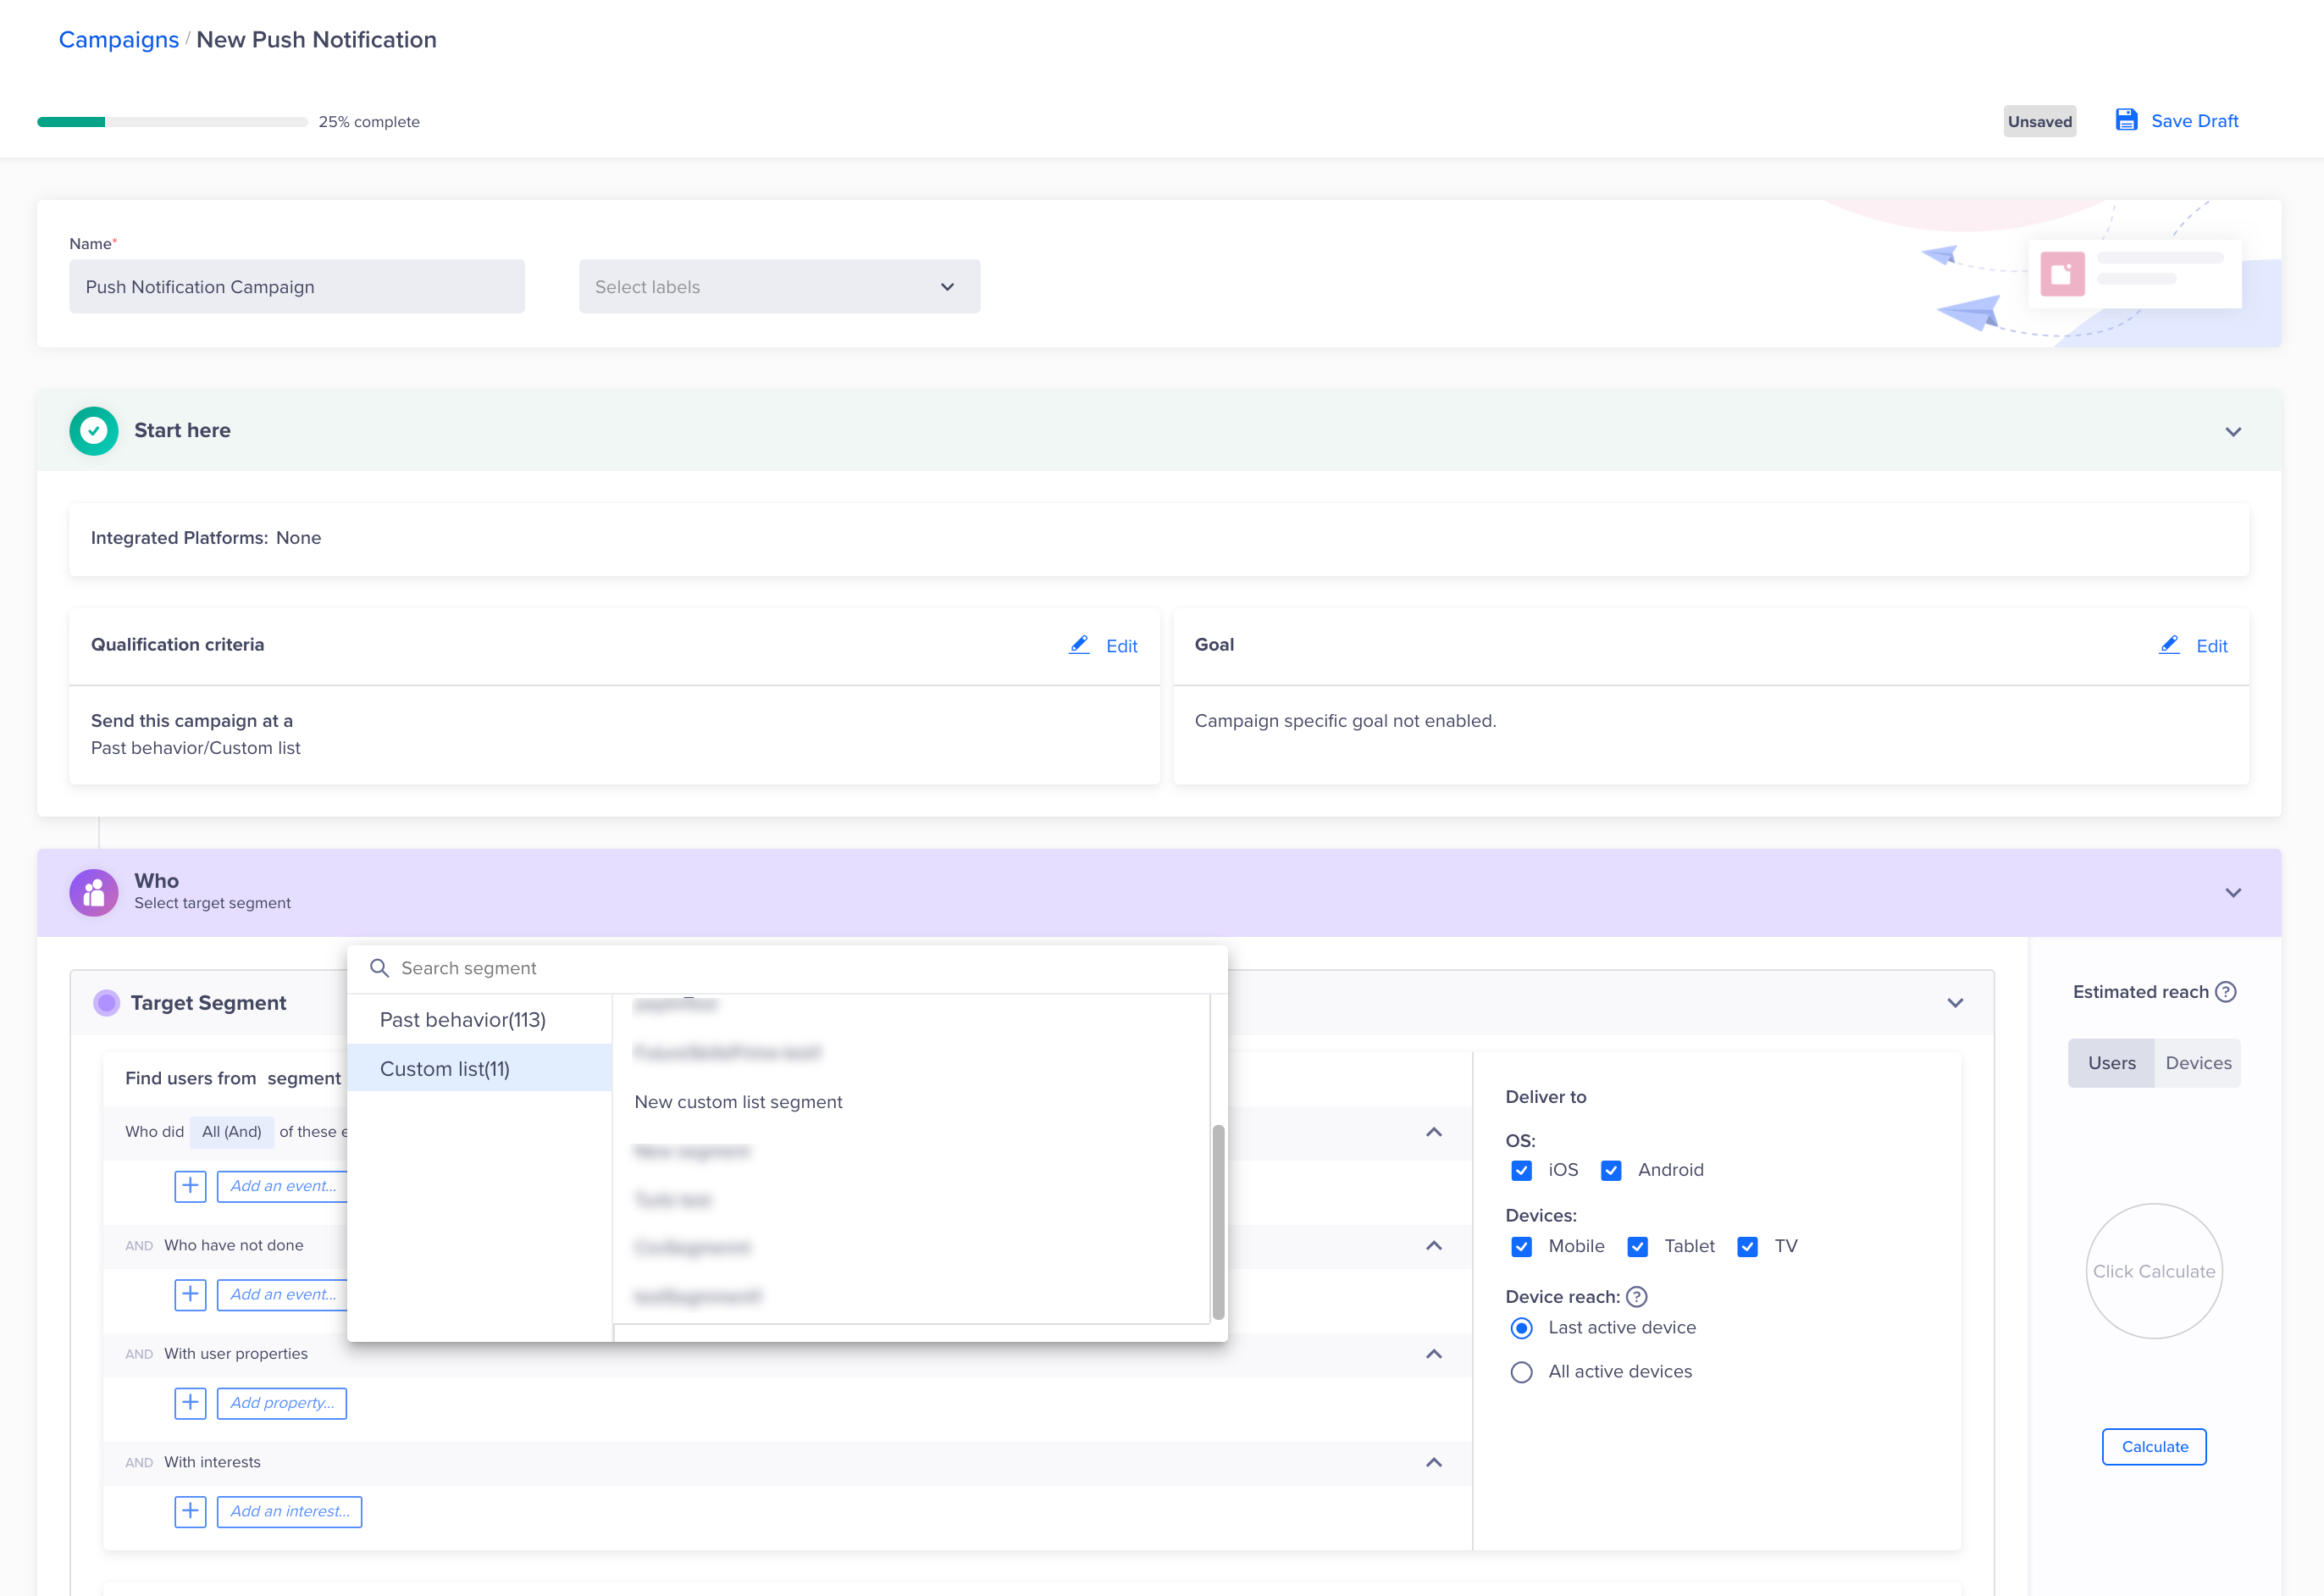 Custom List Segment
Updated 24 days ago
