Setup
Understand how to set up Email as a channel for your marketing campaigns.
Overview
This section covers various email tasks, including the integrations, and inbox previews. No matter the type of customer emails, all businesses have the same goal to get to the correct recipient's inbox. By setting up your email correctly, you ensure successful email deliverability.
Email Integrations
Before you can create email campaigns, you must integrate an email service provider with CleverTap.
CleverTap supports integrations with popular email service providers. Select your email service provider from the following list:
For all other service providers, use Generic SMTP.
Setup Provider
Once you have integrated an email service provider with CleverTap, you can set up your email service provider.
To add a provider, perform the following steps:
- From the dashboard, navigate to Settings > Engage > Channels > Email.
- Click + Provider to add a provider.

Add Provider
- Add the email provider's information.
- Click Save.
- Click Send Test Email to check if the provider has been set up correctly and can send emails.
Provider Operations
This section describes actions for the available email service providers.

Provider Operations
Archive Service Providers
You can archive any of the current email service providers from the email settings. Archiving the email service provider stops any active Campaigns or Journeys for this provider. The archived provider will not be available for use in the future. However, it will still retain the provider stats.
Follow the steps to archive an email service provider:
- From the CleverTap dashboard, navigate to Settings > Channels > Email > Providers tab.
- Click the ellipsis next to the provider.
- Select Archive from the list.
Delete Service Providers
You can delete any of the current email service providers from the email settings. Deleting the email service provider will remove all existing data from our system and stop any active Campaigns or Journeys. The deleted provider will not be available for use in the future, as well as the corresponding provider stats won't be retained.
Follow the steps to delete an email service provider:
- From the CleverTap dashboard, navigate to Settings > Channels > Email > Providers tab.
- Click the ellipsis next to the provider.
- Select Delete from the list.
Edit Settings
Edit the email settings to change Provider credentials.
Follow the steps to edit provider settings:
- From the CleverTap dashboard, navigate to Settings > Channels > Email > Providers tab.
- Click the ellipsis next to the provider.
- Select Edit settings from the list. The Provider credentials window displays.
- Change the required information.
- Click Send Test Email to check that the provider is working correctly.
- Click Save.
Mark as Default
Set a service provider as default so that the same provider is used for delivering your emails.
- Follow the steps to set a default email service provider:
- From the CleverTap dashboard, navigate to Settings > Channels > Email > Providers tab.
- Click the ellipsis next to the provider.
- Select Mark as Default from the list.
Inbox Previews
Before you can use inbox previews, you must enable them. Inbox previews with code analysis let you view an analysis of your HTML code. It also provides the capability to view previews across devices and inboxes before you send out a campaign.
Account SpecificationsEmail previews are available only if you have opted for the email add-on from CleverTap.
Enable or Disable Inbox Previews
To enable or disable the inbox preview, perform the following steps:
- From the dashboard, navigate to Settings > Engage > Channels > Email.
- Select the Previews tab.
- Select a client from the list.
- Click on the ellipsis and click Enable or Disable.
Multi-selectYou can also select multiple clients, then enable or disable previews by clicking Enable in inbox previews or Disable in inbox previews.

Enable or Disable Inbox Previews
The Previews tab lists the available email inboxes. For example, a mobile device that runs Gmail on Android 8 or a computer that runs Apple Mail 10 on an OS X 10.10 operating system.
Account SpecificationsEmail previews are available only if you have opted for the email add-on from CleverTap.
This feature is not available for trial accounts.
Advanced Setup
AppsFlyer OneLink
Deep linking gives your app users the most seamless experience possible by guiding them securely and contextually to in-app information.
CleverTap automatically wraps all links in the email body to track clicks. When a user clicks on any of the links in the email, this may lead to several redirects. Turning off click tracking for deep links is one option for marketers who wish to send users straight to the content.
The other option is to leverage the AppsFlyer OneLink with branded links. Doing so can provide your app users with the greatest experience possible as it directs them to a specific landing page, the app store, or in-app content. All this while, CleverTap tracks the click and assists in boosting conversion rates.

AppsFlyer OneLink Integration
Set Up AppsFlyer OneLink(s)
The following are the steps to enable this feature:
1. Set Up OneLink(s) in AppsFlyer
To use the AppsFlyer OneLink feature on the CleverTap dashboard, you must first set up a Branded OneLink on your AppsFlyer account. To set up branded OneLink in AppsFlyer, refer to these steps.
2. Set Up OneLink(s) in CleverTap Dashboard
To set up OneLink on the CleverTap dashboard:
a. Navigate to Settings > Channel > Email > Advanced Setup on the dashboard and click AppsFlyer OneLink dropdown.

Advance Setup
b. Enter your AppsFlyer OneLink domain or sub-domain and click Add.

Add AppsFlyer OneLink
Adding a DomainYou can add a maximum of 20 valid domains or sub-domains.
c. Click Save to save the domain.

Save AppsFlyer OneLink
The message AppsFlyer domain deeplink successfully saved displays at the top.

AppsFlyer Domain Deeplink Success
Disable Tracking via AppsFlyer OneLink
If you want to avoid click tracking via AppsFlyer OneLink, add the following tag for all the required links in your email:
<a data-track="off" href="donotoverrride"> Your link </a>AppsFlyer OneLink does not apply to links with this tag.
NoteTurn off click tracking from your email service provider's dashboard for one link redirection to function as intended. CleverTap will receive the click data directly from AppsFlyer.
Invalid AppsFlyer Branded OneLinkAppsFlyer does not send the click data for invalid OneLink URLs configured in an Email campaign to CleverTap.
Font Manager
This feature enables you to add and manage custom fonts and use those fonts in your email campaigns. This simplifies font management across Drag & Drop and Rich Media editors.
Private BetaCurrently, this feature is released in Private Beta. If you want to access this feature, contact your Customer Success Manager.
Add Custom Font
You can add custom fonts by navigating to Settings >_Channel > Email > Advanced Setup from the CleverTap dashboard. You can add up to 100 custom fonts.
The following are the steps to add a custom font:
- From the Advanced Setup page, click Font Manager.
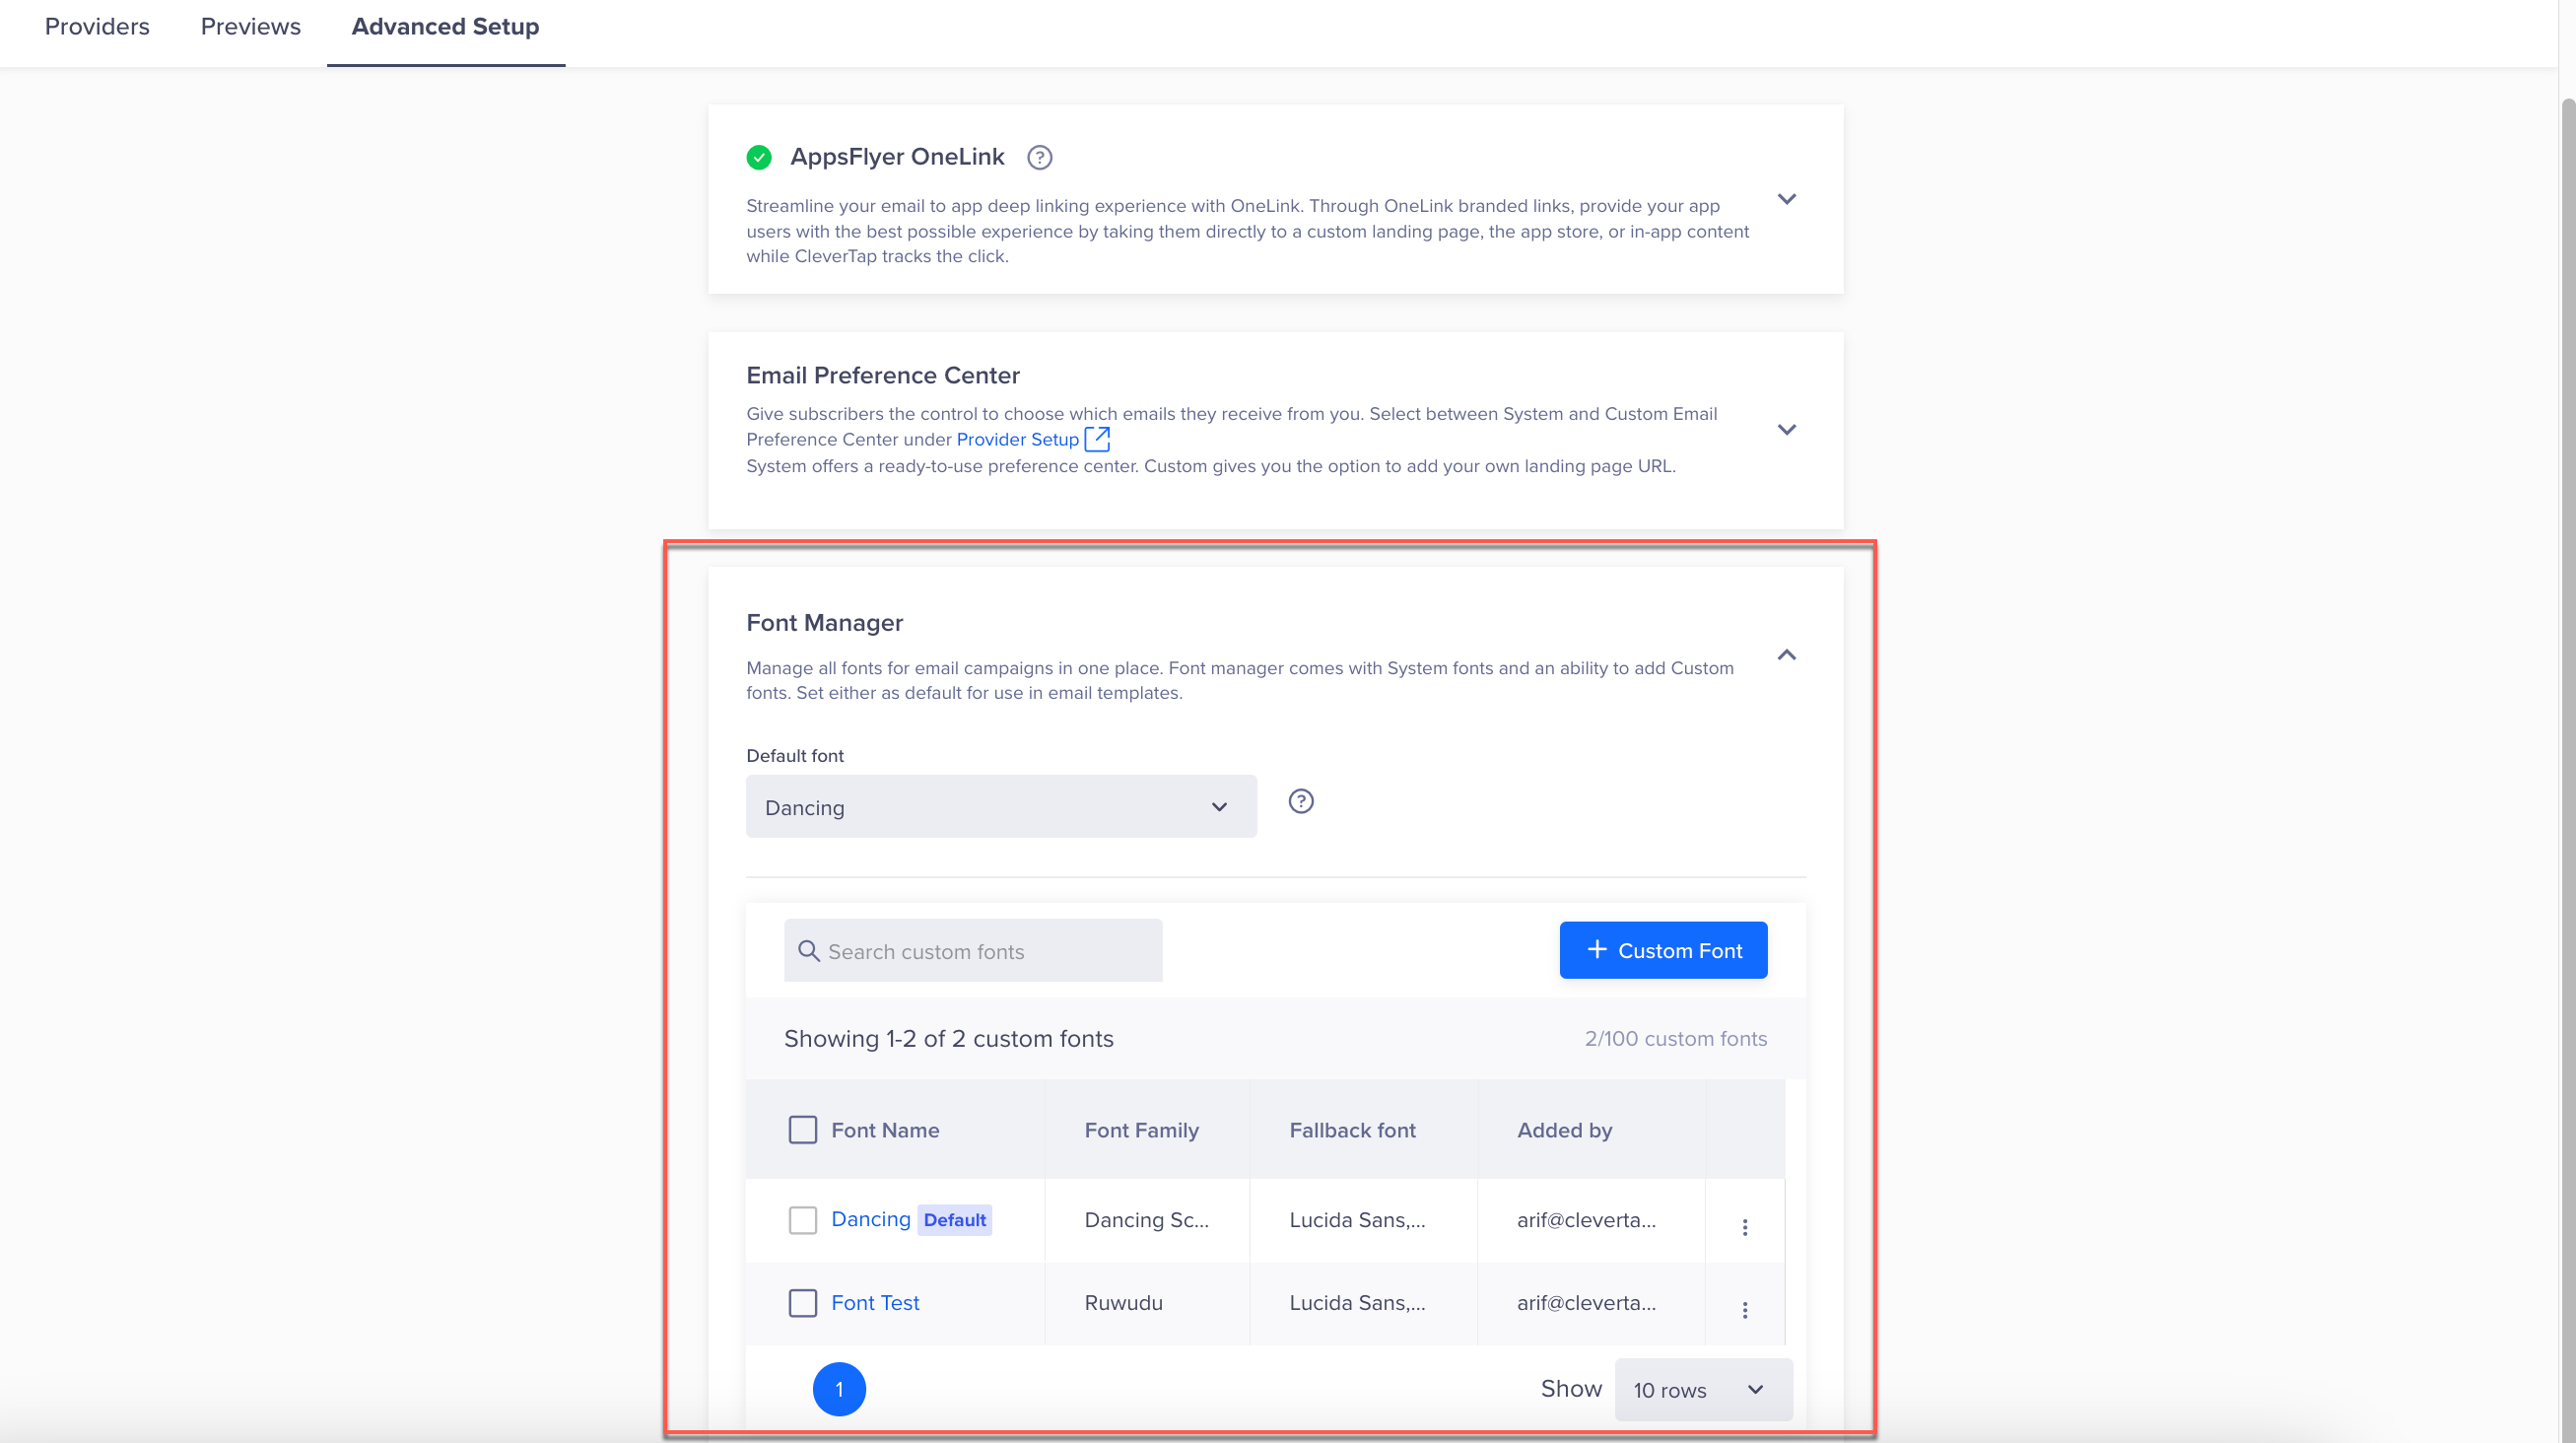
Font Manager
- Click + Custom Font. The Add Font popup opens.
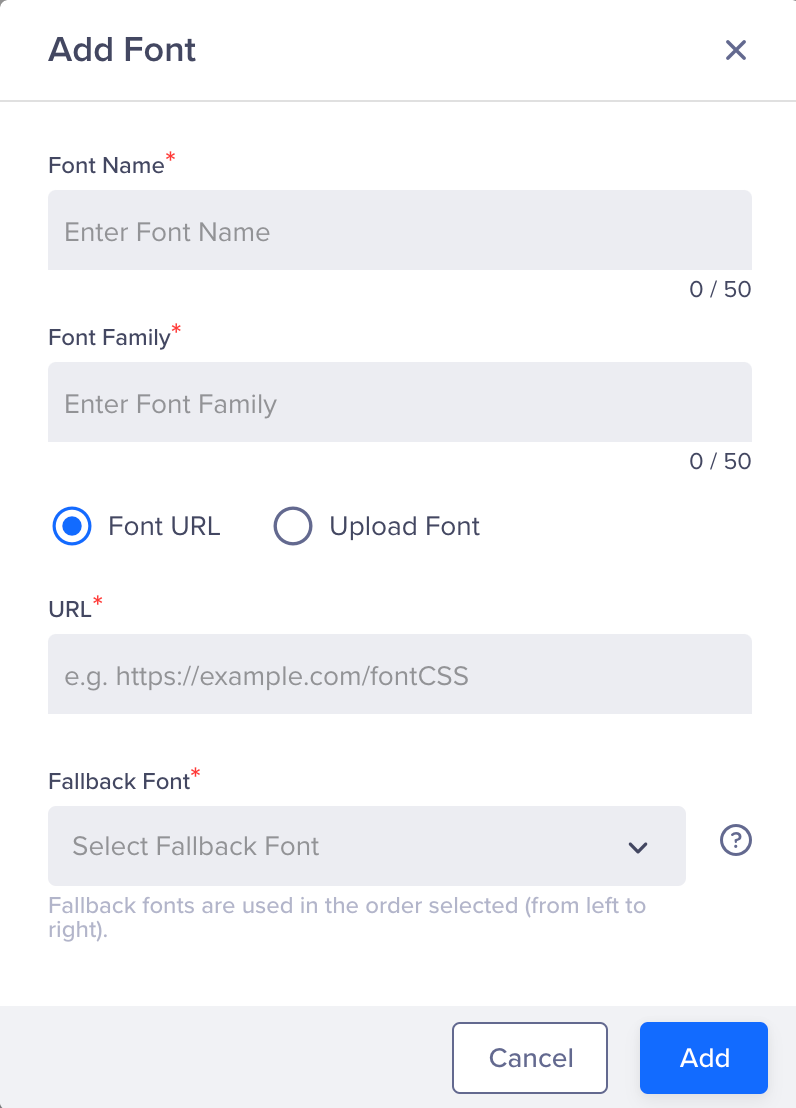
Add Custom Font
- Enter the following details:
| Field Name | Description |
|---|---|
| Font Name | Uniquely identifies the font. This field has a limit of up to 50 characters. |
| Font Family | Defines the style applied to the font. This field has a limit of up to 50 characters. The custom font family must match the name of the font face in the CSS file. |
| Font URL | If the font is not on your local system, you can select this option to add the URL for the font you want to add. The URL must point to a CSS file. If your custom font is a public font available on the web, you can directly add the URL for the font. If you upload the font to your private server, ensure that CORS is enabled on the server that provides the custom font file. |
| Upload Font | If you already have a font downloaded on your local system, choose Upload Font, and click Upload to upload the CSS file for your custom font. The file size should be a maximum of 1 MB. The custom font file must have the following header: |
|
|
*The fields marked with asterisk sign are mandatory.
- Click Add to add the custom font.
Sample CSS code:
@font-face {
  font-family: 'Dancing Script';
  font-style: normal;
  font-weight: 400;
  font-display: swap;
  src: url(https://fonts.gstatic.com/s/dancingscript/v25/If2RXTr6YS-zF4S-kcSWSVi_szLgiuEHiC4W.woff2) format('woff2');
  unicode-range: U+0000-00FF, U+0131, U+0152-0153, U+02BB-02BC, U+02C6, U+02DA, U+02DC, U+0304, U+0308, U+0329, U+2000-206F, U+2074, U+20AC, U+2122, U+2191, U+2193, U+2212, U+2215, U+FEFF, U+FFFD;
}
Set Up Default Font
You can also set up the system and custom fonts as the default font for your email campaigns. Select the font from the Default font dropdown to set up the default font for your email campaigns.
The default font cannot be deleted. In case you still want to delete it, change the default font and then delete the required font.
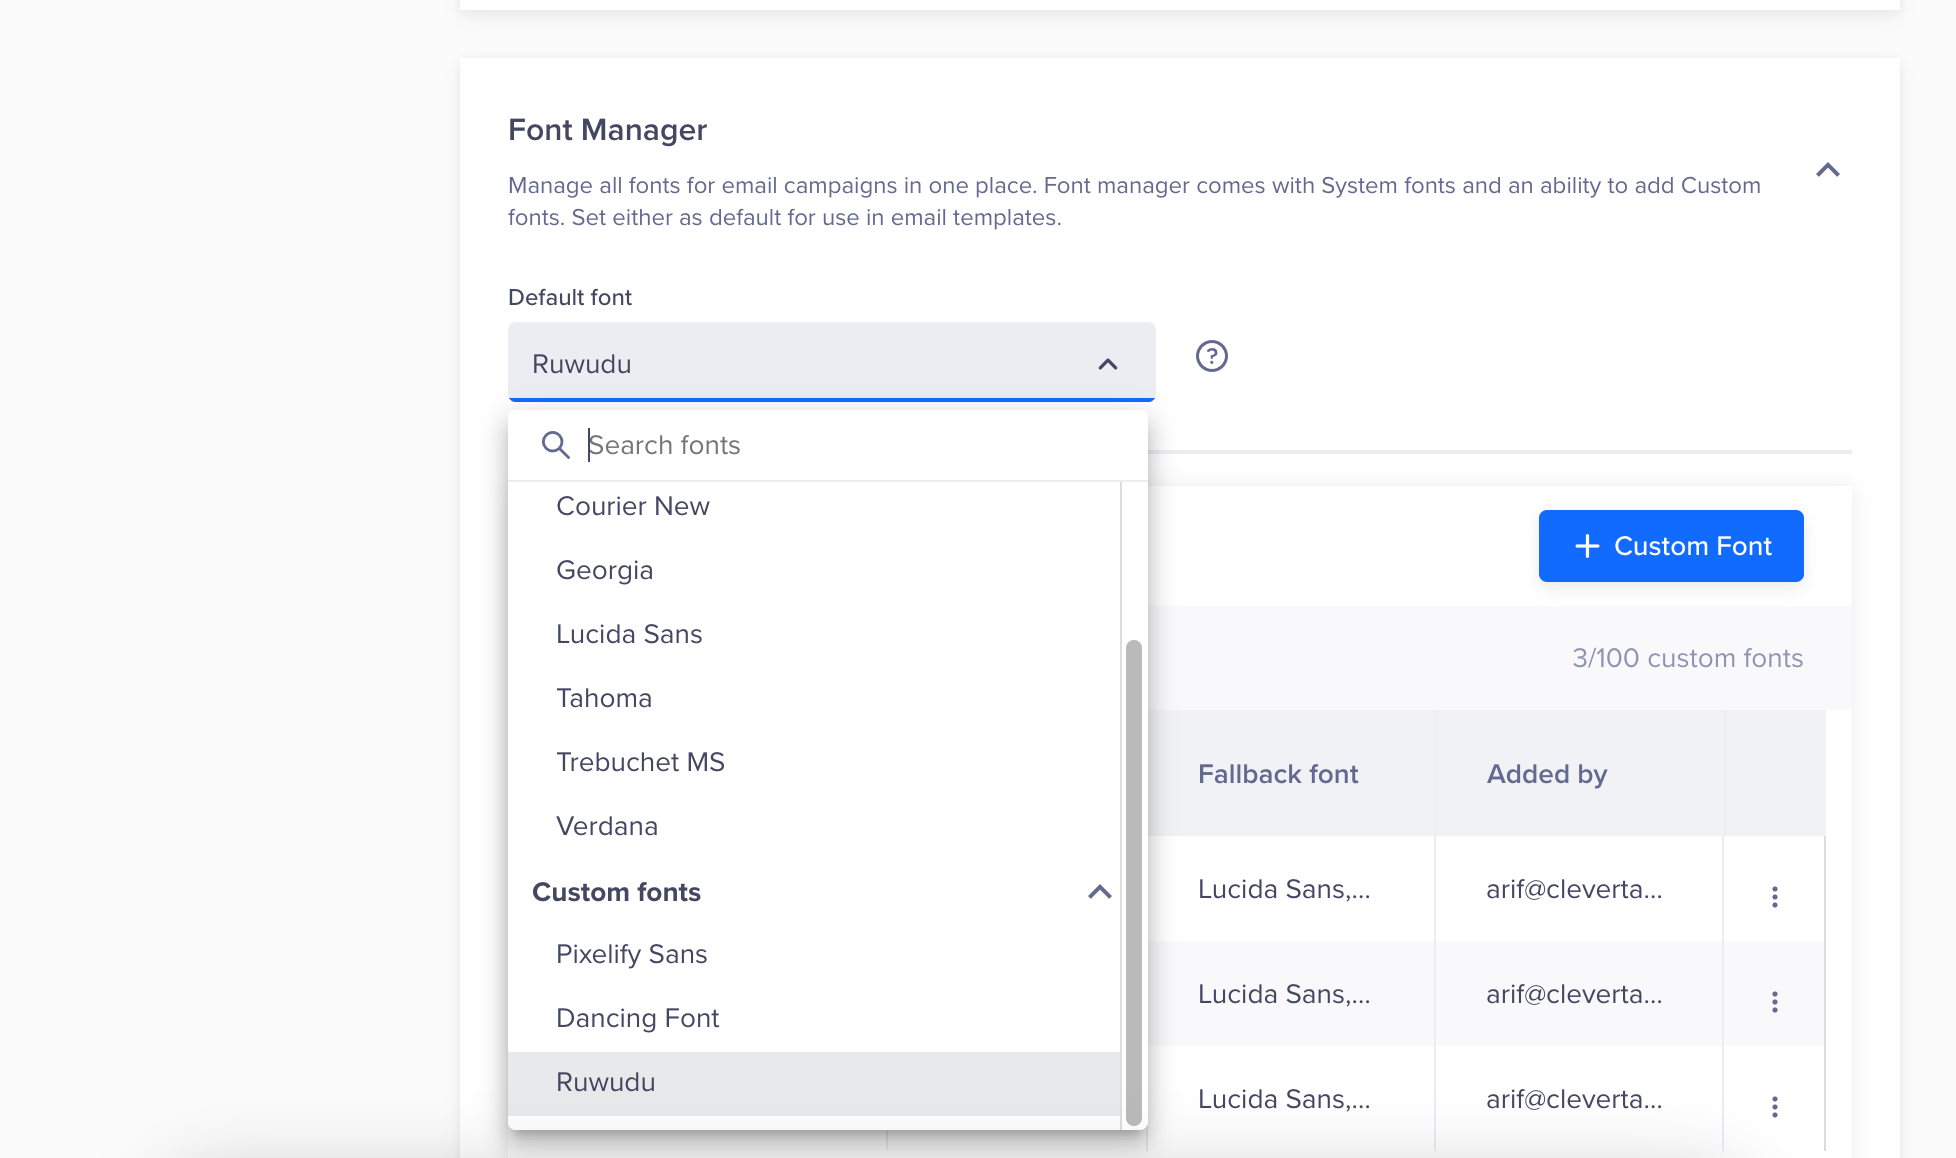
Set Up a Default Font
Delete Custom Font
You can delete one or multiple custom fonts to manage your custom font library. To delete a custom font
- Select one or multiple custom fonts you want to delete.
- Click the
 icon and select Delete. The Delete font? popup opens, highlighting potential impacts on drafts and saved templates and prompting you to confirm your action.
 - Select Delete to successfully delete the custom font(s). A confirmation message is displayed.
Upon deleting the custom font, it is unavailable for use in both the Drag & Drop and Rich Media_ editors.
Delete Custom Font
Edit Custom Font
You can edit your custom font and update the font details.
- Select the custom fonts you want to edit.
- Click the
 icon and select Edit. The Edit Font popup opens.
 - You can update the required fields related to the custom font and click Save to save the changes.
Edit Custom Fonts
The updated custom font is now available for both the Drag & Drop and _Rich Media editors. When making changes to the custom font, an email alert is sent to the user updating the custom font and also to the account admin.
Delete or Edit Custom FontEditing or deleting custom fonts do not impact running, scheduled, and draft engagements. The modifications take effect for the campaigns created subsequent to your changes.
Updated 8 months ago