Facebook Audiences Create Message
Understand how to create a campaign for Facebook Audiences
Overview
CleverTap’s Facebook Remarketing integration enables you to run personalized ad campaigns on Facebook by exporting user segments directly to your connected Facebook Ads account. This guide walks you through the process of creating a remarketing campaign—from selecting a channel to defining your target audience and exporting it to Facebook. You can configure qualification criteria, apply user-level filters, define control groups, and set targeting caps to optimize campaign performance and reach.
Create a Campaign
Follow these steps to create a new remarketing campaign on Facebook:
-
From the dashboard, navigate to Campaigns.
-
Click the + Campaign button.
Create Facebook Campaign
-
From the Messaging Channels list, select Facebook.
The campaign page will load.
Campaign Page
Start Campaign Setup
The Start here section displays the setup information.
Qualification criteria: Define the criteria for your target audience. You can deliver the Facebook ad based on the user's past or real-time behavior.
Ad Account: From the Ad Account drop-down, select the linked Facebook Ads account to which you want to export the audience.
Set a Goal: You can track campaign performance by defining a conversion goal. This helps measure how effectively the campaign achieves the intended outcome. For example, you may choose to track users who made a purchase within five days of the campaign launch. This step is optional.
Start Campaign Setup
Define the Target Audience
Under the Who section, define the target audience for your campaign. You can create a new segment or use an existing saved segment. For instance, you may want to re-target users who added a product to their cart but did not complete a purchase in the last 30 days.
Filter by User Properties
Use the With user properties filter in the Who section to refine your audience based on specific characteristics.
For example, you can choose to show Facebook Ads only to users based in a specific country and within a certain age group.

Filter by User Properties
The following table describes the available property types:
Property Type | Description | Example |
|---|---|---|
User Properties | Custom user profile properties that you define and send to CleverTap. | Customer Type = Platinum |
Demographics | Demographics filters include Age and Gender. | Age = 25 to 40 years |
Geography | User's coarse location. Filters include Country, Region, and City. CleverTap's SDK can detect this from the user's IP address. | Country = United States |
Reachability | Filters include Has email address, Has phone number, Unsubscribed email, and Unsubscribed SMS. | Unsubscribed email = No |
App Fields | Includes App Version, Device Make, Device Model, OS Version, and CleverTap SDK Version. Sent automatically from the SDK per device. | OS Version = 10 |
Control Group and Target Cap
You can define a control group to compare campaign performance against a non-targeted audience. For more details, refer to Control Groups. Additionally, you can set a target cap to limit how many users will receive the Facebook ad.
Control Group and Target Cap.
Use Case: If you are distributing a coupon-based offer with limited codes, a target cap ensures only a defined number of users receive the message.
What Section
The What section allows you to export the audience defined in the Who section to your selected Facebook Ads account.
Export Audience
Once your audience criteria are defined, use the What section to export the audience to the connected Facebook account. This audience will then be available for targeting within your Facebook Ads Manager.
In the What section of the campaign flow, you can configure how CleverTap exports users to your Facebook Ads account. There are two ways to define this behavior:
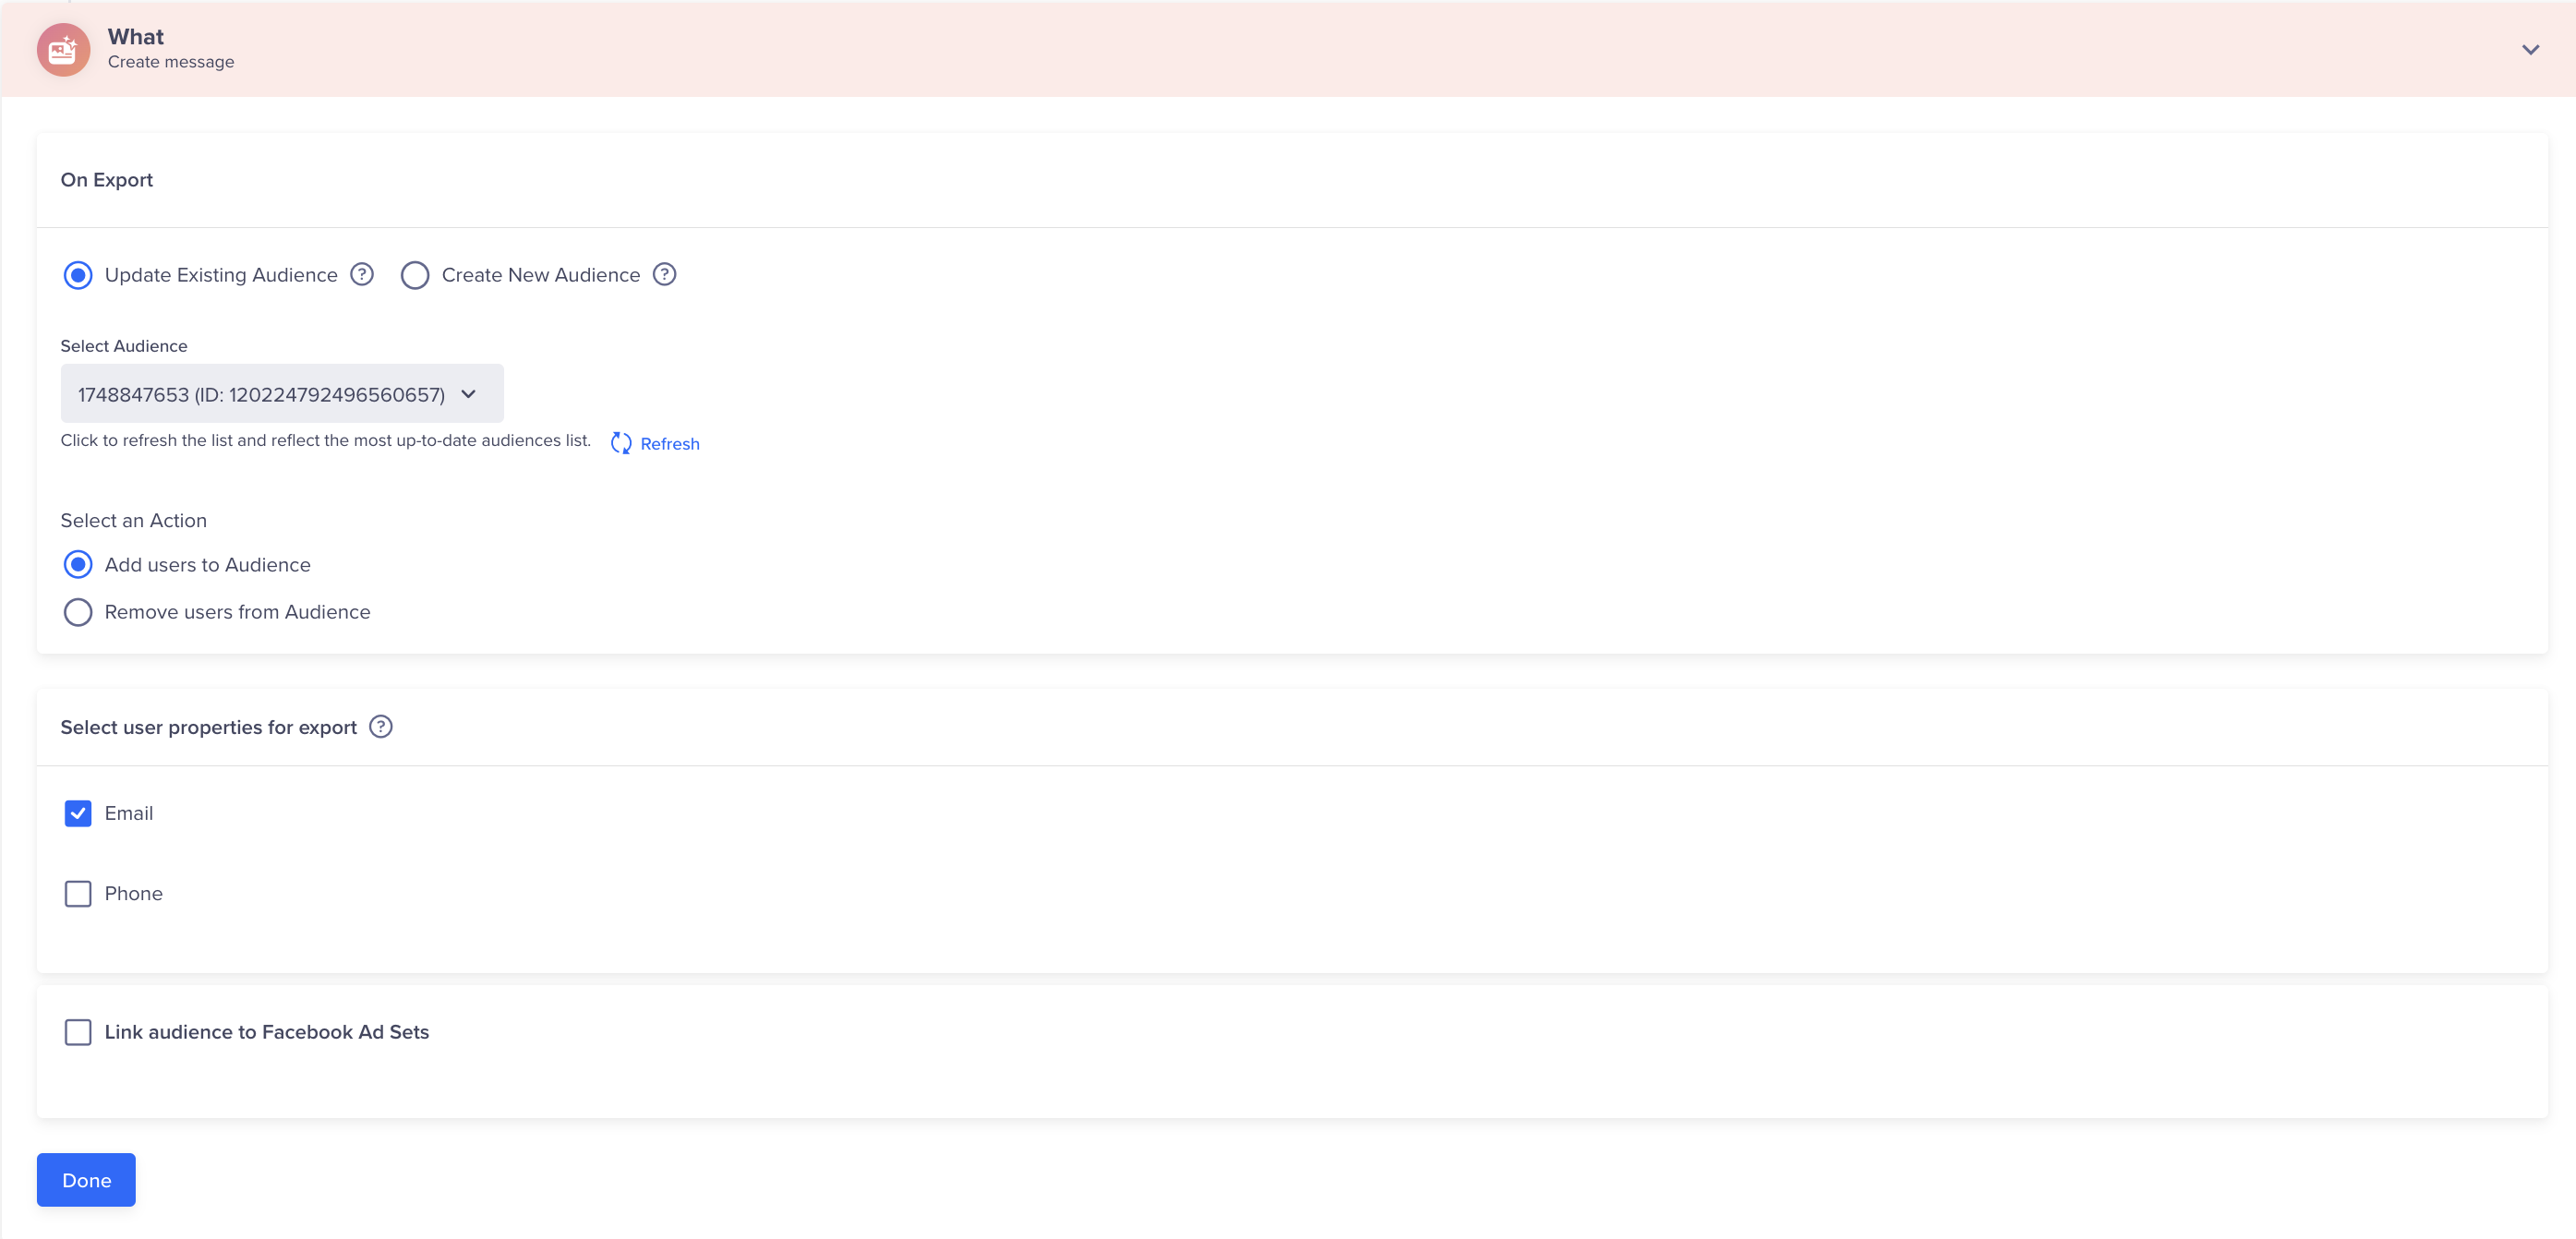
Update Existing Audience
Select this option if you want to modify an existing audience based on the new qualification criteria. You can choose one of the following actions:
- Add users to Audience: Adds newly qualified users to the selected existing audience in your Facebook Ads Manager.
- Remove users from Audience: Removes users who no longer meet the qualification criteria from the selected existing audience.
This method is useful when you want to continuously refine an audience over time based on evolving user behavior.
Update Existing Audience
Create New Audience
Choose this option to create a fresh audience based on the qualification and segmentation defined in the Who section.
You will be required to provide the following:
-
Audience Name:
Enter a unique and descriptive name for the new audience. Use clear naming conventions that make it easy to recognize the audience's purpose later (e.g., "Abandoned_Cart_30_Days" or "Loyal_Customers_Q2"). -
Audience Description:
Add a brief summary (up to 200 characters) describing the characteristics or intent of the audience. This is especially helpful when managing multiple audiences across different campaigns.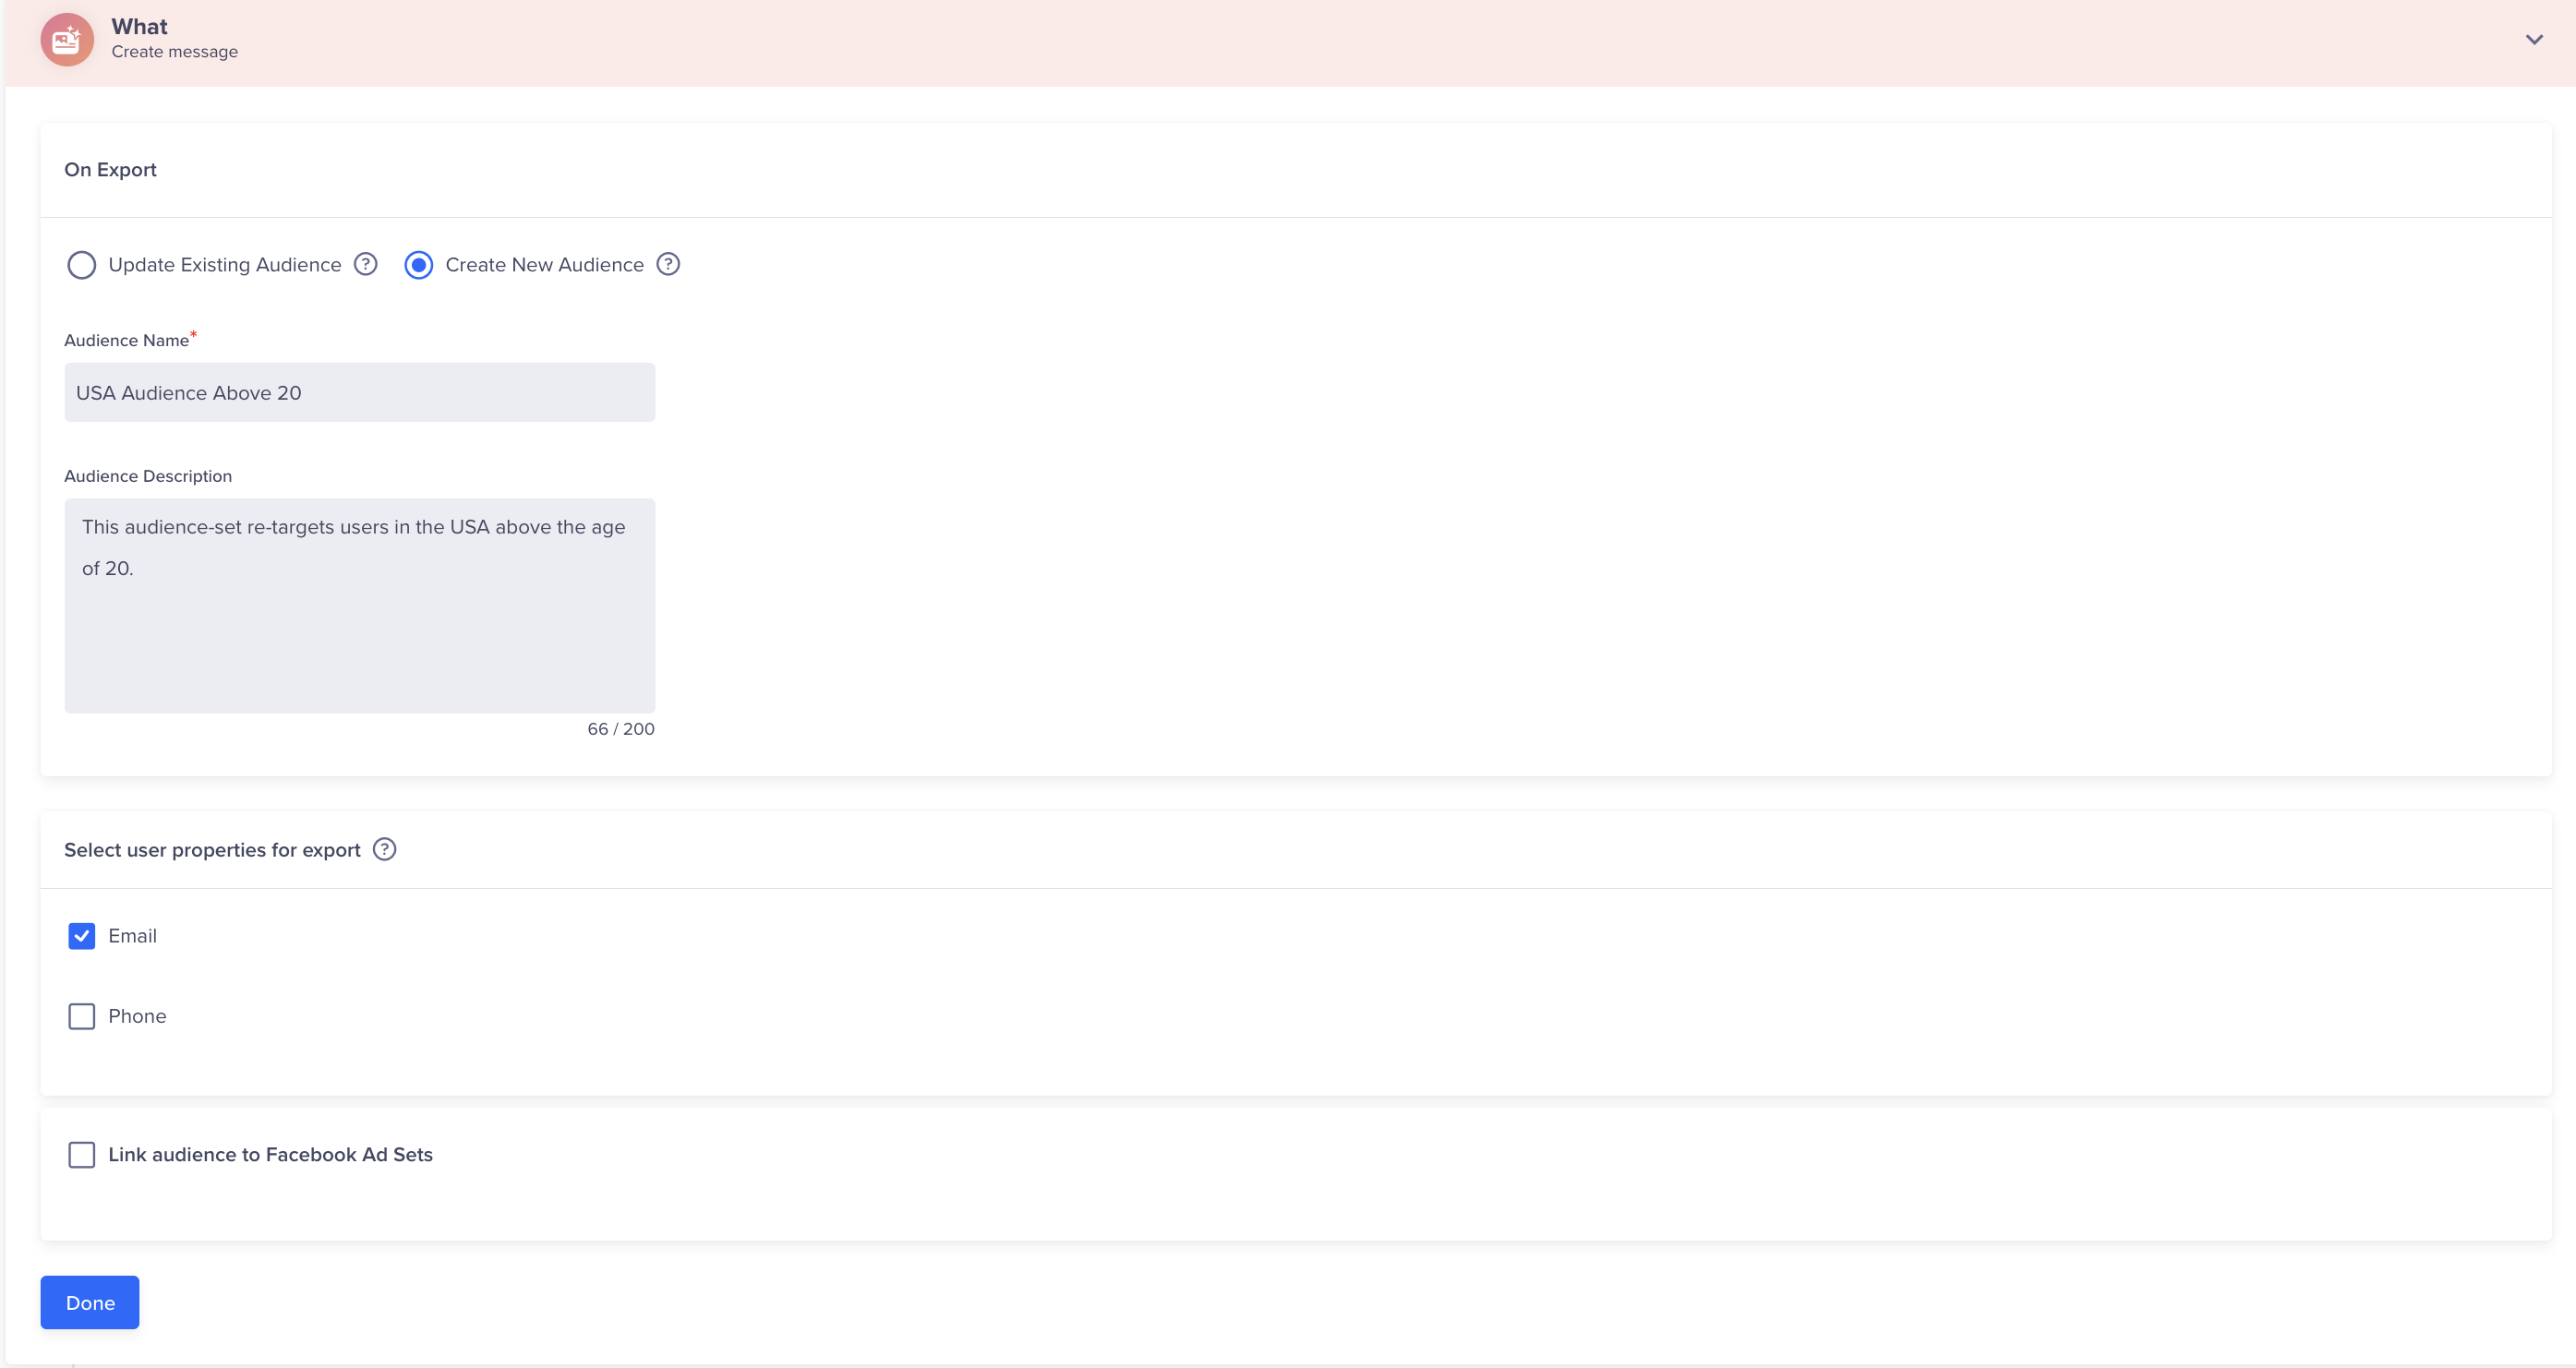
Create New Audience
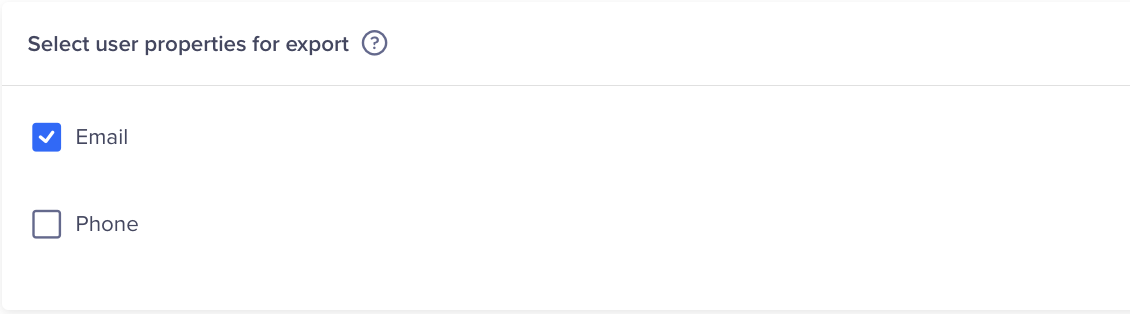
Choose User Properties for Export
To sync user profiles with Facebook, at least one of the following user identifiers must be selected:
- Email: Exports the user's registered email address to Facebook for matching and targeting.
- Phone: Exports the user's phone number for the same purpose.
Note:You must select at least one identifier. You may choose both for higher match rates.
User Properties to export
Link Audience to Facebook Ad Sets (Optional)
Once the audience is created or updated, you have the option to link it directly to a Facebook Ad Set. This step allows you to immediately associate the exported segment with an ad campaign already configured in your Facebook Ads account. Linking an Ad Set is not mandatory and can be done later in Facebook Ads Manager if preferred.
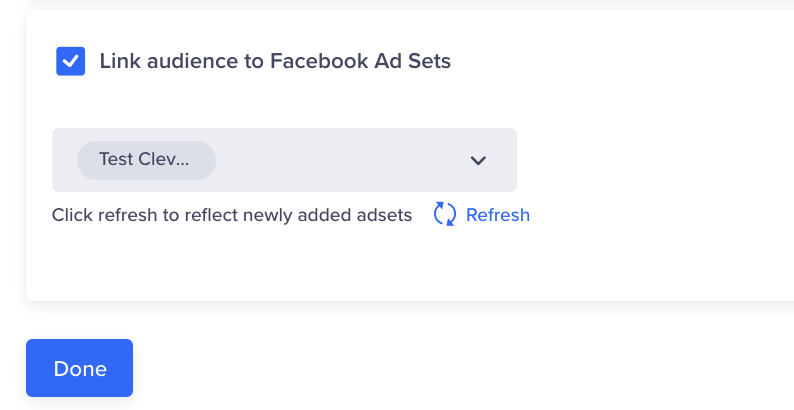
Link Audience to Facebook Ad Sets
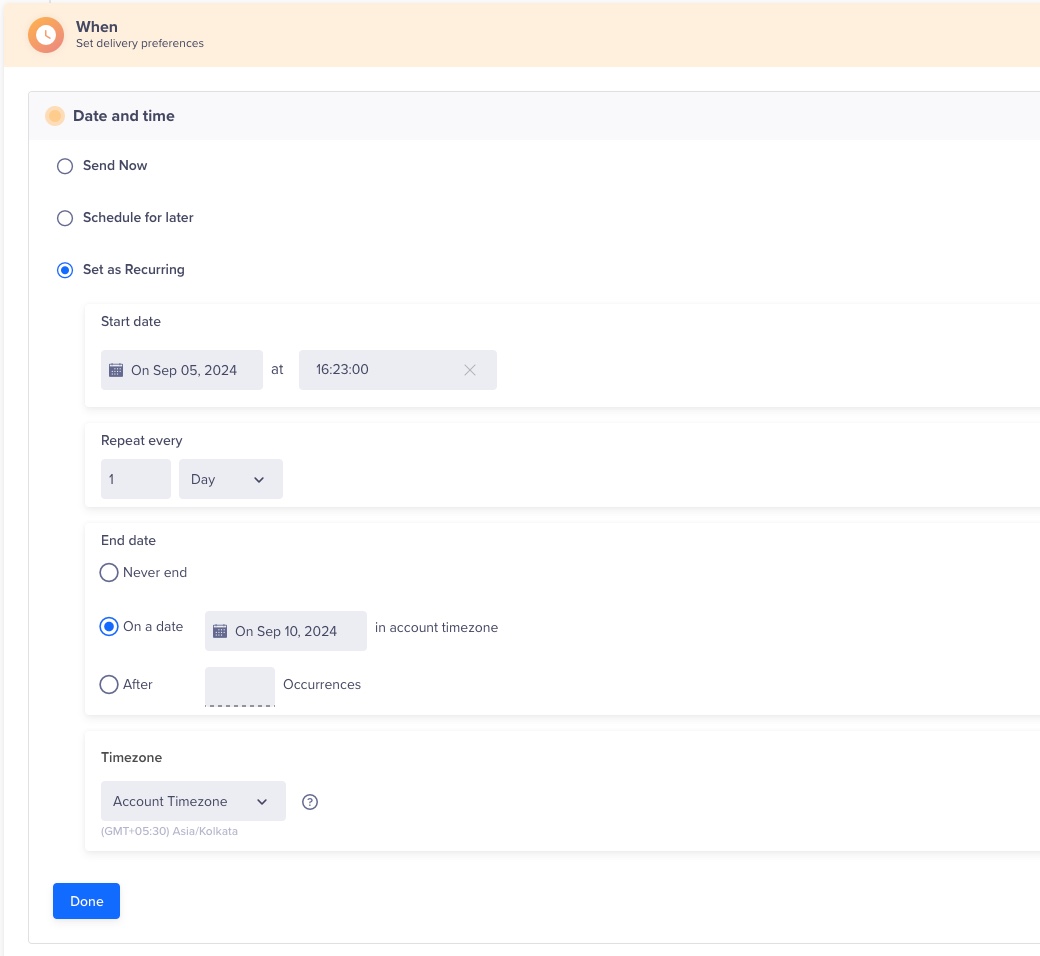
Define the Remarketing Campaign Schedule
Under the When section, you must define the timeframe for your campaign to start and end.
Past behavior campaigns can be scheduled to run:
- On a specific date and time.
- On multiple specified dates and times.
- Recurring at a periodicity you set.
Live campaigns can be set up on a specific event:
- In response to a user event.
- User event/inaction combination (for example, abandoned cart scenario).
You can set specific dates and times to control when your ads will be live. Depending on the campaign's goals, you can also set recurring schedules or specific time windows when the ads will be shown.
Define the Remarketing Schedule
Publish Campaign
After previewing the overall configuration of your remarketing campaign, finalize your campaign by clicking Publish Campaign.

Publish Campaign
Updated about 2 months ago