Amazon Simple Email Service
Email Partner
Amazon Simple Email Service (SES), a cloud-based email service provider, allows you to deliver high-volume email campaigns and manage incoming emails at scale.
Important UpdateThe new Amazon SES configuration will use HTTP as the default protocol for integration, offering faster and more efficient performance compared to SMTP. If you are an existing customer with email campaigns running on SMTP, you can switch to HTTP by entering their Access Key ID, Secret Access Key, and Server Name (HTTP) on the Settings page of the CleverTap dashboard. For more information about this, refer to Migrate Existing Amazon SES Provider Setup to HTTP .
This is currently released in Private Beta.
Integrate Amazon SES with CleverTap
To integrate Amazon SES with CleverTap:
-
From the CleverTap dashboard, go to Settings and click Integrate Email.
-
Select Amazon SES as a provider.
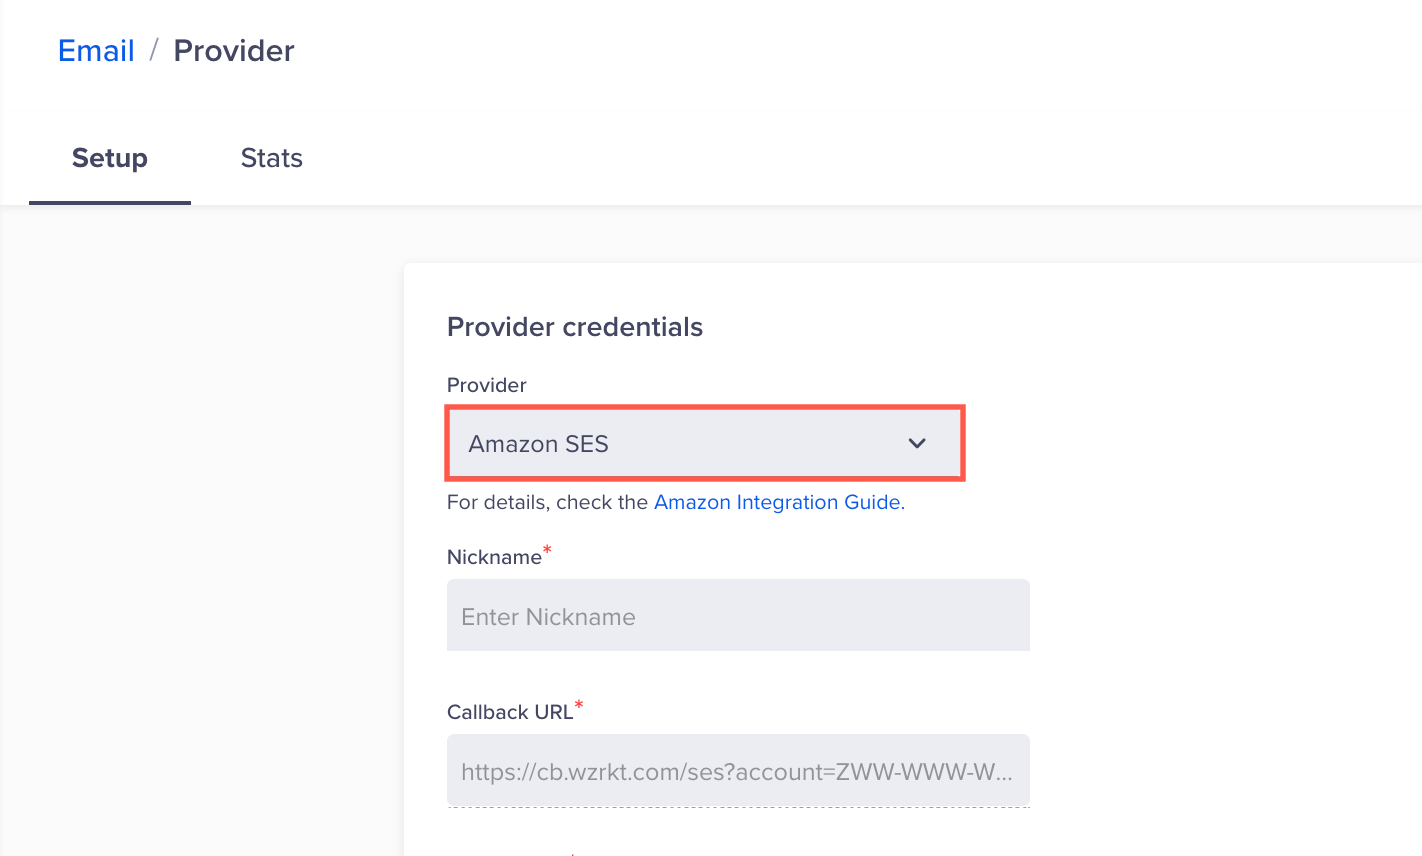
Select Email Provider
-
Enter the endpoint in the Server Name field. To identify the endpoint, refer to Service API Endpoints.
-
Enter the Access Key ID and Secret Access Key. To obtain this:
-
Select the user name in the navigation bar on your AWS dashboard.
-
Select Security credentials from the list.
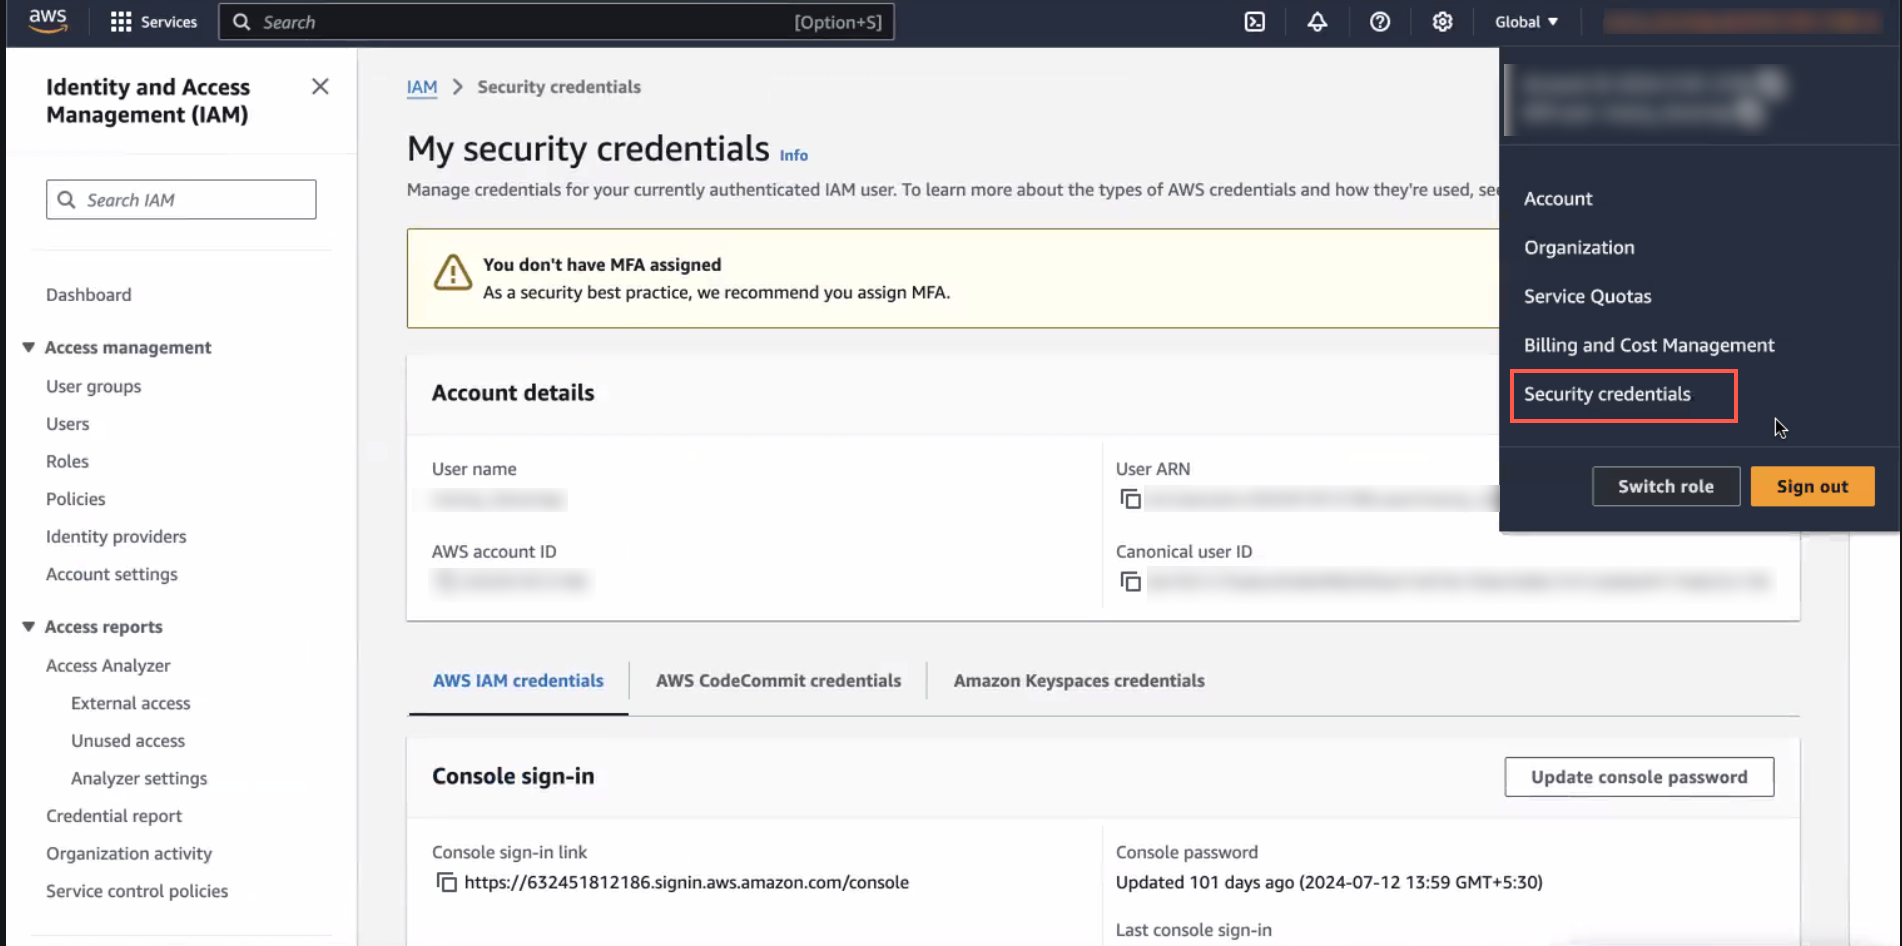
Select Security Credentials
-
Scroll down to the Access Key section under the AWS IAM credentials tab and click Create access key.
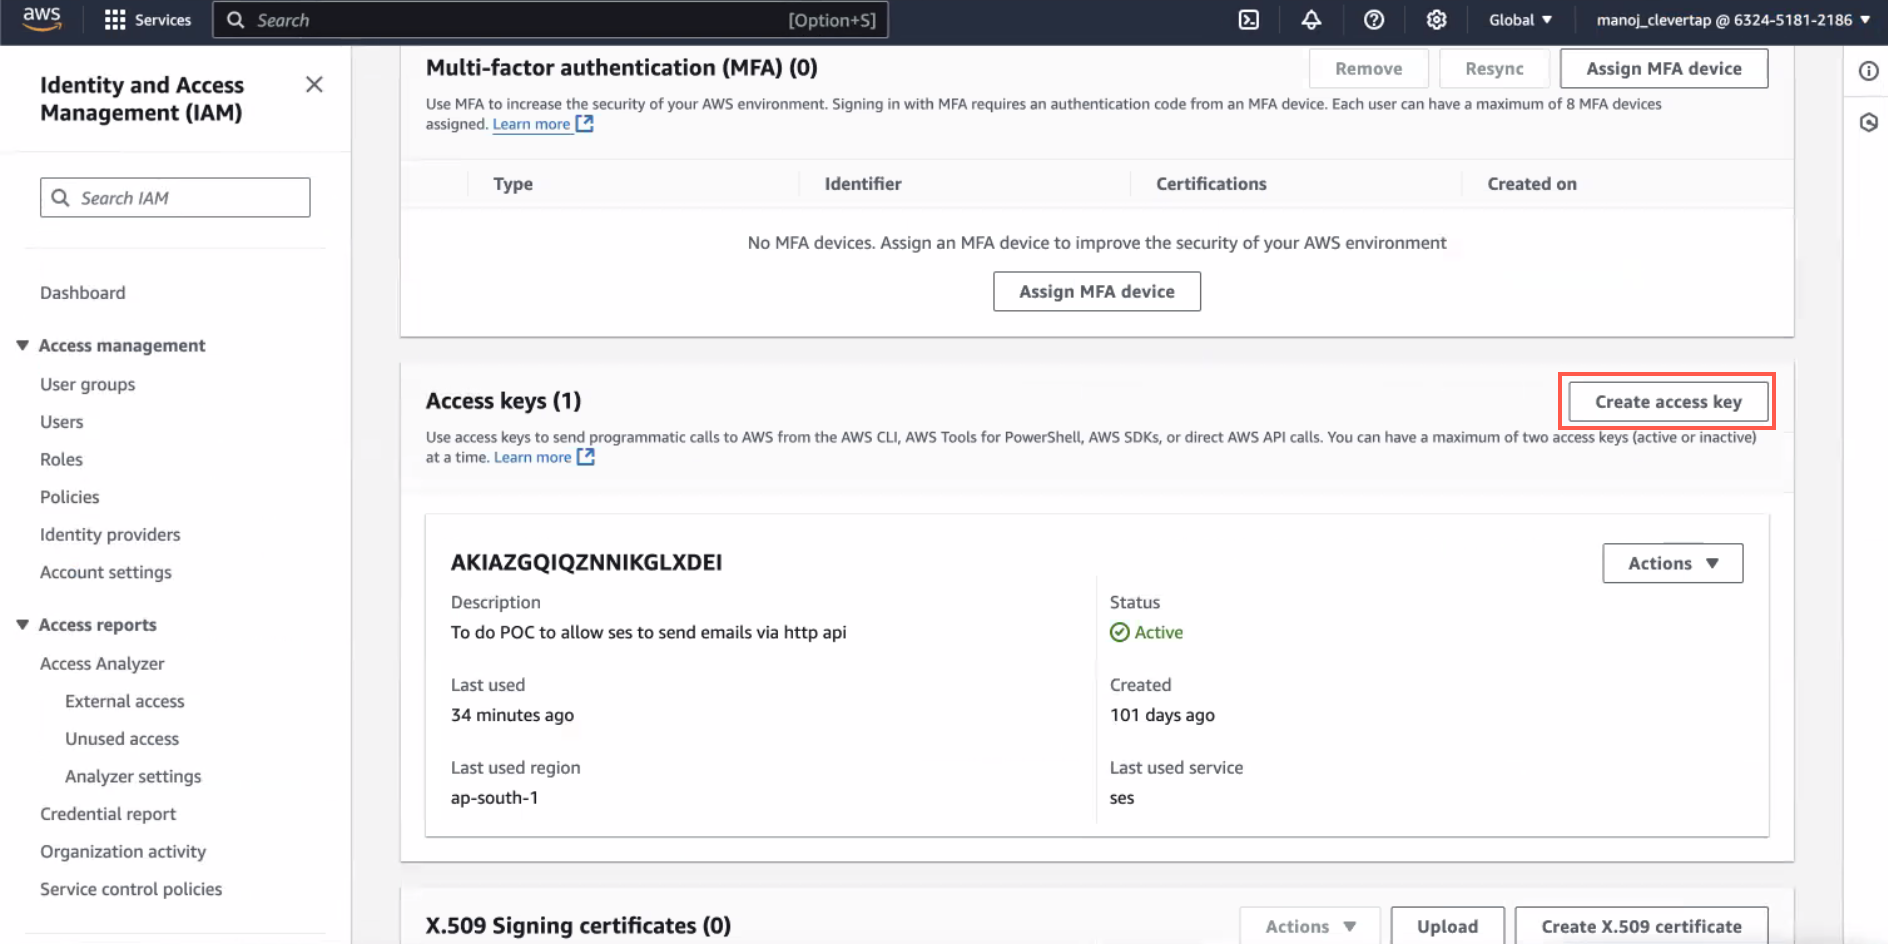
Click Create Access Key
-
Select Third-party service and click Next.
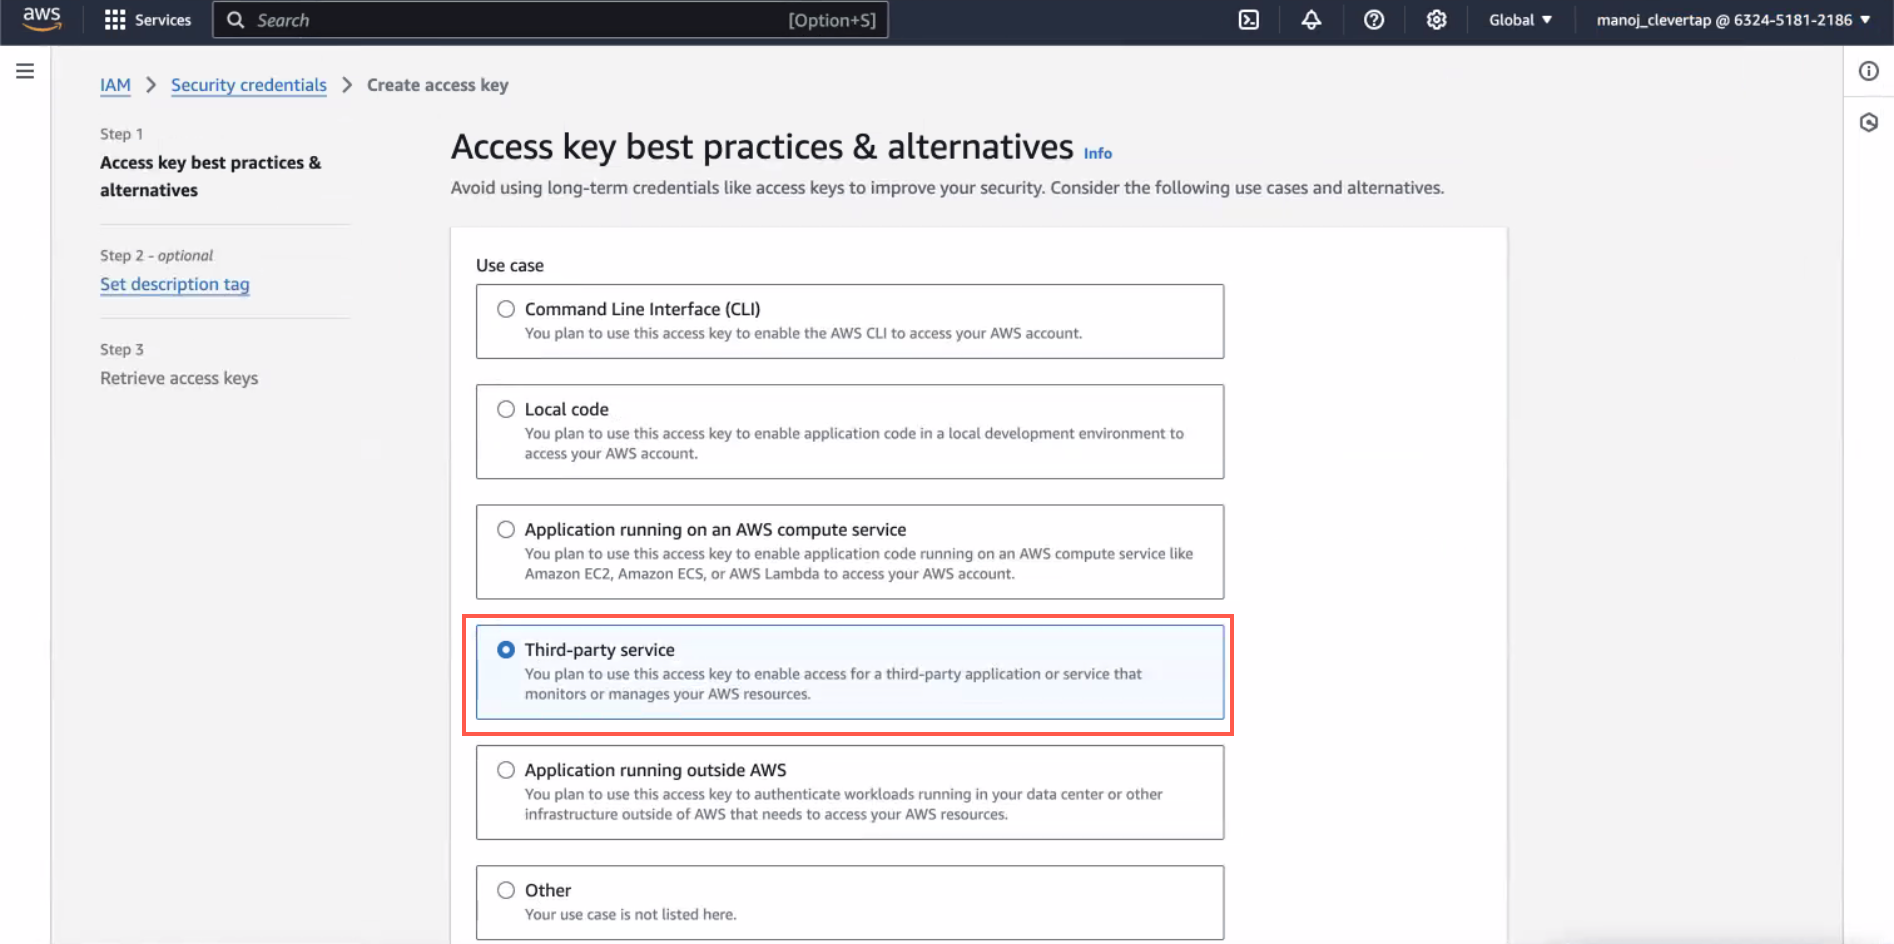
Select Access Key Best Practices and Alternatives
-
Enter Description tag value and click Create access key. You can copy Access Key ID and Secret Access Key or download the .csv file.
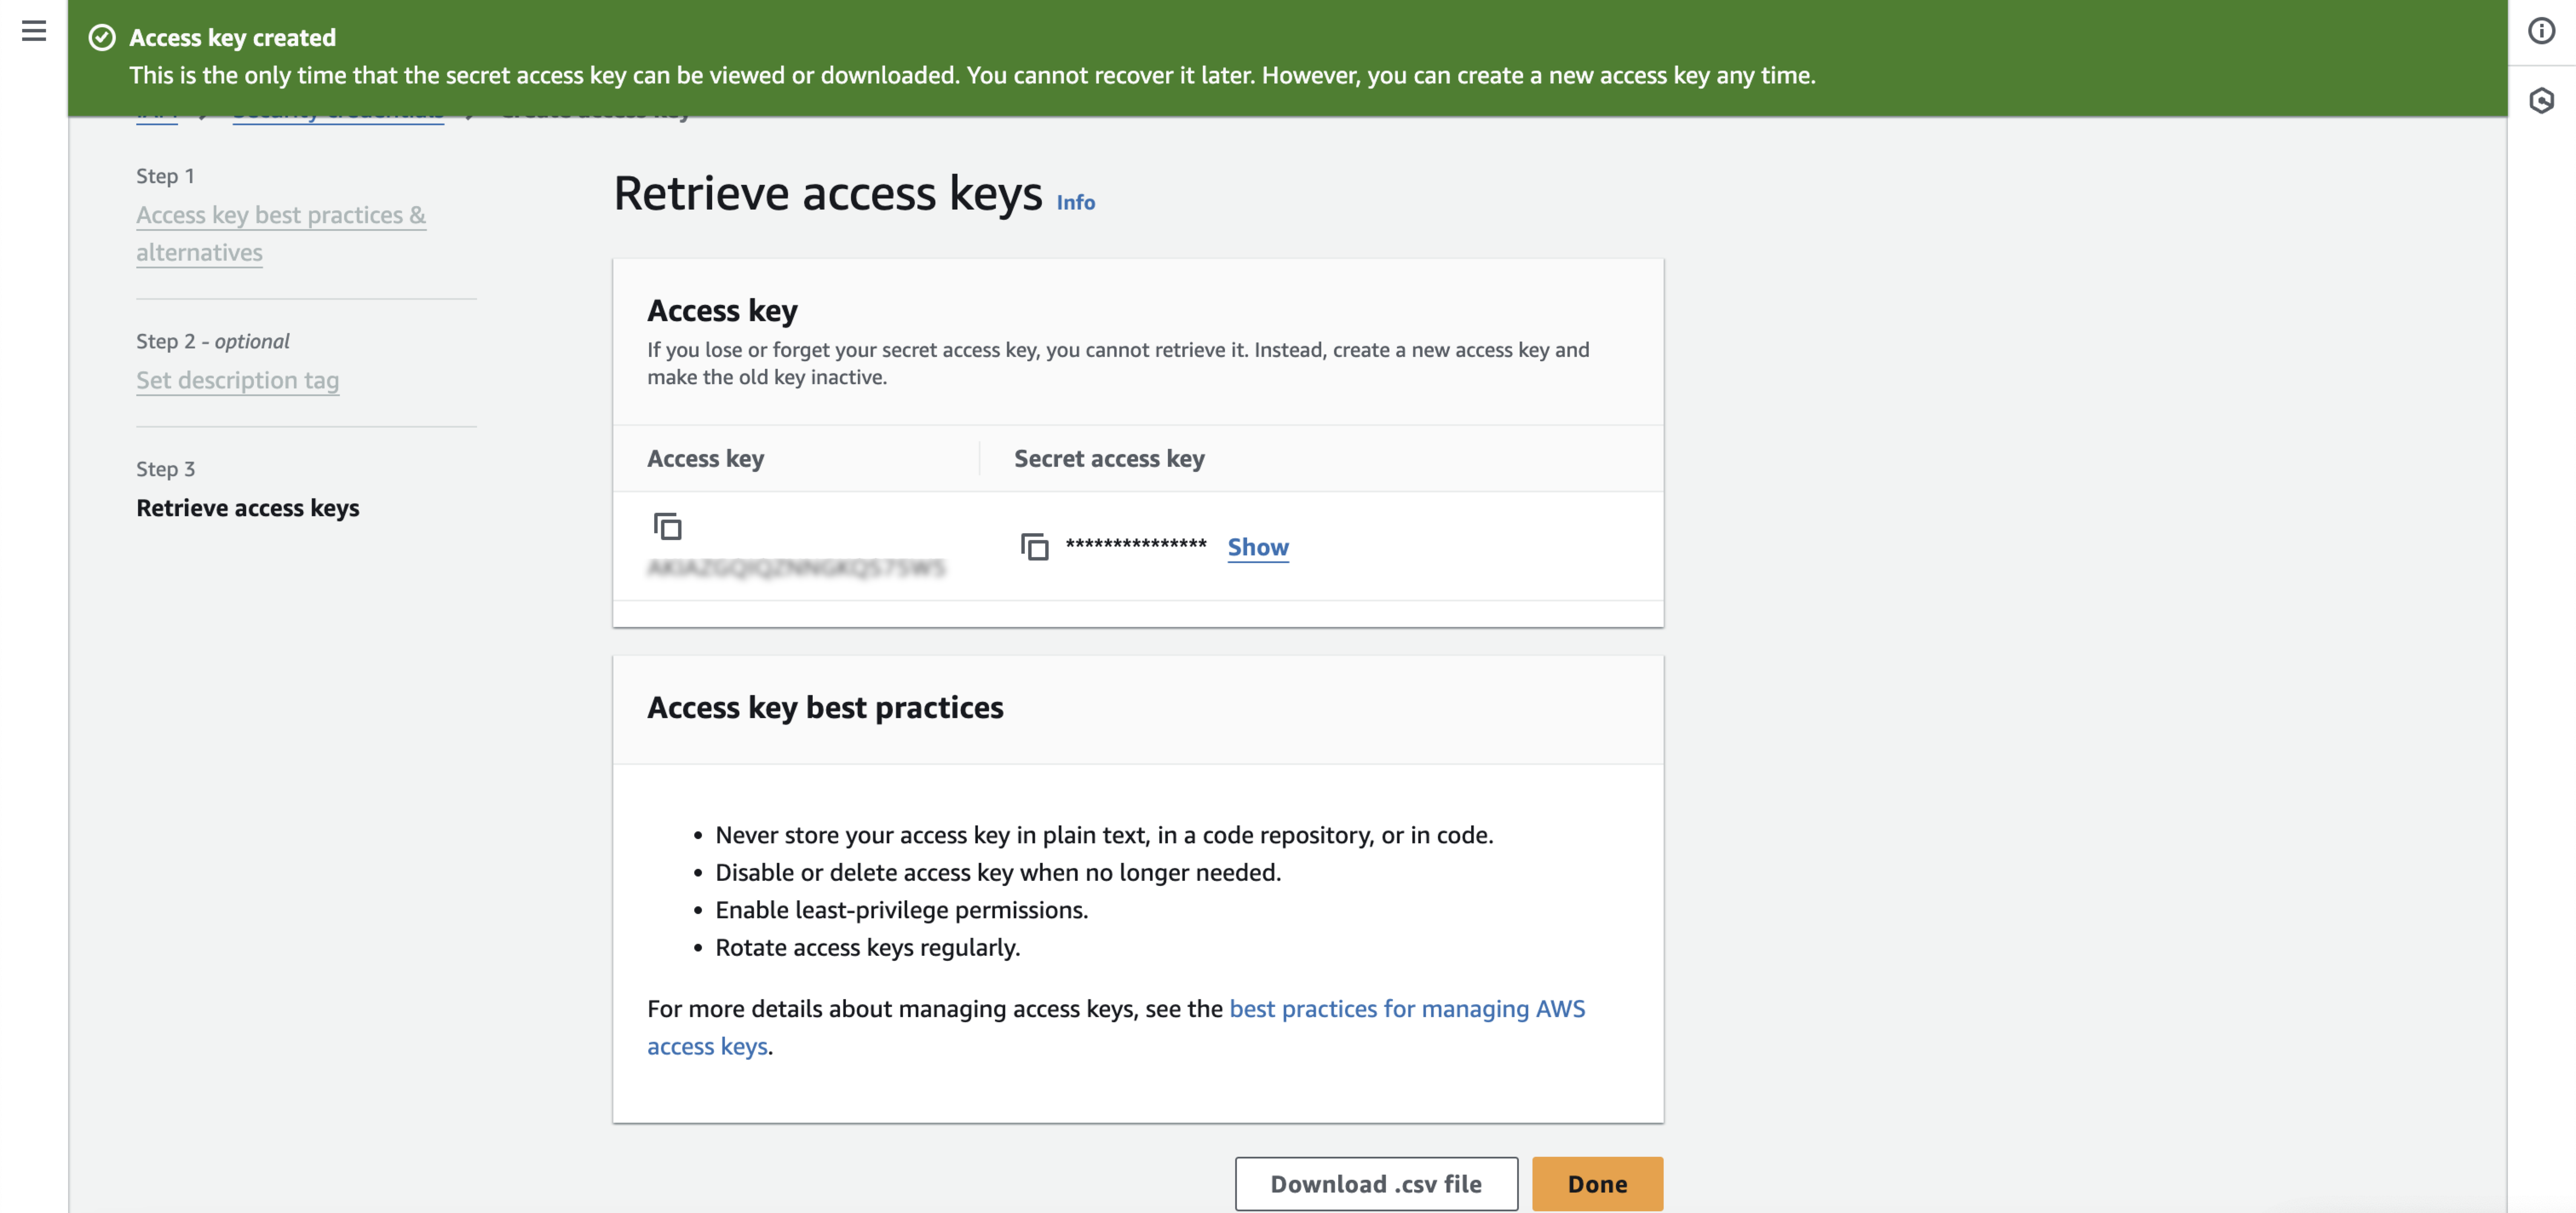
Retrieve Access Keys
-
-
Copy the Access Key ID and Secret Access Key from the newly created access key and paste them into the corresponding fields on the CleverTap dashboard.
-
Enter the From Address. You can enter your preferred email address from Verified email addresses listed under Configuration > Identities on the Amazon SES dashboard.
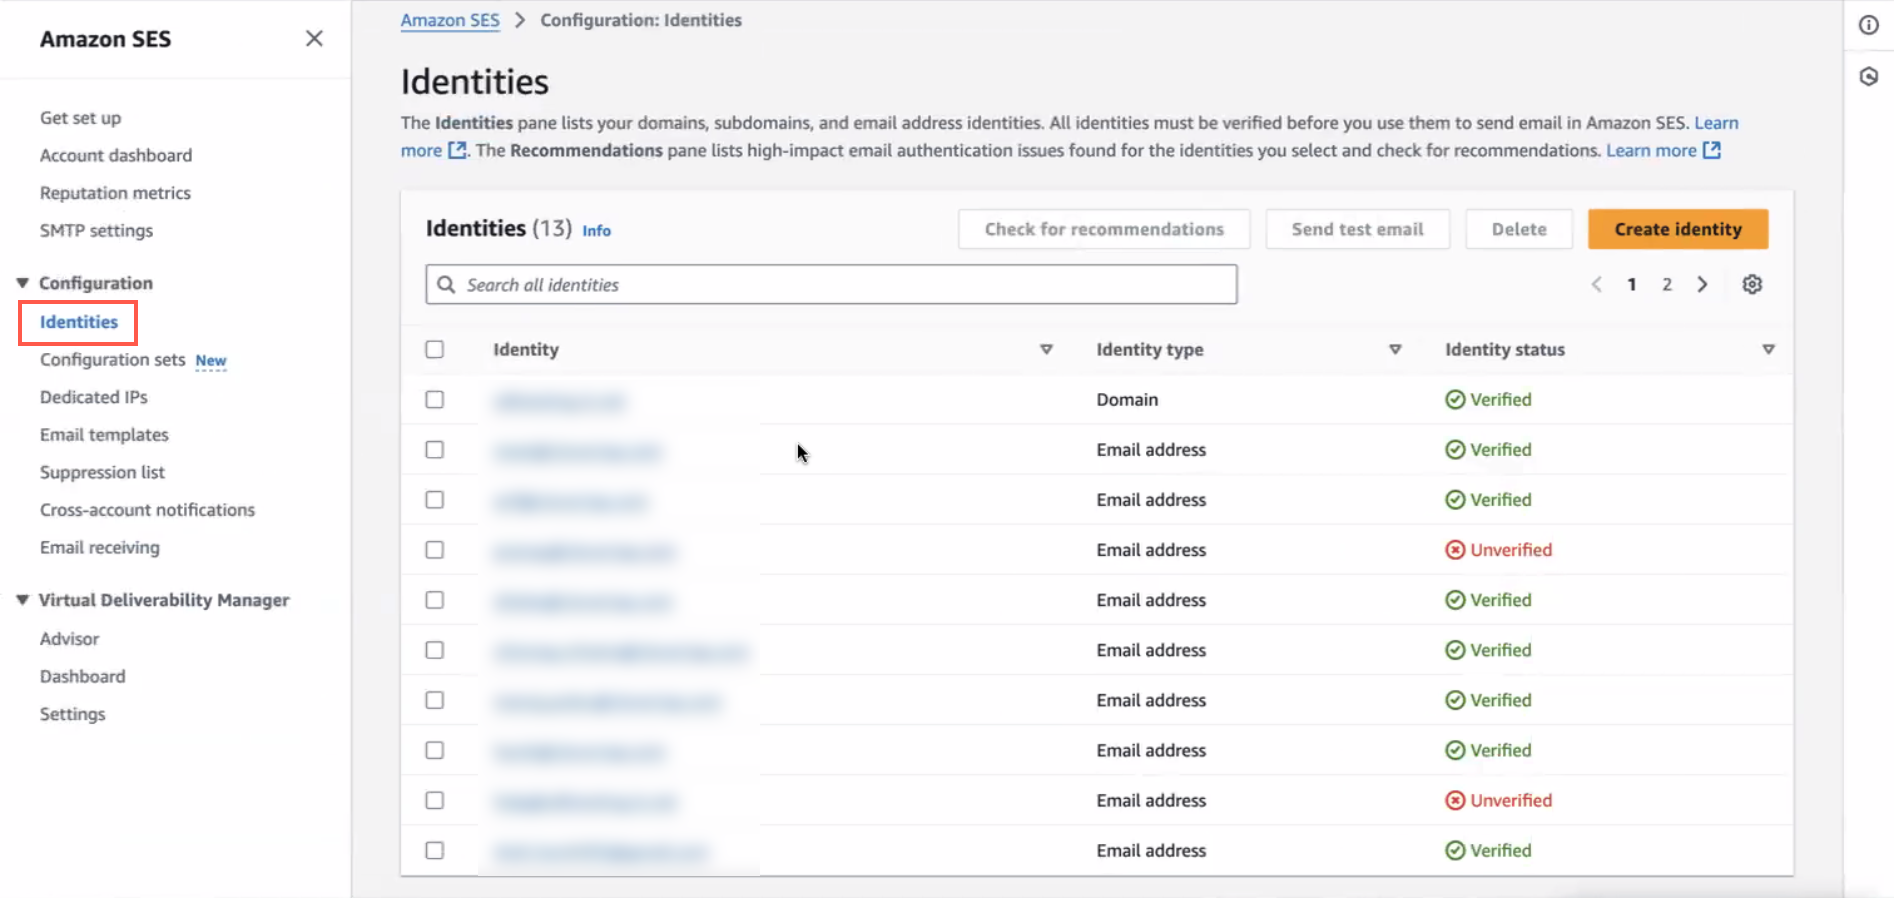
Enter Verified Email Address Under From Address
- Click Save to save the settings.
- Click Send a test email and fill in your details to test the configuration details you entered. If you encounter any issues, refer to Troubleshooting.
Switch Existing Amazon SES Provider Setup to HTTP
If you already have set up Amazon SES configuration under Settings > Channels> Email earlier using SMTP credentials, you can switch to HTTP to send subsequent email campaigns from the Settings page on the CleverTap dashboard. To do so, you must edit the current Amazon SES provider setup:
- From the CleverTap dashboard, go to Settings > Channels> Email.
- Click the existing Amazon SES Provider from the Providers tab.
- Repeat Step 4, 6, and 7 of Integrate Amazon SES with CleverTap.
NoteYou must add Access Key ID, Secret Access Key and update the server name to the HTTP server name.
Enabling Bounce and Complaint Processing
When an email is classified as bounced, CleverTap needs to be notified so that no further deliveries to that mailbox are attempted. This is considered a good practice and helps improve your sender reputation.
To enable support for bounce processing, follow the steps below:
- Navigate to Amazon SNS.
- Create a Topic.
- Select the Topic and navigate to Actions > Subscribe to Topic.
- Select HTTPS as the Protocol.
- As the Endpoint value, add the Callback URL as shown in your CleverTap Email page.
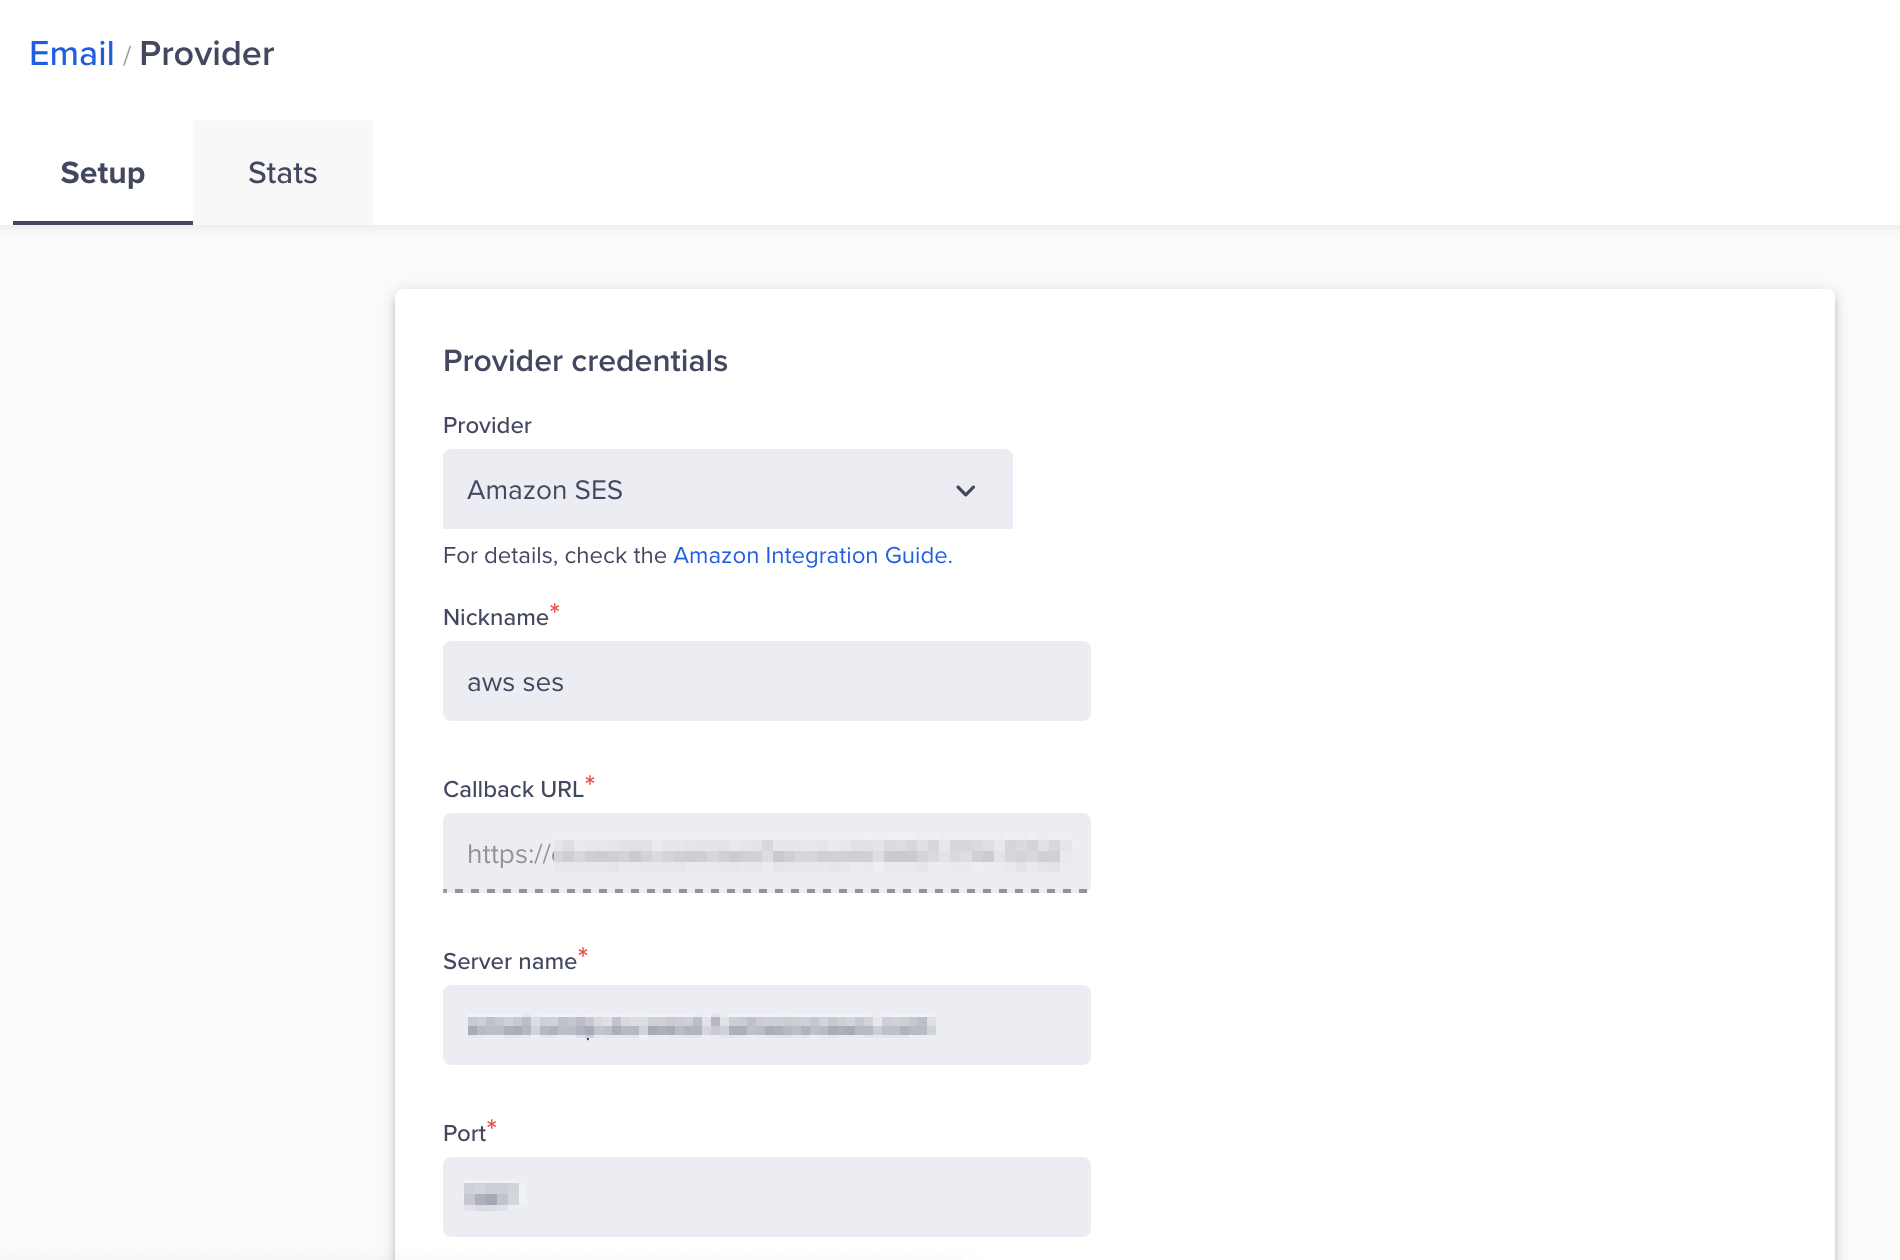
Email Provider Credentials
- Save your settings by clicking on Create Subscription.
- Navigate to Amazon SES.
- Select the Email Address you had previously added to the CleverTap Dashboard.
- Click on View Details.
- Click on Notifications > Edit Configuration.
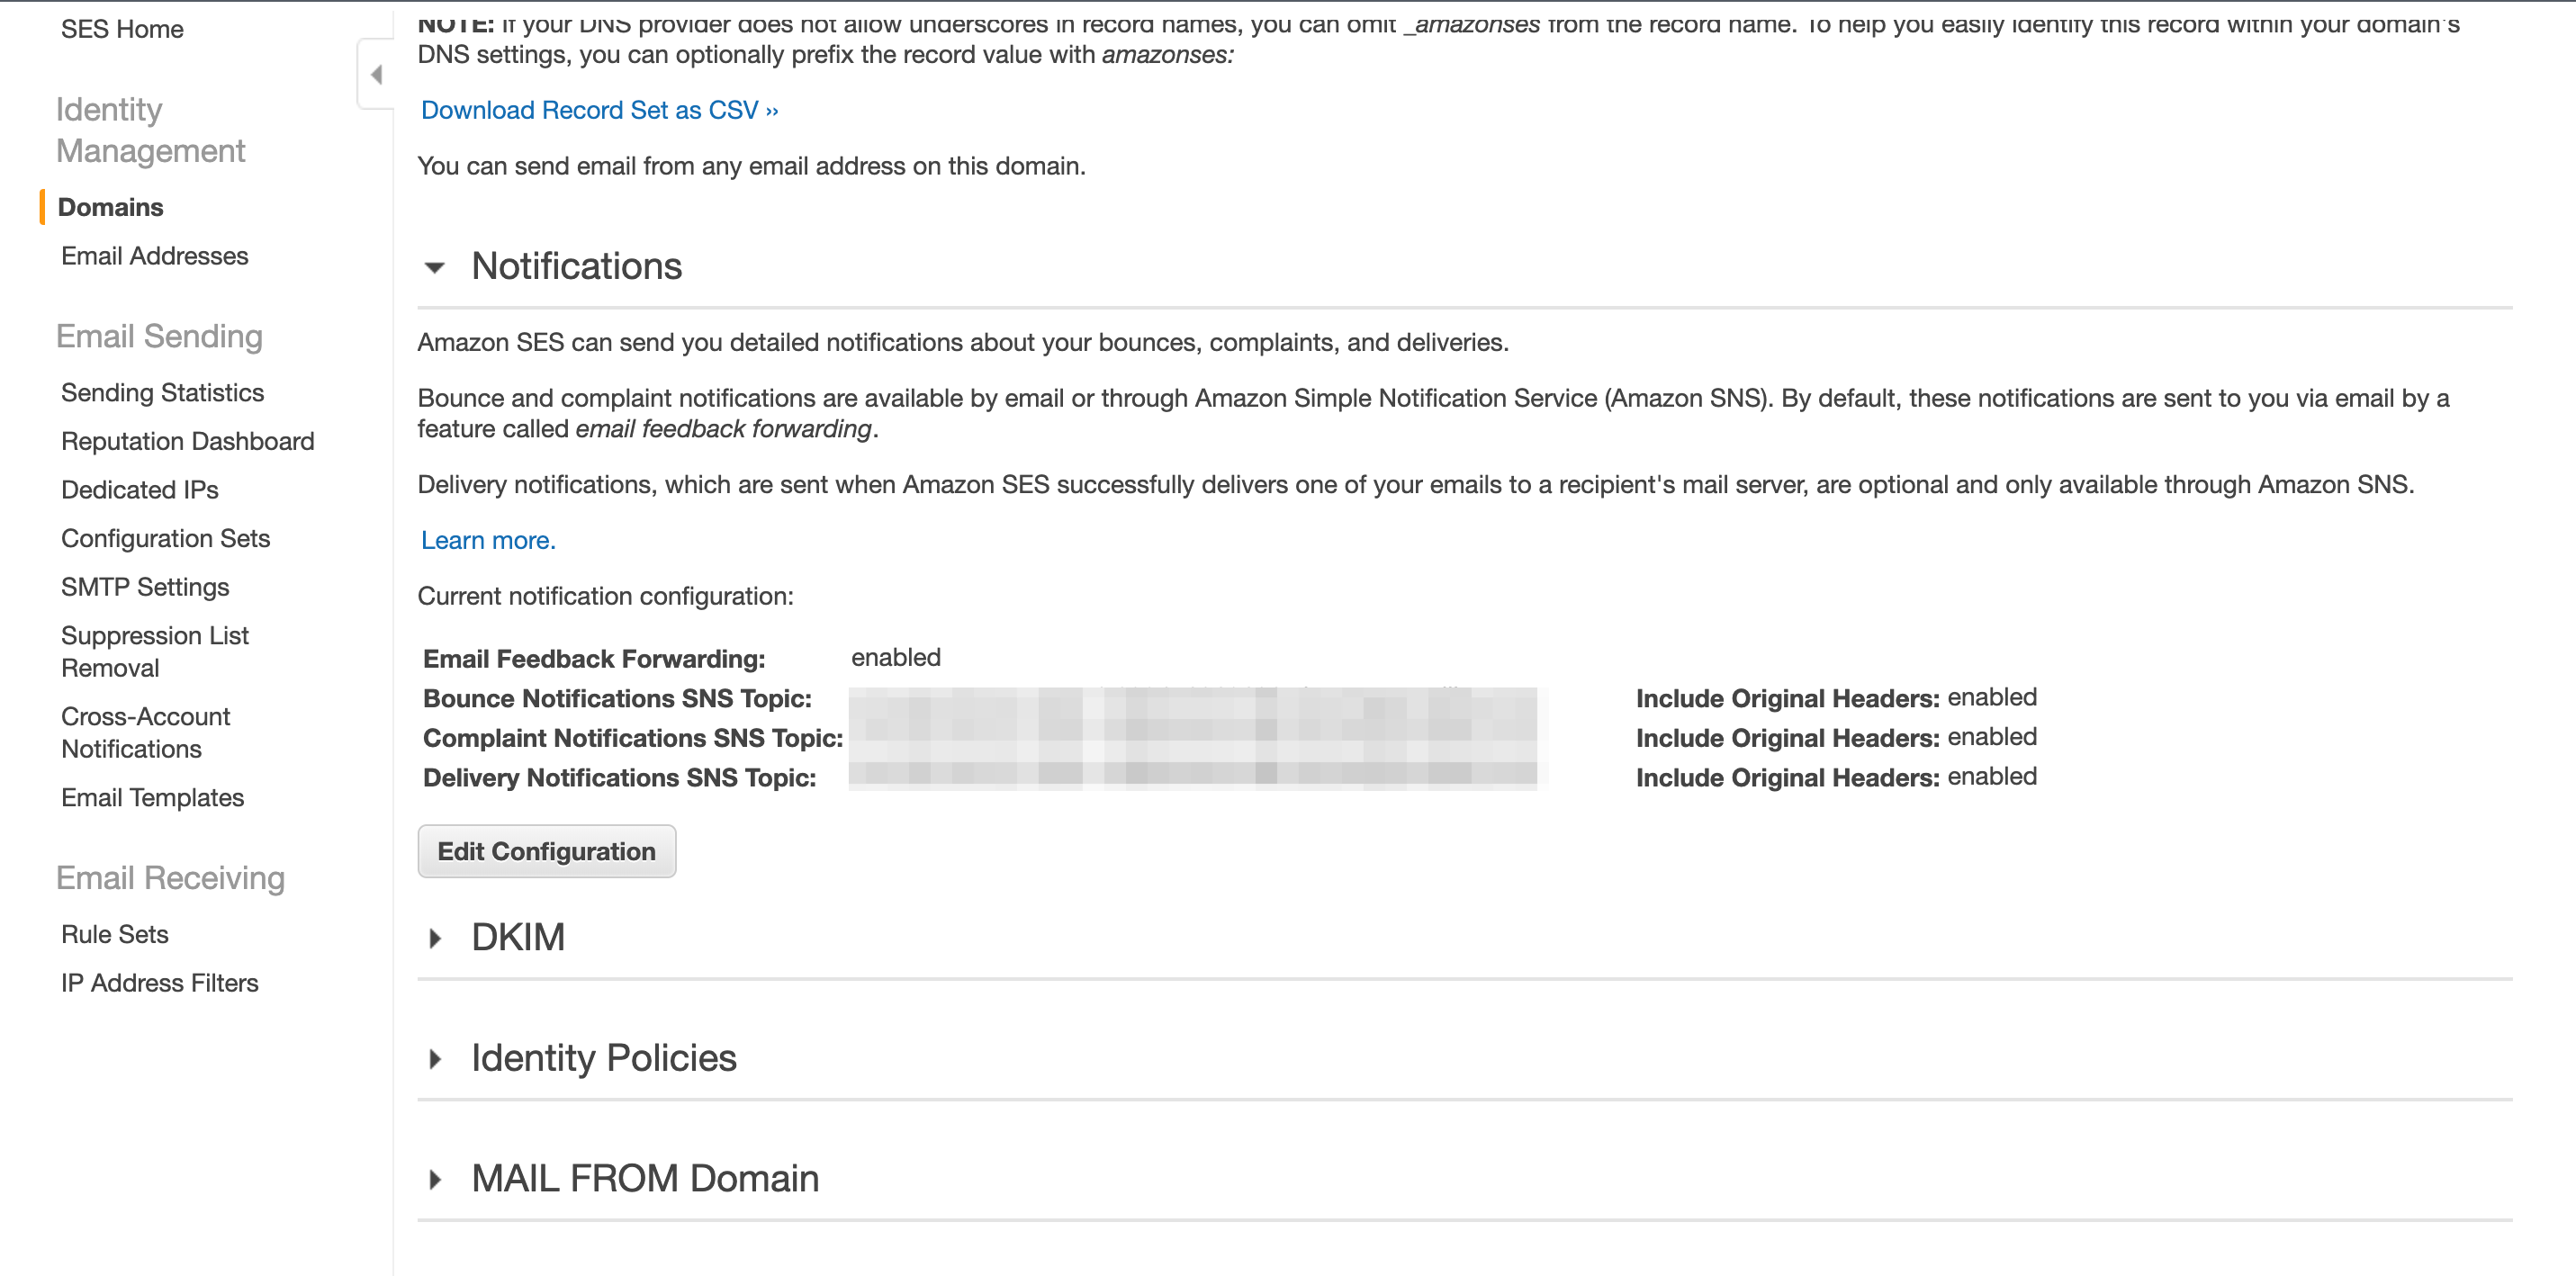
Email Configurations
- Under SNS Topic Configuration, select the topics you created earlier such as Bounces, Complaints, and Deliveries by clicking on the Include original headers checkboxes.
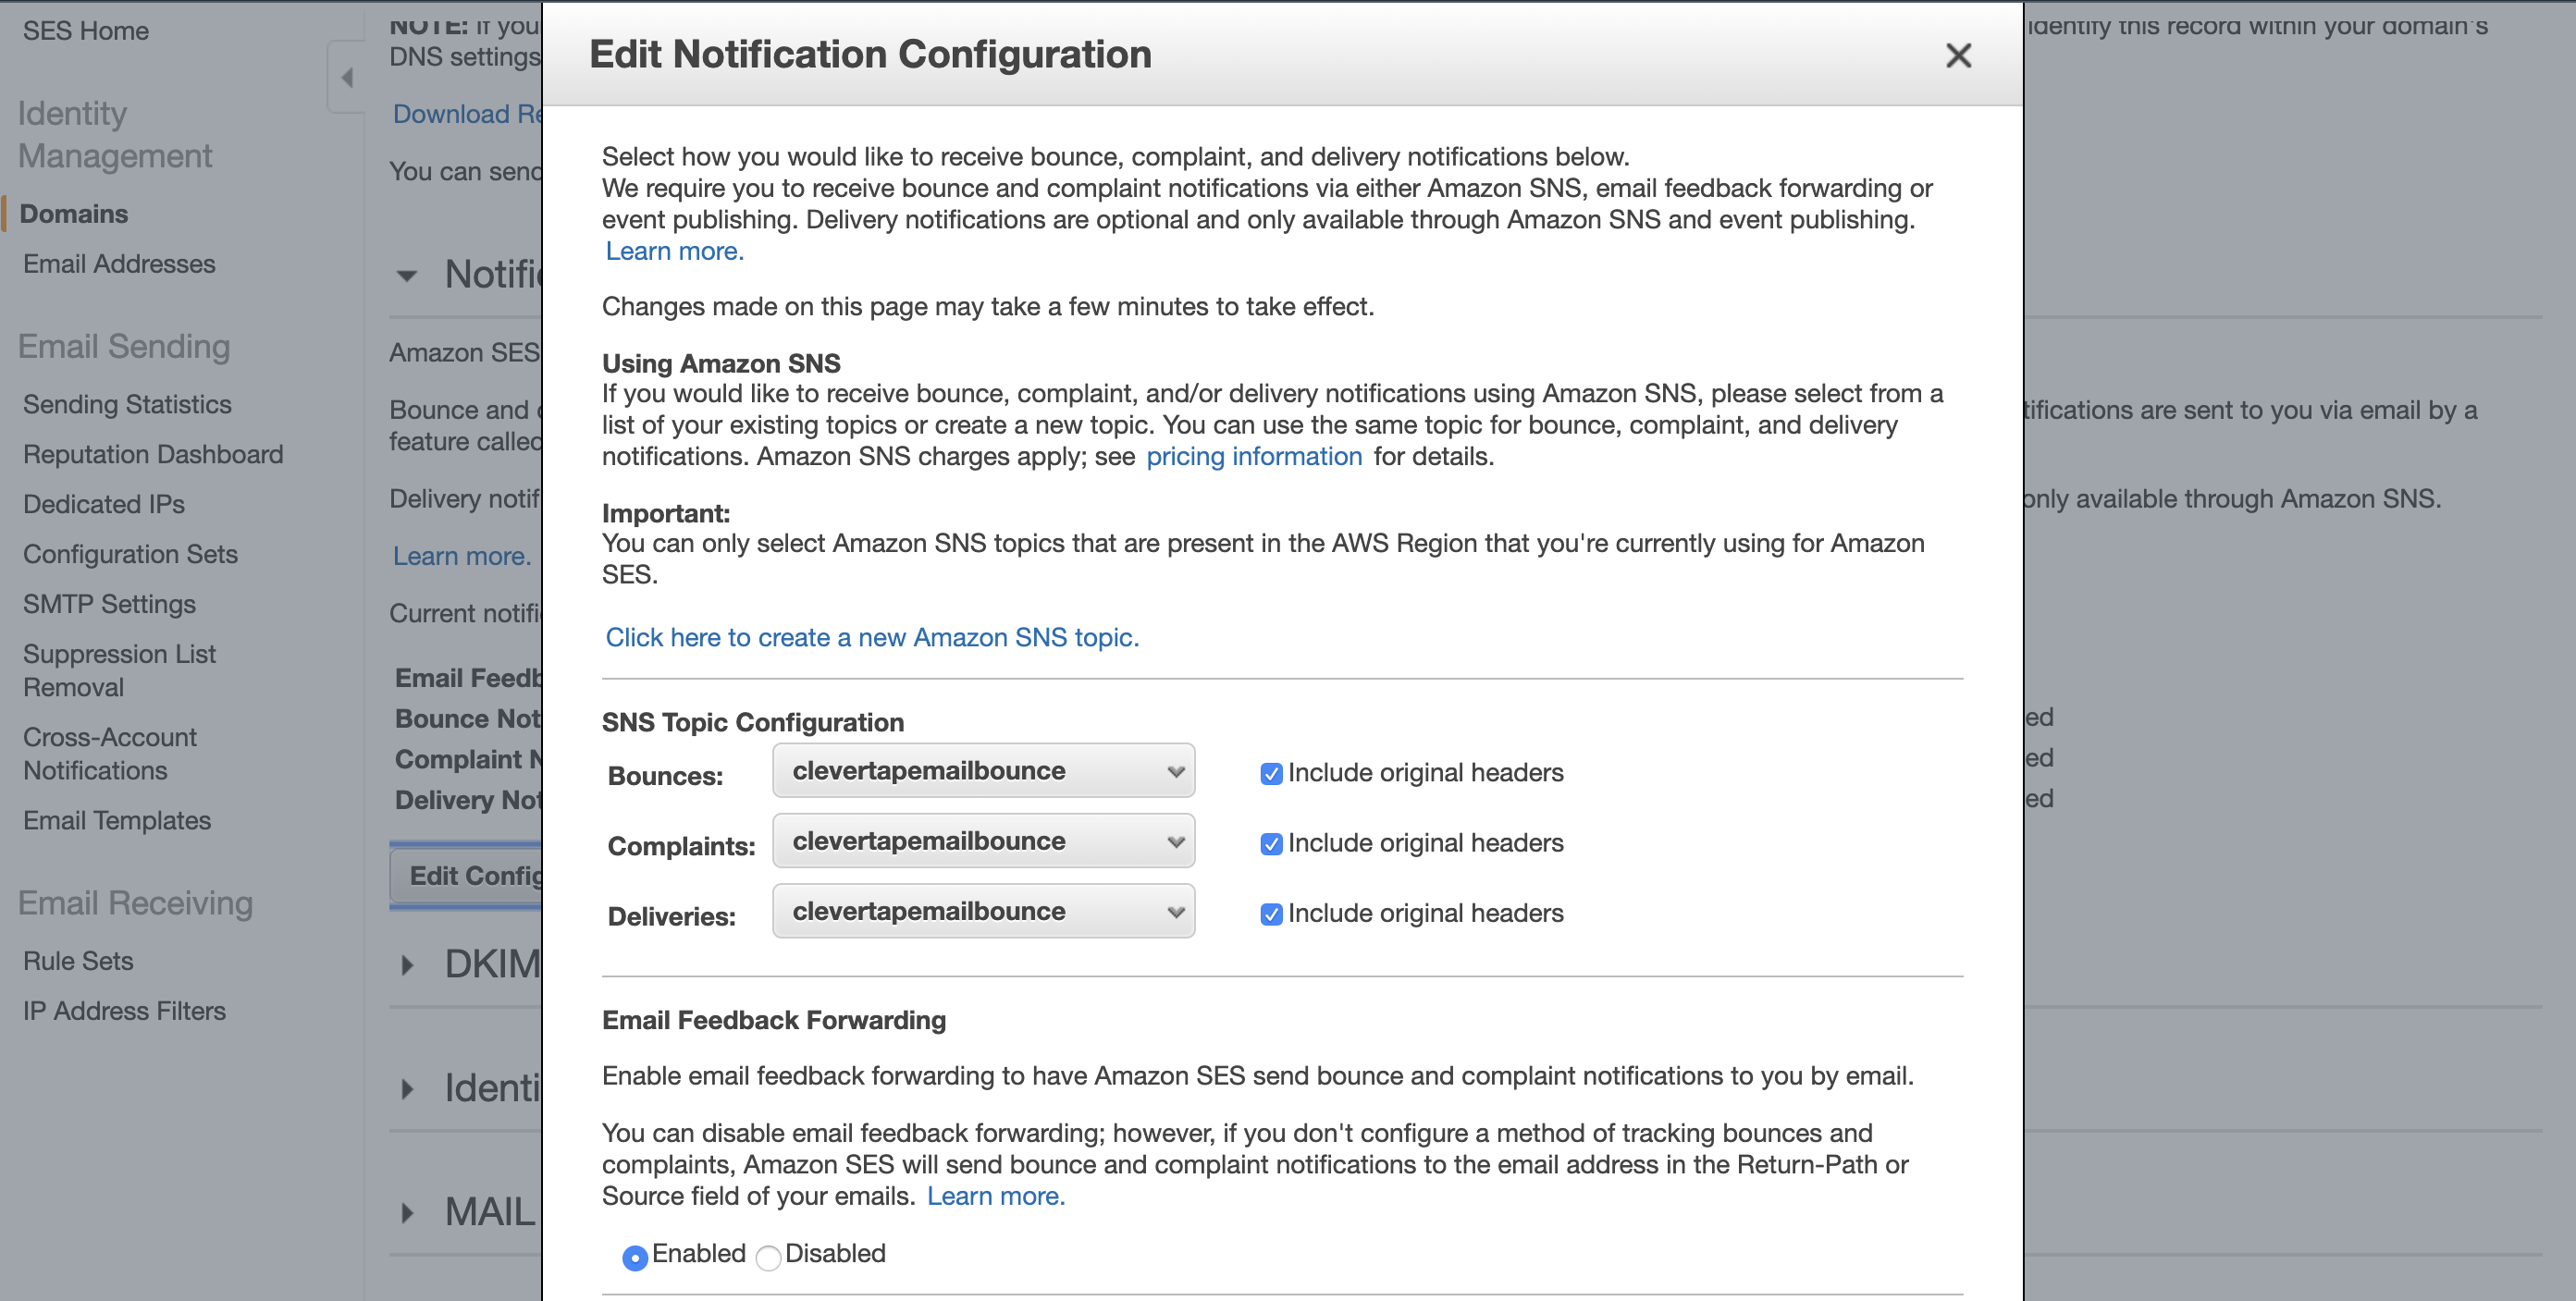
Edit Notification Configuration
- Save the configuration.
Handling Unsubscribe Requests
To handle unsubscribed user requests, refer to the steps listed under Handling Unsubscribes.
Troubleshooting
This section outlines some troubleshooting scenarios and their solutions:
- Sandbox mode: If you are getting an Invalid Credentials message when saving your settings, it could be that your Amazon SES account is a sandboxed one. You need a valid production-ready Amazon SES account to save your credentials.
- Spam: Check your Spam folder to see if the message has been classified as Spam by your email provider.
- Email rendering: If your email does not render properly, check the subject line for new line characters or too many additional spaces. Amazon SES email converts data from UTF-8 format to a 7-bit ASCII format before sending it out. The new line characters or additional spaces may interfere with this conversion.
Updated about 1 month ago
