Liquid Tags
Liquid tags offer tremendous flexibility and personalization for your messages. You can create a 'write once use multiple times' message and add multiple variations to it. You can use Liquid tags with the following engagement channels:
- Mobile Push
- SMS
- Webhooks
- App Inbox
- In-App
- Native Display
Here is a simple example of personalization with a liquid tag:
{% if Profile.Language == "Spanish" %}
Hola!
{% elsif Profile.Language == "English" %}
Hello!
{% endif %}
If the user's preferred language is Spanish, the greeting will appear in Spanish.
Hola!
If the user's preferred language is English, the greeting will appear in English.
Hello!
Getting Started
You can personalize your messages for Events and User Profiles. For example, a user whose language is English (Profile property), or someone who has purchased (Event property) a new shirt.
Let us create a Liquid tag in an email campaign. To create a tag, select the "New email with rich media" template when you create an email campaign. You can use Liquid Tags within this template.

Select a Rich Media Template
The Liquid Tags work within the email editor. However, you can also combine the power of HTML with Liquid Tags. You can paste your HTML code directly in the HTML editor by clicking the Source button and then personalize it with Liquid Tags. For more information, see Liquid Tags with HTML
The liquid terms are adapted from shopify's documentation to CleverTap. We support only the terms identified in our documentation for a seamless experience.
Using Tags
You can start creating your message by declaring tags in the campaign editor. You can declare the tags in the following ways:
- For creating message conditions - Conditional tags can help you vary the message for each condition. For example, if your users make a purchase, then send them a coupon with an additional discount for their next purchase. You can create a conditional tag by enclosing the condition within curly braces and a % sign. Start by entering
{%in the email editor. The closing tag is completed automatically. The syntax for these tags is:{% if %} {% endif %} - For displaying output from a variable - Output tags display the output of a variable. For example, if customer_type is a variable, display all the types of customers such as Platinum, Gold, and Silver. Start by entering
{{in the email editor. The closing tag is completed automatically. The syntax for these tags is:{{customer_type}}
You can use any of the Profile and Event properties within tags. Just enter Profile. or Event. in the editor and we will list all the corresponding properties automatically.
Note
When selecting properties, the "P" in profile and the "E" in Events must be capitalized and followed with a period ".". Profile properties are available for all segments. Liquid tags for Event properties are only available for live user segments. The "@" personalization is supported only outside the tags.
Conditional Tags
You can use conditional tags for creating simple or complex conditional statements. For example, If condition A, then send message 1, else send message 2, else-if message 3. If we were to express this in tags, we can use the user's preferred language as an example.
Following are the conditional tags:
- if
- else
- else-if
- unless
- switch case
- for
- break
- split
- continue
- abort
- limit
- offset
- tablerow
- now
If
{% if Profile.Language  == "French"%}

Bonjour !

{% endif %}
Else/Elseif
You can send messages conditionally to each recipient.
{% if Profile.Language  == "French"%}

Bonjour !

{% elsif  Profile.Language == "Spanish"%}

Hola!

{% else %}

Hello!

{% endif %}
If the user's preferred language is French, the greeting will appear in French. If the user's preferred language is Spanish the greeting will appear in Spanish. However, if the preferred language is anything other than French and Spanish, then the greeting will appear in English.
Hello!
You can display different messages based on the value of an Event Property (for example, Requested Product). Here is an example demonstrating the syntax for using Event Properties in Liquid Tags:
{% if Event["Requested Product"] == "Personal Loan" %}
You selected **Personal Loan**. Here's what you need to know about it.

{% elsif Event["Requested Product"] == "Car Title Loan" %}
You selected **Car Title Loan**. Let's get started with your application.

{% else %}
It seems like we couldn't determine your requested product. Please try again.
{% endif %}
Unless
You can use this tag if a condition is not true. For example, if a user's language is "not" French, then greet with "Hello" in English.
{% unless Profile.Language  == "French"%}

Hello!

{% endunless %}
The message display will be as follows:
Hello!
Switch case
You can switch a statement when a variable changes in value. The when statements define the various conditions.
For example, you have three types of customers, namely "Gold", "Silver" and everyone else. They are represented by the profile property "customer_type". You can change the displayed message based on the type of customers.
{% case Profile.customer_type %}
  {% when "Gold" %}
     You are eligible for free lounge access!
  {% when "Silver" %}
     You are eligible for lounge access at only 50% of the cost!
  {% else %}
     Upgrade your membership now for free lounge access!
{% endcase %}
Upgrade your membership now for free lounge access!
for
You can repeat execution in liquid script with the for a loop.
{% for item in hiking.items %}
  {{ item.names | default: "NA"}}
{% endfor %}
flashlight backpack boots
break
You can stop execution in the liquid script by adding break in a loop.
{% for i in (1..10) %}
  {% if i == 7 %}
    {% break %}
  {% else %}
    {{ i | default: "NA" }}
  {% endif %}
{% endfor %}
1 2 3 4 5 6
split
You can divide a string into an array using the argument as a separator. It converts comma-separated values from a string format to an array.
{% assign premium = " Customer 1, Customer 2, Customer 3, Customer 4" | split: ", " %}
{% for member in premium %}
  {{ member }}
{% endfor %}
split displays the following output:
Customer 1

Customer 2

Customer 3

Customer 4
continue
You can skip the current iteration in a loop with the continue tag.
{% for i in (1..10) %}
  {% if i == 7 %}
    {% continue %}
  {% else %}
    {{ i | default: "NA"}}
  {% endif %}
{% endfor %}
1 2 3 4 5 6 8 9 10
abort
This is a CleverTap Tag within Liquid. You can abort sending a message with the abort tag. If a condition is not fulfilled for a user, it is displayed in the campaign reports as LiquidLogicAborted.
{% if Event.price > 100%}
Thank you for your purchase. Here is a coupon code for you.
COUPON
{% else %}
{% abort %}
{% endif %}
Thank you for your purchase. Here is a coupon code for you.
COUPON
limit
You can specify the limit of the for loop with this tag.
<!-- if array = [1,2,3,4,5,6] -->
{% for item in array limit:2 %}
  {{ item | default: "NA" }}
{% endfor %}
1 2
offset
You can begin the loop at a specified index.
<!-- if array = [1,2,3,4,5,6] -->
{% for item in array offset:2 %}
  {{ item | default: "NA" }}
{% endfor %}
3 4 5 6
tablerow
You can generate an HTML table with this tag. It must be wrapped in opening <table> and closing </table> HTML tags.
<table>
{% tablerow product in Profile.multi %}
{{ product | default: "def" }}
{% endtablerow %}
</table>
<table>
  <tr class="row1">
    <td class="col1">
      Cool Shirt
    </td>
    <td class="col2">
      Alien Poster
    </td>
    <td class="col3">
      Batman Poster
    </td>
    <td class="col4">
      Bullseye Shirt
    </td>
    <td class="col5">
      Another Classic Vinyl
    </td>
    <td class="col6">
      Awesome Jeans
    </td>
  </tr>
</table>
now
Using this tag, you can insert the current date and time in the specified format.
{{ "now" | date: "%Y-%m-%d %H:%M" }}
Variable Tags
Assign
You can use the assign tag to assign value to a variable. The value of this variable can change based on the defined condition or a range. You can then reuse this variable across your message.
For example, you want to greet a user in French. You create a variable called LANG. Now, you can use this variable for all available languages. If the value of the LANG variable is French, the greeting is "Bonjour!". The greeting is "Hello!" for all other languages.
{% assign LANG = PROFILE.Language %}
{% if LANG == "FRENCH" %}
Bonjour!
{% else %}
Hello!
{% endif %}
Theme Tags
Raw
You can use the raw tag to display characters used by the tag syntax.
{% raw %}{{ 5 | plus: 6 }}{% endraw %} equals 11.
{{ 5 | plus: 6 }} equals 11.
Comment
You can comment on your code with this tag. It can be notes or description that you want to add to make your code more understandable.
{% if Profile.Language  == "French"%}

{% comment %} This condition is fulfilled only if the value is
French {% endcomment %}

Bonjour !

{% endif %}
Bonjour!
Operators
You can use the following operators to evaluate conditions in your tags.
| Operator | Description |
|---|---|
| == | equals |
| != | does not equal |
| > | greater than |
| < | less than |
| >= | greater than or equal to |
| <= | less than or equal to |
| or | logical or. Choose between condition 1 or condition 2. |
| and | logical and. Choose conditions 1 and condition 2 |
| contains | check for a string within a string |
Liquid Tags with HTML
This section applies only to the email channel.
You can combine your HTML code with Liquid Tags to create beautiful and personalized messages for your users. To do so:
- Open the message editor and paste your HTML code.
- Click the
 icon and add your Liquid Tags.

Add Liquid Tags
Linked Content and Liquid Tags in Drag and Drop Editor
Linked Content and Liquid tags are available for the drag-and-drop email editor. This functionality allows customers to design emails and personalize them using dynamic content when they create an email campaign.
Perform the following steps to personalize drag and drop editor templates with liquid tags.
- Select a template.

Select Media Template
- Click the Row item in Preview.

Select the Row Tab
- Click More dropdown and select Customize with Liquid Tags. The Personalize messages with Liquid tags and Linked Content popup displays.

Customize with Liquid Tags
- Add the liquid script inside the popup.

Add Liquid Script
- Click Add.
Validate Liquid Tags
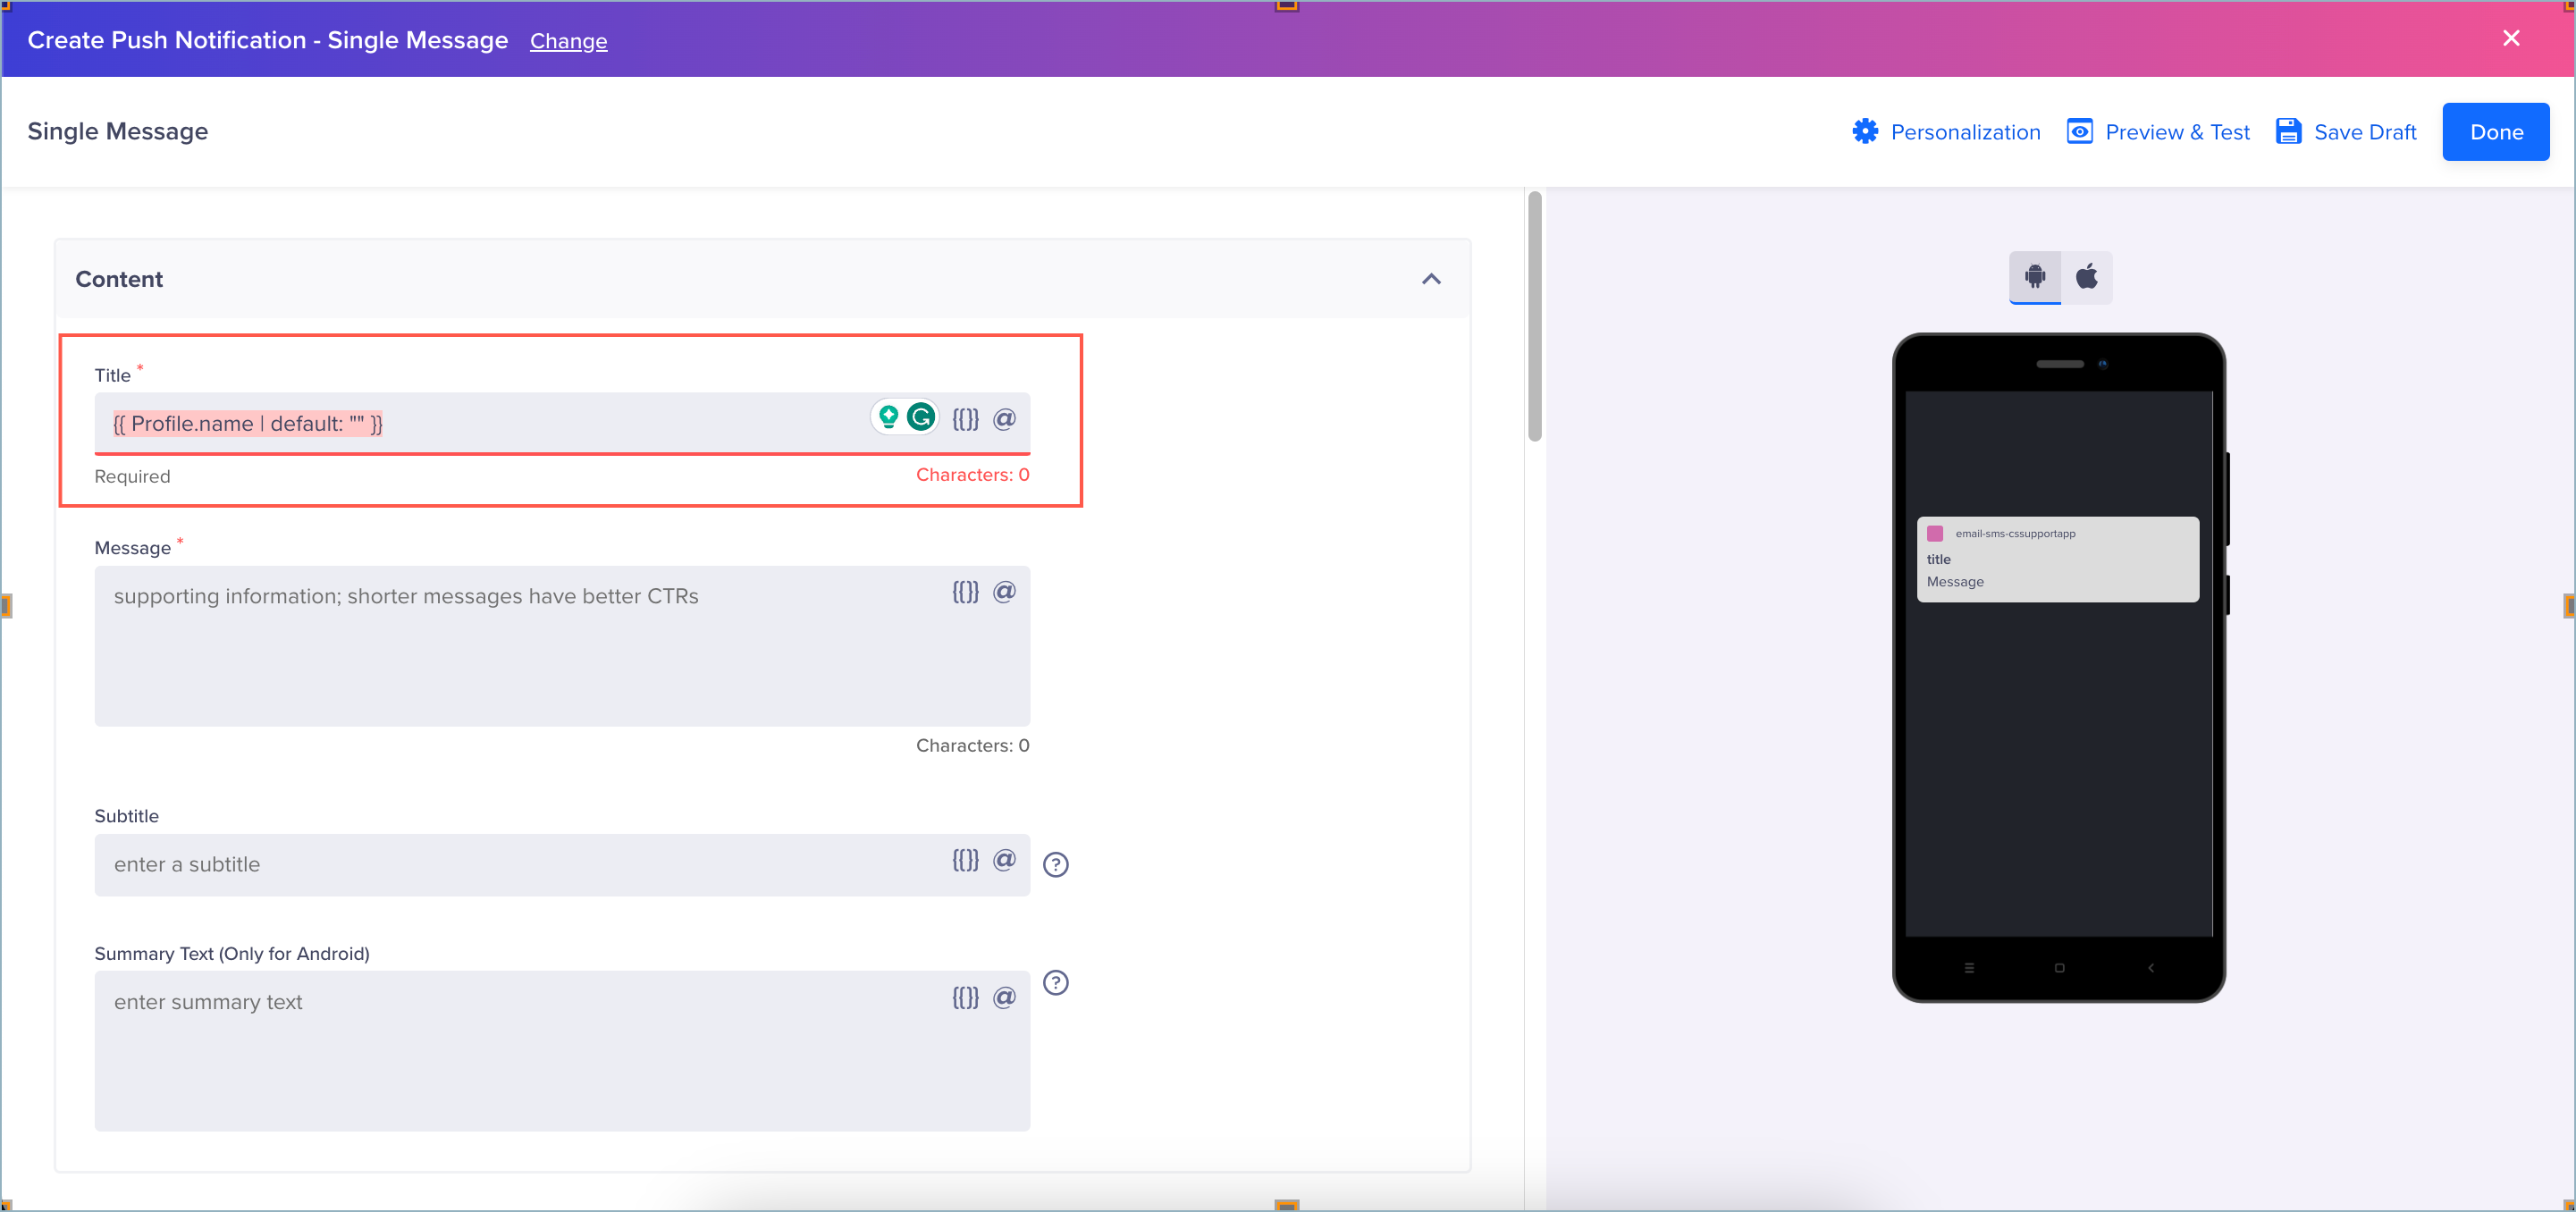
When creating a campaign message with Liquid tags, errors appear in real time if the syntax is incorrect. Errors also surface when clicking Done on the campaign creation page if the message contains invalid Liquid Tag syntax. You can also use Preview & Test in the message editor to validate your message and send test campaigns with personalized values.
Here is an example of how to add Liquid Tags in the message editor:
Message Editor
Here is an example of how CleverTap validates the Liquid Tag syntax from the campaign creation page:
Validating the Liquid Tag Syntax
Video Tutorial
For further information, you can watch the following video on liquid tags:
Updated about 2 months ago