Journey Engagement Node
Understand how to set up your journey
Overview
Set up your journey by defining:
The first step to building a Journey is defining the Journey's configuration within the Setup node.
Click Journeys from the dashboard and click the +Journey button to set up a Journey. A new Journey canvas is displayed.
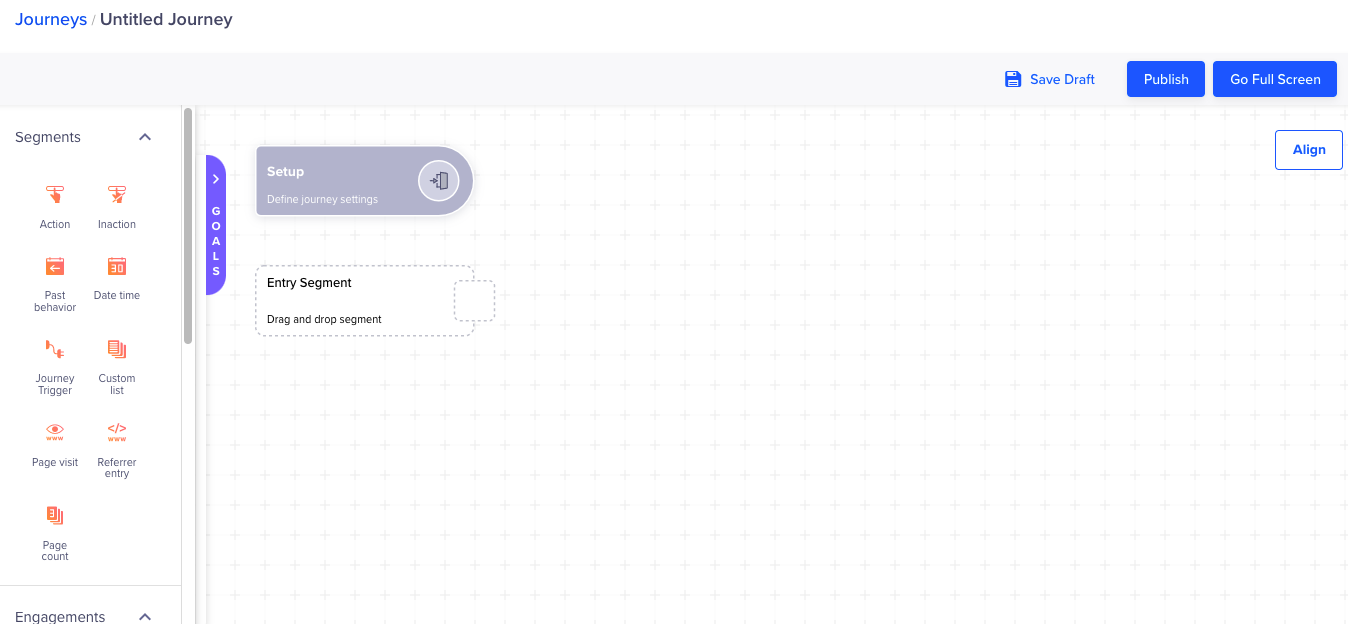
Setup a Journey
Click Setup.
The Setup window displays. Enter the Journey Name.
Define the Journey Entry Criteria
Select the Journey entry criteria. It can be a specific time or an event trigger.
When you start building your Journey, you must define your entry criteria. This is a condition that decides if the users will be included in the Journey. The entry criteria of a Journey is essentially the segment of users you want to target.
The various types of segments you can use are:
- Live User segments: These segments qualify people as soon as they meet your specified criteria
- Past Behavior segments: In this type of Entry Criteria, users who match your specified entry criteria will qualify once every twenty-four hours.
Live user segments are further classified as follows:
- Action: In this type of entry criteria, users will enter your Journey, as soon as they perform an event. For example: Enter people into your Journey, as soon as they install your application.
- Inaction: Users enter your Journey, as soon as they don’t do something in the future. For example: If someone adds an item to their cart, but doesn’t transact within 15 mins.
- Property Date-time segments: Qualify a user relative to a specific date and time in a property.
- Page visit: Users will qualify as soon as they reach a web page that matches your specifications.
- Refer entry: When users come to your website from a certain referrer, for example, Facebook, or Twitter, they will be qualified for your Journey.
- Page count: As soon as the user sees the specified number of pages, they will be a part of your Journey.
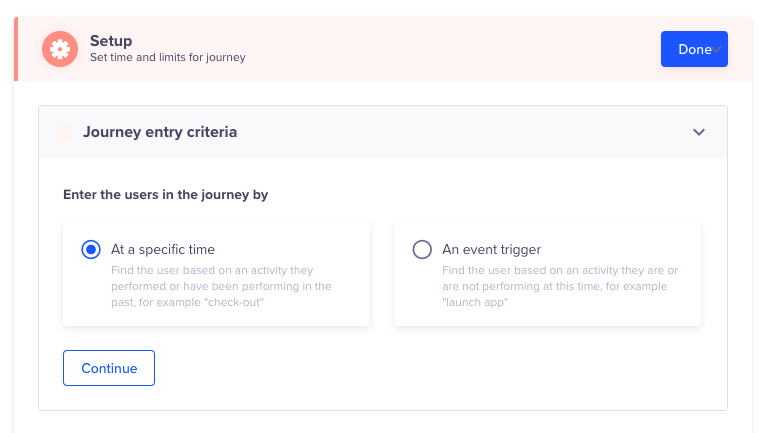
Setup Journey Entry Criteria
Define the Journey Entry Timelines
We support one-time, multiple dates, and recurring Journeys.
For example, for monthly payment reminders, you can schedule a Journey to start on the 1st of every month
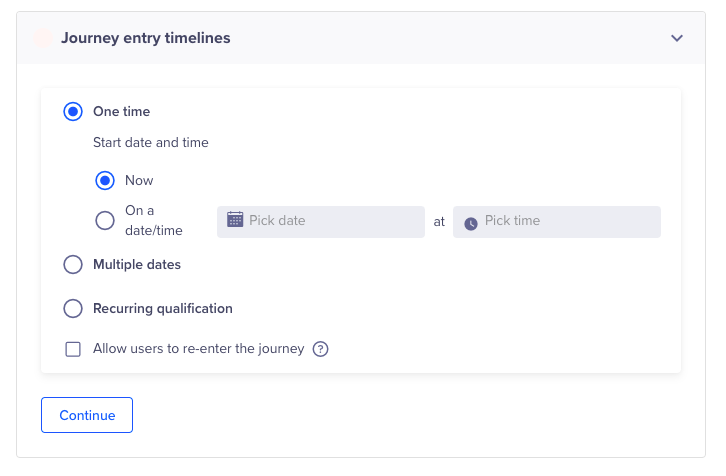
Define Journey Entry Timelines
One Time
This Journey type runs only for one time at the start time of the journey. The option to re-enter the journey is not available to the users who have exited the journey through journey timeout, force exit, or Goal completed.
There will be no new users added, after the journey runs its course on the start time.
Multiple Dates
This Journey type runs on the selected multiple dates. Select the journey end time as per the journey's need.
The option to allow users to re-enter the journey may be selected.
Recurring qualification
This Journey type runs repeatedly and allows entry to new users on the criteria selected in the Repeat section. The first run is immediate on publishing the Journey. The subsequent runs are basis the selected criteria.
The option to allow users to re-enter the journey may be selected.
Allow Users to Re-Enter a Journey
By default, a user will qualify for a Journey only once. However, you can optionally allow users who have exited from a Journey to re-enter it, should they meet the entry criteria at a later date.
After a user is a part of a Journey, they can only re-qualify if they exit the Journey, either by matching one of the specified goals or by being forced out of the Journey and subsequently meeting the specifications of the entry criteria.
Following is an example:

Re-entry of Users in a Journey
When a user makes a purchase they enter into the Journey. After a 20 minute wait time, qualifying users will receive a Push Notification with a discount promotion code.
If the Journey was set up with the default behavior (users cannot re-enter the Journey) then after they purchase and receive the push notification they exit from the Journey. If a user makes another purchase subsequent to the initial purchase they will not receive another promotional Push Notification since this Journey does not allow for re-entry.
If however, your intent is to allow users to receive a new promotional discount after each subsequent purchase, you’d select the option to allow a user to re-enter as follows.
DND and Timezone
CleverTap provides an option for setting the Do Not Disturb hours for notification delivery while creating a journey. The DND feature manages message delivery via engagement nodes in Journeys so that campaigns are only sent after the DND period or discarded. If users send time-specific messages via Journeys where they send notifications to registered users who requested a specific active time and a specific inactive time, notifications will only be sent during the active time.
To set DND for Push, SMS, Email & Web Push journeys, perform the following steps:
Select the days and enter the time period during which you do not want to send campaign notifications. If you want to use the same time inactive period for each day, click the ApplyTo All link.
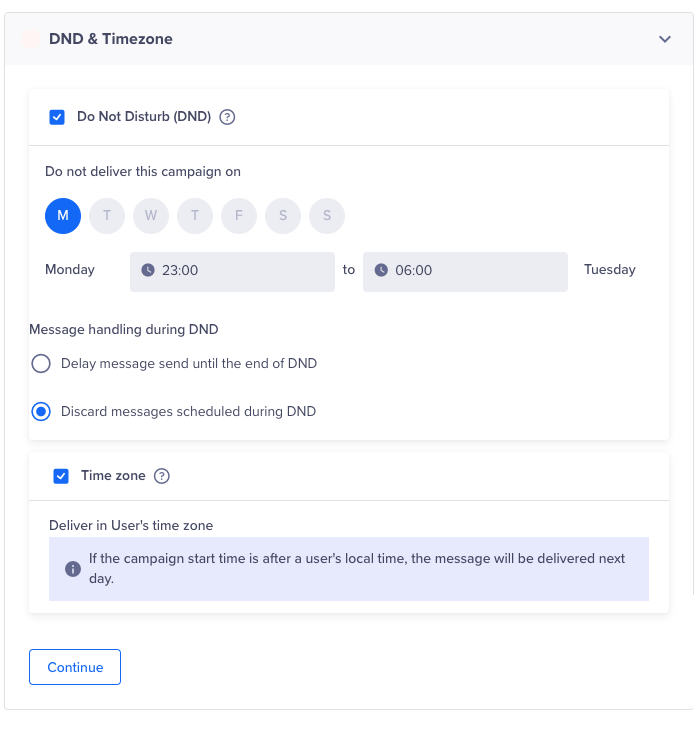
DND and Timezone
DND Conflict Hours
If you schedule a message node to send out delivery during the scheduled DND hours, you will receive an error message. This error message appears at the publishing of the journey.
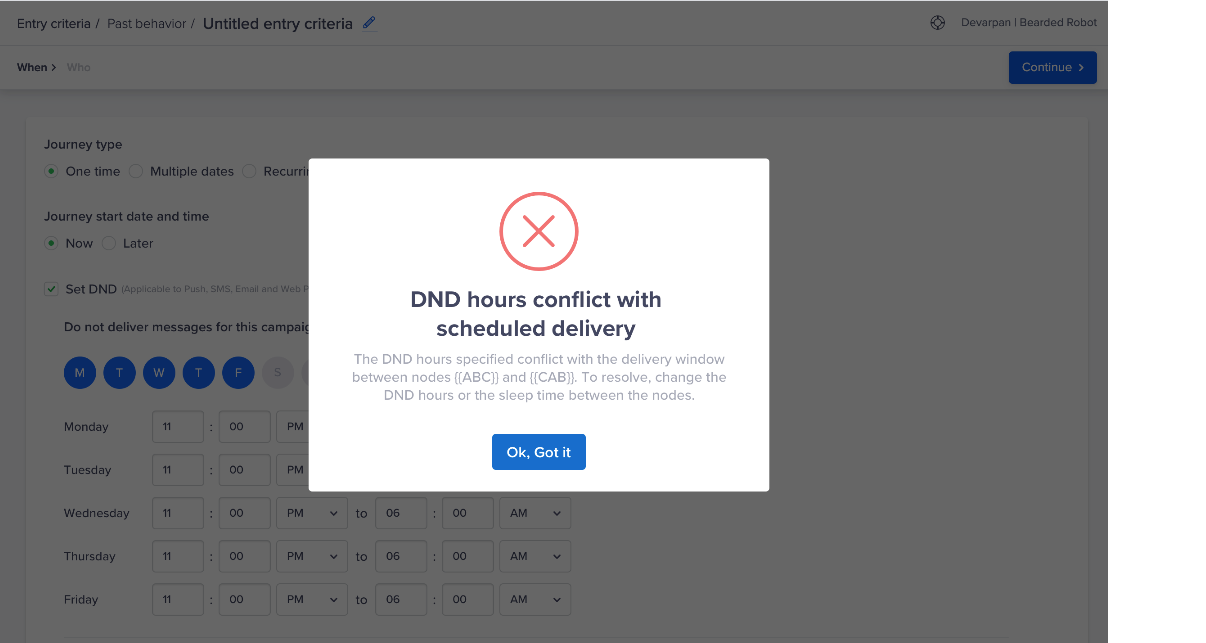
DND Hours Conflict
Define the Control Group
Define the required control groups. For more information on control groups, see Control Groups.
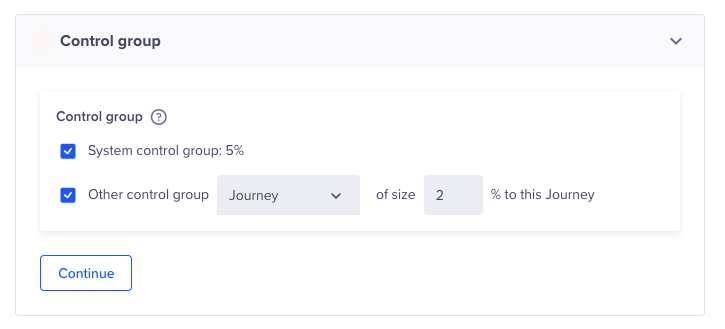
Define Control Group
Select a Journey Timeout
Journeys are sequences of campaigns. At each stage of a Journey, you can choose to segment your audience further and deliver campaigns across multiple channels.
While creating Journeys, you can choose to specify a Journey Timeout, which will be the maximum time a user spends in a Journey. Users exit the journey once this window is complete for them, irrespective of the journey stage.
Once a user has exited the Journey, the user is free to re-qualify, if you have allowed re-entry in your setup.
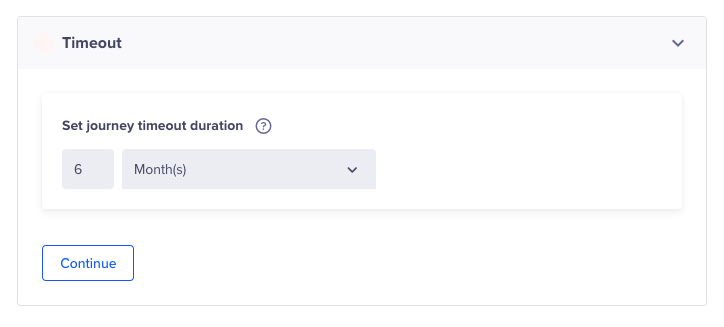
Set Journey Timeout
Updated about 1 year ago
