Create Message
Create a New Campaign
Create a campaign to deliver your message.
To create a new campaign:
- From the dashboard, select Campaigns.
- Click + Campaign.
- From the Messaging Channels list, select Web Native Display.
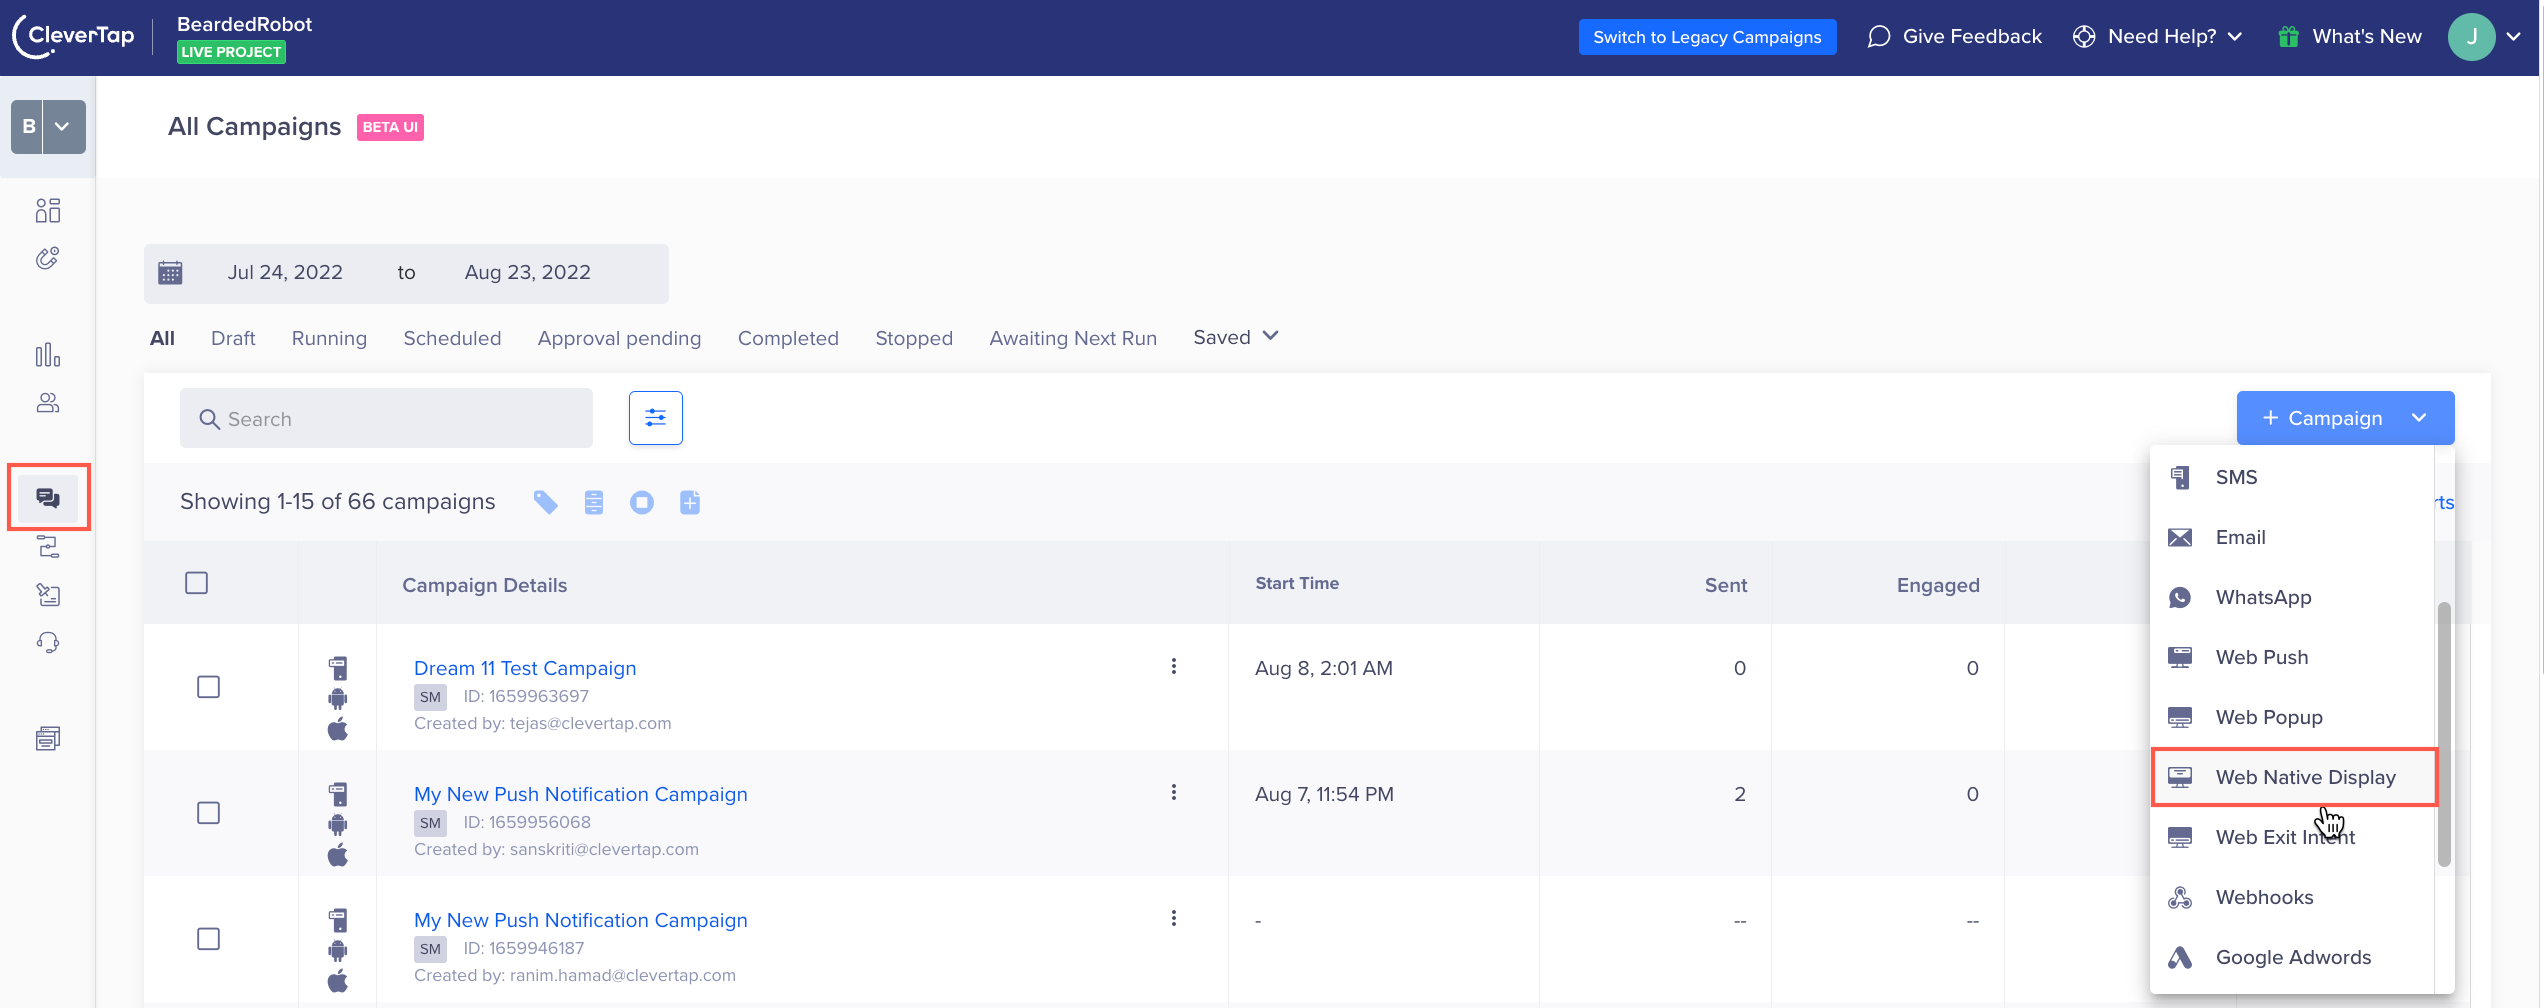
Create a New Web Native Display Campaign
The Campaign page displays.
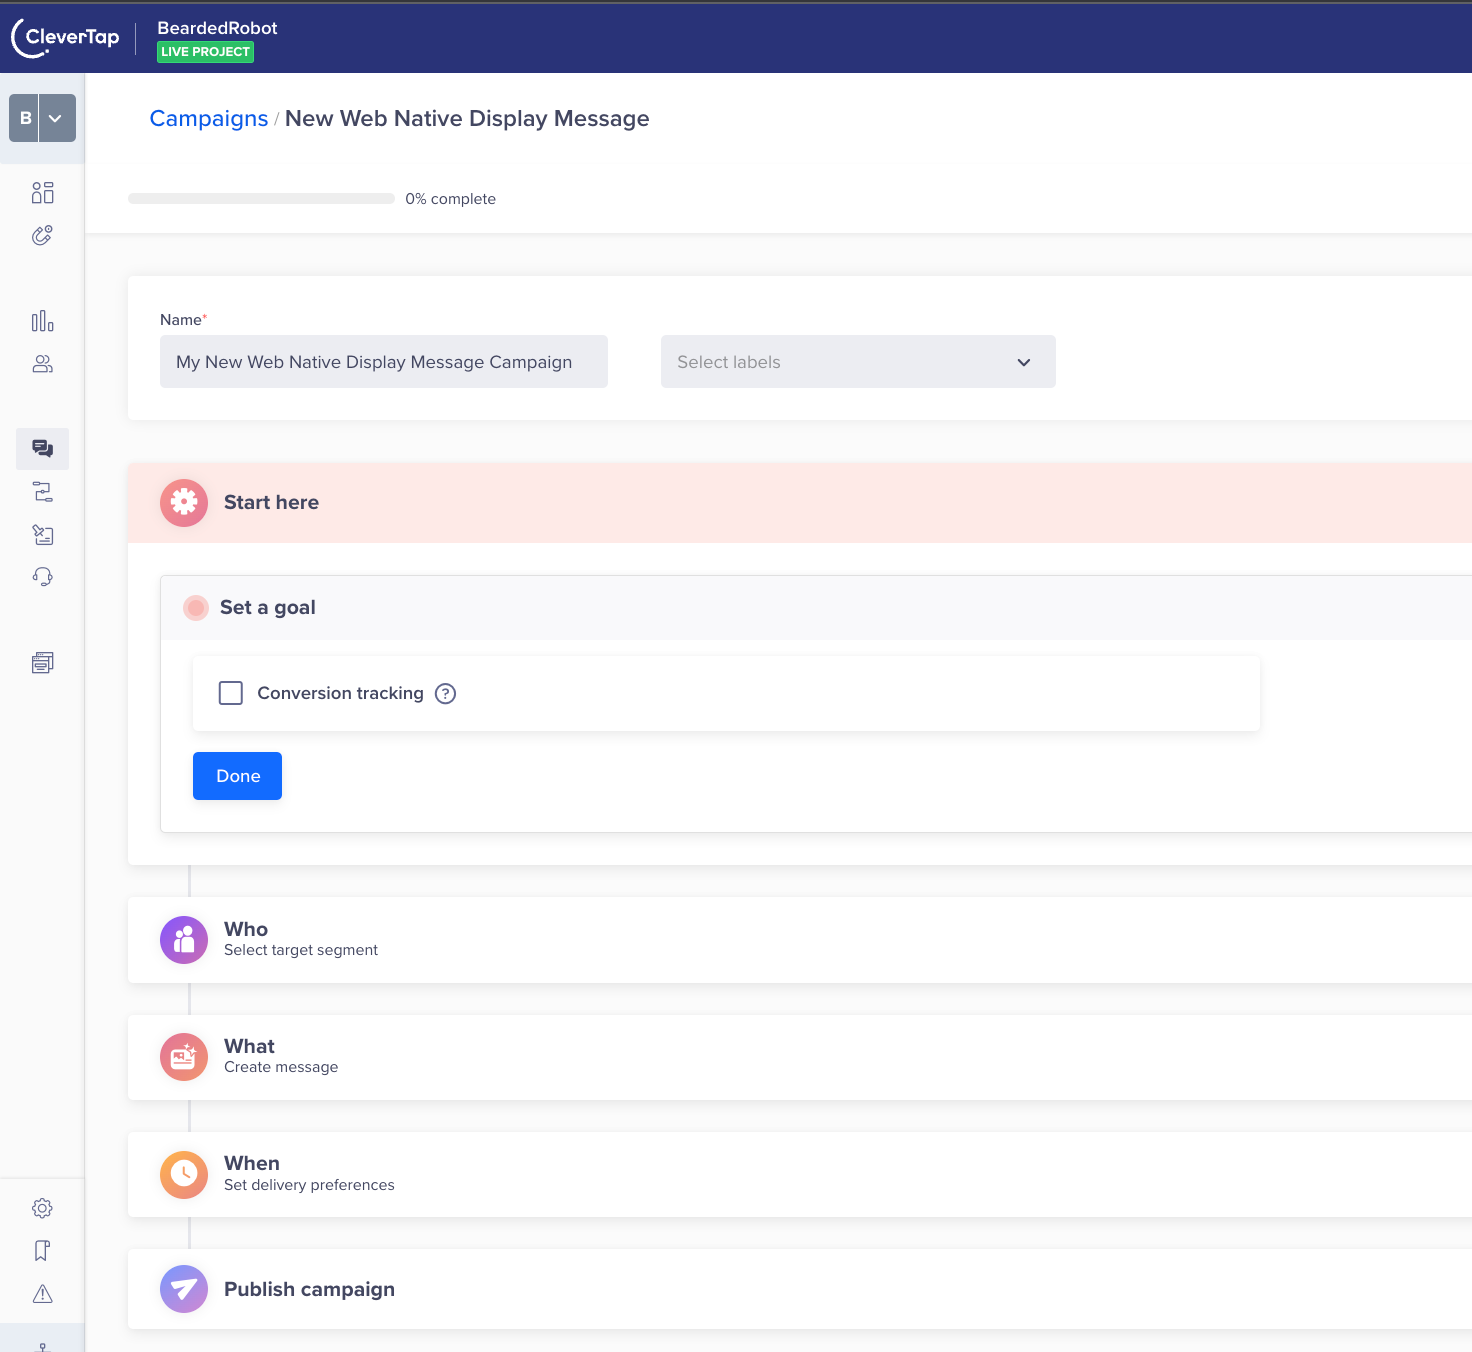
Web Native Display Campaign Setup
Define all the sections and publish the campaign.
Start Campaign
The Start here section displays the setup information.
This section has the following parts:
- Set a goal: You can track your campaign conversion by setting up a goal. Setting a goal allows you to measure your campaign effectively against what you want to achieve in the campaign. This selection is optional.
The campaign goal can be as generic or as specific as you want. It can answer questions from "How many users were influenced for purchasing an X amount?" to "How many first-time visitors purchased red shoes worth a minimum of X amount and blue jackets worth a minimum of Y amount? ".
Define the conversion period by selecting the Conversion Time. You can define your conversion goal further by filtering an event by event properties. For more information on event properties, see Events.
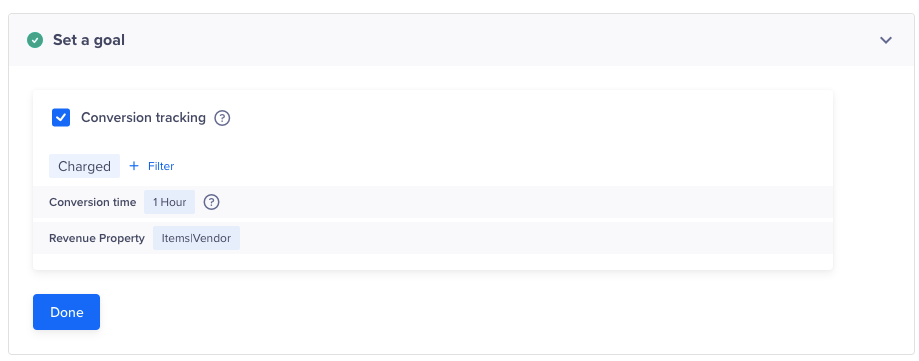
Set a Goal
Define the Audience
You must indicate the target audience for your campaign. You can specify your target audience from the Target segment section. Here, you can create a new segment or use a previously saved user segment from the segment list.
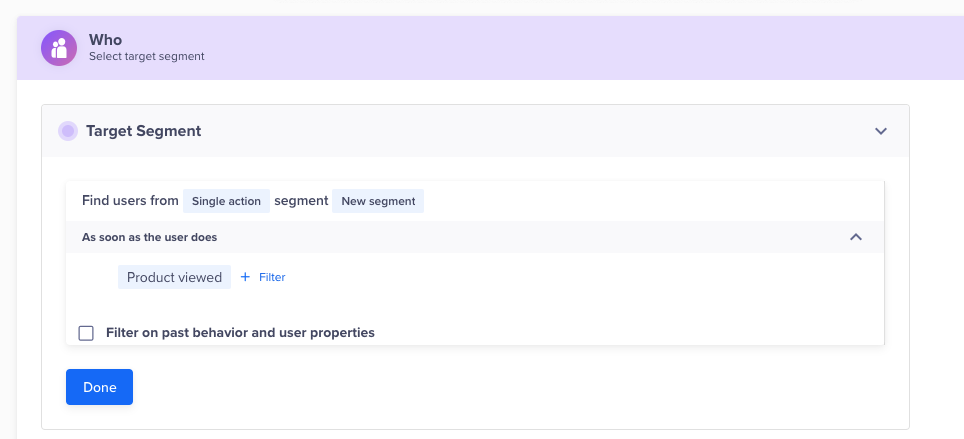
Define the Target Audience
Segment
If you want to create an ad-hoc segment, you can select a type of segment on which to base your campaign. You can create the target based on user properties or live (ongoing) user behavior. The latter is helpful to send out real-time, triggered campaigns.
Deliver Action-Based Web Native Display Campaign
You can trigger a web native display campaign based on an action. Users receive this campaign when they perform an action on the website. For example, creating a campaign that displays a personalized contextual banner with images of fitness equipment for users who have shown interest in the fitness category.
It makes the web experience more contextual and increases conversion.
Filter Users Based on Past Behavior
You can also target users basis their past behavior. For example, you might want to create a personalized campaign for a set of customers who have purchased a specific product in the past.
Filter by User Properties
Using the With user properties filter in the Who section, you can segment your campaign to only reach users who meet specific criteria.
For example, you can create a web native display campaign specifically for female users who live in the United States. The image below represents a sample target segment that is filtered using specific user properties to target the required audience.
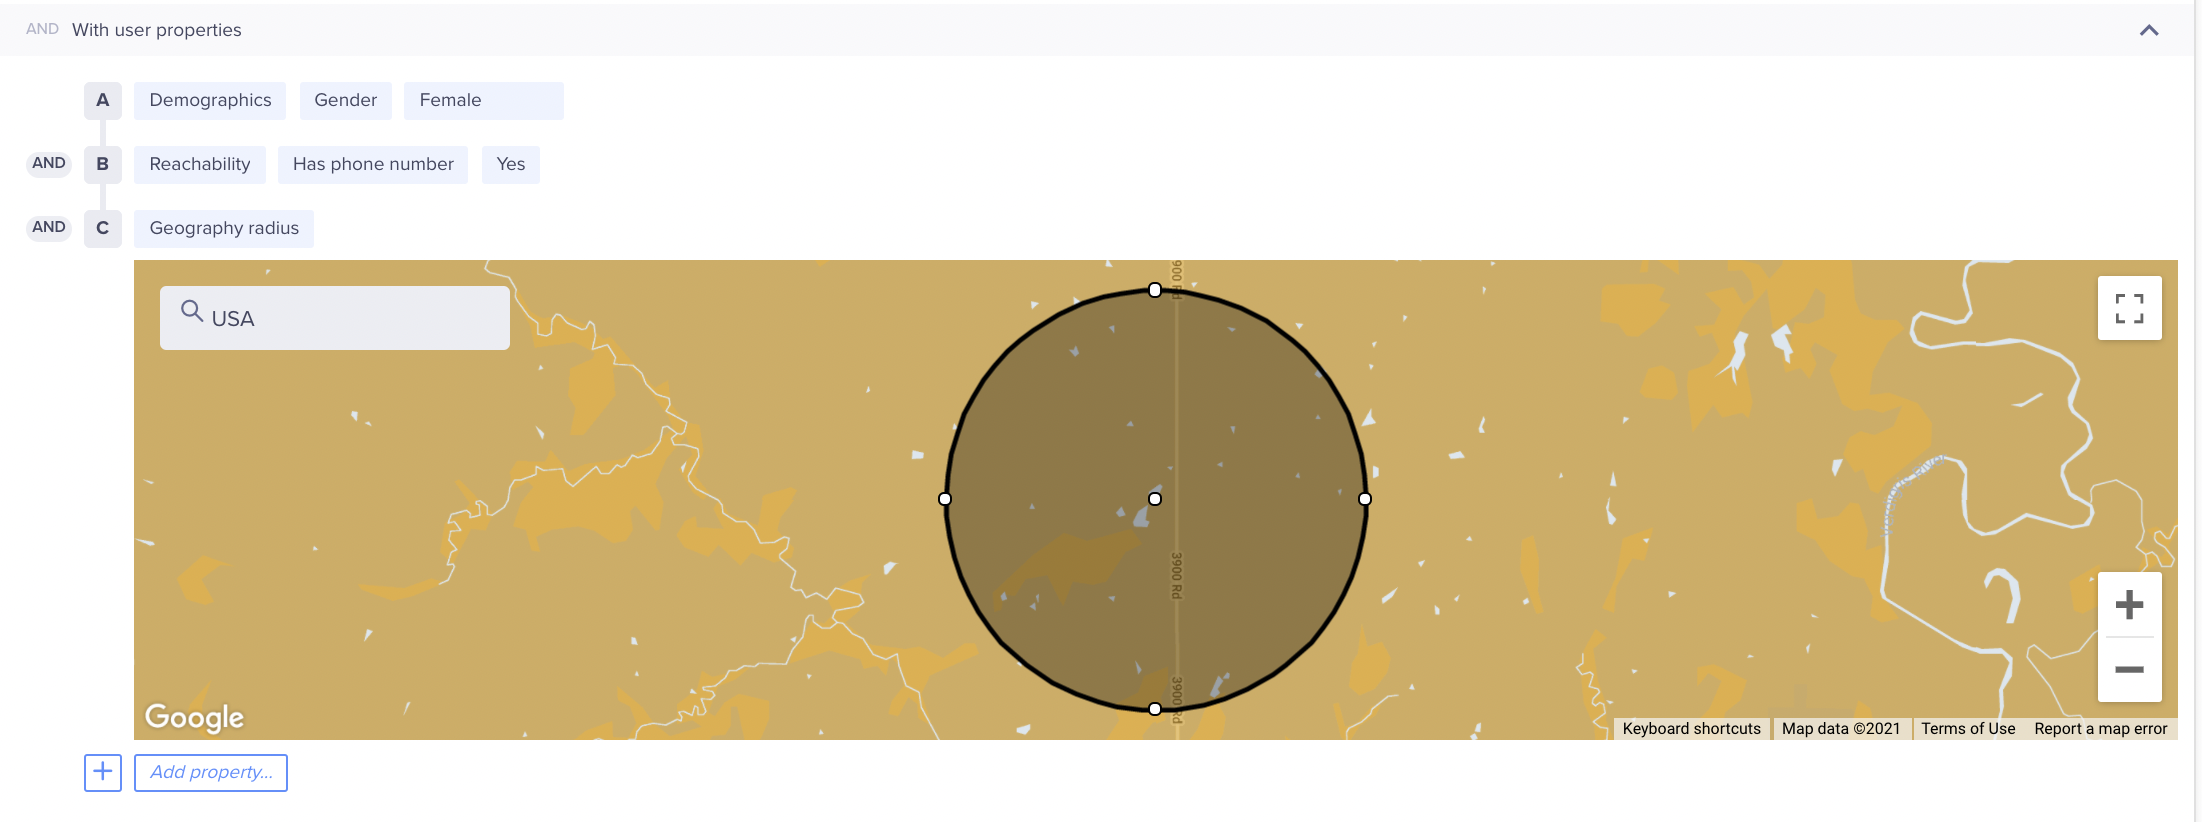
Filter by User Properties
The following table explains the various property types:
| Property Type | Description | Example |
|---|---|---|
| User Properties | Custom user profile properties that you define and send to CleverTap. | Customer Type = Platinum |
| Demographics | Demographics filters include Age and Gender. | Age = 25 to 40 years Gender = Female |
| Geography | User's coarse location. Filters include Country, Region, and City. CleverTap's SDK can automatically detect this from the user's IP address. | Country = United States State = California City = San Francisco |
| Reachability | Reachability filters include Has email address, Has phone number, Unsubscribed email, and Unsubscribed SMS. | Unsubscribed email = No |
| App Fields | App fields filters include App Version, Device Make, Device Model, OS Version, and CleverTap SDK Version. This information is sent by CleverTap's SDK for each device that has your app which means a single user can have multiple devices associated with their user profile. | OS Version = 10 |
To know more about what segments can be used, see Segments.
Control Group
You can define the control group to compare and measure the results of your campaign. For more information, refer to Control Groups.

Set Control Group
Message Types
You can create the following types of messages:
- Single Message
- AB Test
- Split Delivery
- By User Property
Single Message
Here, a standard web campaign is rolled out for all the users who qualify as your target audience. This type of campaign is best suited for use cases where the campaign communication does not vary based on the differences between properties such as language, geography, or any other user properties.
A/B Testing
A/B testing helps you understand what type of message copy works best to get clicks from users.
You can test up to three message variants on a test group and the variant that gets the most clicks is declared the winning variant and is automatically sent to the rest of your target audience.
When you create multiple variants for a campaign, you can also auto-copy what is already present in a current variant.
Split Delivery
With split delivery, you can decide what percentage of your audience receives each message variant for the duration of the campaign. You can test up to three message variants.
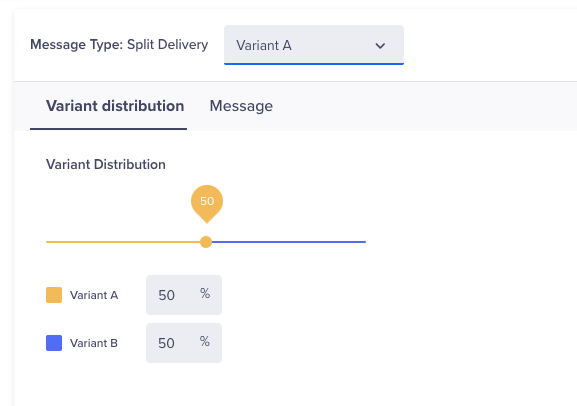
Split Delivery for Web Native Display Campaigns
Split Delivery to Live User Segments
With campaigns sent to live user segments (triggered campaigns), messages are delivered immediately when a user’s activity matches the criteria you have selected. For example, you can send a message when the user has completed a booking or purchase. Since it is not possible to determine the reach of triggered campaigns upfront, you need to decide how many total messages to send for A/B testing before a winner is declared.
Triggered Campaign Example
If you select 500 users as your test audience, we will alternate delivery of Variant A and Variant B as users qualify for the campaign. After a total of messages are sent (Variant A – 250 and Variant B – 250), we then decide the winner based on the number of clicks and continue only with this winning message for the duration of the campaign.
Deciding on a test audience for A/B testing triggered campaigns requires some estimation. We recommend you check the total messages that were sent for similar triggered campaigns in the past to get a sense of how many users may qualify. If you select a test audience that is too small such as 25 users, you will get a statistically insignificant sample. If your test group size exceeds the total number of users who ultimately qualify for that campaign, then no winner will be declared and each message variant will be alternatively delivered for the duration of the campaign.
By User Property
If you would like to send different message variants to your target audience based on the user properties they possess, this campaign type is your best bet. You can send up to 50 message variants to different users based on a user property. A good example would be when you want to send a localized update to people based on their preferred language.
Web Native Display Templates
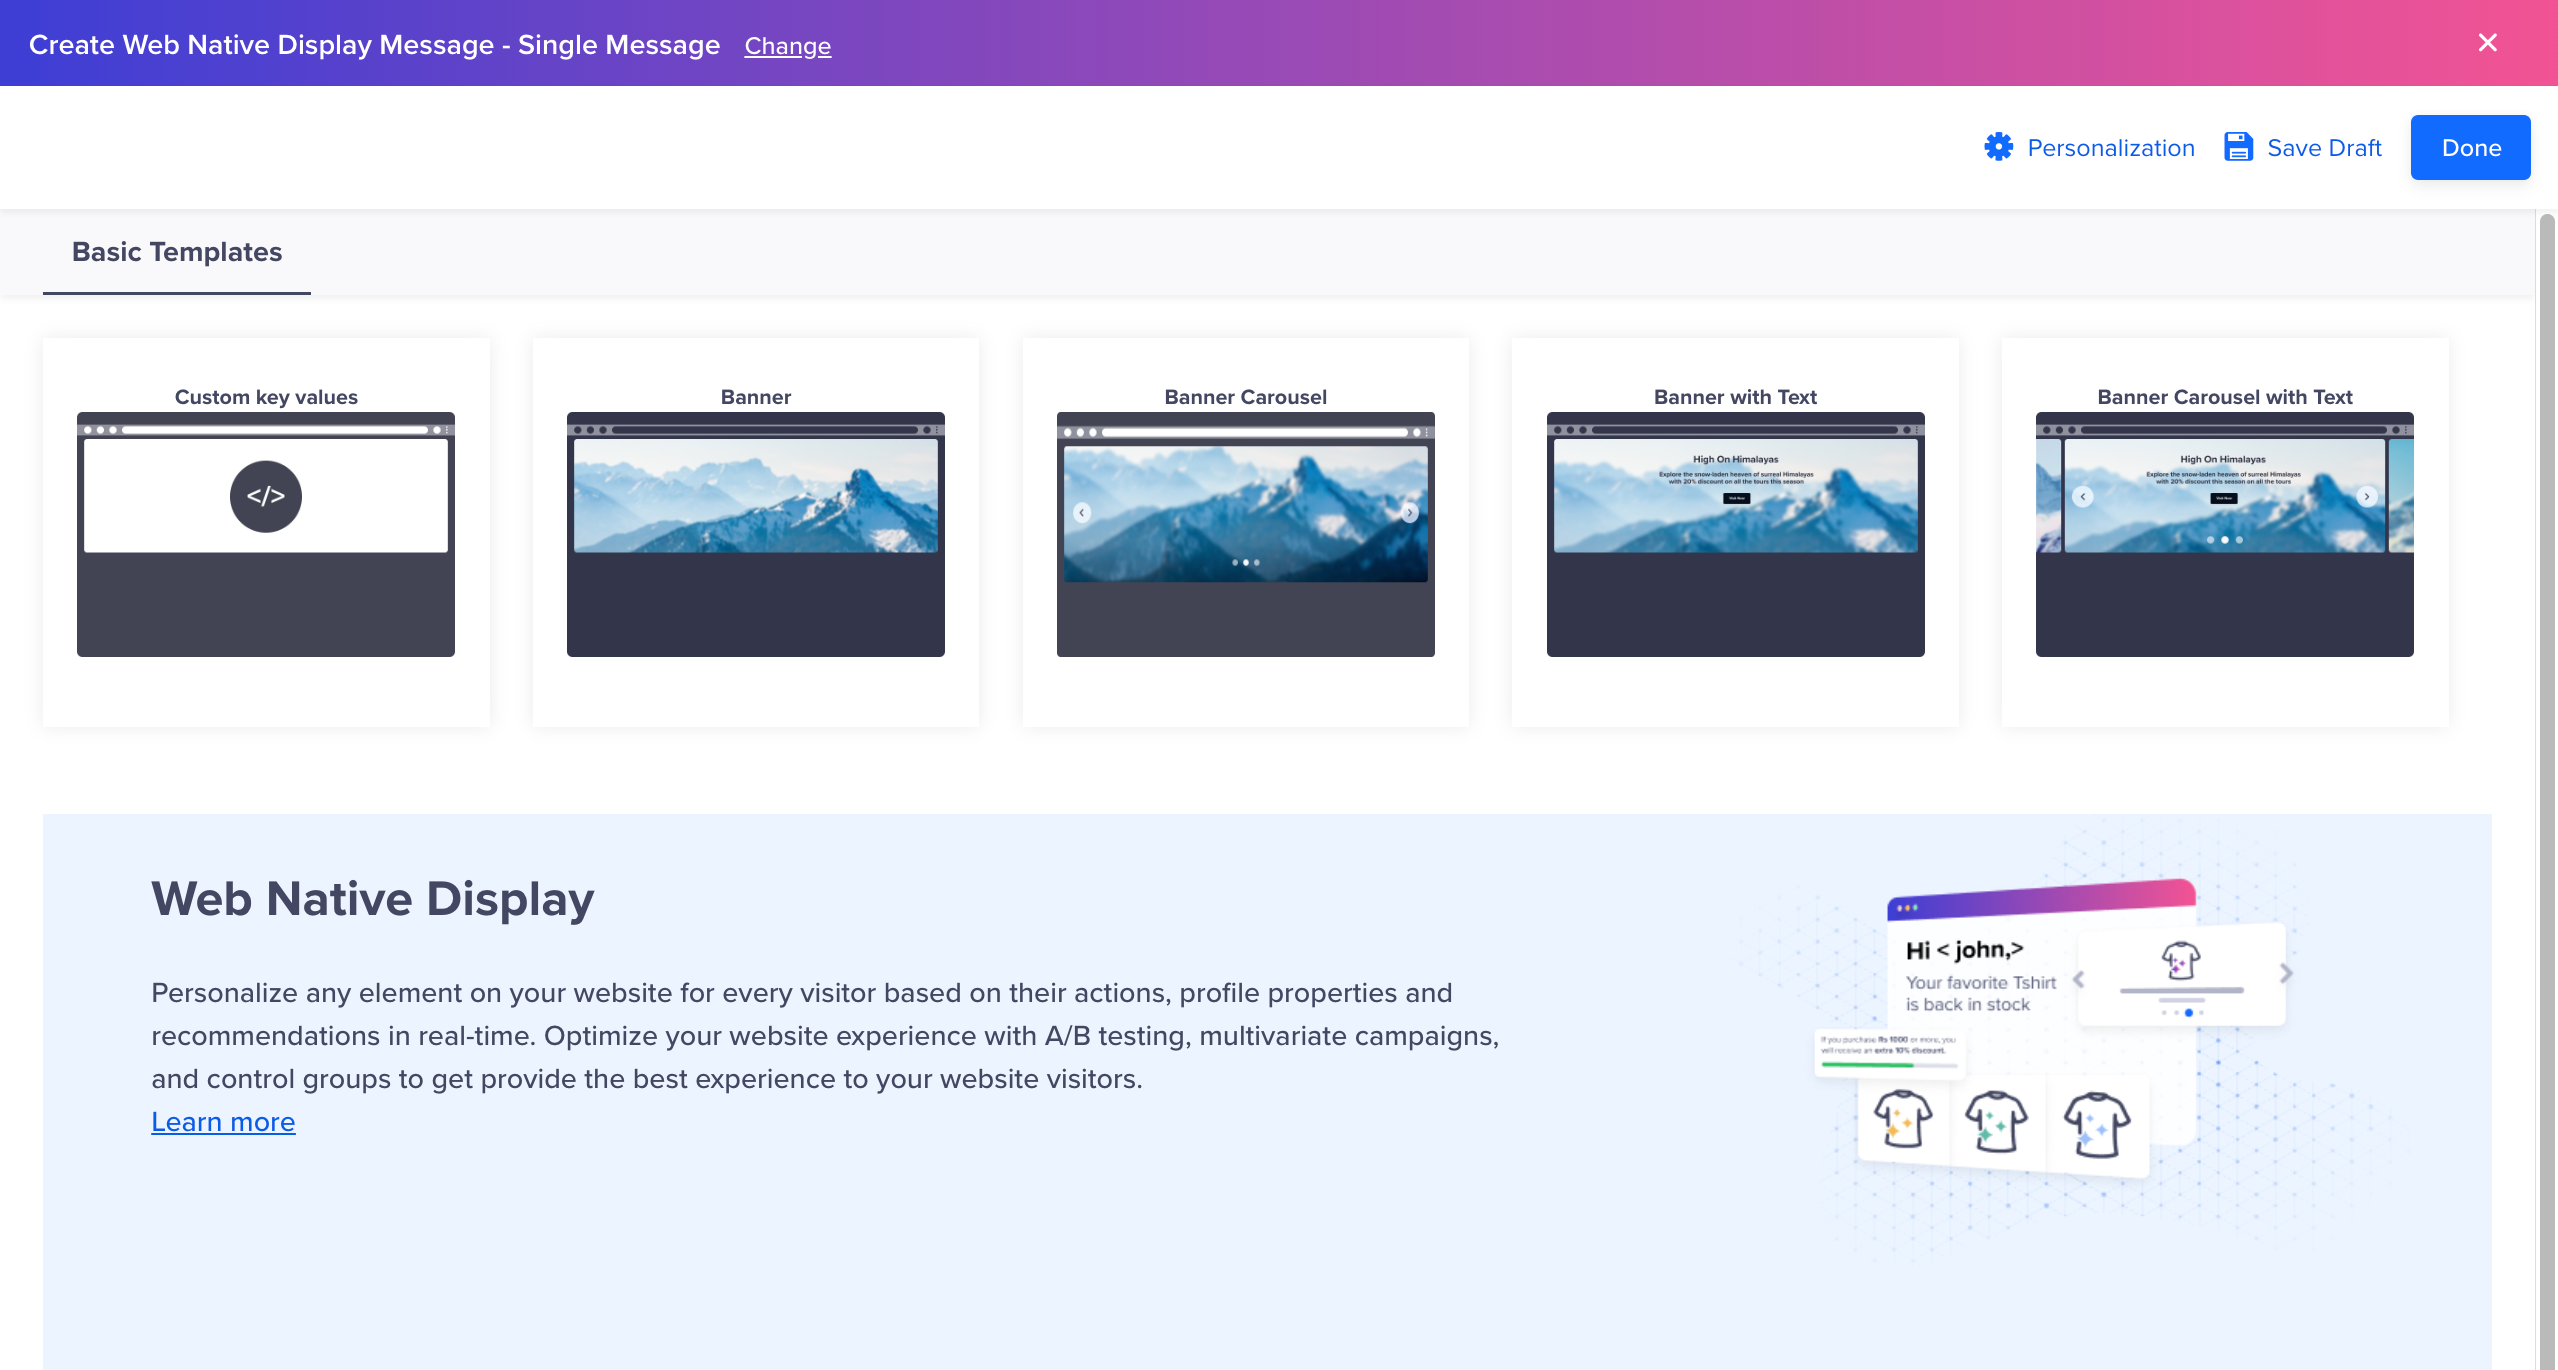
Web Native Display Templates
Marketers get instant access to ready-to-use message templates for creating engaging campaigns. These templates are mobile responsive, which means marketers can deliver personalized campaigns across devices (mobiles, tablets, desktops etc).
Custom Key Value
Marketers can use the custom Key-Value template for delivering an engaging and personalized user experience.
The custom key value can have any value.
Note
The first key of your object will always be topic. The marketer can provide the relevant value of this key while configuring the campaign. The developer must use this value to access the right payload for that campaign.
For example, if you want to change the carousel images for your users based on their language and favorite products, you can set the custom key-value pairs for this change.
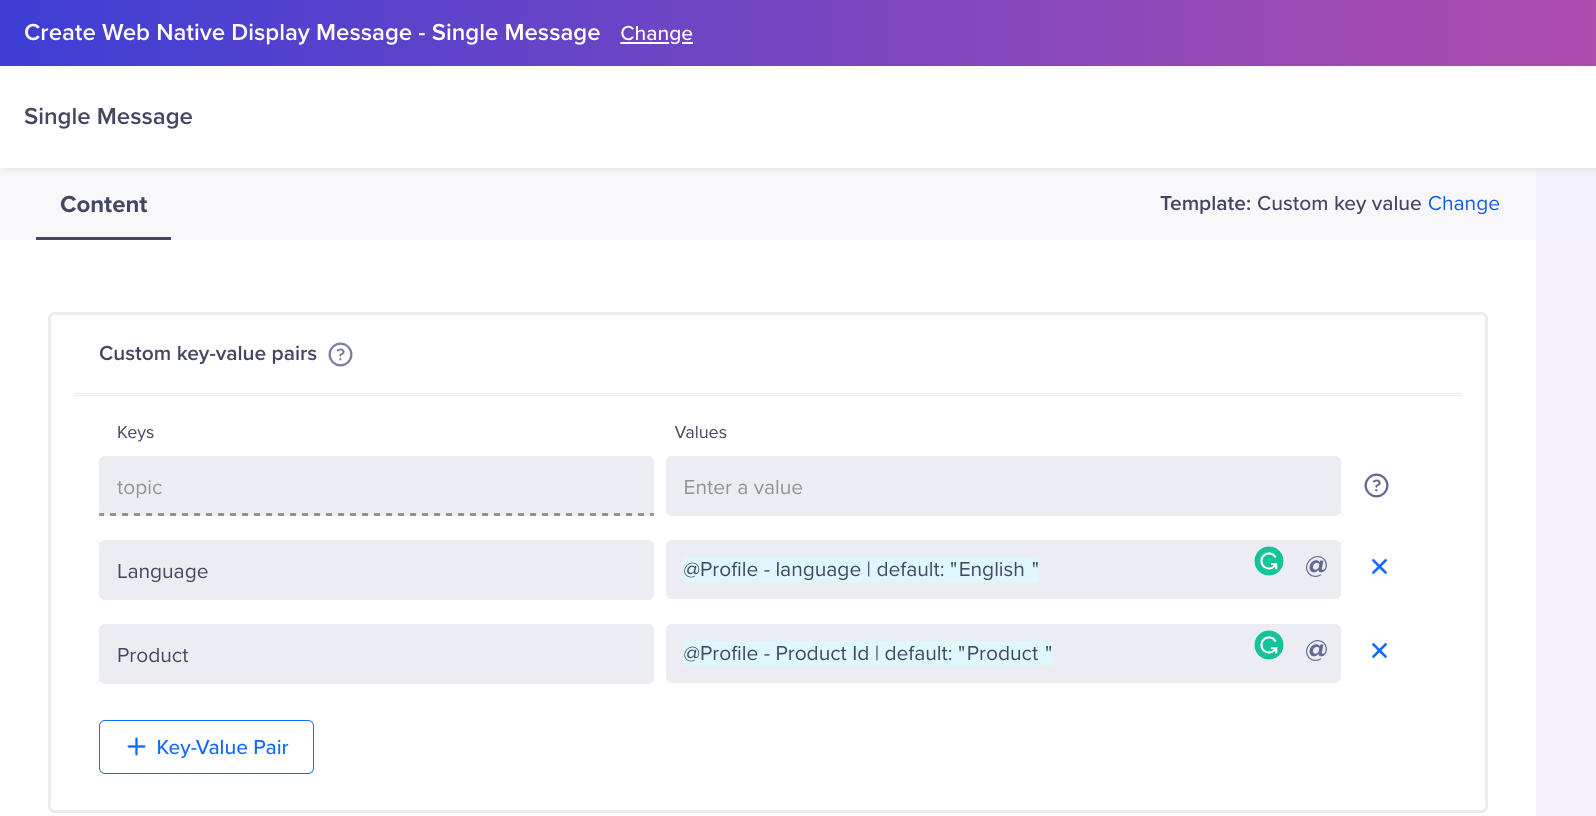
Define Custom Key-Value Pairs
Refer to the sample key value pair web native display campaign. It explains the steps you need to perform after creating a campaign in details.
Banner
The banner template allows you to create visually appealing banners for your website. You can directly upload the banner image or add a URL to the banner. Besides, you also get the flexibility to upload a dedicated image for mobile users to deliver an optimal experience for mobile audiences.
You must enter the Div ID or the Div Class for the relevant container where you wish to render the banner on your website. Optionally, you can also define the Div height to adjust the appearance of your banner.
Personalize Div Class
If multiple div elements share the same class on a webpage, the campaign personalization will only be applied to the first div element.
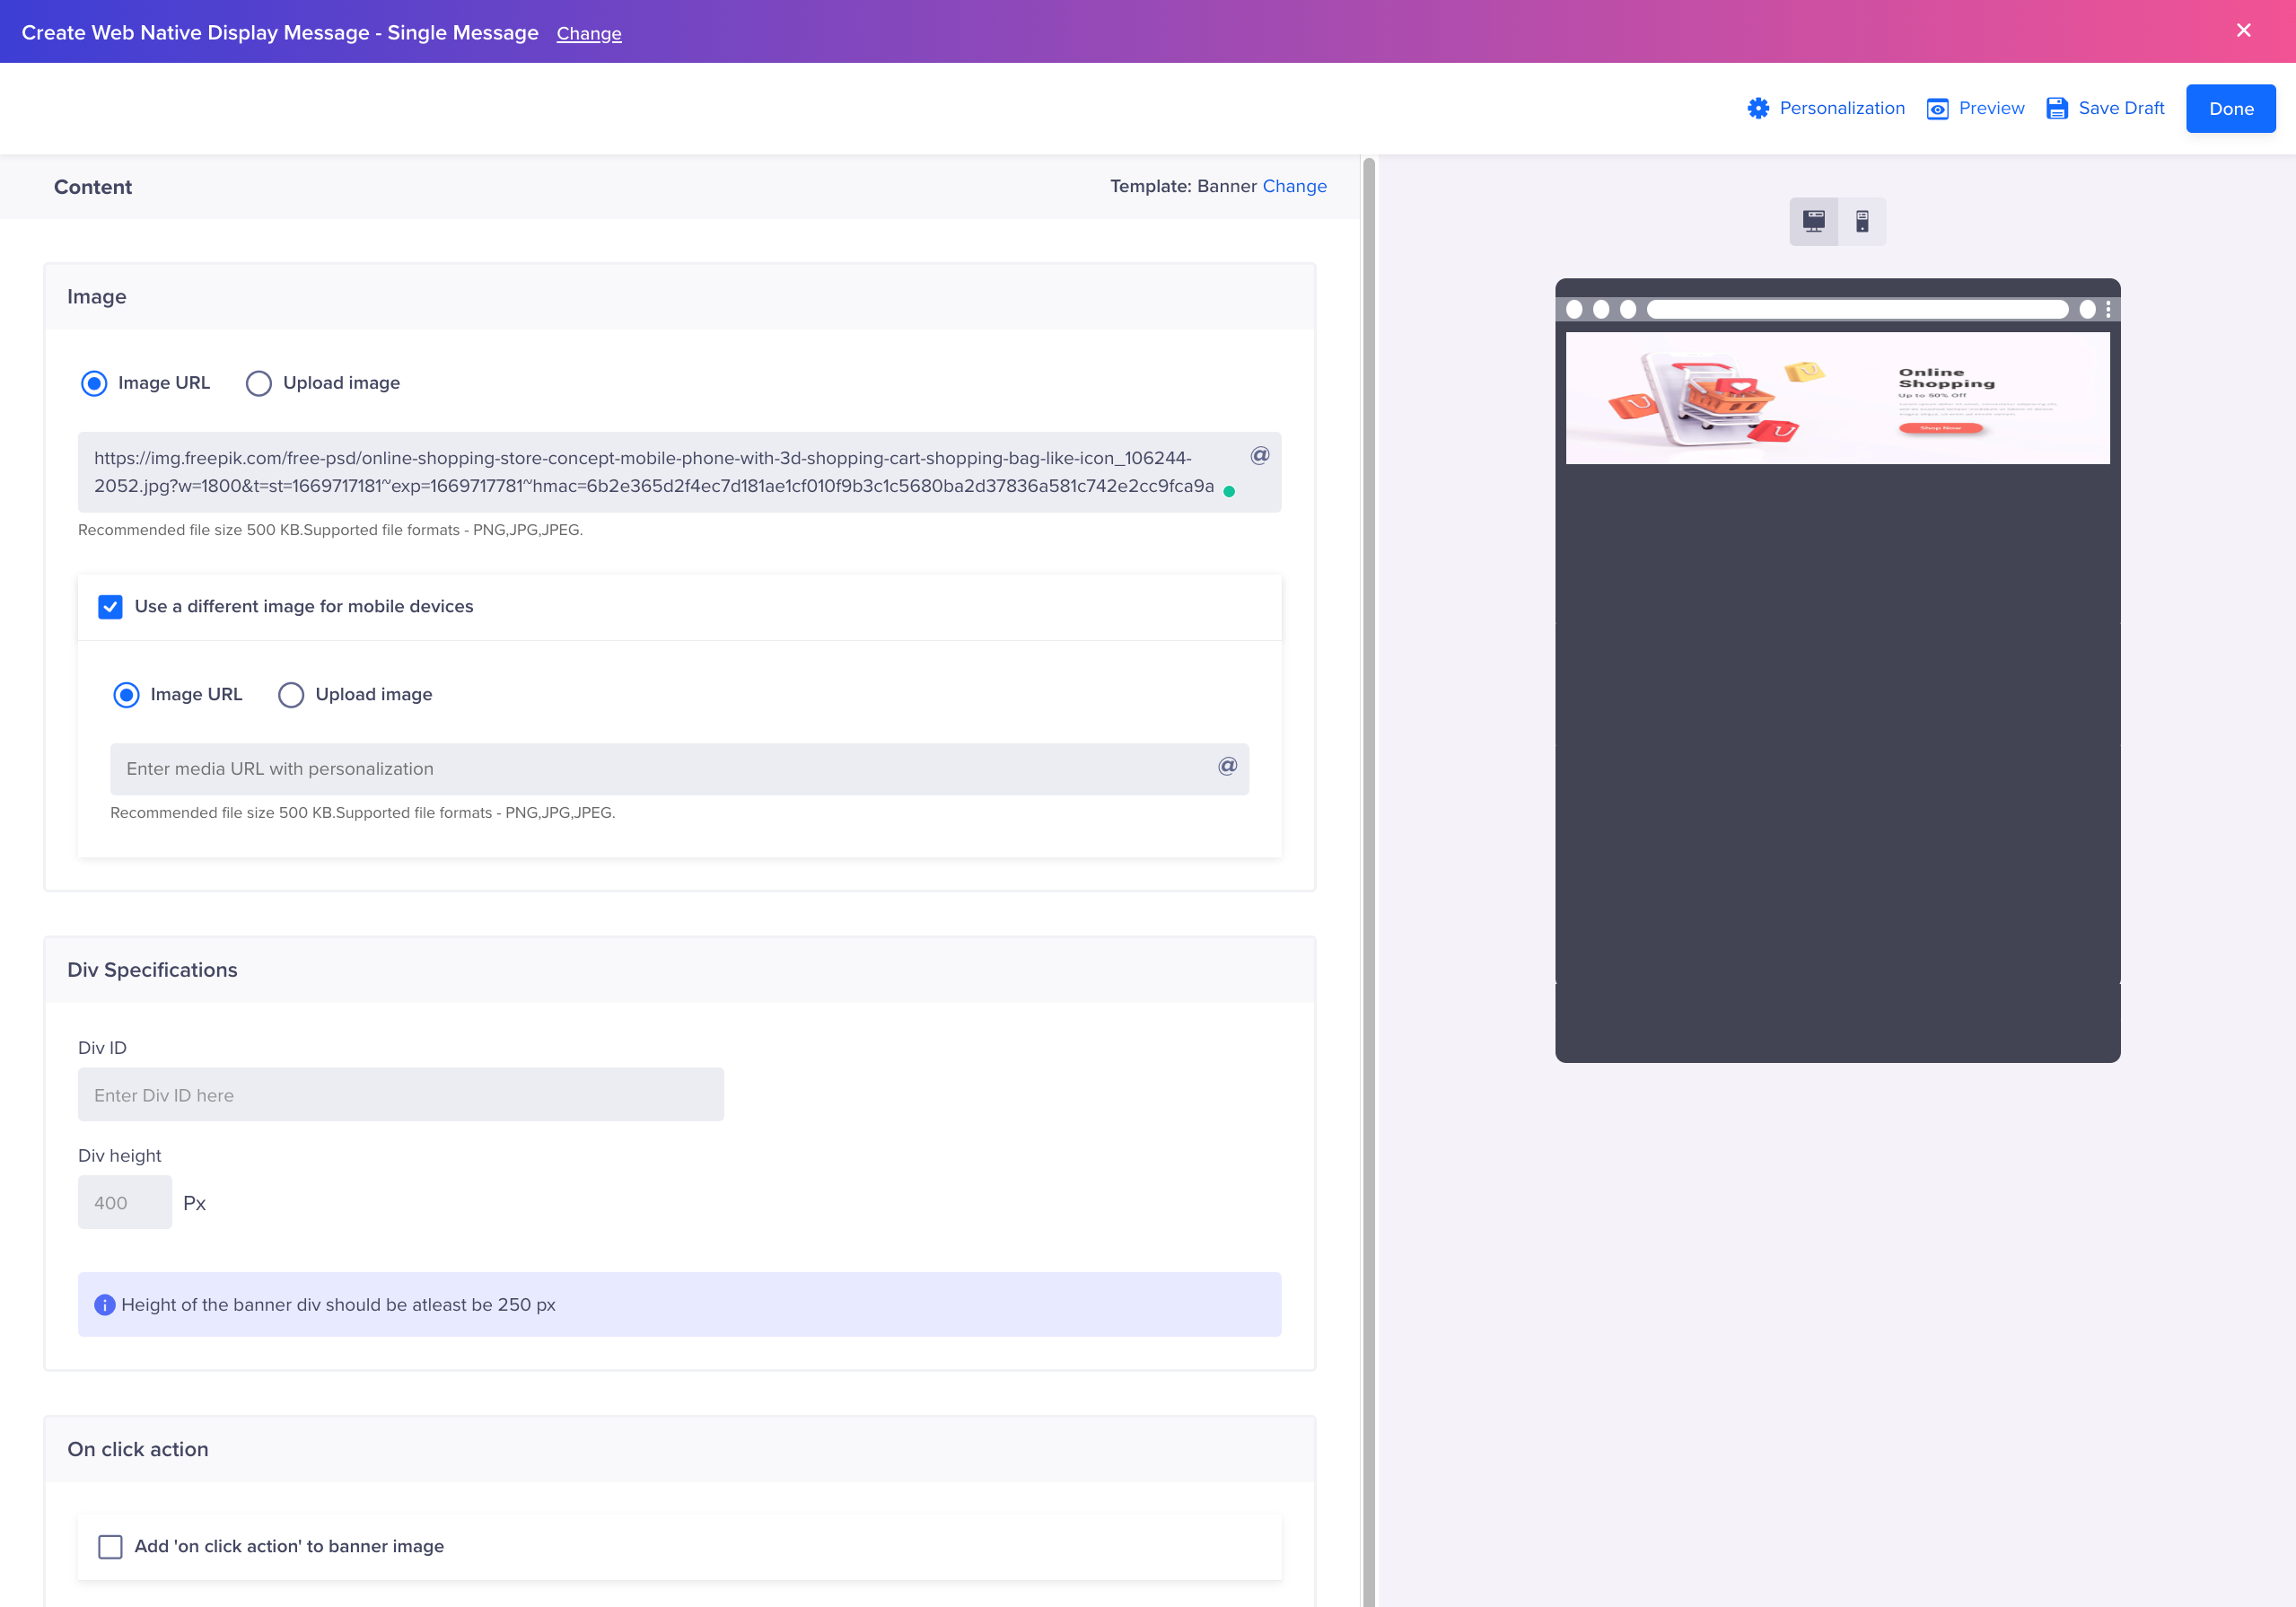
Banner Template
Banner with Text
Similar to the Banner template, the Banner with Text template allows you to create visually appealing banners with personalized messages for contextual communications. Marketers can add title and descriptions to their banners and personalize them to deliver individualized experiences. For example, marketers can target their audience by personalizing names in the banner title for enhanced engagement.
You need to enter the Div ID or the Div Class for the relevant container where you wish to render the banner on your website. Optionally, you can also define the Div height to adjust the appearance of your banner.
Personalize Div Class
If multiple div elements share the same class on a webpage, the campaign personalization will only be applied to the first div element.
You can also provide a URL for redirecting the users to a specific web page when they click the banner.
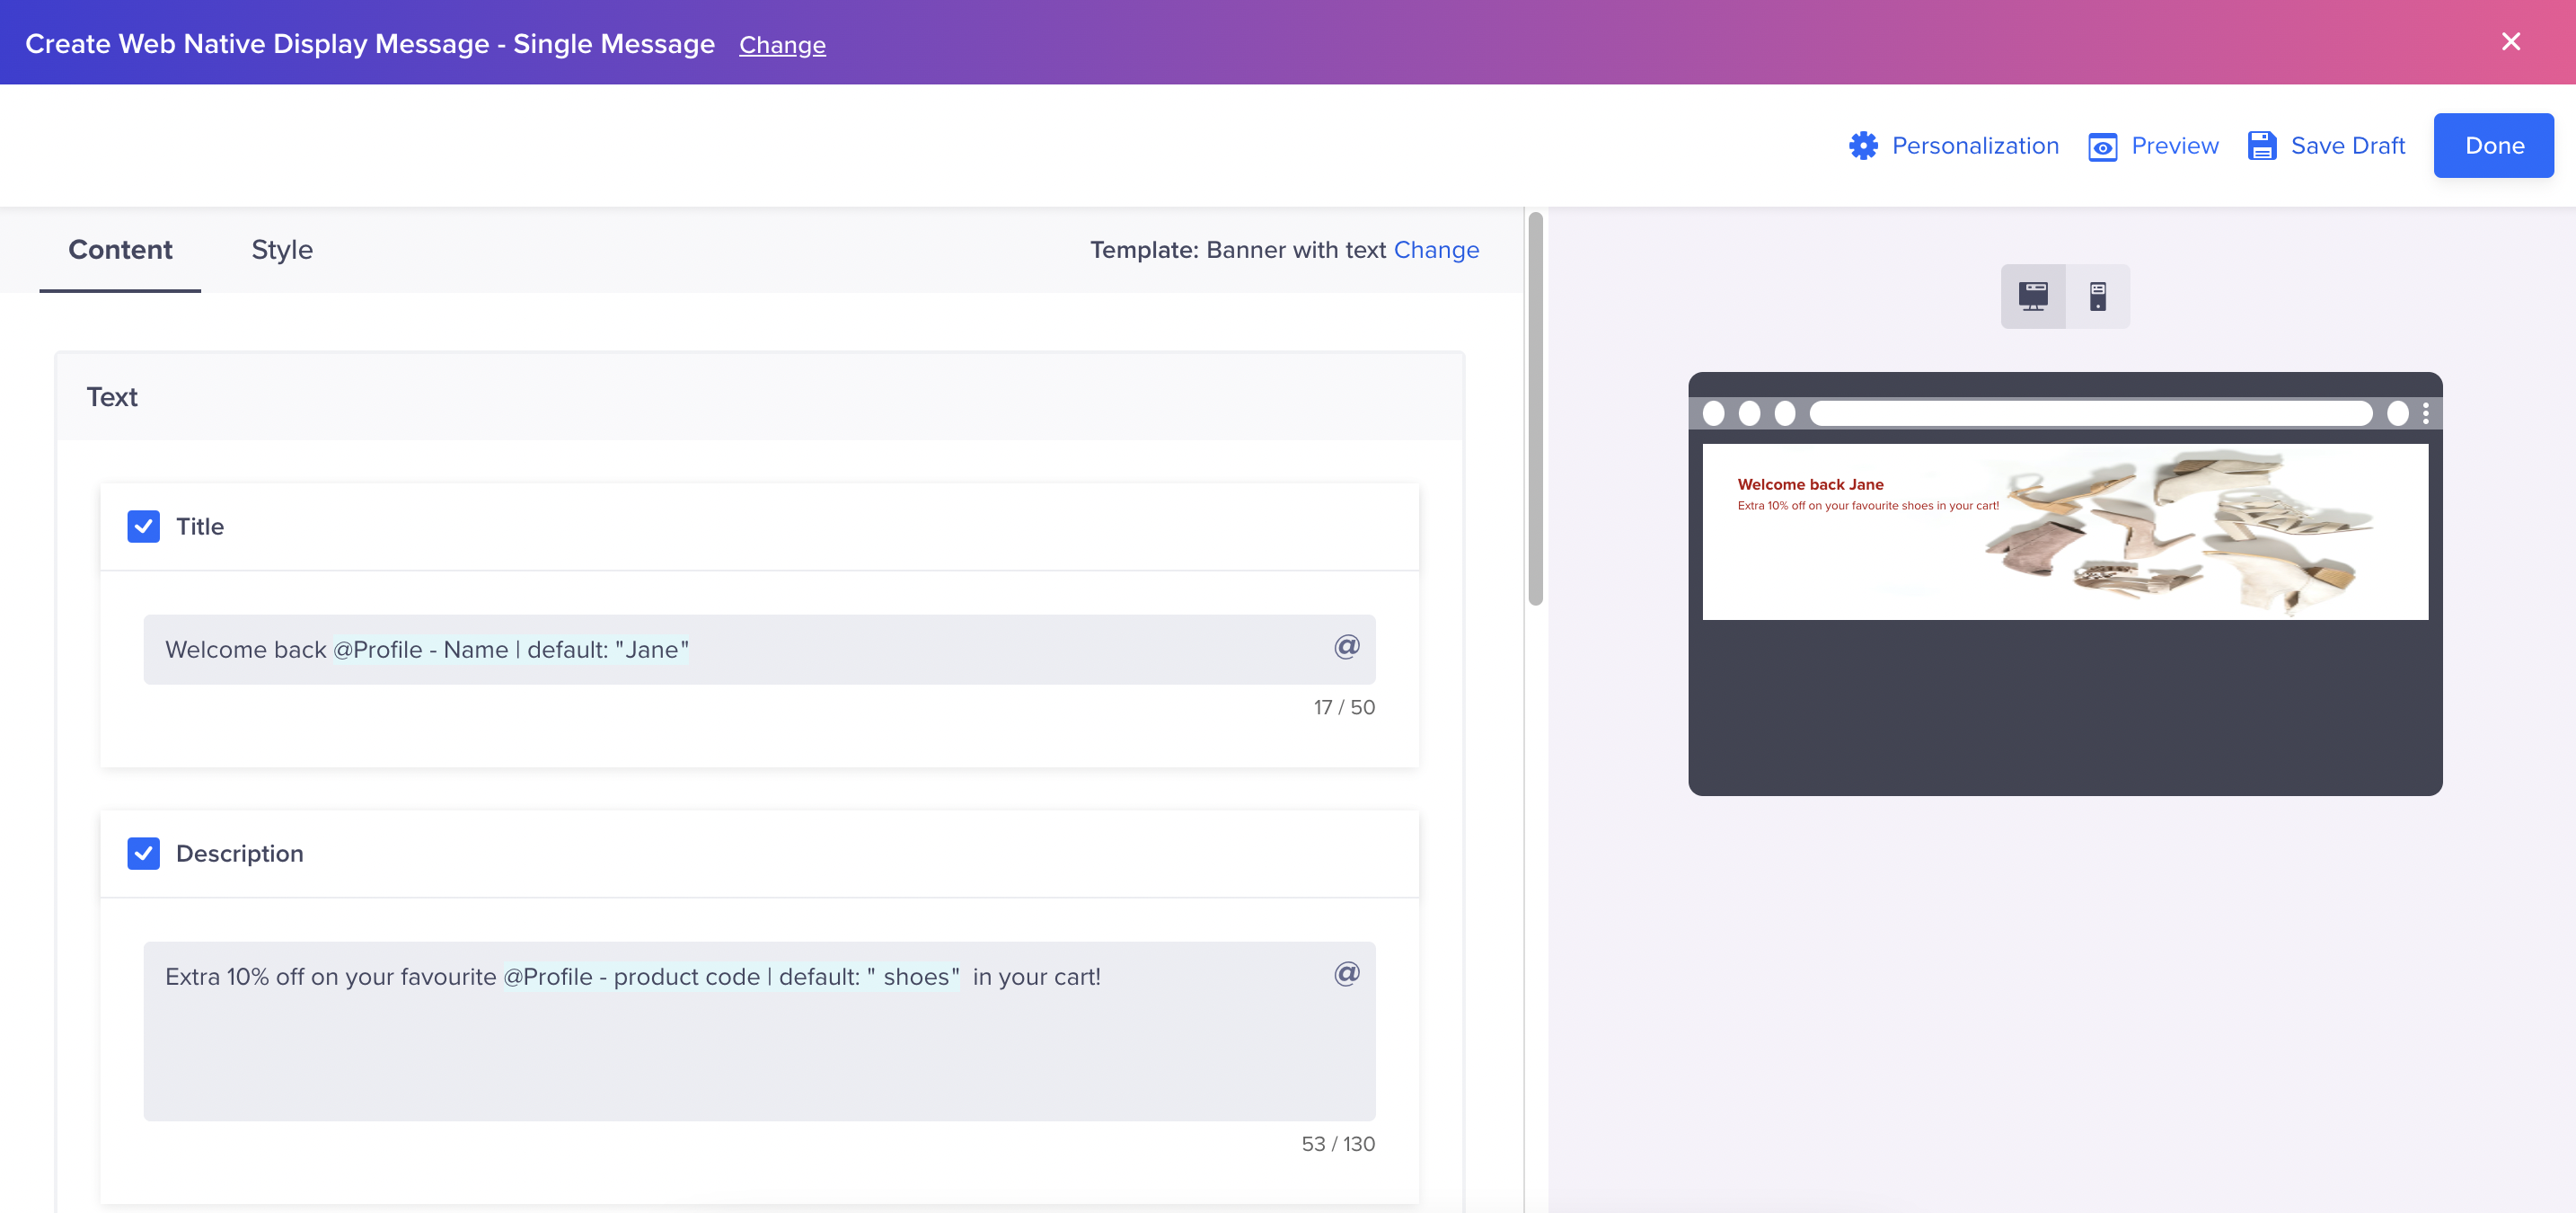
Banner With Text
Under the Style tab in the editor, you also have the option to align the title and description of your banner as per your design guidelines. Additionally, you can also define the font style, size, and color of the title and description.
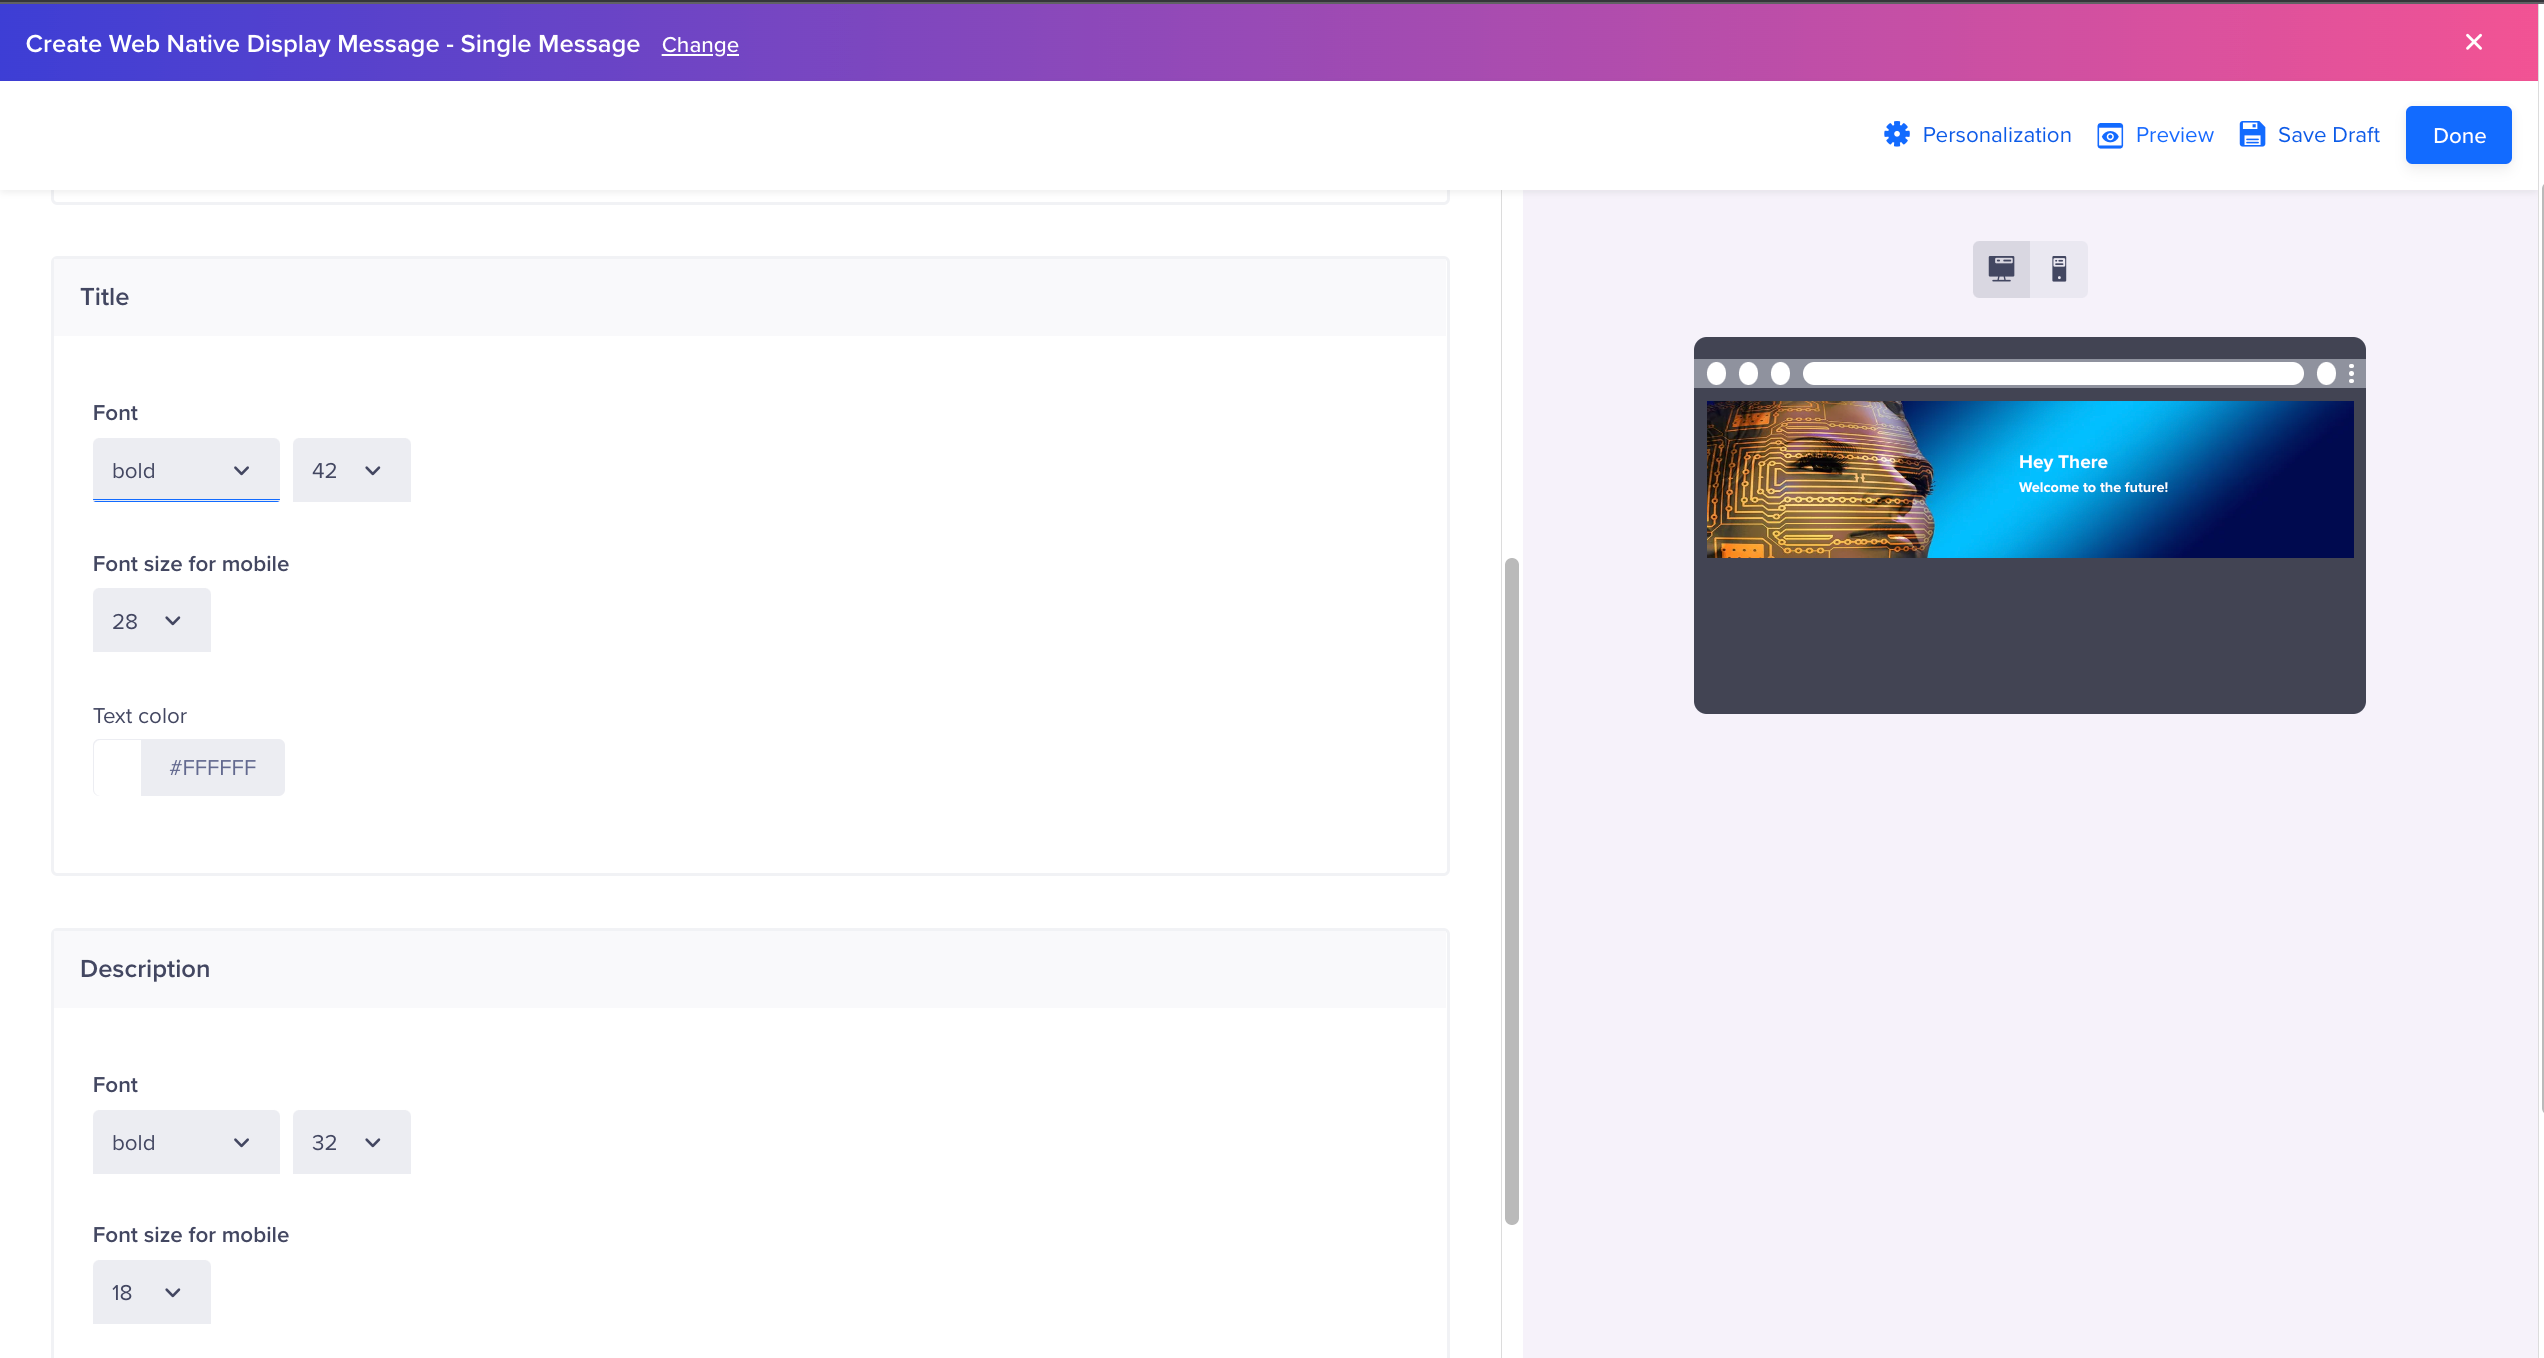
Banner with Text Editor
Banner Carousel
Banner Carousels allows you to display up to seven rotating banners that help you deliver engaging content faster. It primarily lets you display broader and more engaging content within a restricted area on your website.
Using the Banner Carousel template, you can create promotional and engaging banner slides that can auto-rotate. You can use this template for various purposes, such as displaying the latest product releases on e-commerce sites, banners of web series on OTT platforms, and displaying festive offers on your application's home page.
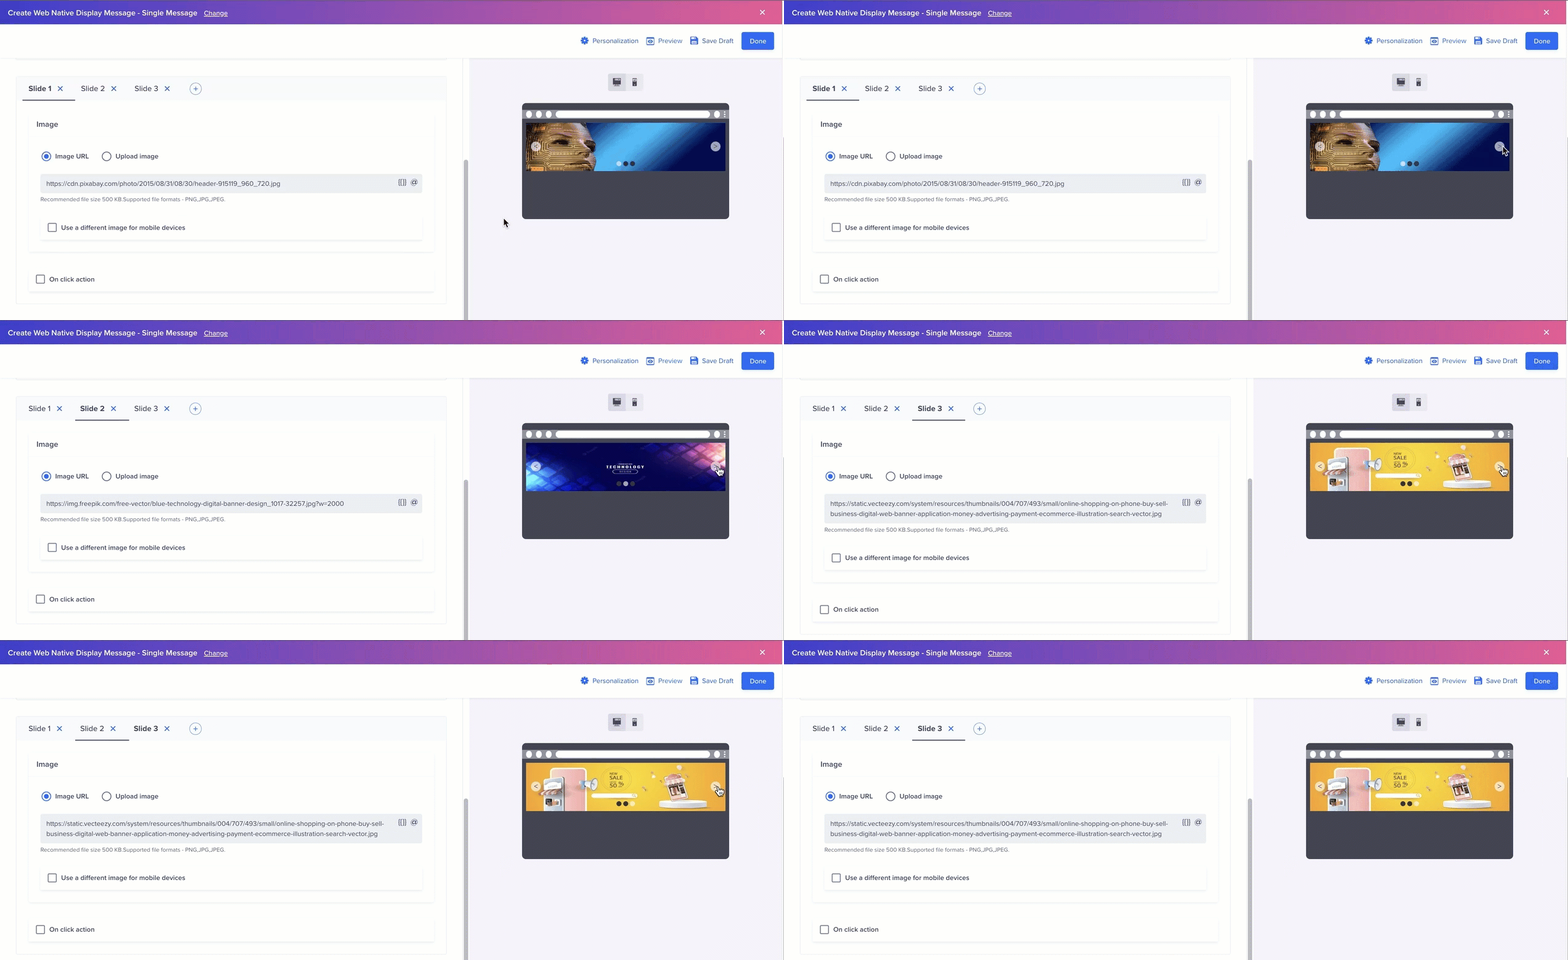
Banner with Carousel
You need to enter the Div ID or the Div Class for the relevant container where you wish to render the banner carousel on your website. Optionally, you can also define the Div height to adjust the appearance of the banner carousel.
You can also provide a URL for redirecting the users to a specific web page when they click a specific banner slide. Additionally, you can also use a different image for mobile users to optimize the viewing experience for your mobile audience.
You need to define the Slider Time (in seconds) so that the banner slides auto-rotate after the defined time. You also have the option to enable the Carousel dots and Navigation arrows to scroll banner slides manually.
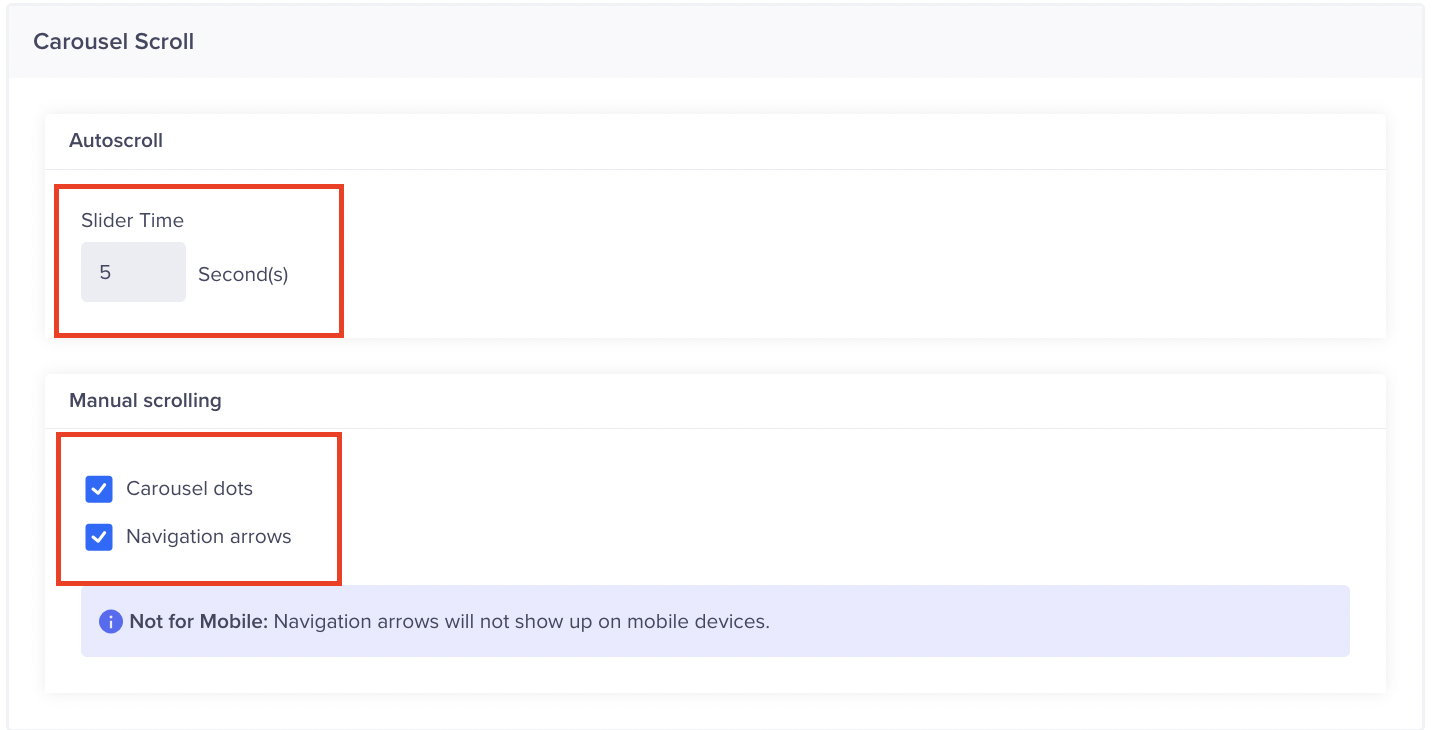
Define Scroll Time
Banner Carousel with Text
This template is similar to the Banner Carousel template with an additional option of adding a Title and Description on top of each banner in the carousel.
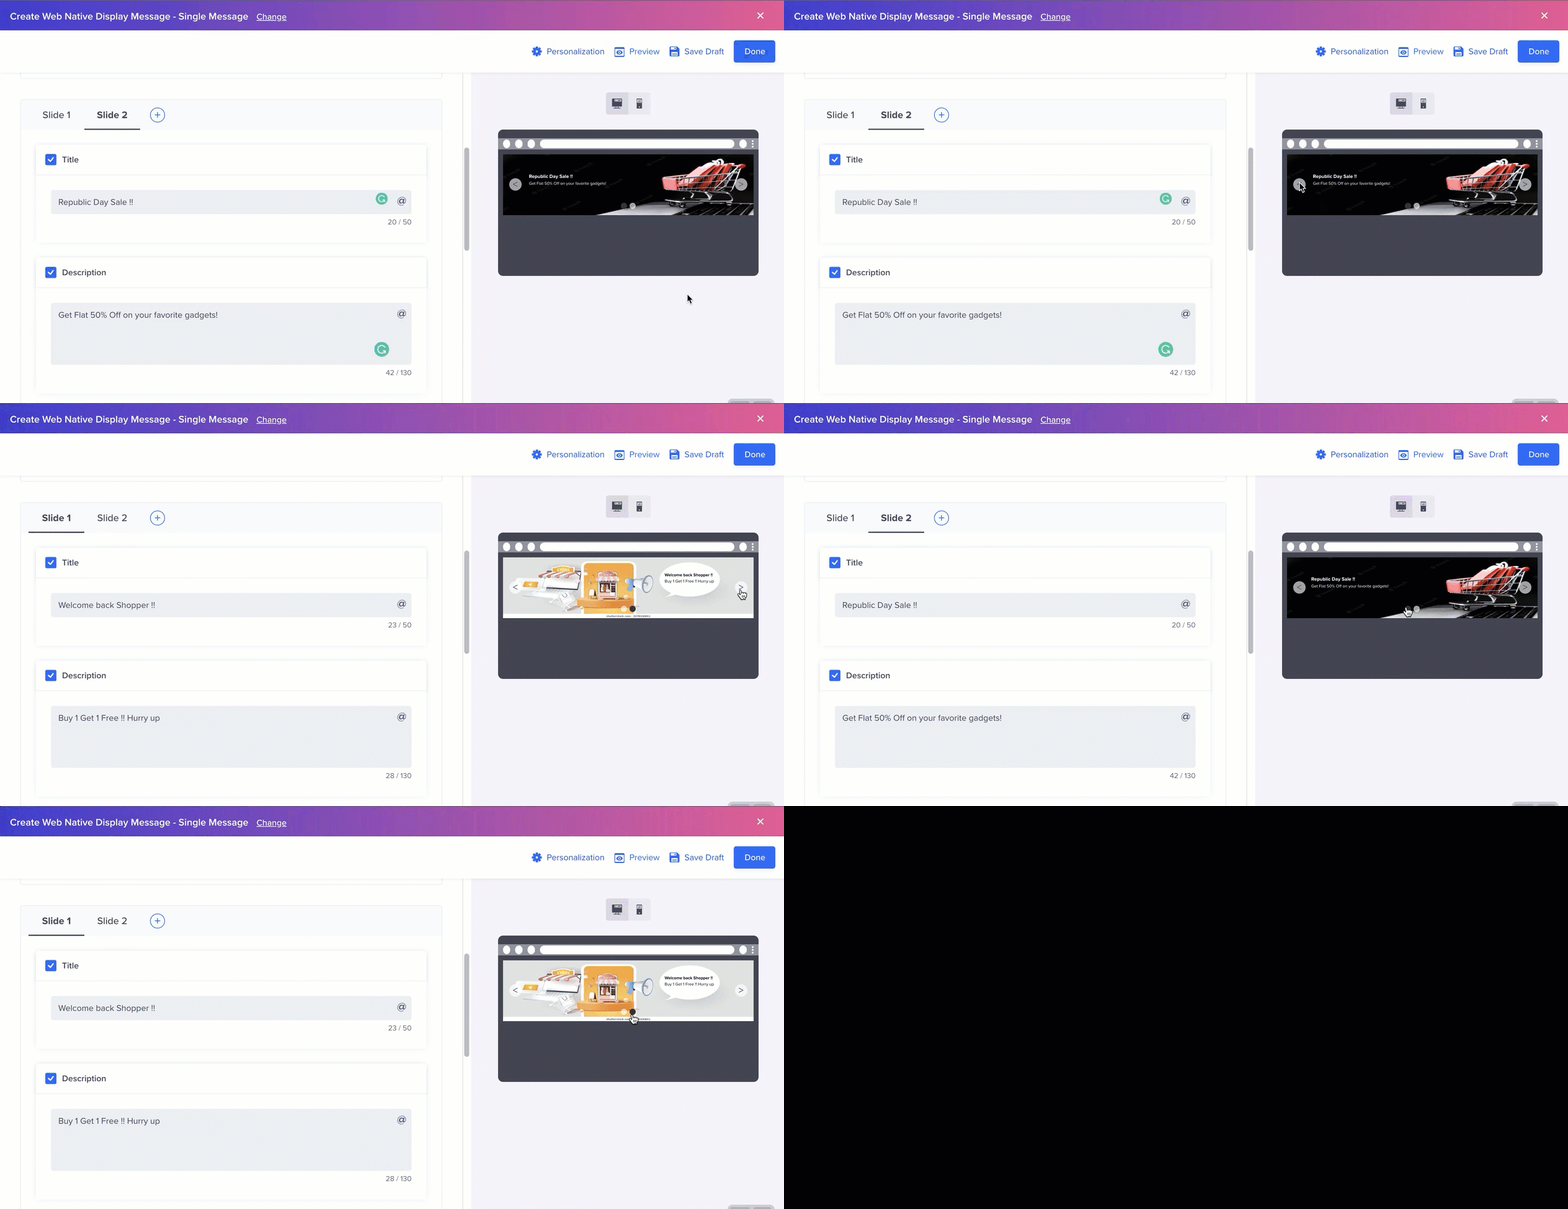
Banner Carousel with Text
Under the Style tab in the editor, you also have the option to align the title and description of your banner as per your design guidelines. Additionally, you can also define the font style, size, and color of the title and description.
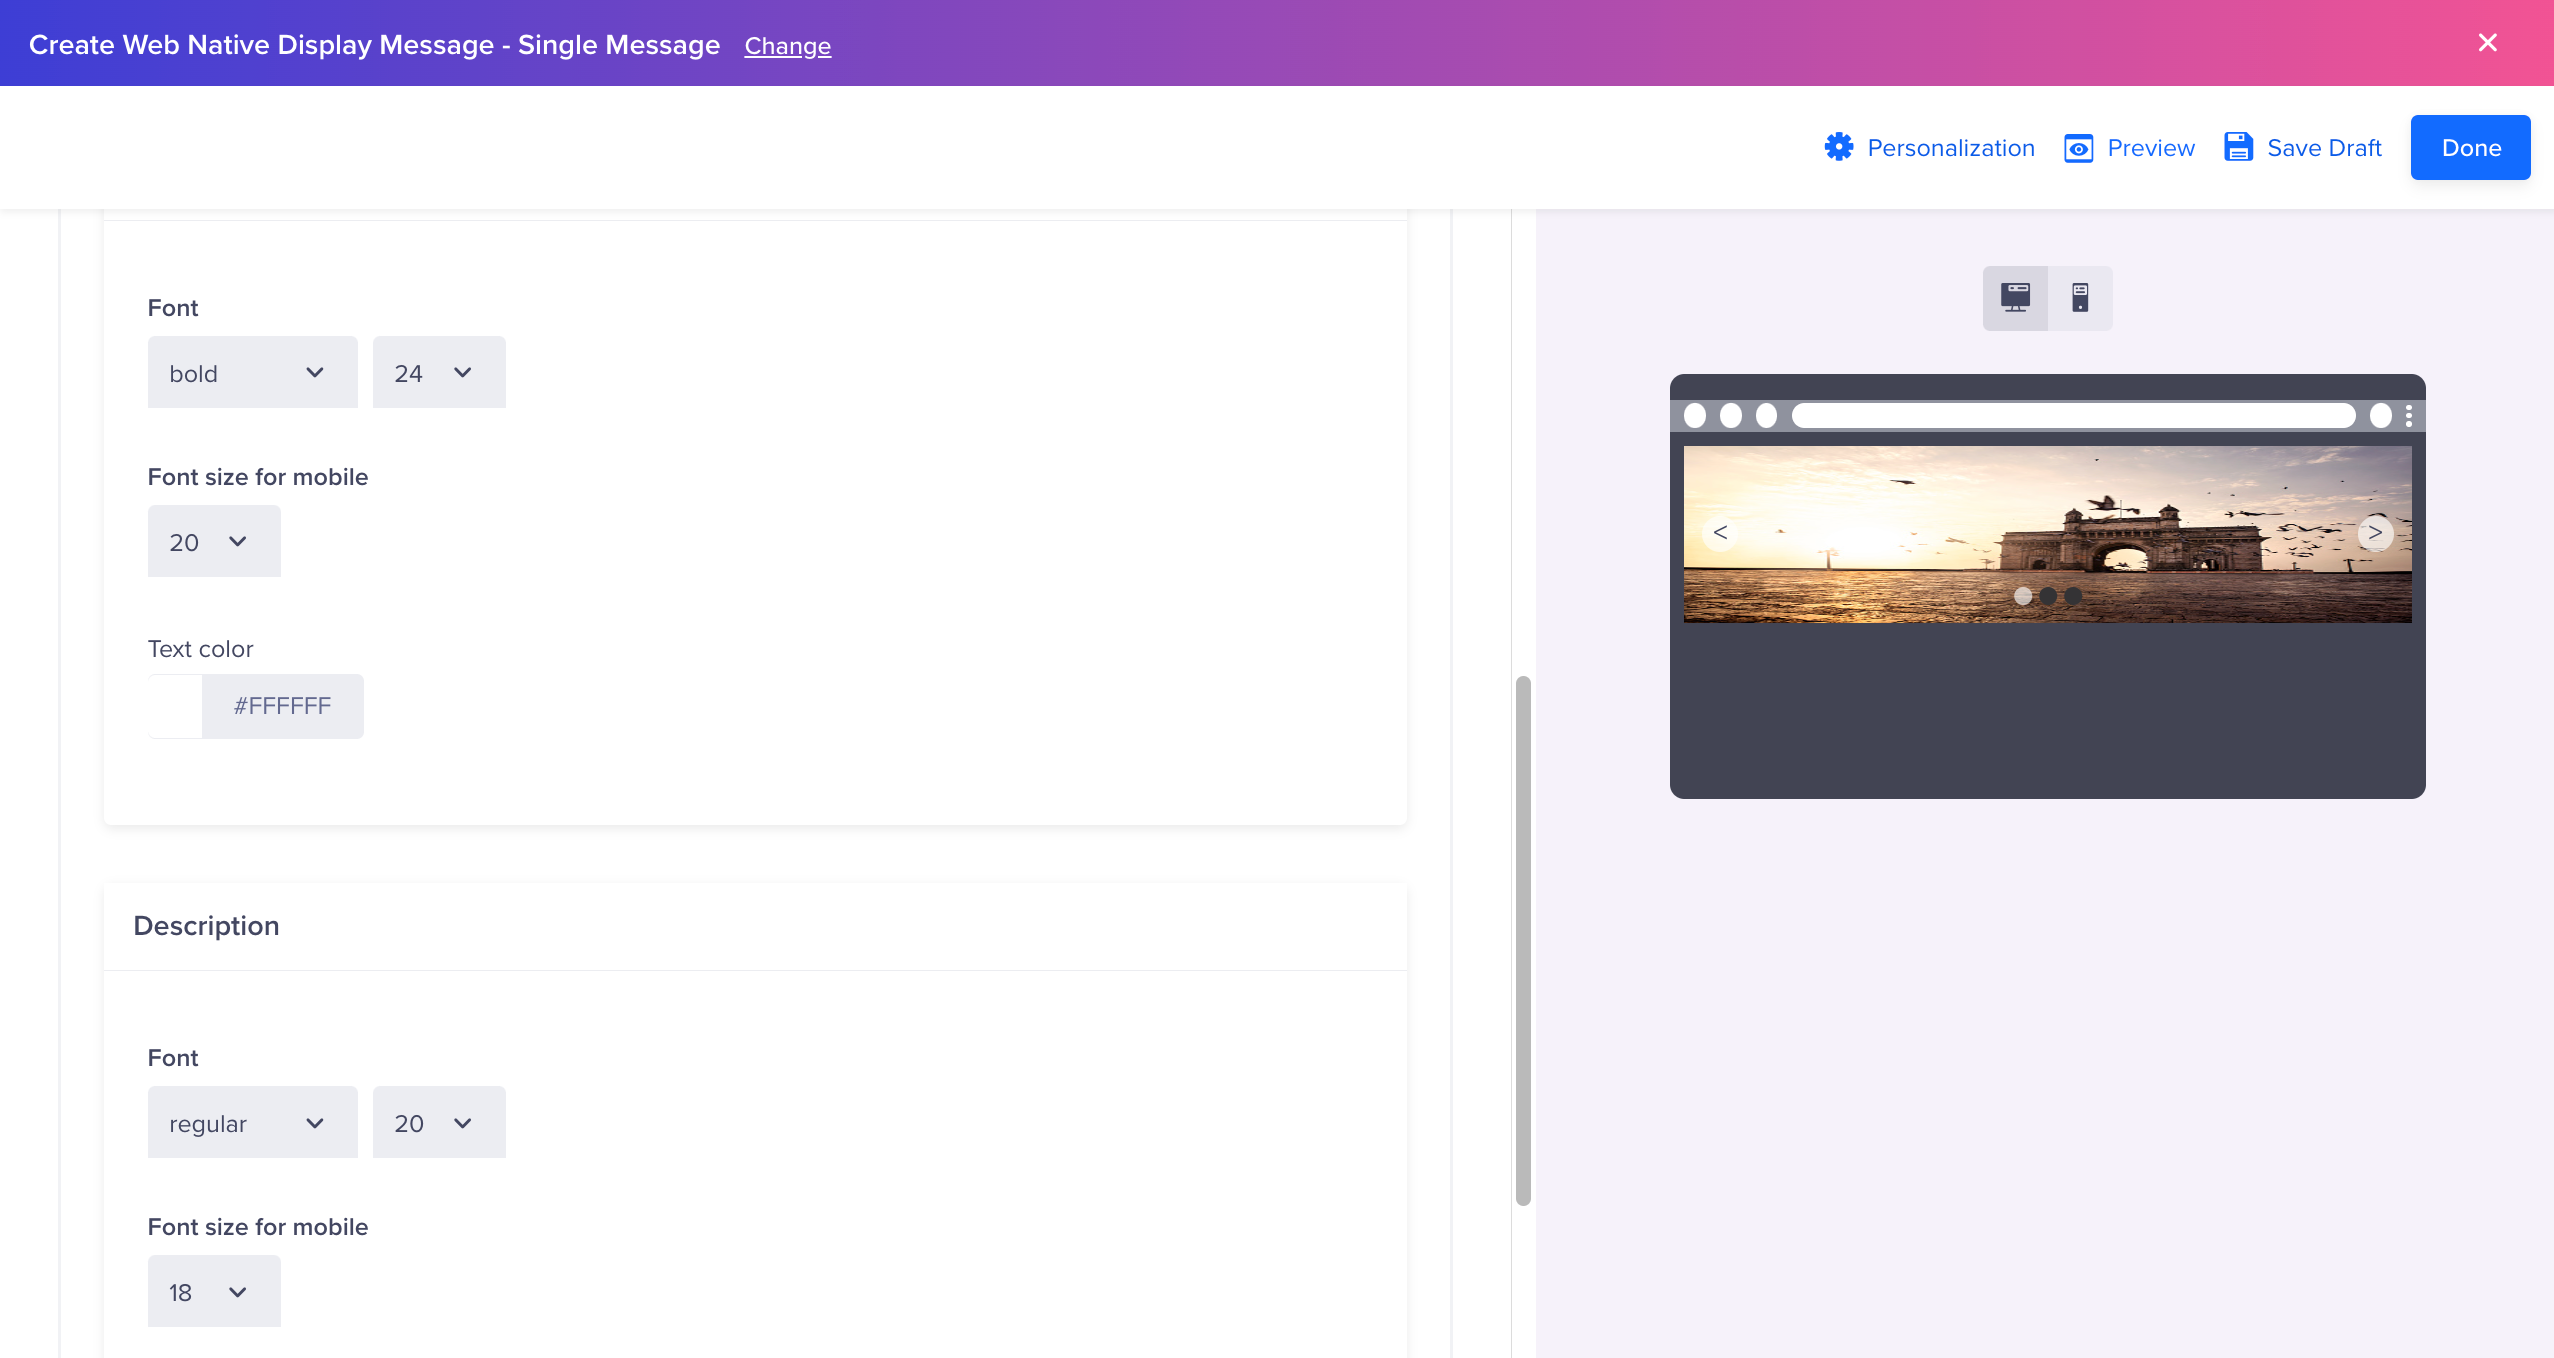
Style Editor
Define the Campaign Schedule
The delivery preferences for Live campaigns can be set as follows:
- Start Date and Time
- End Date and Time
- Set Delay
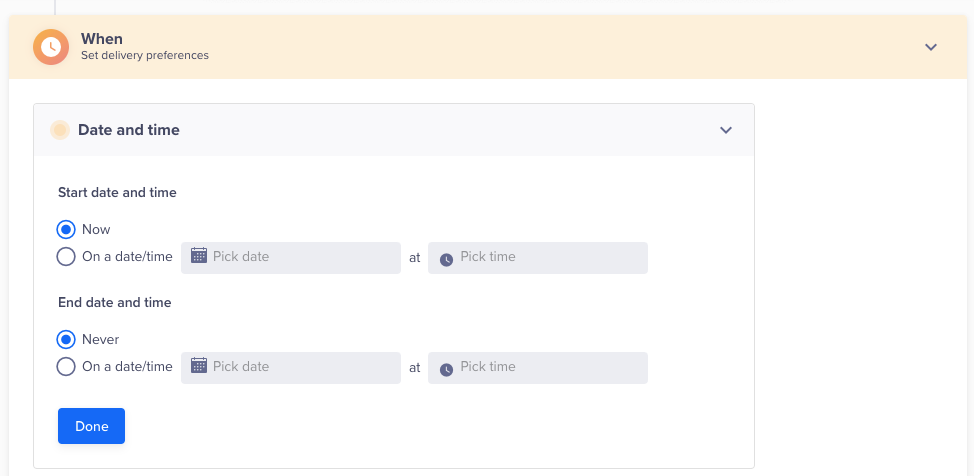
Define Campaign Schedule
Delivery preferences
Set frequency
From the Delivery preferences section, select the days and the time frame to deliver the message.
Click Apply to all to copy the choices from the selected day to all other days.
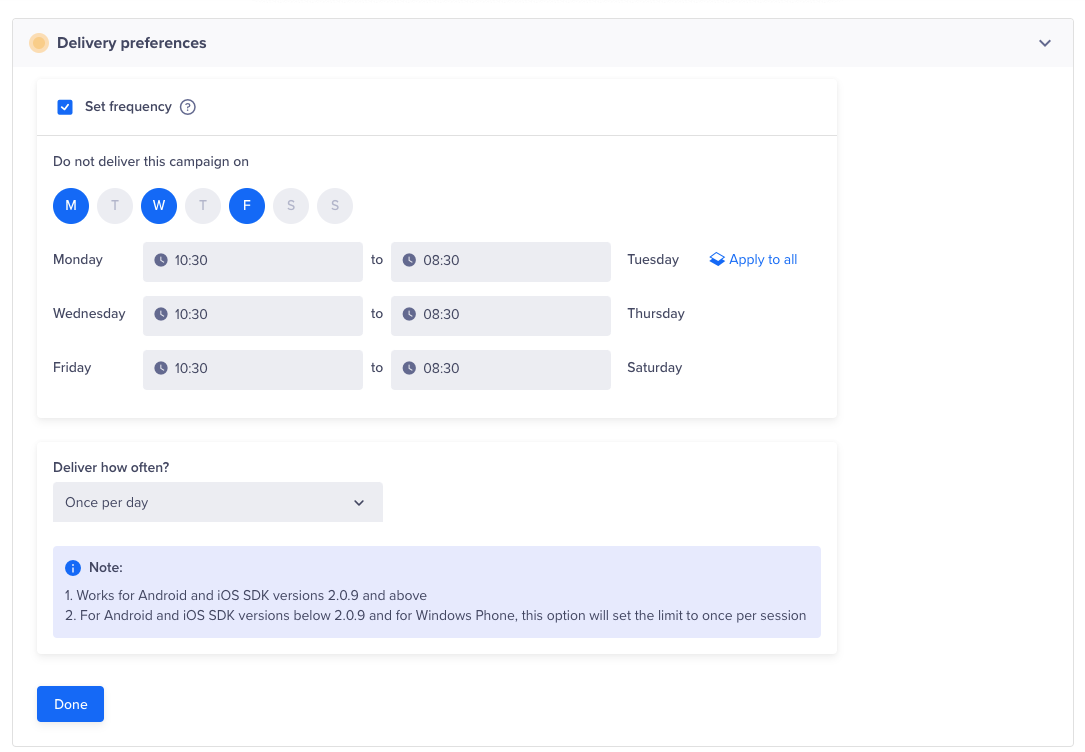
Set Campaign Delivery Preferences
Publish Campaign
After testing and once you are satisfied with the appearance of your campaign, finalize your campaign with the following steps:
- Click Continue to view your campaign summary. The overview page displays.
- View your campaign summary, then click Publish Campaign.

Publish Campaign
Updated 5 months ago
